
Contentstack
Lytics runs as a product inside Contentstack, set up as a Lytics project. This page covers the Lytics-side configuration: authorizing your stack, importing entries, and — for sites that need it — configuring the JavaScript tag plugins by hand.
Connecting your CMS content to Lytics lets you:
- Power and customize Lytics Context Layers based on your Contenstack taxonomy. This connection helps to drive affinity calculations and power personalized content or product recommendations that combine user activity data and metadata from your Contentstack Stack.
- Power real-time experiences in Contentstack Personalize with Lytics audiences. Audience and flow membership syncs to Personalize, where it drives variant targeting and A/B tests.
Authorization
If you haven't already done so, you'll need to set up a Contentstack account before you begin the process described below.
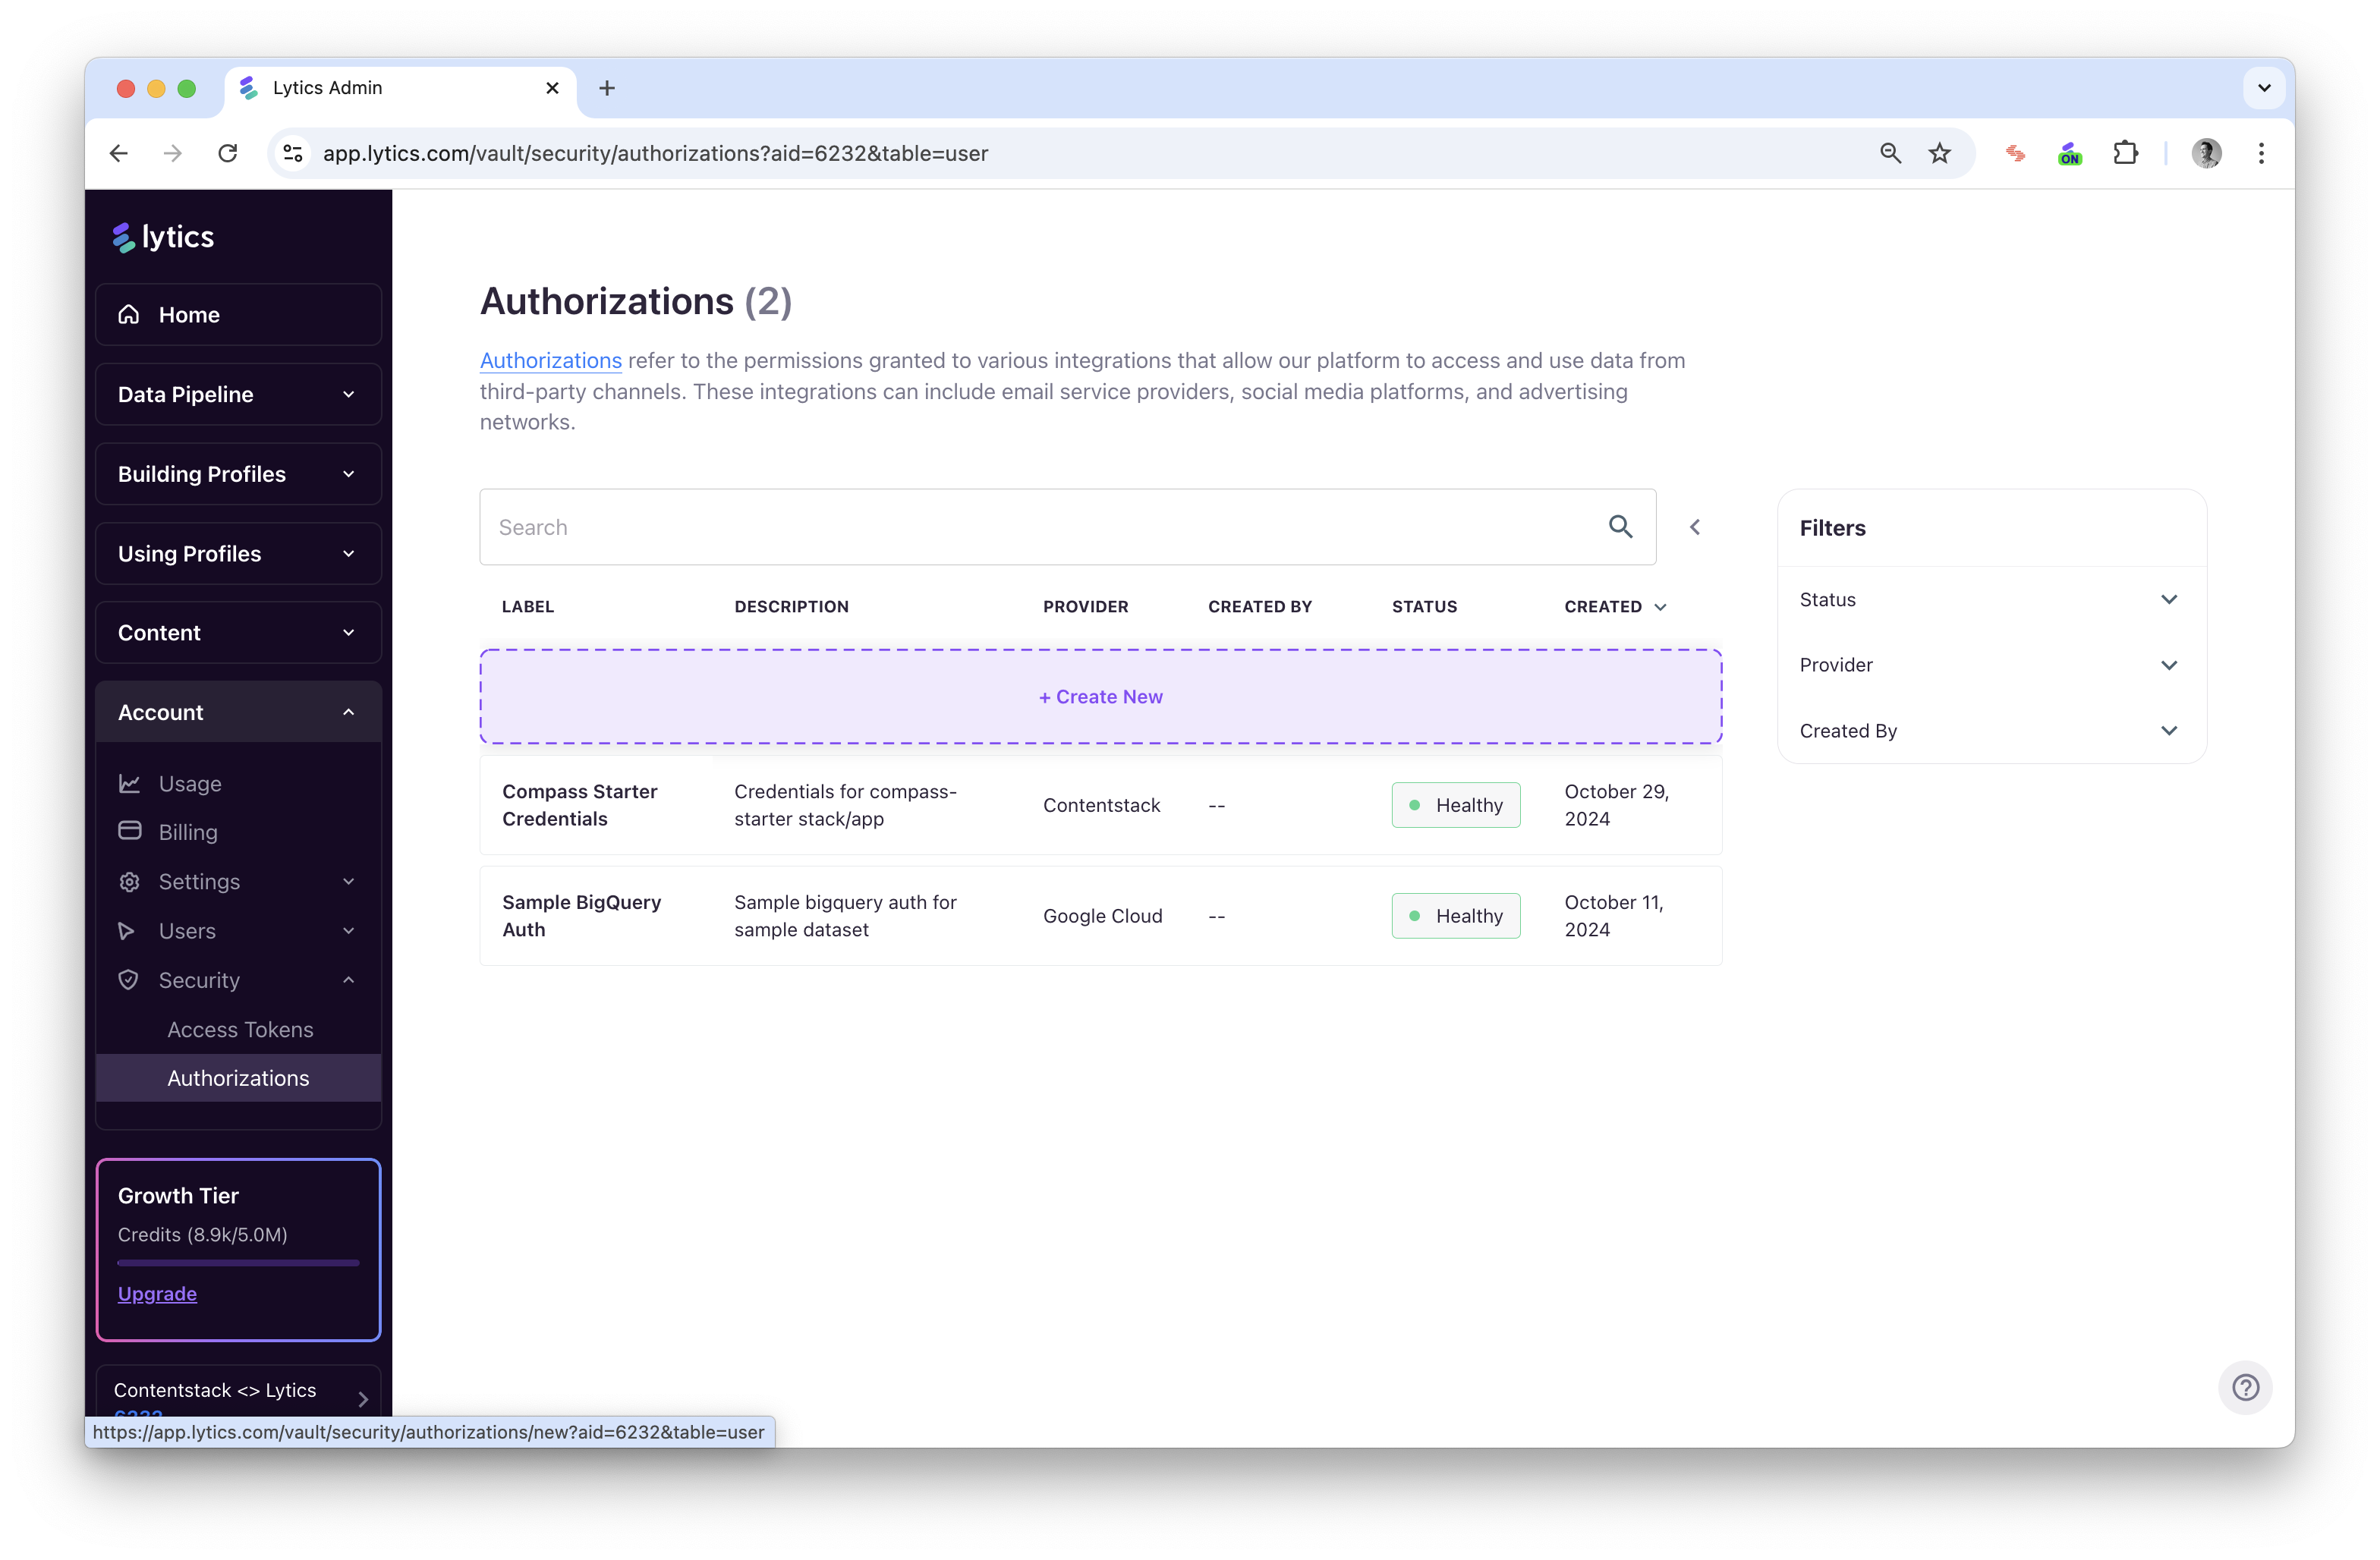
Once created, you'll add new Authorizations in Lytics for Contentstack by navigating to "Account > Authorizations > Create New" and select Contentstack as the provider.
Contentstack API Key
Syncing your entry metadata to Lytics requires a Contentstack API Key for your desired stack Stack.
-
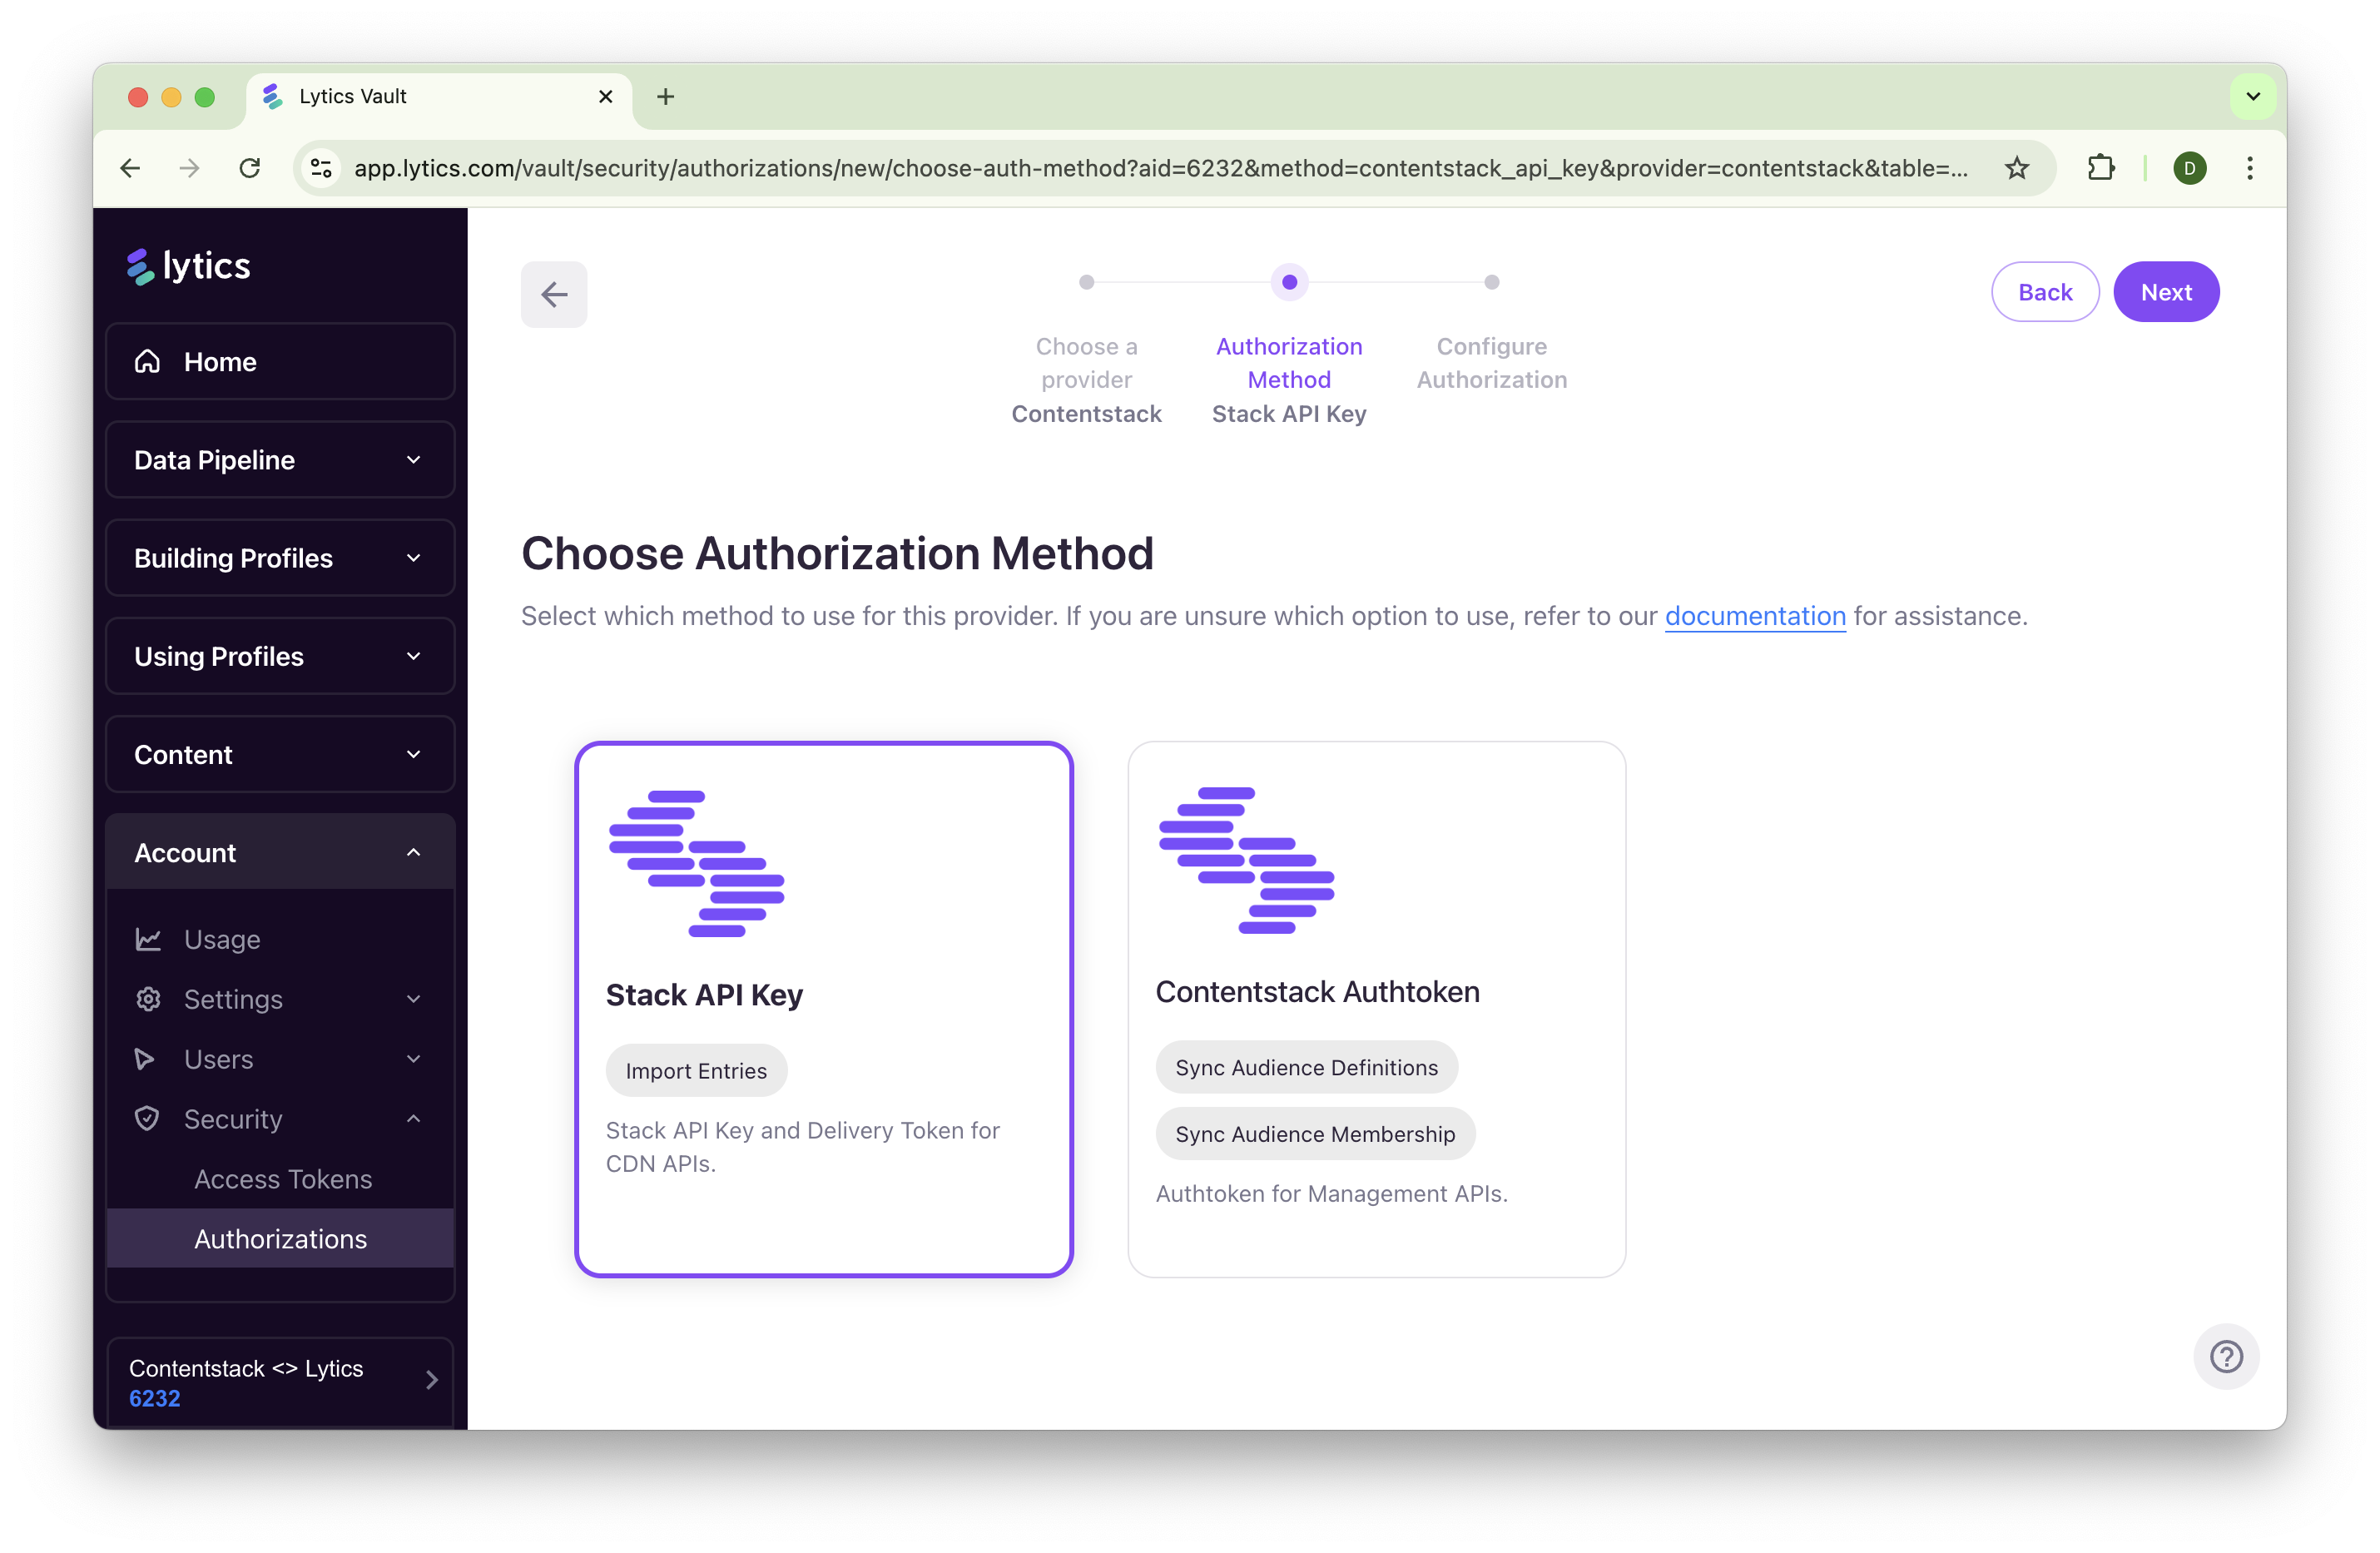
Select "Stack API Key".
-
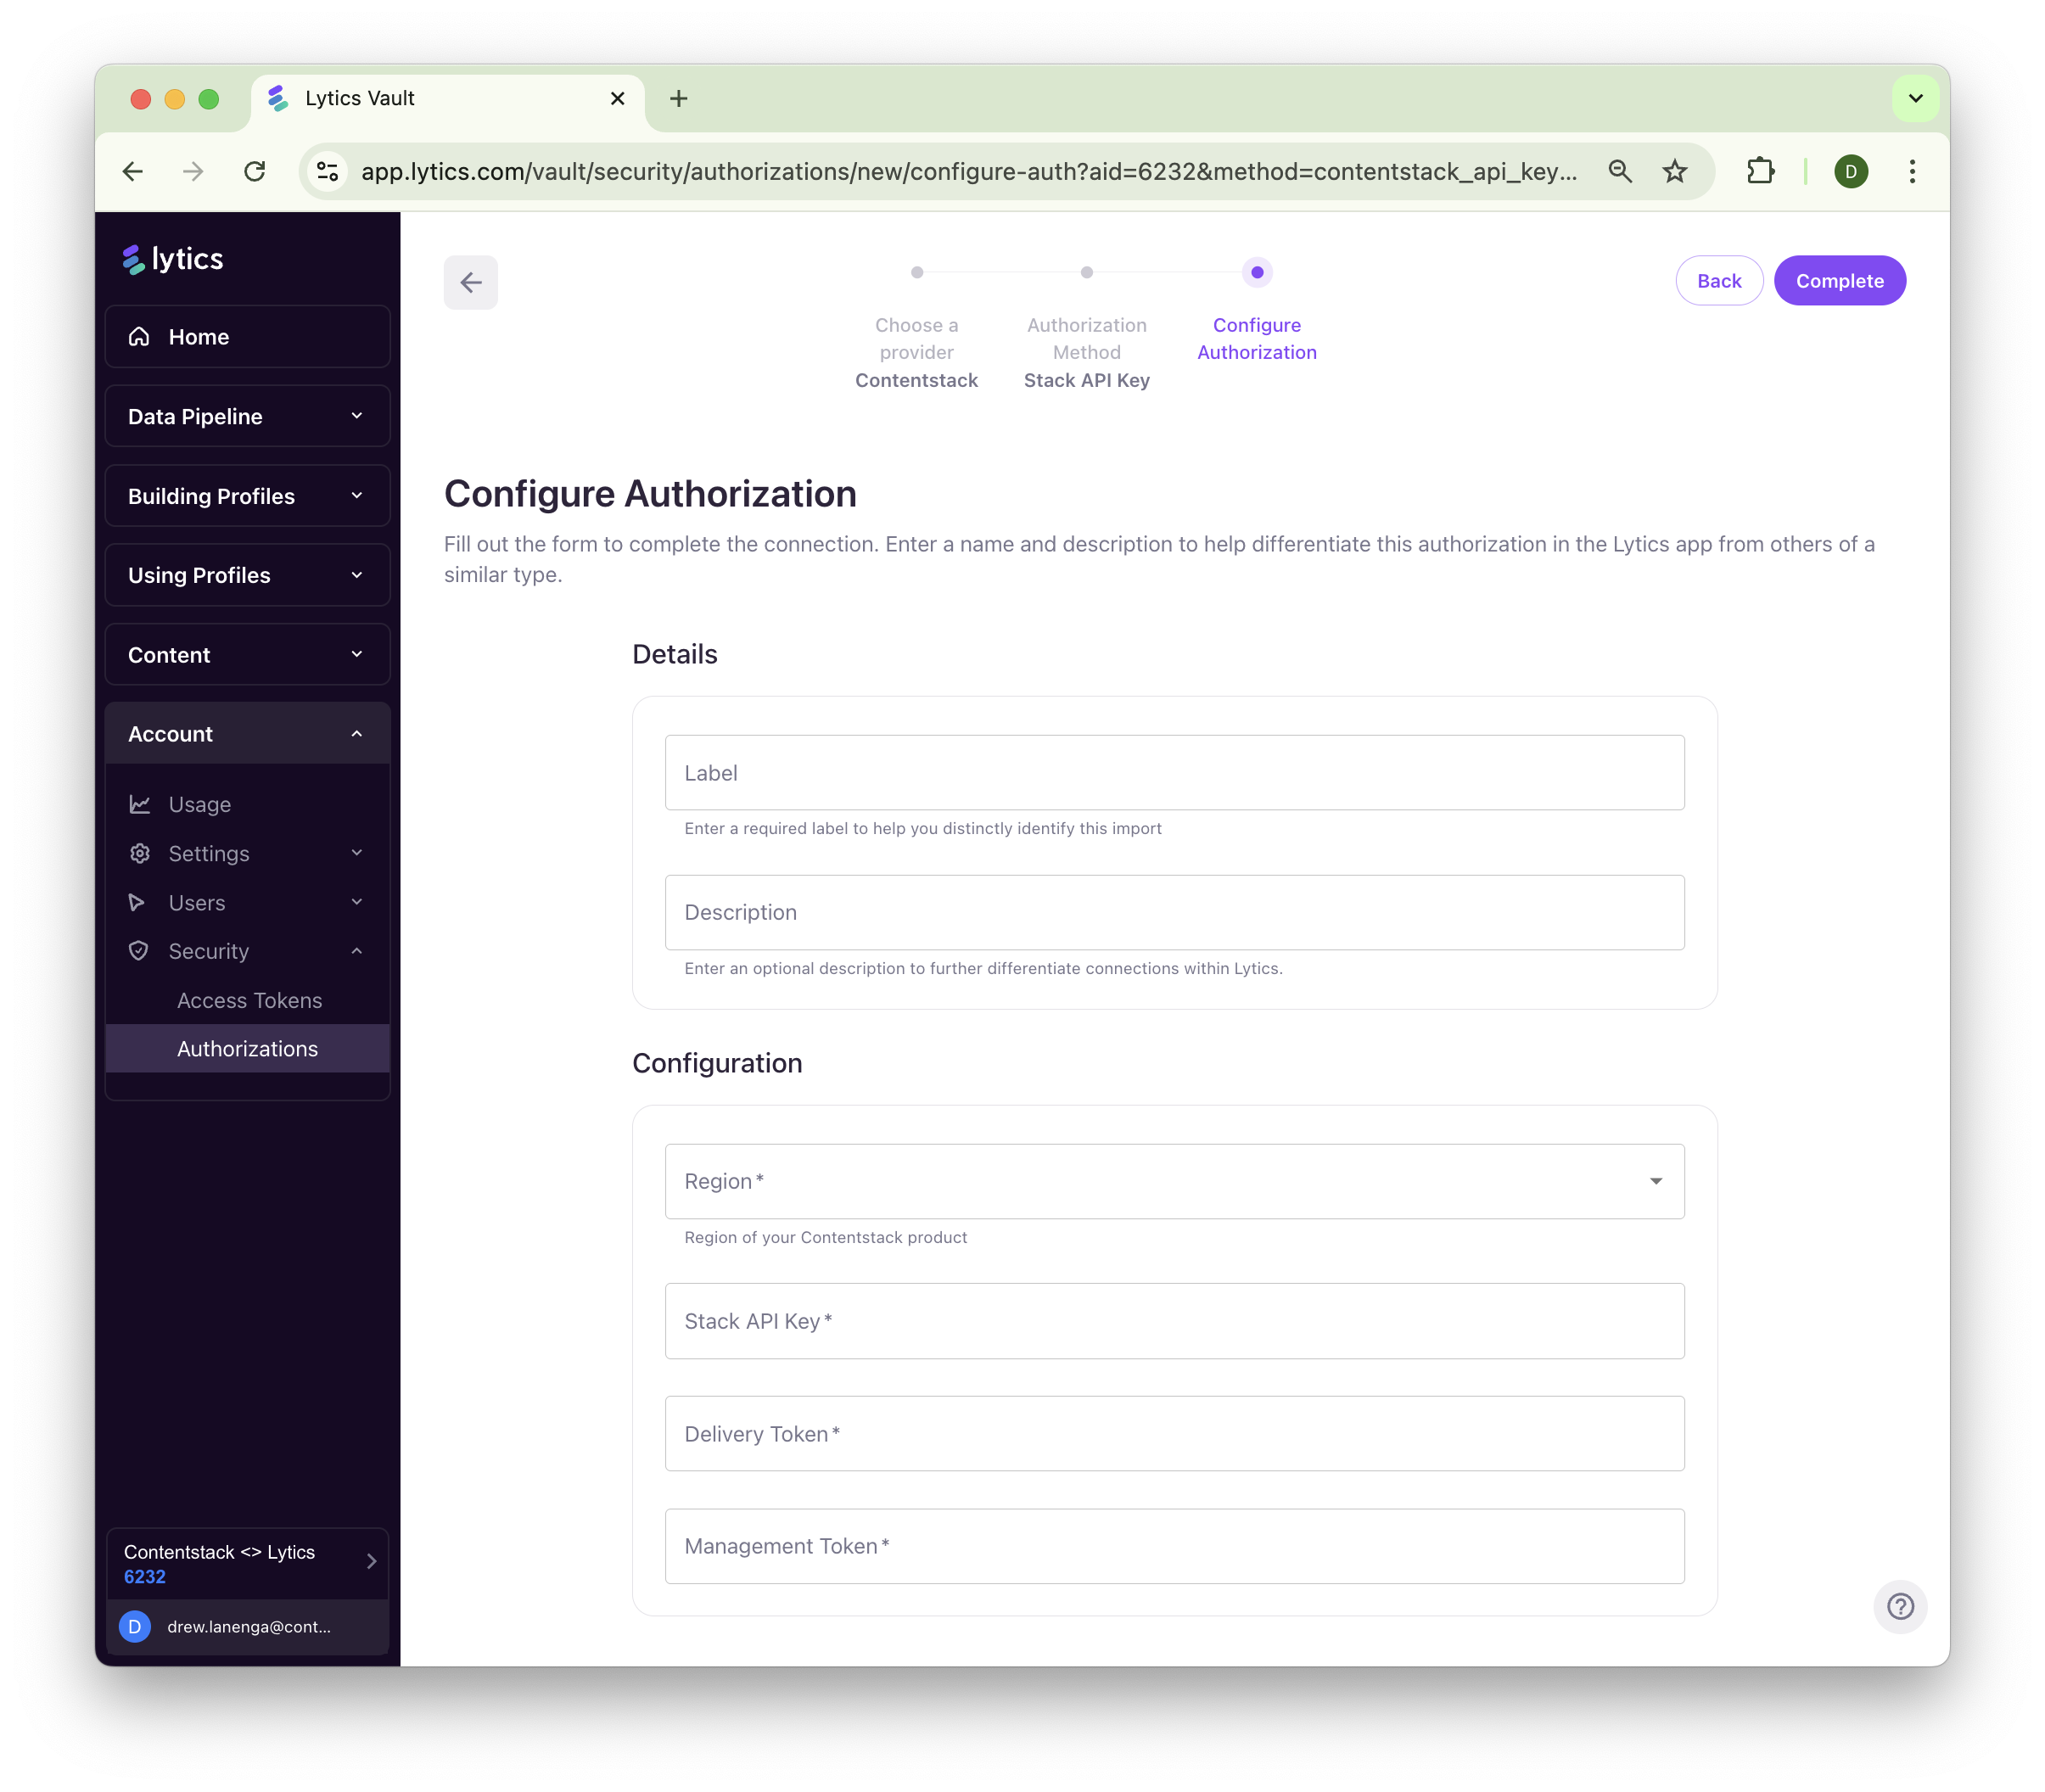
Add your Contentstack Region, Stack API Key, Delivery Token and Management Token.
-
Click "Complete".
Contentstack Authtoken
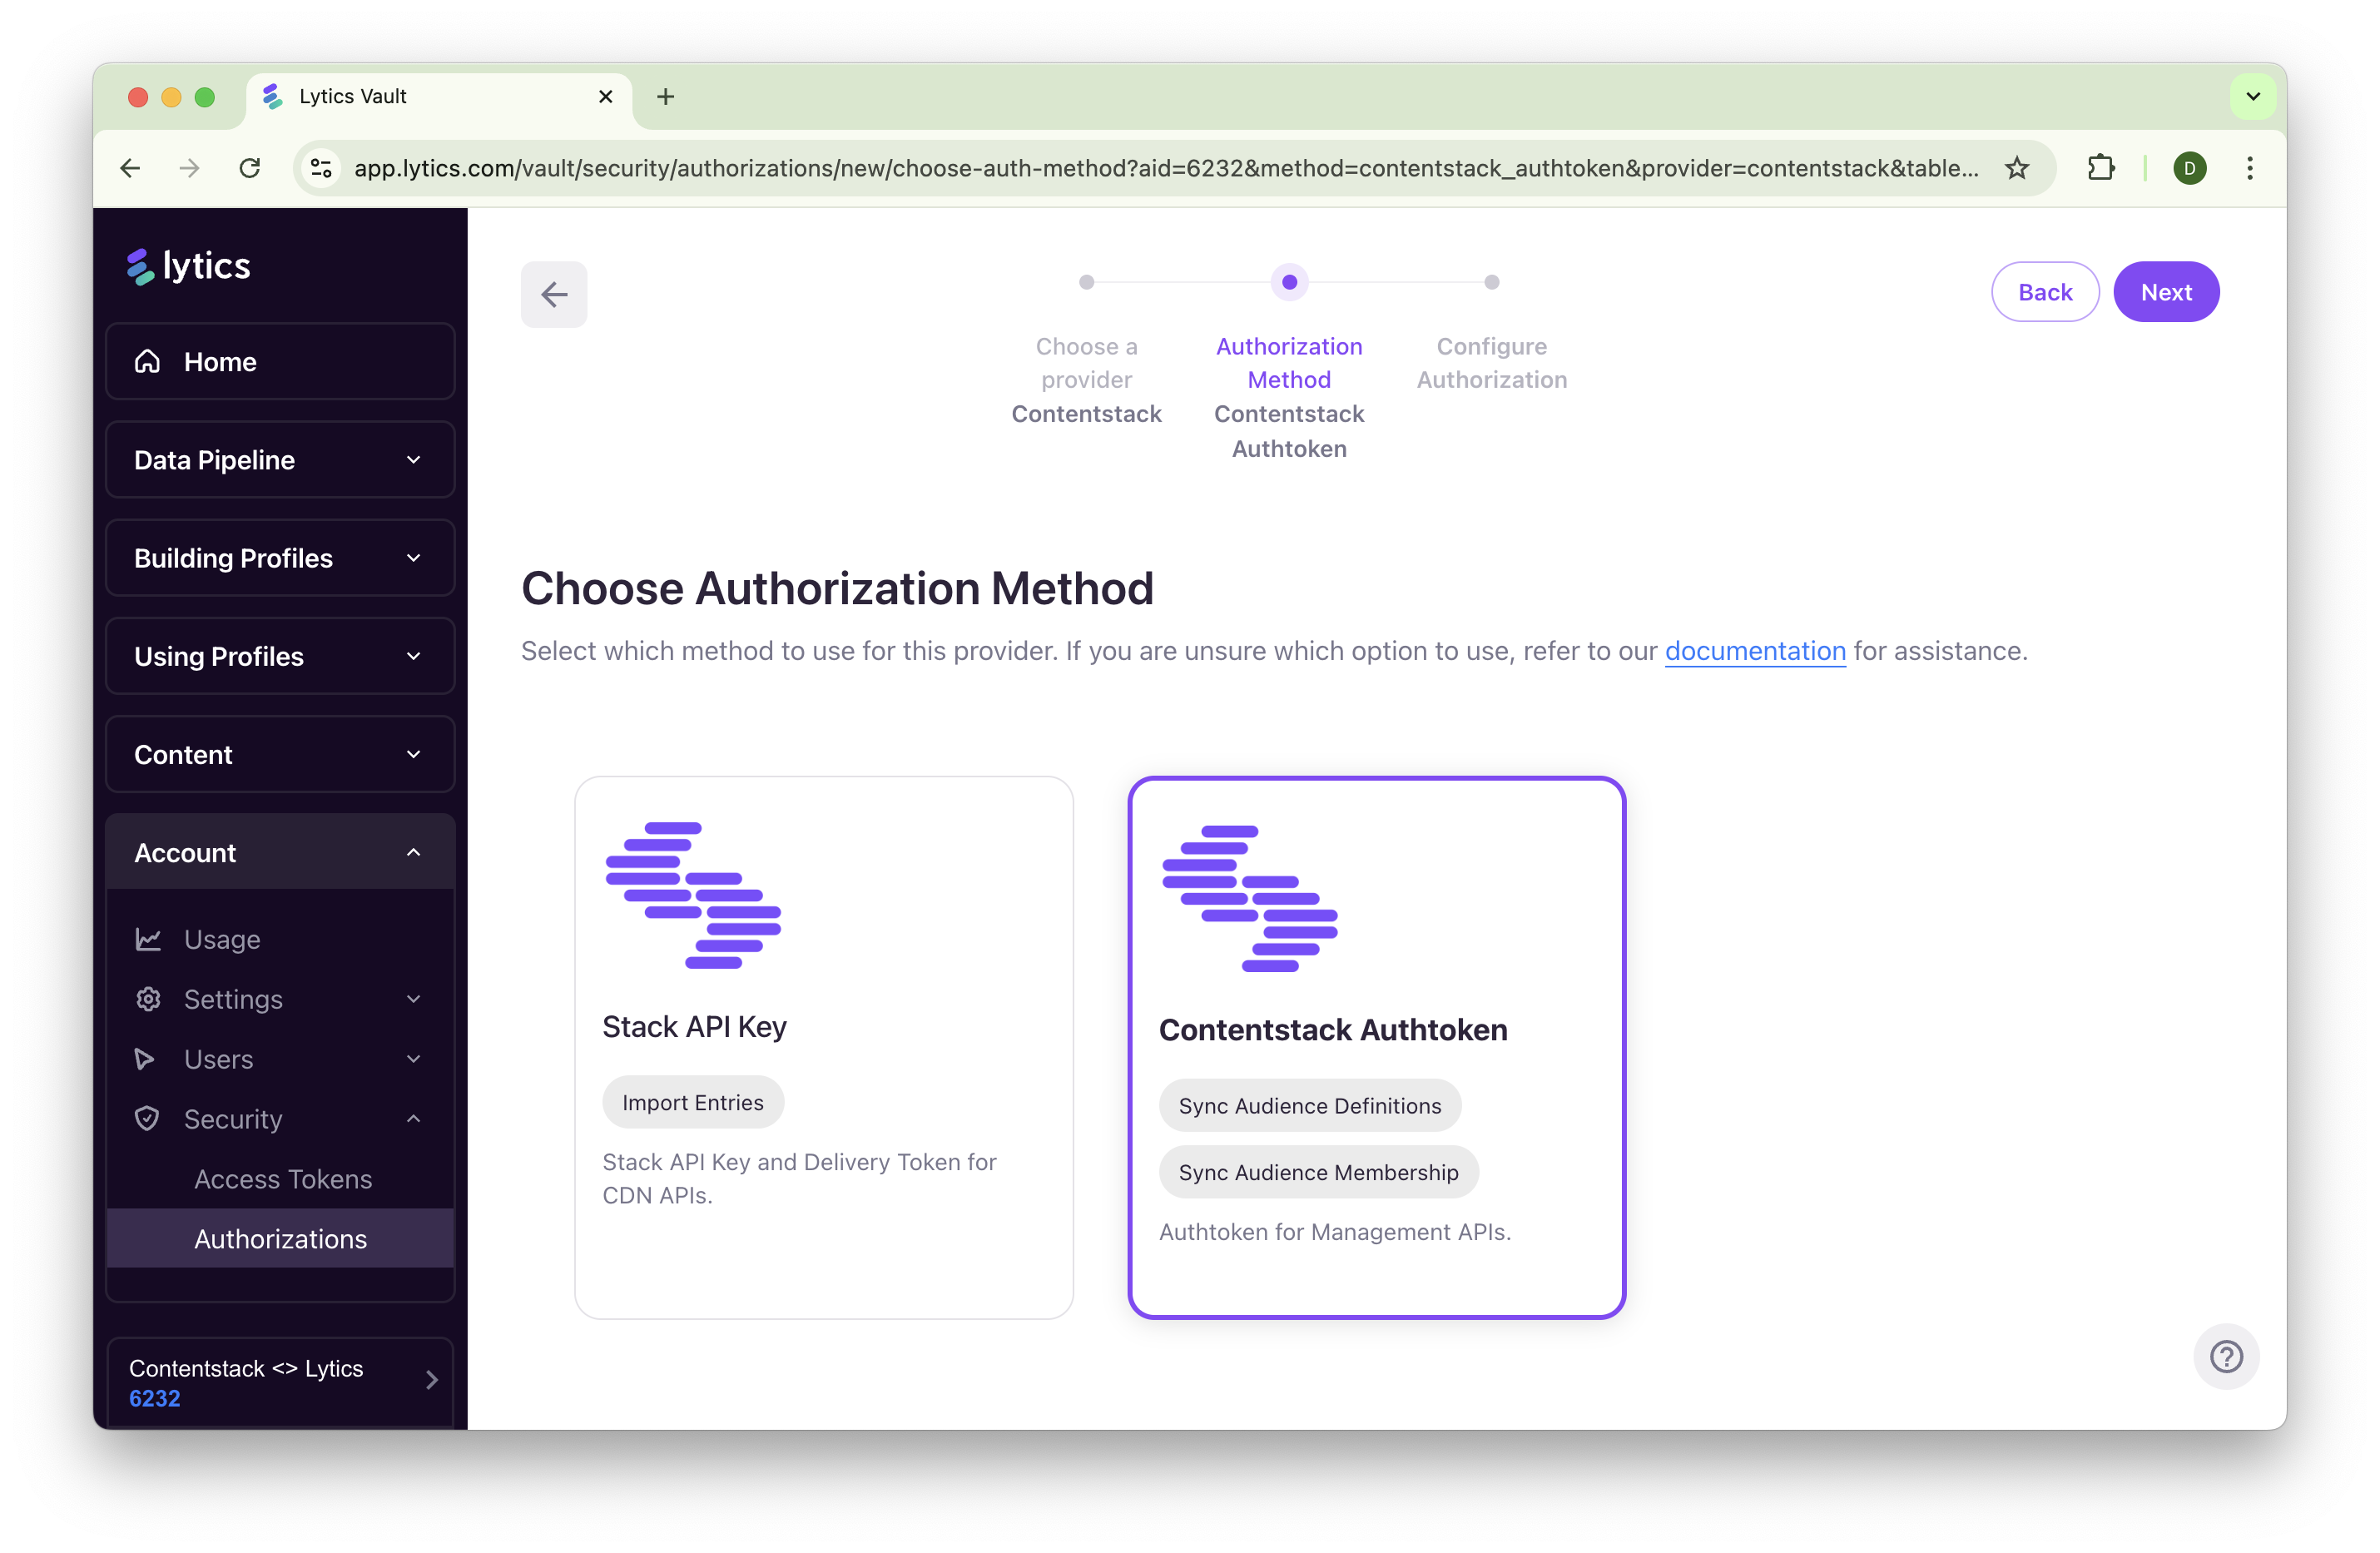
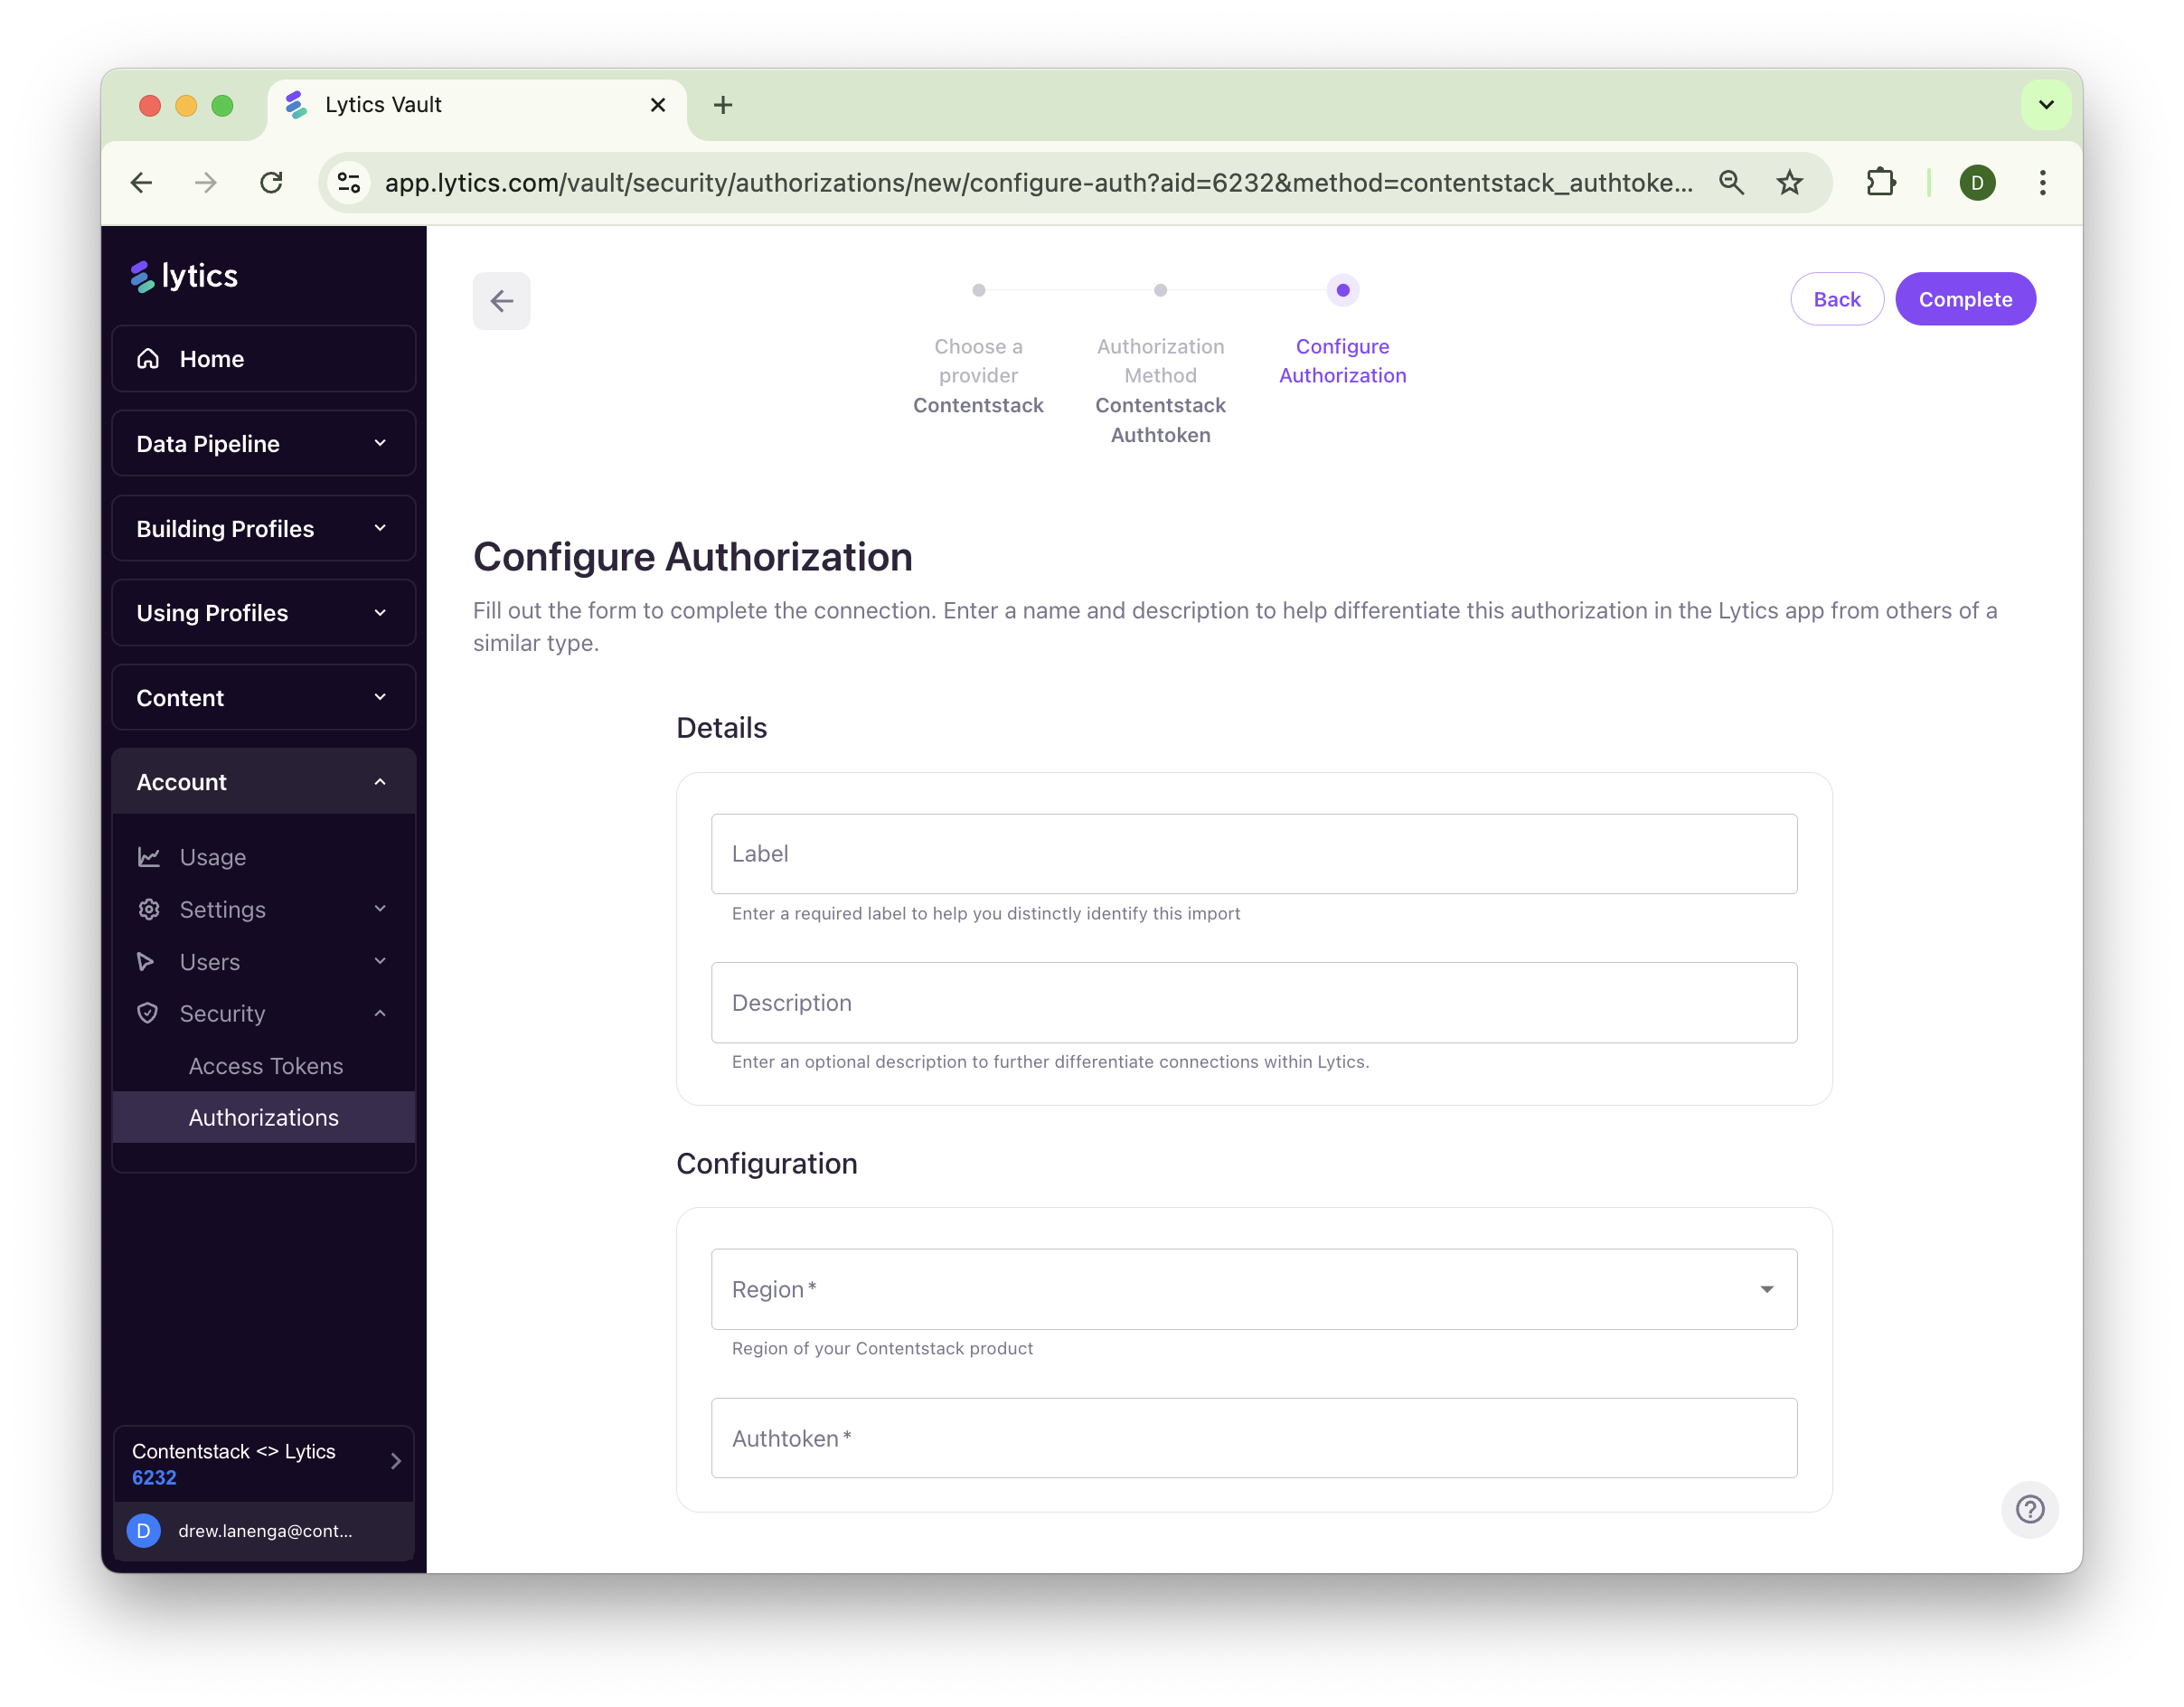
Syncing profiles to Contentstack Personalize requires you to first generate an authtoken from Contentstack. Then, you'll add that authtoken as a new Lytics authorization.
-
Select Contentstack Authtoken.
-
Add your authtoken and the region of your Personalize Project.
-
Click "Complete".
Contentstack Entry Import
Once you've created an Authorization for Contentstack, you'll start a Contentstack "Import Entries" job in Lytics to sync your entries and taxonomy with your Lytics Content Graph.
-
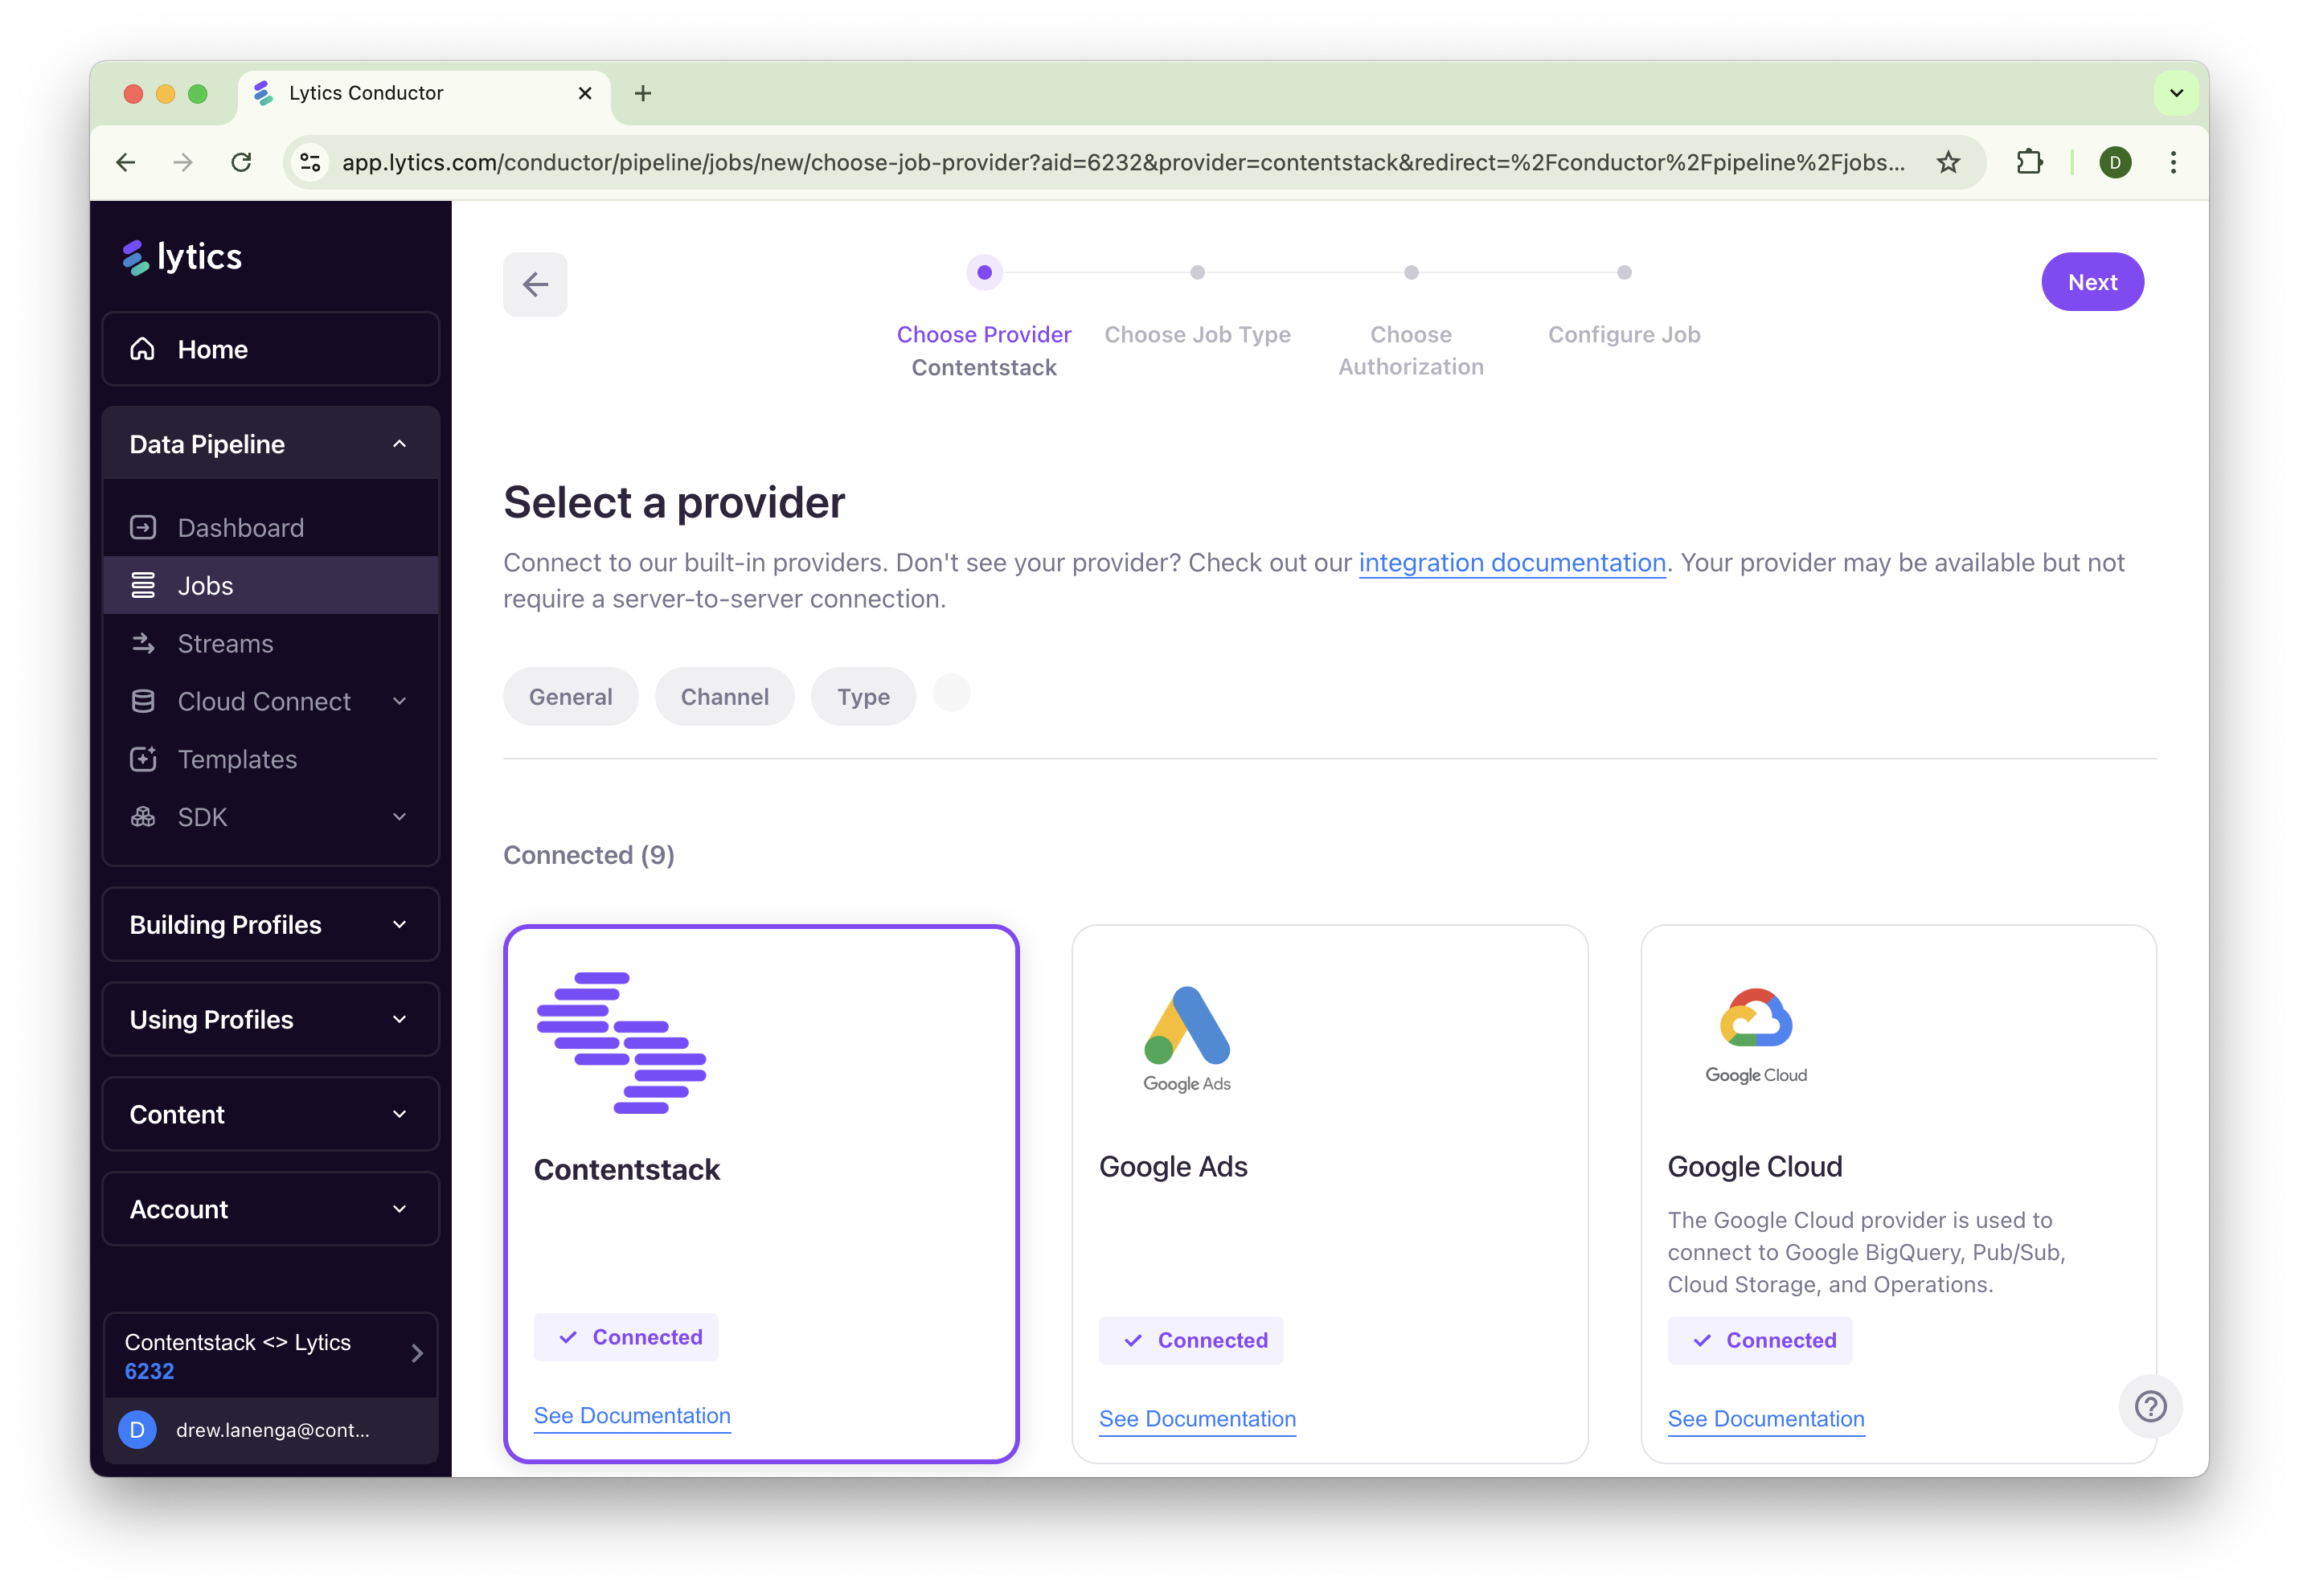
Navigate to "Data Pipeline > Jobs > Create New" and select Contentstack as the provider.
-
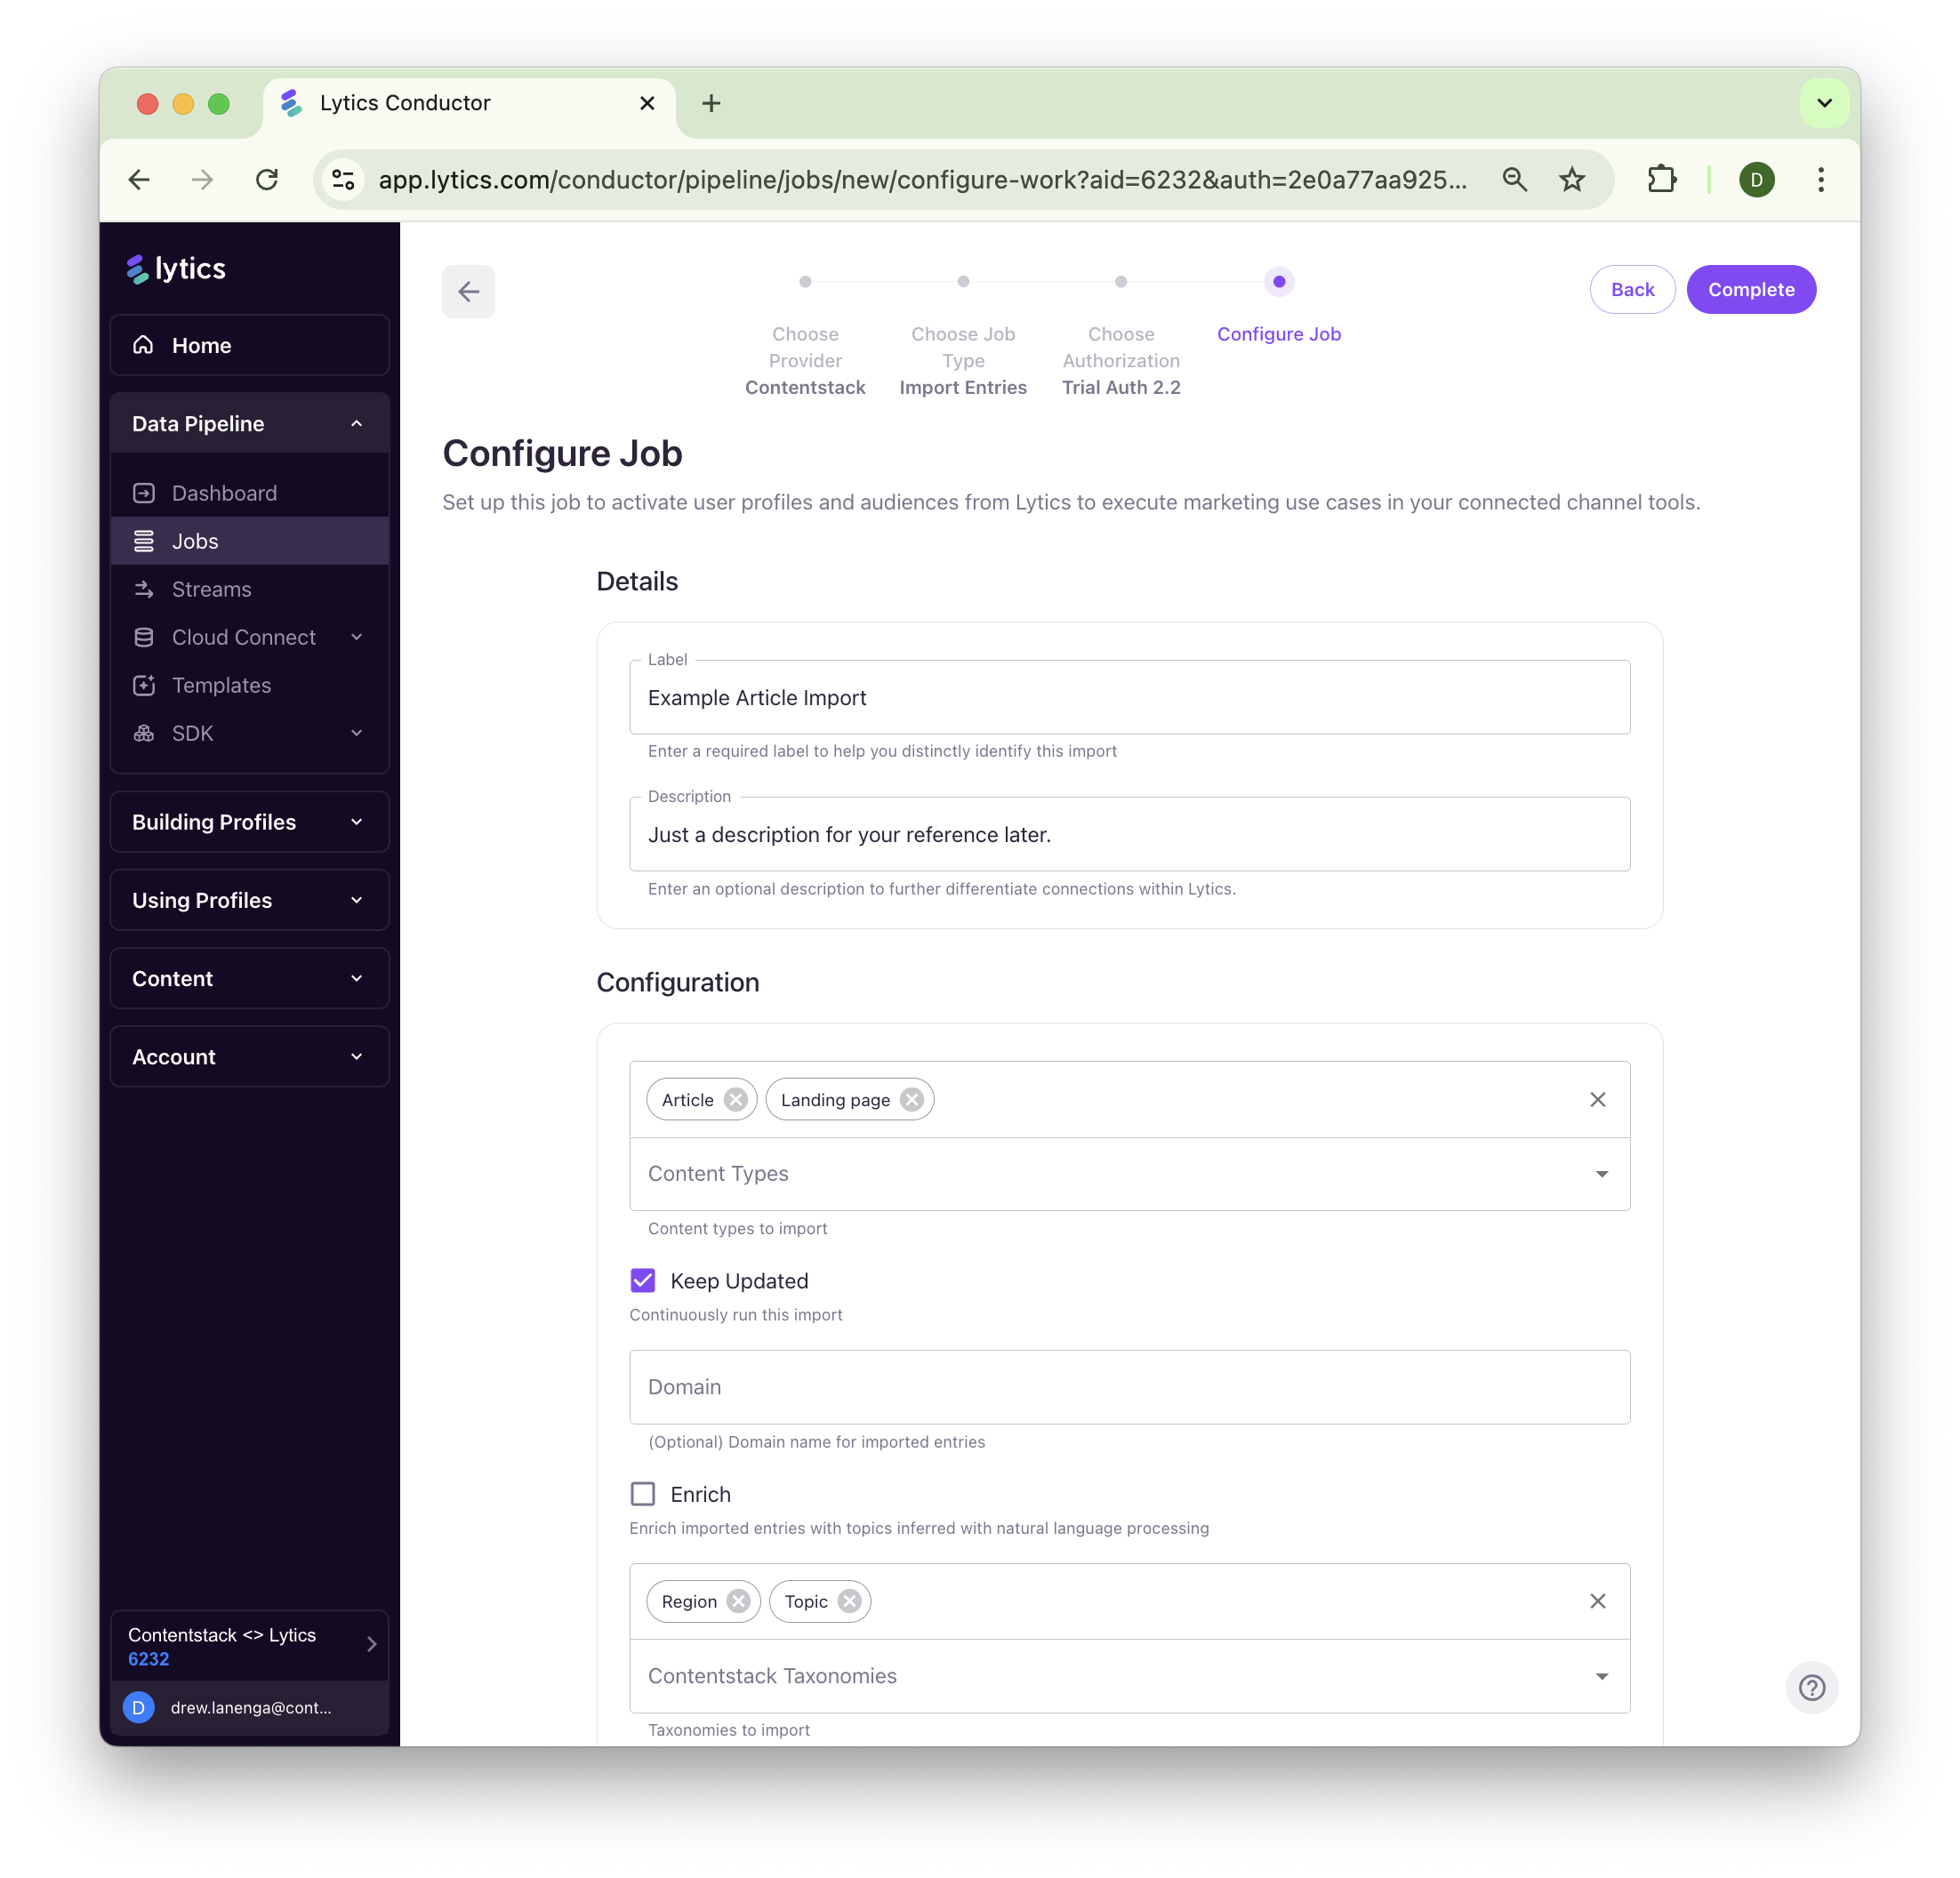
Select the "Import Entries" job type and then select your content types to import (likely "article", "landing page", not "navigation", etc.). You can select multiple content types to import their entries.
-
Select Keep Updated to continuously import the entries for selected content types.
-
You can also provide the domain (optional) on which you are serving content and have the JavaScript Tag installed.
-
Select the Taxonomies you'd like to import. Each taxonomy selected will create a new Context Layer and calculate new scores on profiles for each value in that taxonomy.
-
Click "Complete".
Sending Audiences to Personalize
Connecting a Personalize project to your Lytics project is all it takes. Once connected, any Lytics audience is usable as a Contentstack audience for tailoring content, managing variants, and running A/B tests.
Add the connection under Settings → General → Connections in your Lytics project. See Manage a Lytics project for the walkthrough, and Install the Lytics JStag SDK for getting the tag onto a site that is not deployed through Launch.
Manual Website (Jstag) Configuration
Most sites do not need this section — the Personalize connection above covers the profile and audience sync. Reach for the plugins below when you are configuring the tag by hand and need to control cookie names, polling, or the push target: JSTag3 ships two of them, Contentstack Sync and Contentstack Push.
Overview
Contentstack Sync vs Contentstack Push
Contentstack Sync
- Synchronizes audience and flow membership data to Contentstack via cookies
- Sets browser cookies (
cs-lytics-audiences,cs-lytics-flows) that get passed to the edge on each request and leverages "Live Attributes" within Contentstack Personalize - Recommended approach due to better performance and lower latency
- Real-time data availability on every subsequent page request
Contentstack Push
- Pushes audience and flow data directly to the Contentstack Edge API
- Makes HTTP requests to update user attributes on Contentstack's servers
- Higher latency due to API calls
Configuration
Both plugins are disabled by default and must be explicitly enabled in your JSTag configuration or via supported account settings.
Sync Configuration (full configuration options)
window.jstag.config({
  contentstack: {
    entitySync: {
      disabled: false, // Enable the sync plugin
      cookie: "cs-personalize-user-uid", // Main user ID cookie name
      segmentsCookie: "cs-lytics-audiences", // Cookie for audience data
      flowsCookie: "cs-lytics-flows", // Cookie for flow data
      stateCookiesMaxAge: 604800, // Cookie expiration (7 days in seconds)
      cookieDomain: null, // Cookie domain (null = current domain)
      poll: {
        disabled: true, // Disable automatic polling
        initialDelay: 4000, // Initial delay before first poll (ms)
        maxAttempts: 5, // Maximum polling attempts
      },
    },
  },
});
Push Configuration (full configuration options)
window.jstag.config({
  contentstack: {
    entityPush: {
      disabled: false, // Enable the push plugin
      baseUrl: "https://personalize-edge.contentstack.com", // Contentstack API endpoint
      personalizeProjectId: "your-project-id", // Your Contentstack project ID(s)
      audienceAttribute: "lytics_audiences", // Attribute name for audiences
      flowAttribute: "lytics_flows", // Attribute name for flows
      cookie: "cs-personalize-user-uid", // User ID cookie name
      cookieDomain: null, // Cookie domain
      poll: {
        disabled: true, // Disable automatic polling
        initialDelay: 4000, // Initial delay (ms)
        maxAttempts: 5, // Maximum attempts
      },
      cache: {
        disabled: false, // Enable caching
        storage: sessionStorage, // Storage type
        key: "contentstack_personalize", // Cache key
      },
    },
  },
});
Usage Examples
Basic Sync Setup (Recommended)
// Minimal configuration for Contentstack Sync
window.jstag.config({
  contentstack: {
    entitySync: {
      disabled: false,
    },
  },
});
This will:
- Set a user ID cookie (
cs-personalize-user-uid) when entity data is loaded - Create audience cookies (
cs-lytics-audiences) with pipe-delimited segment data - Create flow cookies (
cs-lytics-flows) with pipe-delimited flow step data - Cookies expire after 7 days and are available on every page request
Basic Push Setup
// Minimal configuration for Contentstack Push
window.jstag.config({
  contentstack: {
    entityPush: {
      disabled: false,
      personalizeProjectId: "your-contentstack-project-id",
    },
  },
});
This will:
- Send PATCH requests to Contentstack's Edge API when entity data loads
- Include user ID in request headers
- Send audience and flow data as JSON attributes
Advanced Configuration with Polling (Advanced use cases only)
// Enable automatic polling for real-time updates
window.jstag.config({
  contentstack: {
    entitySync: {
      disabled: false,
      cookieDomain: ".yourdomain.com", // Set cookies for entire domain
      poll: {
        disabled: false, // Enable polling
        initialDelay: 5000, // Wait 5 seconds before first poll
        maxAttempts: 10, // Poll up to 10 times
      },
    },
  },
});
Multiple Project IDs (Push only)
// Push to multiple Contentstack projects
window.jstag.config({
  contentstack: {
    entityPush: {
      disabled: false,
      personalizeProjectId: ["project-id-1", "project-id-2", "project-id-3"],
    },
  },
});
How Data is Formatted
Both plugins format audience and flow data consistently:
Audience Data Format
- Input:
["segment1", "segment2", "segment3"] - Output:
"|segment1|segment2|segment3|"
Flow Data Format
- Input:
{"flow1": "step2", "flow2": "step1"} - Output:
"|step1|step2|"
The data is:
- Deduplicated (removes duplicates)
- Sorted alphabetically
- Wrapped in pipe delimiters for easy parsing
// Monitor polling status (both plugins)
window.jstag.on("contentstack.entitySync.pollStarted", function() {
  console.log("Polling started");
});

window.jstag.on("contentstack.entitySync.pollStopped", function() {
  console.log("Polling stopped");
});
Troubleshooting
Common Issues
-
No cookies are set (Sync)
- Verify
disabled: falsein configuration - Check that entity data contains user ID and segments
- Ensure no ad blockers are preventing cookie setting
- Verify
-
API requests failing (Push)
- Verify
personalizeProjectIdis correct - Check network tab for CORS or authentication errors
- Ensure Contentstack endpoint is accessible
- Verify
-
Polling not working
- Confirm
poll.disabled: falsein configuration - Check that initial delay and max attempts are reasonable
- Verify entity loading is working properly
- Confirm
Debug Mode
// Enable debug logging
window.jstag.config({
  audit: {
    disabled: false, // This enables console logging for troubleshooting
  },
});
Migration Notes
- Both plugins require entity data to be available before they can function
- The plugins automatically detect when entity data is loaded and trigger accordingly
- No manual triggering is required - everything happens automatically after configuration
Updated 10 days ago