

Audiences
Build, manage, and activate audiences with the Lytics audience builder.
Introduction
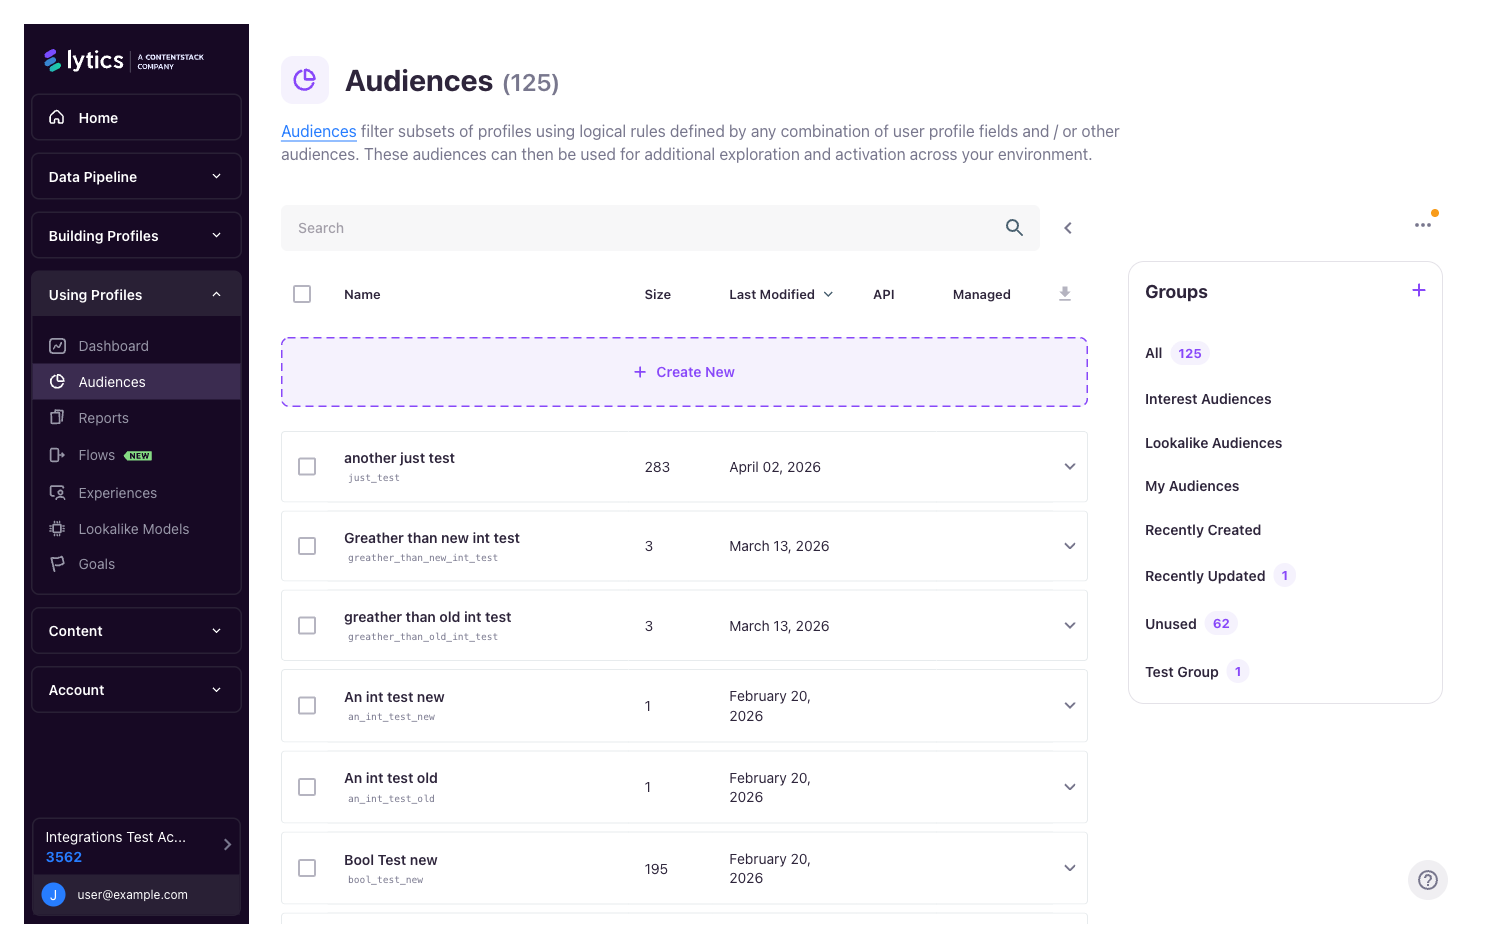
Audiences are central to creating personalized marketing using Lytics. They group users who share characteristics so you can target them in campaigns, personalize experiences, export to downstream tools, and explore user behavior. Audiences stay up to date automatically — as users' behavior changes, they join or leave audiences in real time.
Access the audience builder from the left navigation: Using Profiles → Audiences, then click + Create Audience.
Creating a New Audience
An audience consists of two parts: details (name, description, configuration) and a definition (the rules that decide who belongs).
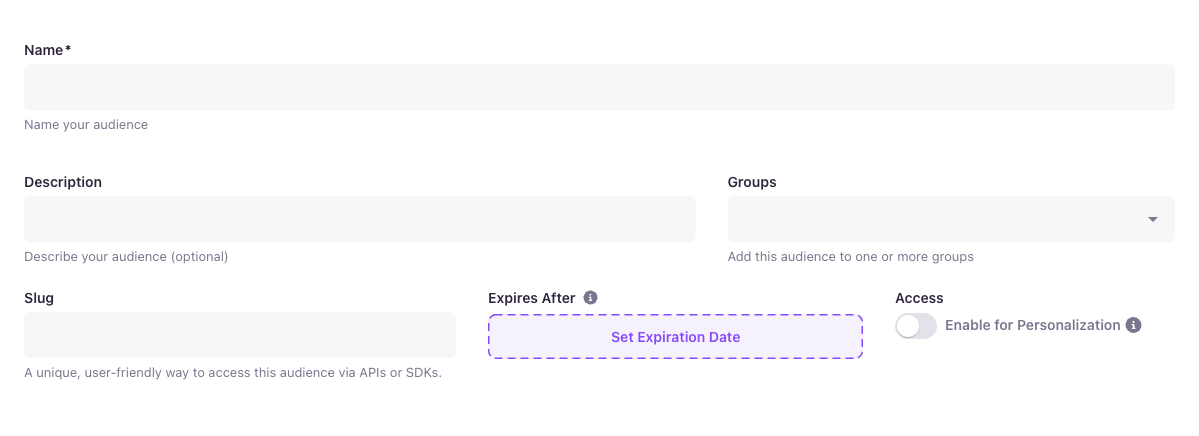
Audience Details
The top of the builder collects metadata about the audience.
| Field | Required | Purpose |
|---|---|---|
| Name | Yes | Human-readable name shown across the Lytics UI. |
| Description | No | Optional longer explanation of what the audience targets. |
| Groups | No | Assign to one or more groups for organization. Groups are managed from the Audiences list page. |
| Slug | No | A unique, URL-friendly identifier used when referencing this audience via APIs or SDKs. If left blank, one is generated from the name. |
| Expires After | No | Optional expiration date. The audience is deactivated on this date. Note: if a downstream dependency (export, campaign, other audience) uses this audience, expiration will fail. |
| Access: Enable for Personalization | No | When on, the audience is surfaced by the personalization API and available to Experiences, Pathfora, and tag-based personalization. Leave off for audiences used only in exports or internal reporting. |
Naming tipA Lytics account often ends up with dozens or hundreds of audiences. Use a consistent naming convention — a common prefix per campaign or category (e.g.
Holiday Promo: Tech Lovers,Holiday Promo: Loyal Shoppers) keeps related audiences grouped together in the list and easier to find.Admins can also define structured name templates — with dropdowns, free-text fields, and fixed tokens — and optionally require every new audience to use one. See Audience Naming Conventions.
InsightsLytics Insights are generated automatically for behavioral and engagement audiences. You can also nominate up to 10 custom audiences to be prioritized as candidates for Insights — Lytics ranks candidates by statistical significance and how frequently the audience is used, so nomination doesn't guarantee inclusion.
Defining Rules
The Definition section is where you specify which users belong to the audience. Every audience has at least one Rule set containing one or more rules.
Each rule is configured through the Configure rule panel, which offers two tabs:
- Attribute — build rules based on user profile fields (the most common case).
- Audience — reference another existing audience as a building block.
As you add and edit rules, the This audience panel on the right updates in real time with the current user count and percentage of total users. The Sample Profiles panel shows a preview of matched users.
Attribute Rules
The Attribute tab lets you build rules on any user profile field.
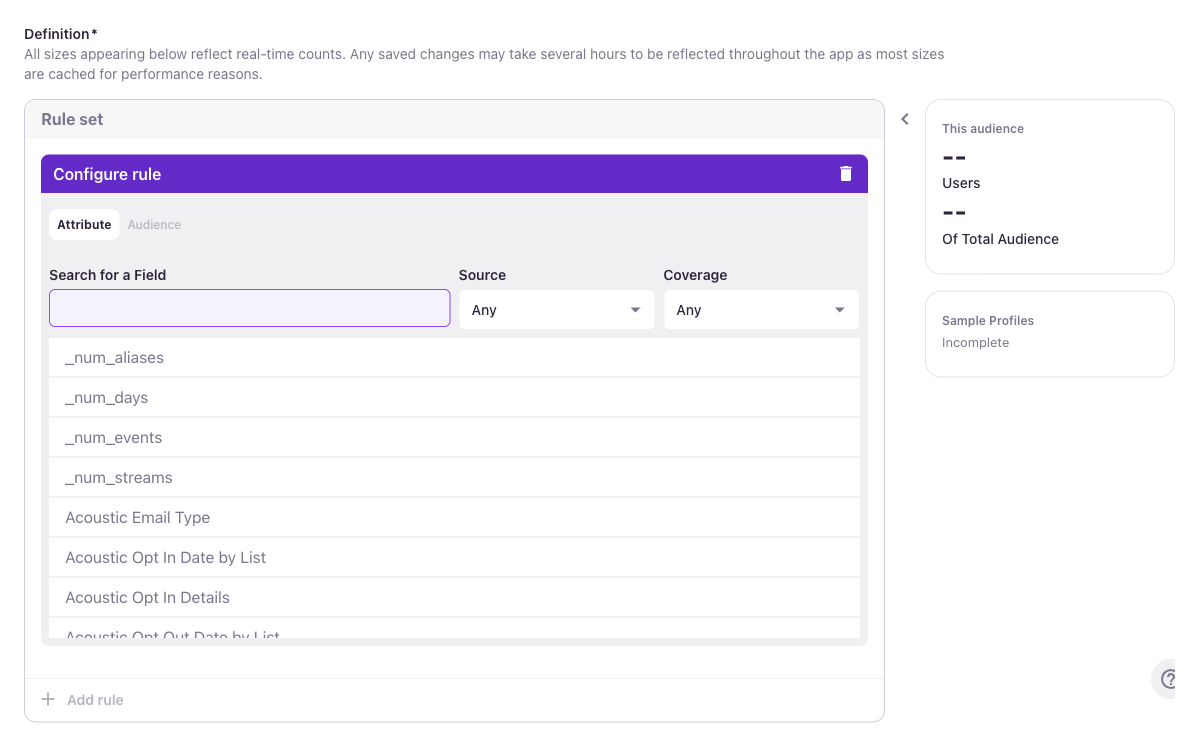
Filter the field list to find the right field:
| Filter | What it does |
|---|---|
| Search for a Field | Text search against field names. |
| Source | Limit to fields from a specific data stream. |
| Coverage | Limit to fields populated on at least X% of profiles, so you don't build rules on sparsely-populated fields. |
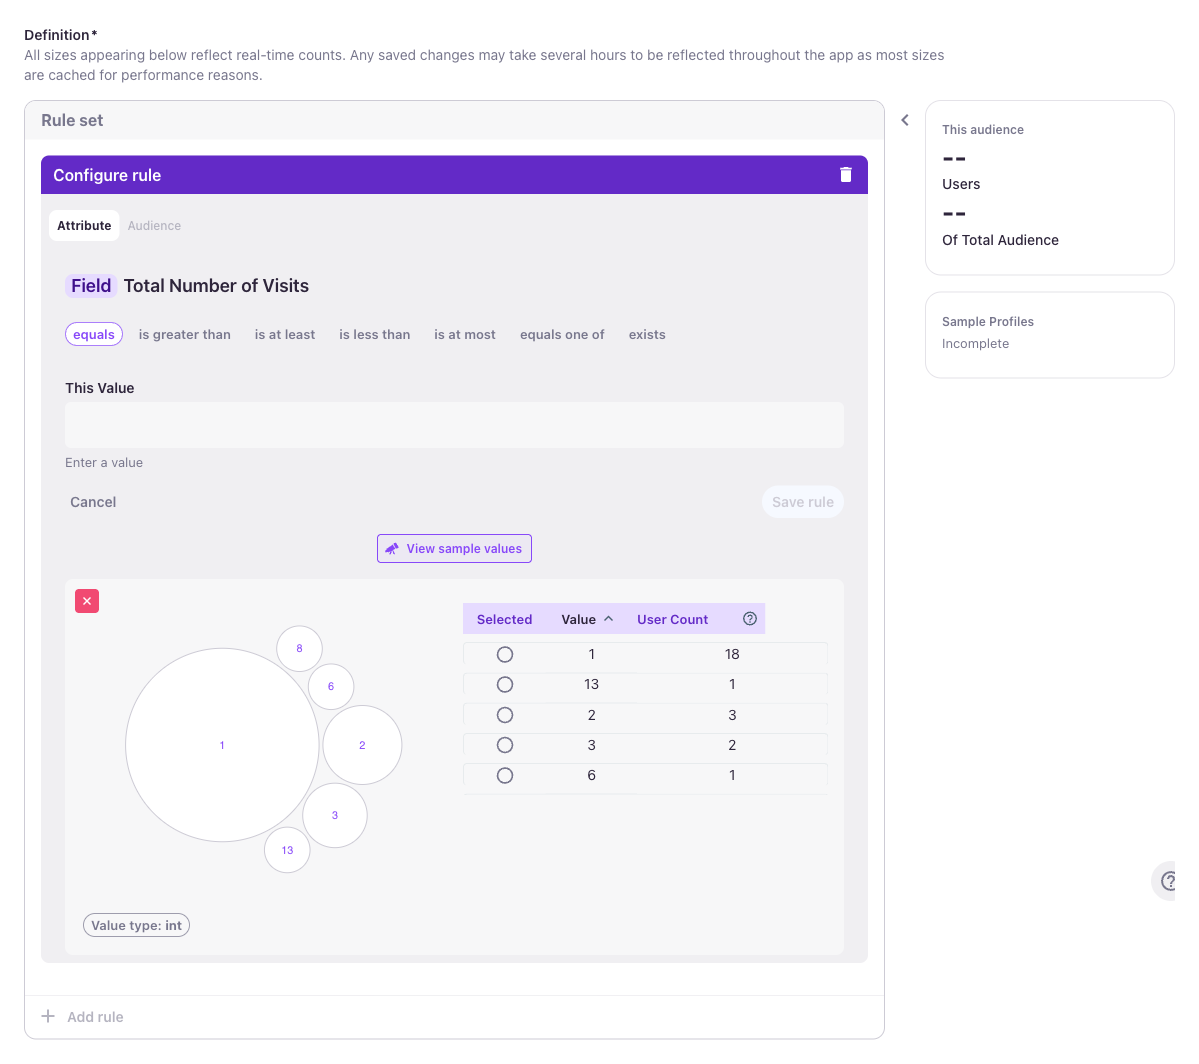
Click a field to open its configuration, choose an operator and value, then click Add rule. Numeric fields show a histogram of value distributions and a table of sample values you can pick from.
Rules work differently depending on the field type — see User Field Types below.
Audience Rules
The Audience tab lets you use an existing audience as a rule.
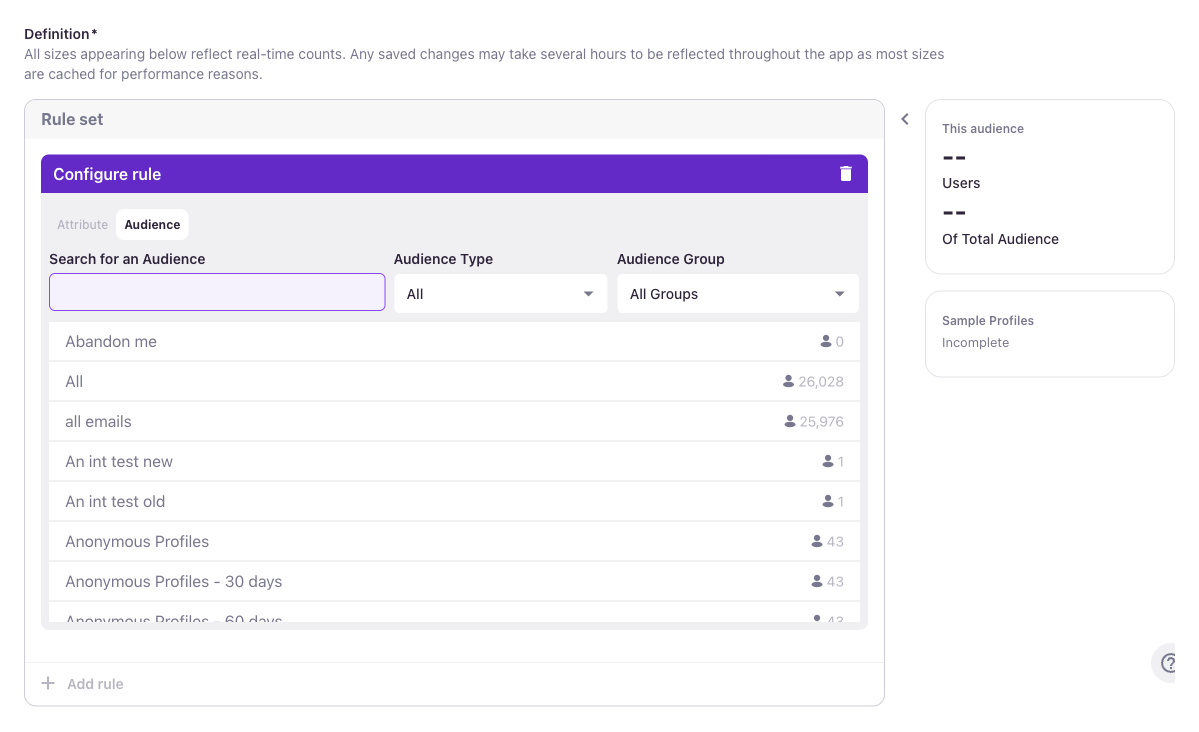
Filter with:
| Filter | What it does |
|---|---|
| Search for an Audience | Text search against audience names. |
| Audience Type | Limit by type (All, Behavioral, Characteristic, etc.). |
| Audience Group | Limit to audiences in a specific group. |
Select an audience to add it as a rule.
Content Affinity and TopicsAffinities, Topics, and related interest signals appear in the Attribute tab alongside other user fields — search by the Affinity or Topic name to find them. See Affinities and Topics for how interest data is modeled.
📘 Geolocation rules
Geolocation fields (country, region, city, radius-from-point) live in the Attribute tab. Search for geo or the specific field name to find them.
User Field Types
How you configure a rule depends on the type of the user field. Expand the sections below for the supported operators and UI behavior of each type.
Numeric User Fields
Numeric fields (e.g. Total Number of Visits, Total Pageview Count) support these operators:
- equals — exact match
- is greater than / is at least — minimum thresholds
- is less than / is at most — maximum thresholds
- equals one of — match any of a list
- exists — include everyone with a value
The value distribution bubble chart shows which values are most common across your user base; click a bubble or select from the Selected/Value/User Count table to pick a value. Use View sample values to inspect matching profiles before saving.
Text User Fields
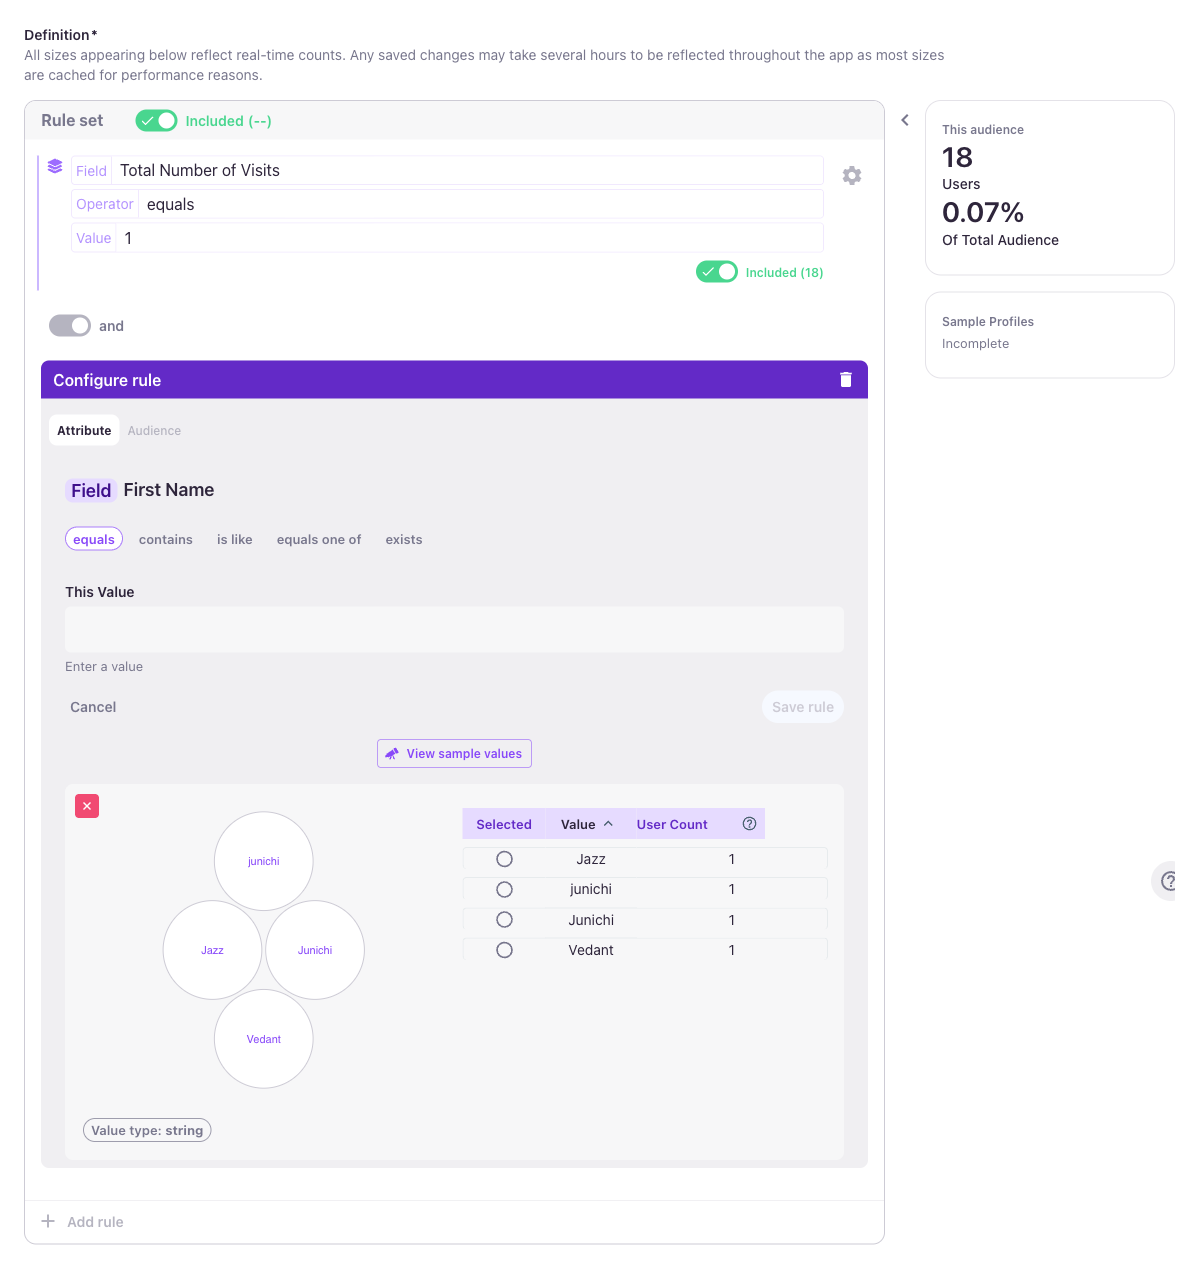
Text fields (e.g. First Name, Last Visit City) support these operators:
- equals — exact match (case-sensitive)
- contains — substring match anywhere in the value
- is like — pattern match with
*as a wildcard (e.g.test*matches "testing", "test" matches "my test case") - equals one of — match any of a list of values
- exists — include everyone with a non-empty value
Pick a value from the bubble chart or the sample values table, or type one into This Value. The bubble chart sizes values by user count.
Date User Fields
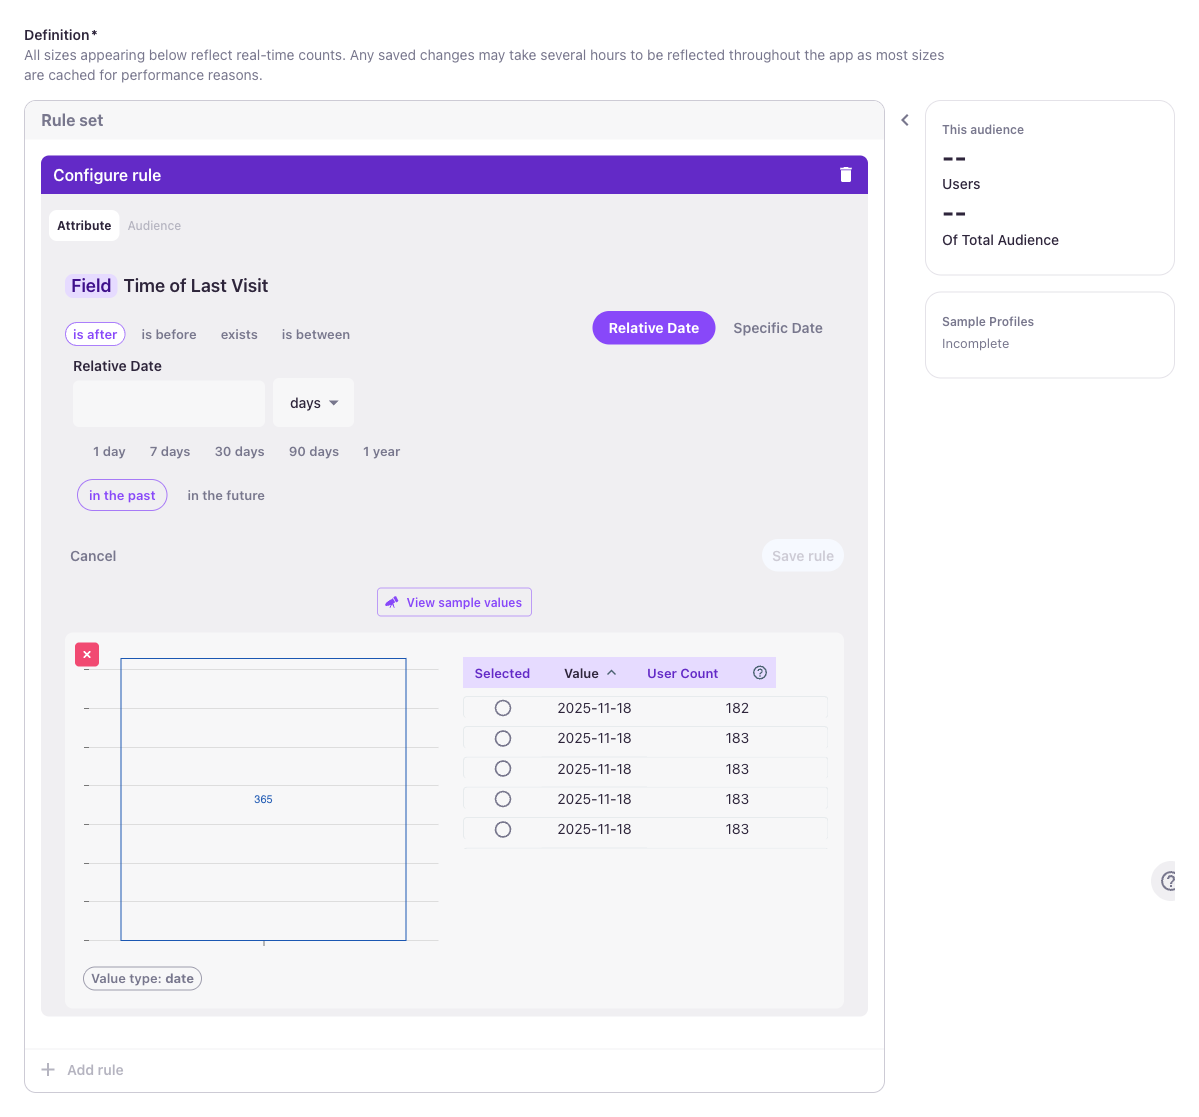
Date fields (e.g. Time of First Visit, Time of Last Visit, Created Timestamp) support these operators:
- is after — match values after a given date
- is before — match values before a given date
- is between — match values within a date range
- exists — include everyone with a non-null date
Pick Relative Date for windows that slide with "now" (e.g. visited in the last 7 days), or Specific Date for fixed points in time (e.g. created after 2024-01-01). Relative dates come with shortcuts for 1 day, 7 days, 30 days, 90 days, and 1 year in either direction (in the past / in the future).
Set User Fields
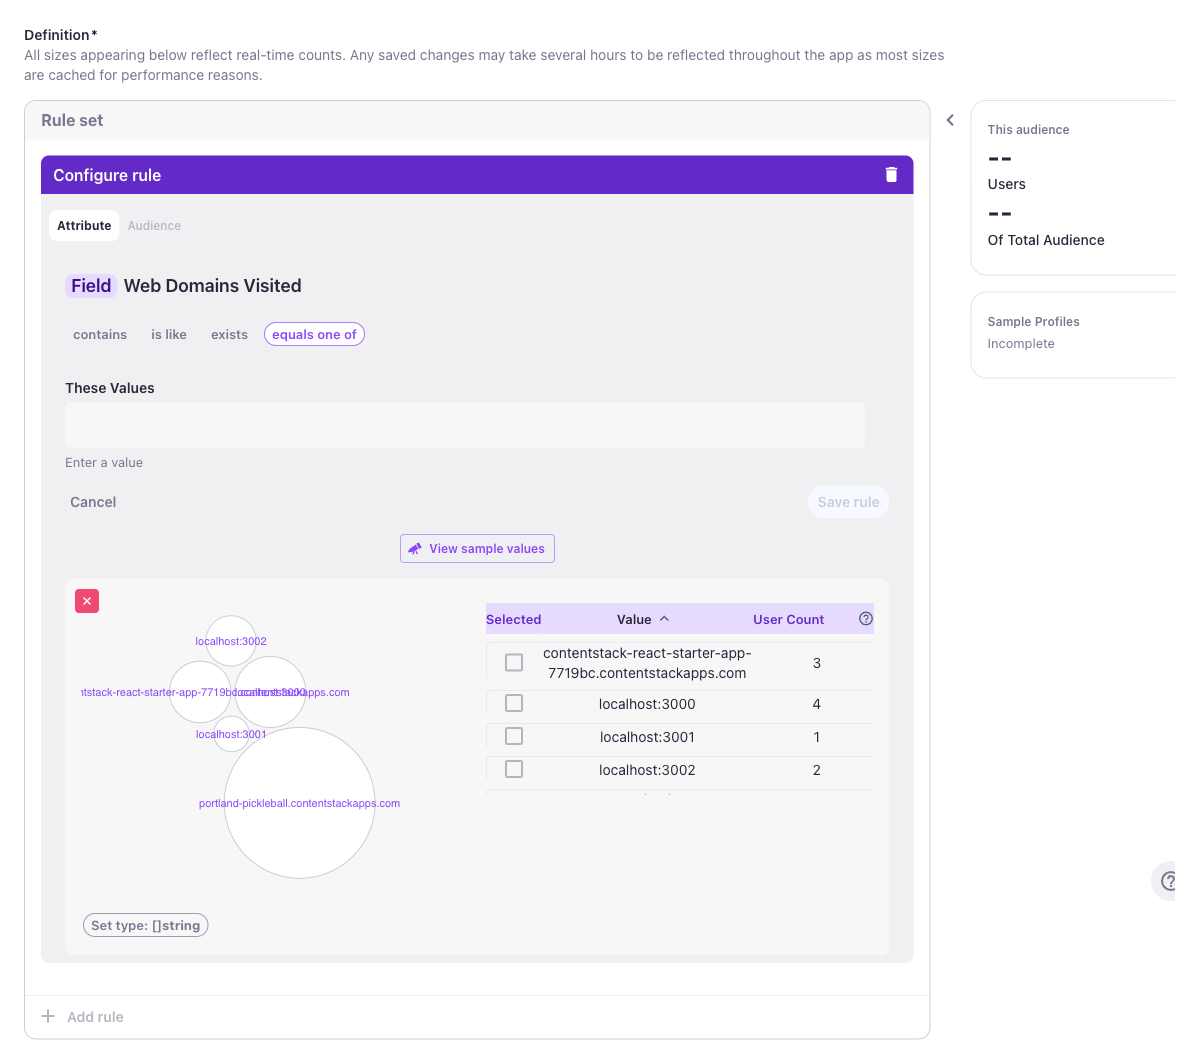
Set fields (e.g. Web Domains Visited, All URL Paths Ever, Followed Sports) collect multiple values per user over time. Operators:
- contains — match users whose set contains the given value
- is like — wildcard match with
* - equals one of — match users whose set contains any of a list of values
- exists — include everyone who has any value in the set
Tick values in the sample list to include them, or type into These Values to supply your own. The Set type: []string pill at the bottom tells you the element type of the set.
Map/Nested User Fields

Map fields (e.g. Web Events By Hour, Events By Device, Signup Date for Event) store values grouped by a key, giving you a two-step rule:
- Search for a key — pick which slice of the map the rule operates on. For Web Events By Hour the keys are hours (0–23); for Events By Device the keys are device types; etc.
- Condition — once a key is picked, the rule becomes a condition on the value at that key, using the operators appropriate to the value type (numeric, string, date). The
Map type: map[string]intsumpill at the bottom tells you the key type and value type.
Use Map Exists (No Key Needed) to match users who have any entry in the map, regardless of key.
Combining Rules
A Rule set groups one or more rules with a shared connector (AND or OR) and a shared Include/Exclude disposition. An audience can contain multiple rule sets, which are themselves combined with AND or OR — this lets you express precise logic like "(visitors from US AND engaged last 7 days) OR (known email AND abandoned cart)".
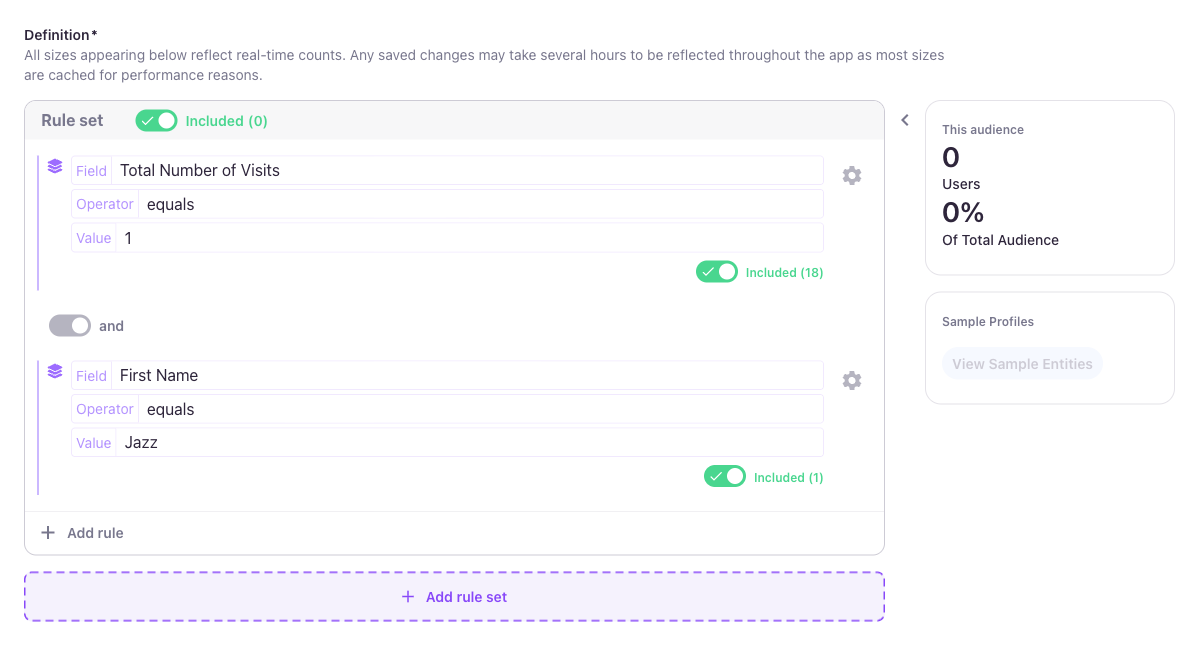
AND: users must match every rule
By default, additional rules are joined with AND — users must match all rules in the set. The connector toggle between rules shows "and" (grey).
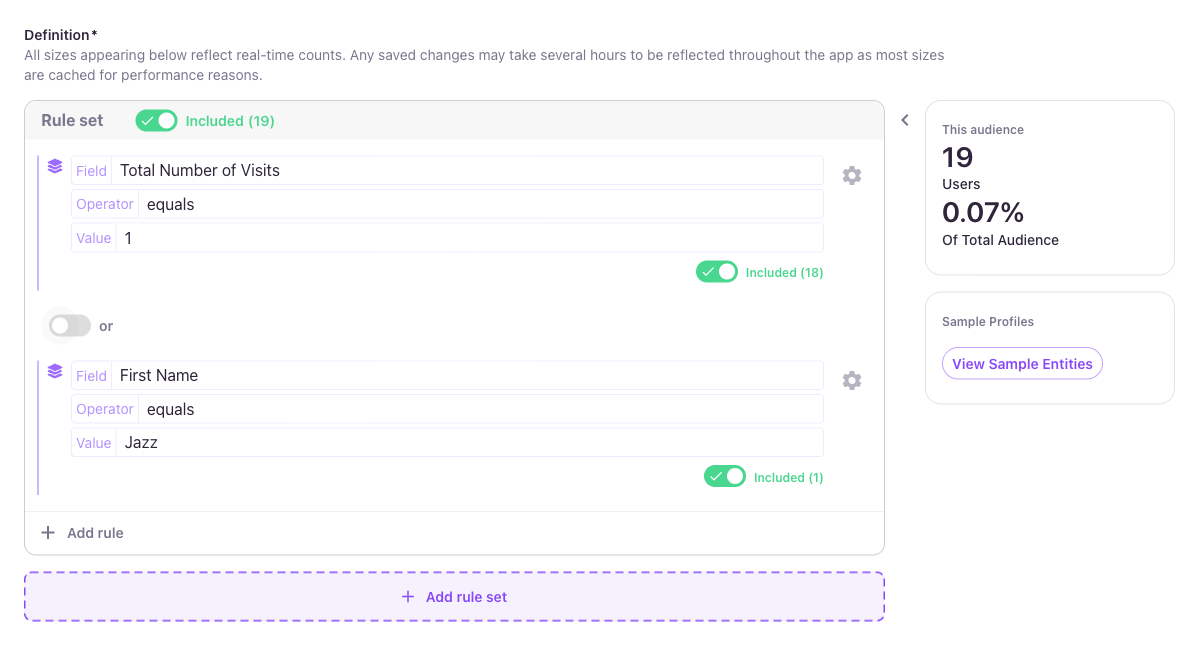
OR: users must match at least one rule
Click the connector toggle between rules to switch to OR — users match if they satisfy either rule. The audience size updates in real time.
The connector applies to the whole rule set — you can't mix AND and OR within a single set. To combine both, split into multiple rule sets.
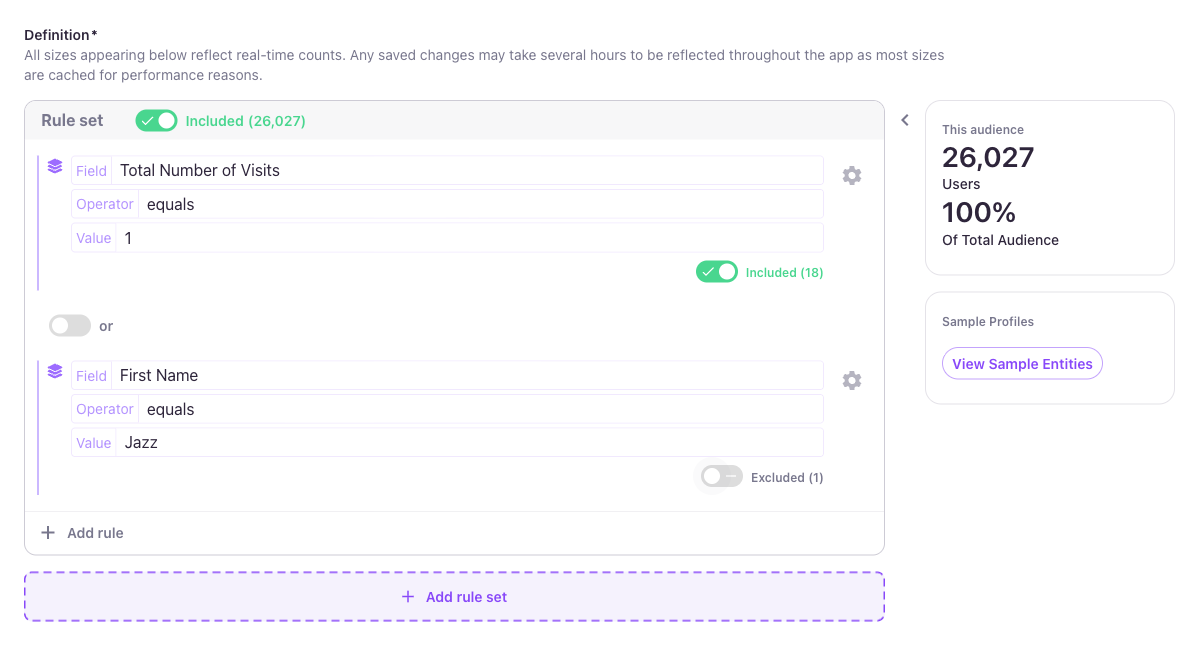
Included / Excluded: invert a rule
Each rule has an Included / Excluded toggle on its right side. When a rule is Excluded, users who match the rule are kept out of the audience.
The same toggle exists at the rule-set level. Excluding a whole rule set removes everyone who matches it from the final audience.
Adding another rule set
Click + Add rule set below the existing set to start a new set. Rule sets are combined with AND or OR using the same connector pattern. Use rule sets to express logic that can't fit in a single flat list of rules.
Saving the Audience
Click Save at the bottom of the builder. Save is disabled until the audience has a Name and at least one valid rule in the Definition.
After saving, you land on the audience's summary page.
Field-value limitAn audience can reference a maximum of 1,000 field values across its definition. A "value" is a single evaluation against a user field, so the limit can be reached by:
- One rule with 1001+ values in a multi-value operator (e.g. equals one of with 1001 entries).
- 1001+ separate single-value rules (e.g. each using exists).
- Any mix in between, such as two rules with 500+ evaluations each.
If you exceed the limit, saving fails with the error "Audience too large! Remove values to save this audience." Reduce the number of values or split the audience into smaller ones referenced via the Audience tab.
Managing Audiences
The Audiences list page lets you browse, search, filter, group, edit, and delete audiences.
Browsing and Searching
The list has a Search box that fuzzy-matches against audience names and slugs, and sortable columns for:
| Column | What it shows |
|---|---|
| Name | Human-readable name with the slug rendered below in code style. |
| Size | Most recent user count (refreshed periodically — not real-time). |
| Last Modified | When the definition was last changed. |
| API | Whether the audience is exposed via the personalization API (the Access: Enable for Personalization toggle). |
| Managed | Lytics-managed prebuilt audiences are flagged here. |
| Download CSV | Trigger a CSV export of the audience's users. |
Click any column header to toggle sort. Pagination controls sit below the list; use Show All to disable pagination.
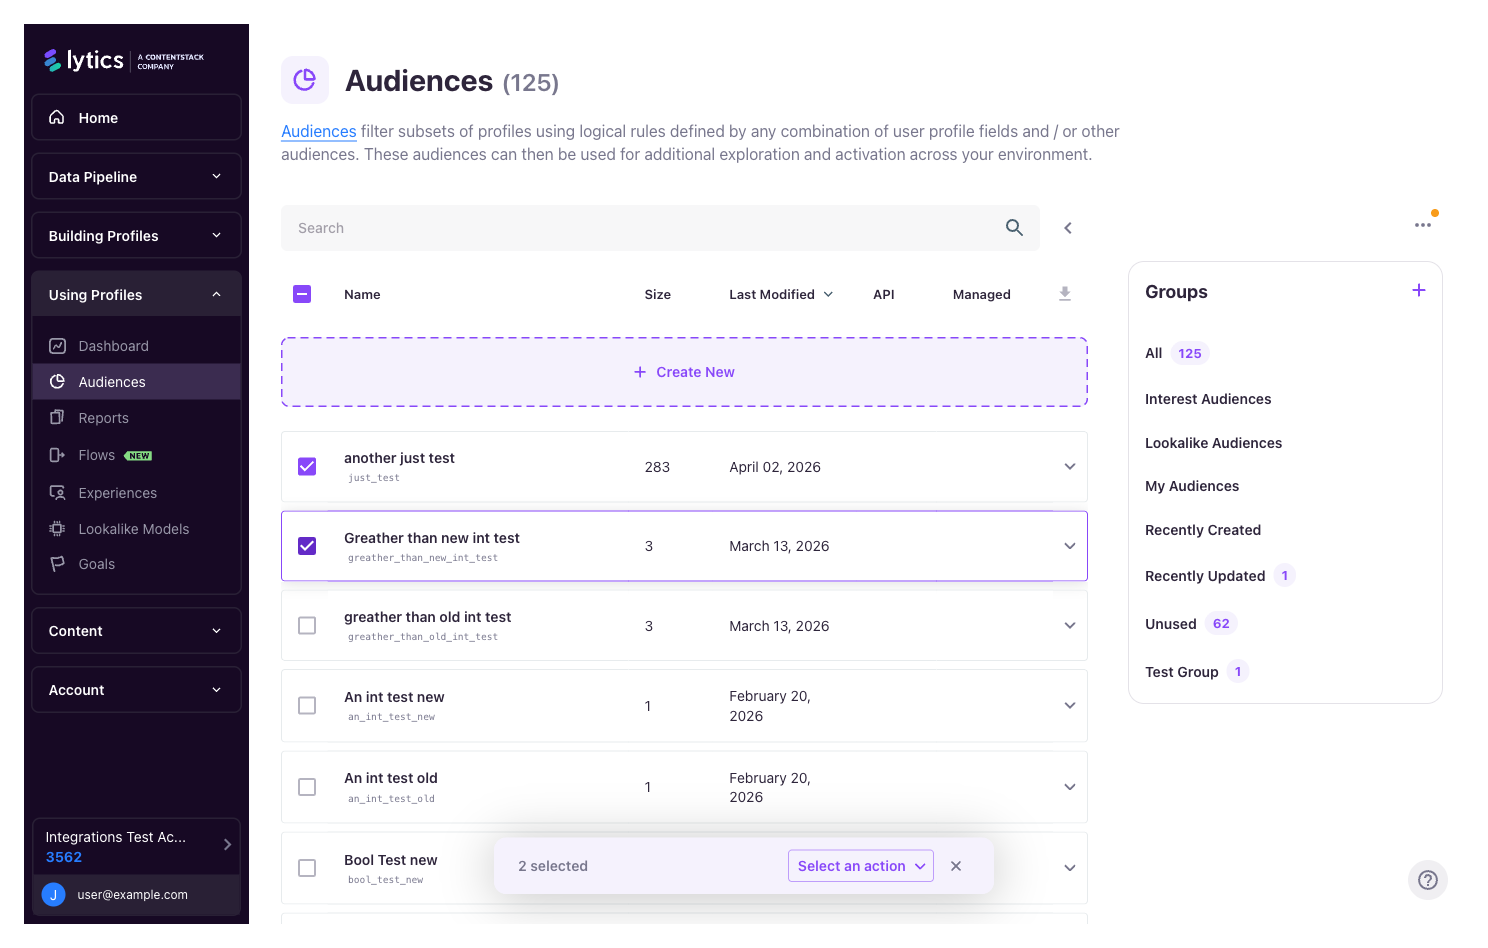
Groups
Groups organize audiences into logical buckets. The right-hand Groups panel lists built-in groups plus any custom groups you've created.
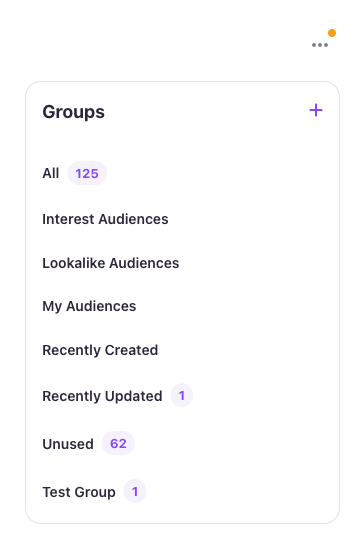
Built-in groups Lytics computes automatically:
- All — every audience in the account.
- Interest Audiences — audiences built on content-affinity rules.
- Lookalike Audiences — audiences generated from the Lookalike Models feature.
- My Audiences — audiences you've created or edited recently.
- Recently Created — audiences added in the last 7 days.
- Recently Updated — audiences whose definitions changed in the last 7 days.
- Unused — audiences not referenced by any export, campaign, or other audience.
Creating a custom group
Click the + next to Groups to create a custom group, give it a name, and save.
Adding audiences to a group
There are two ways to add audiences to a group:
- From the audience builder — set the Groups field while creating or editing the audience.
- From the list — select audiences via checkbox, click Select an action, and choose Add to Groups. Pick the target group(s) to apply.
Editing or deleting a group
Hover the group name in the Groups panel to reveal the edit (pencil) and delete (trash) icons. Deleting a group removes the group assignment from its audiences — it does not delete the audiences themselves.
Audience Summary
Click any row in the Audiences list to open the audience's summary page. It shows the audience name, ID, slug, created/updated dates, API access status, and the Export / Edit / ⋯ actions.

Four tabs below the header give different views of the audience:
- Metrics — headline user count and audience share, plus an activity graph of audience size over time, viewable at hourly, daily, weekly, or monthly intervals. Useful for spotting growth from a campaign or a sudden drop after a rule change. The graph begins to populate within a day of audience creation, and statistics start from the audience's creation date — there's no historical backfill for periods before the audience existed. To get an email when audience size goes out of expected bounds, set min/max thresholds on the activity chart — see Metric Threshold Alerts.
- Details — exports and jobs currently using this audience, plus a sample of recent users you can drill into.
- Characteristics — a breakdown of who's in the audience by behavior, web activity, content affinity, and campaign interactions. Helpful for sanity-checking whether the rules are catching who you expected.
- Logs — recent events on the audience: creation, edits, sync runs, and errors.
Editing an Audience
From the summary page, click Edit to reopen the audience in the builder. Make changes, then Save. Edits are picked up by downstream exports on the next refresh.
If the audience is referenced by an active triggered workflow, reconfigure the job after editing the audience so that the workflow picks up the new definition cleanly.
Duplicating an Audience
From the summary page, click the ⋯ menu and choose Duplicate. You'll get a new audience with the same definition; adjust the name and rules as needed.
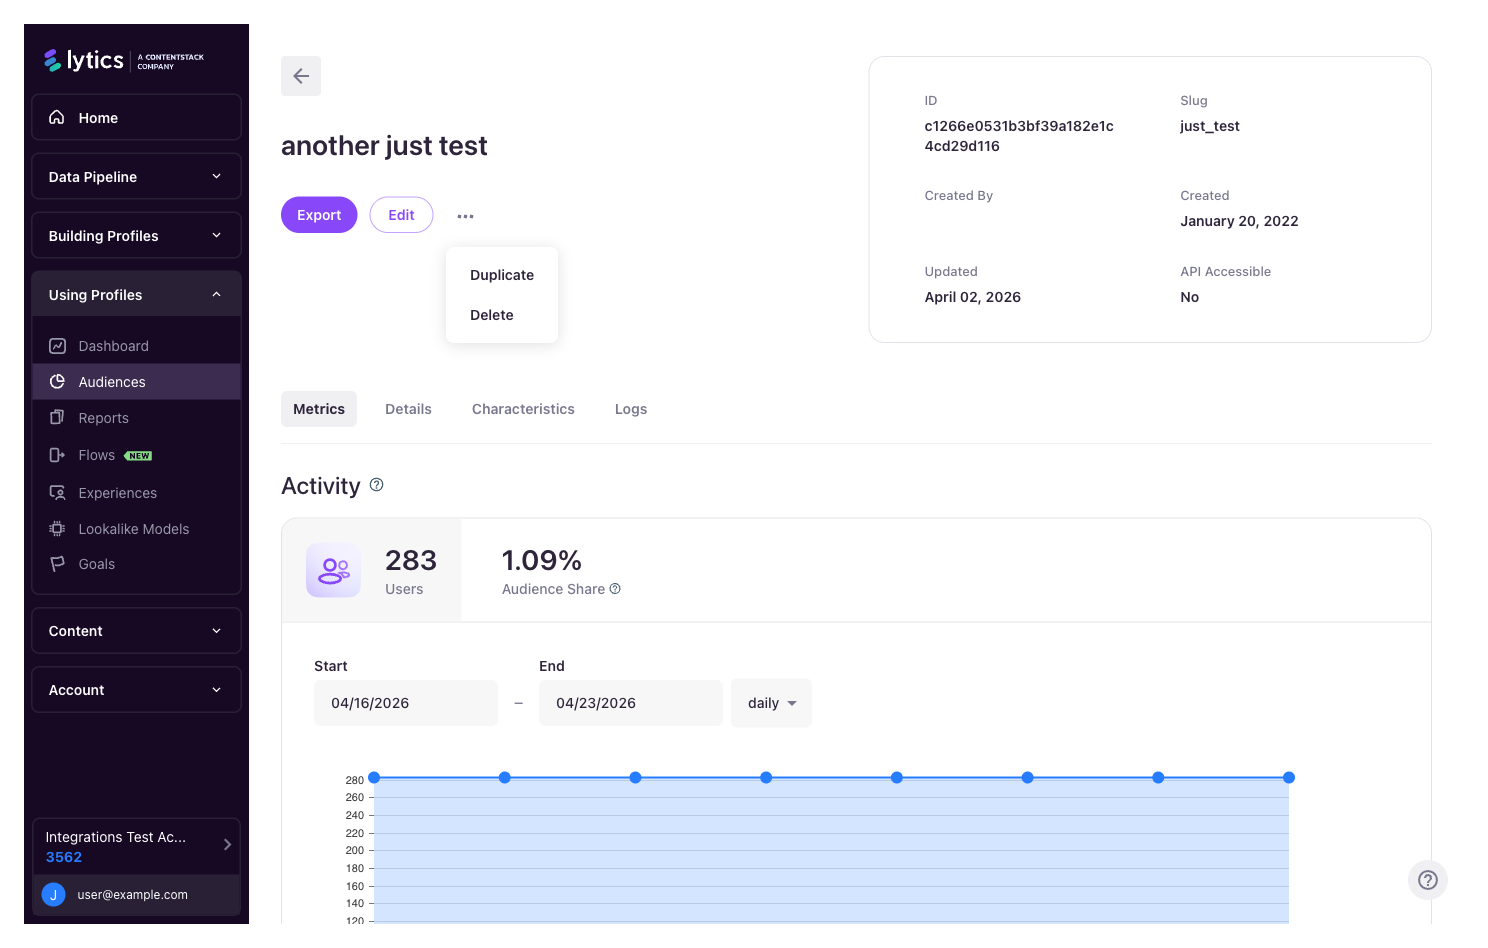
The duplicate inherits the original audience's name and slug withduplicateappended. Update both before saving — keeping a clean, unique slug avoids confusion in API calls and downstream exports.
Deleting an Audience
Deleting an audience removes the audience definition only — it does not delete the user profiles that were in it.
Deleting a single audience
From the summary page of the audience you want to delete, open the ⋯ menu and choose Delete. You'll be asked to confirm.
Deleting multiple audiences
Tick the checkboxes on the rows you want to remove. A blue action bar appears at the bottom showing the selection count.
Click Select an action, then Delete Audiences. You'll be asked to confirm, and Lytics will check for downstream dependencies before deleting.
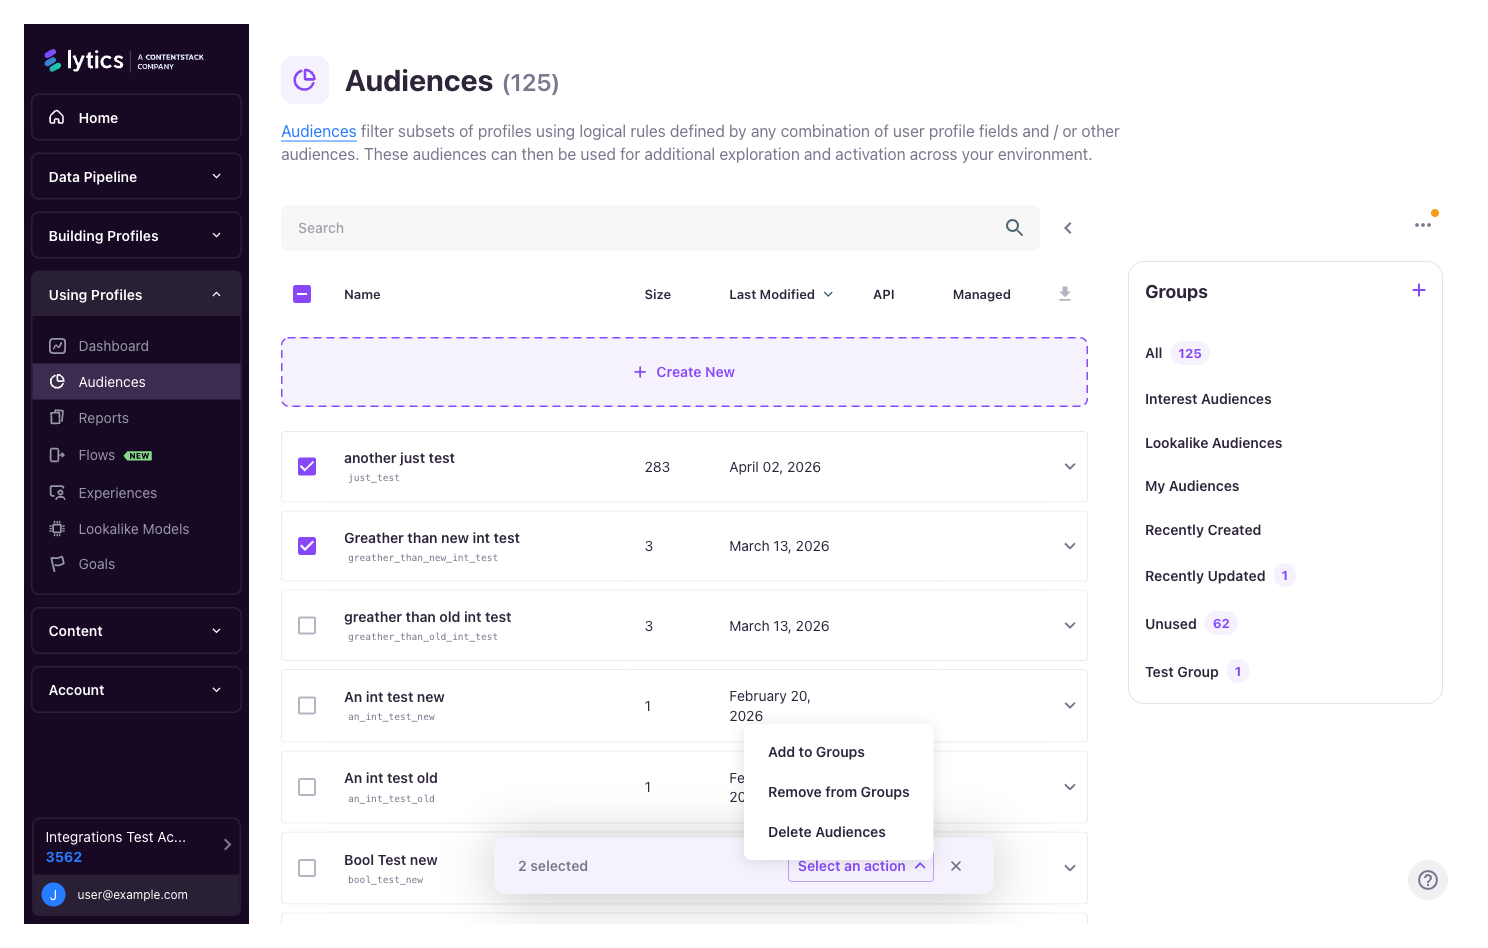
If any of the selected audiences are used by an active export, campaign, or another audience, Lytics prompts you to choose between deleting the dependents as well or skipping the deletion.
Activating Audiences
Audiences can be activated in several ways:
- Lytics Experiences — see Experiences.
- Public Entity API — see the personalization API reference.
- Exports to downstream tools — see Lytics Integration Options.
Updated 3 months ago