Content Modularization in Email with Lytics Audiences
Running a complex nurture program can be difficult to manage, especially if you're using countless static email templates. Luckily most email service providers (ESPs) offer a templating language to allow for dynamic user data to be embedded in an email. Dynamic templates are not only useful for transactional emails, but you can build them to use valuable Lytics user data such as audience membership and other user profile fields to simplify your email marketing programs all while personalizing the emails to increase user engagement.
This guide will walk through how to modularize major components of an email based on Lytics audience membership using Lytics and a single Campaign Monitor template. This technique is applicable to most ESPs that Lytics integrates with, just be sure to refer to the your ESP's documentation for dynamic templating.
Before you begin

You should have a generic HTML email template set up in your ESP. This guide uses an email template promoting new products of a shoes retailer and personalizes it based on the types of shoes the user is interested in. Think about what parts of the email you would like to change based on audience membership.
Build your audiences
In Lytics you'll need a target audience - the group of users to send the email to - and one or more additional audiences that the email can be personalized for. In this guide we have Promotional List as the target audience, and two audiences built with content affinity, Interested in Dress Shoes and Interested in Athletic Shoes which we will build out separate content pieces for.

Sync the audience to your email tool
Once you have your audiences ready, you will sync your target audience to an ESP. This can be done with a Lytics export integration. In this guide we will export to Campaign Monitor. If you're using another ESP browse our list of integrations and the read the instructions for exporting an audience.
Select Promotional List as the target audience to sync. For Campaign Monitor the other two audiences will be recorded in a custom field called LyticsAudiences. This is the field we will use in the template to determine what to show and hide for the user.

Regardless of the provider you choose you should see the Lytics users in your email tool not long after you click the Start Export button.
Modify your email template
In this example the header of the email will change based on audience membership. For every element we want to personalize we need to have three versions of the content:
- Users in the Interested in Dress Shoes audience.
- Users in the Interested in Athletic Shoes audience.
- Users in the Promotional List who have not shown interest in either shoe type (generic promotion).
If a user is interested in both dress shoes and athletic shoes we can prioritize which to show based on the order of the conditionals we will set up in the template. We will opt to promote dress shoes in this example for that case.

Follow these steps to personalize your email template in this manor:
-
Open your template in an HTML editor, locate the text, image or HTML element you want to change based on audience membership.
-
Use the custom
LyticsAudiencefield and conditional logic to bind your HTML content in if/else statements. Take a look at the following example, which the example template uses to change the text on the banner of the example email:<!-- custom headline --> [if:LyticsAudiences=Interested in Dress Shoes]Dress shoes for any occasion [elseif:LyticsAudiences=Interested in Athletic Shoes]Kick start your summer with new shoes [else]Shoes of all shapes and sizes you'll love[endif] -
Continue to edit your template to modularize the content of your email. In our example, we also switch out the image in the banner as well as the CTA link and text based on audience membership:
<!-- custom image -->
[if:LyticsAudiences=Interested in Dress Shoes]<img src="dress-shoes.png" alt="dress shoes" />
[elseif:LyticsAudiences=Interested in Athletic Shoes]<img src="athletic-shoes.png" alt="athletic shoes" />
[else]<img src="default-shoes.png" alt="shoes" />[endif]

...

<!-- custom CTA -->
[if:LyticsAudiences=Interested in Dress Shoes]<a href="https://shoepalace.com/products/dress-shoes">Shop Dress Shoes</a>
[elseif:LyticsAudiences=Interested in Athletic Shoes]<a href="https://shoepalace.com/products/athletic-shoes">Shop Athletic Shoes</a>
[else]<a href="https://shoepalace.com/products/shoes">Shop New Shoes</a>[endif]
In the next step you will be able to see the rendering of the templates in each of the three contexts.
Send your campaign to the target audience
-
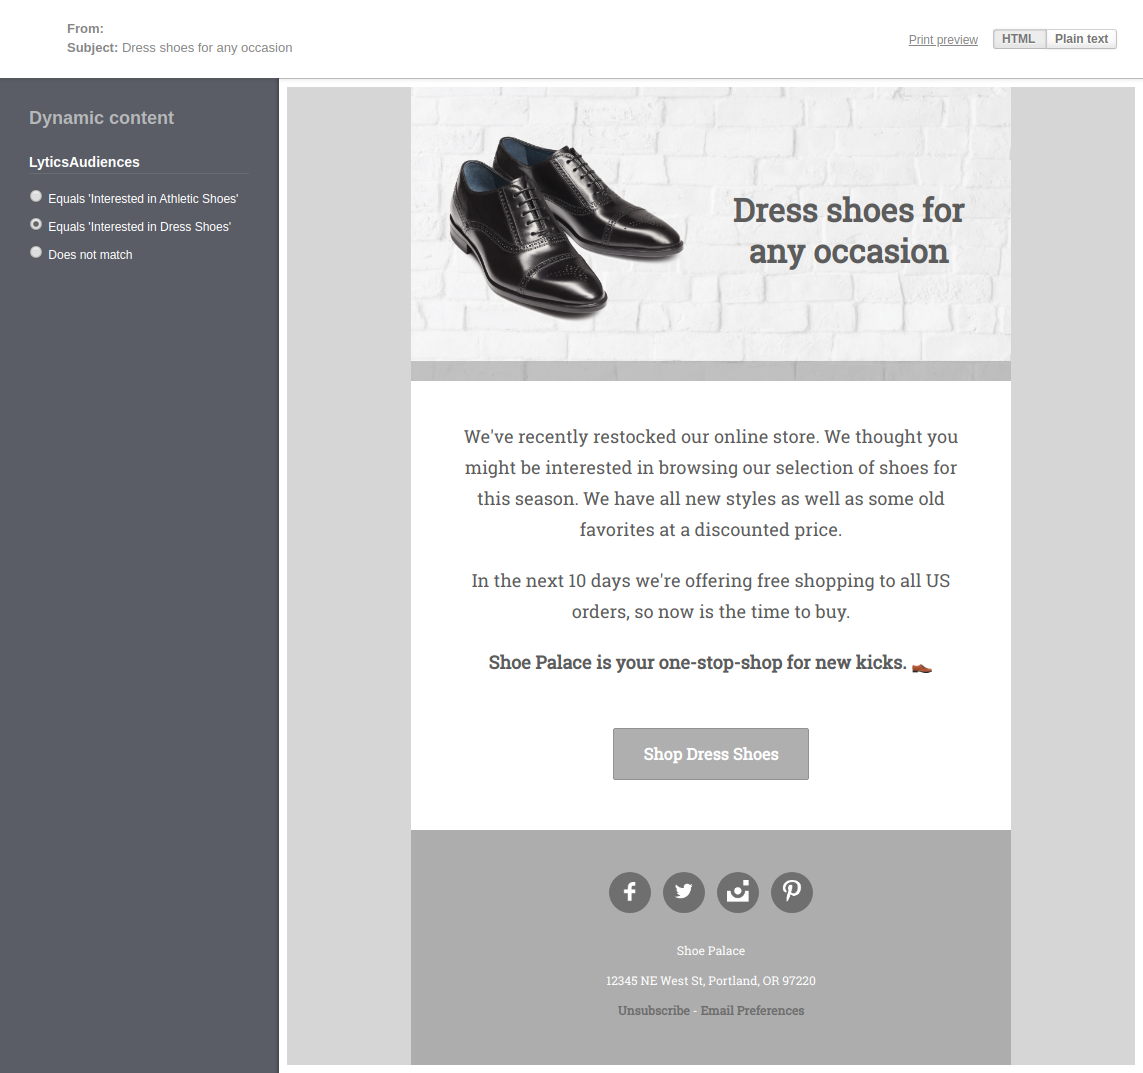
Create a new campaign in Campaign Monitor. On the Content step upload the HTML template you've created that includes your conditionals. After you've successfully uploaded, you can preview the email and toggle between the
LyticsAudiencedynamic content options to view each of the expected outputs.
-
On the Recipients step be sure to select the audience you exported to Campaign Monitor from Lytics.

-
Continue on to the Delivery step. You can send a test email to yourself and/or schedule your campaign for delivery.
This guide has demonstrated how you can send three distinct, personalized emails to users based on their interests in a single campaign. Instead of sending a generic email to all your customers, you can send an email that speaks to a user's interests.
This is just the tip of iceberg, think of how you can personalize and modularize your email templates for more advanced use cases. Conditionals can be used for any number of audiences, and you can show and hide entire content sections in an email based on audience membership. Your Lytics representative can help! If you have any further questions or would like to talk through use cases reach out to the Lytics team.
Updated 5 months ago


