

Access Tokens
Access Tokens
Creating and managing your access tokens gives you fine-grained control over how your Lytics account and data is accessed. To get started, navigate to Account > Security > Access Tokens from the main navigation. Note that just like all other account settings, you must have administrator privileges to view and make changes.
Viewing existing Access tokens
If this is your first time creating an access token, you will see a message prompting you to create a new token.
Once you have created at least one access token, this page will display your tokens, their expiration dates, and the user who created each token.
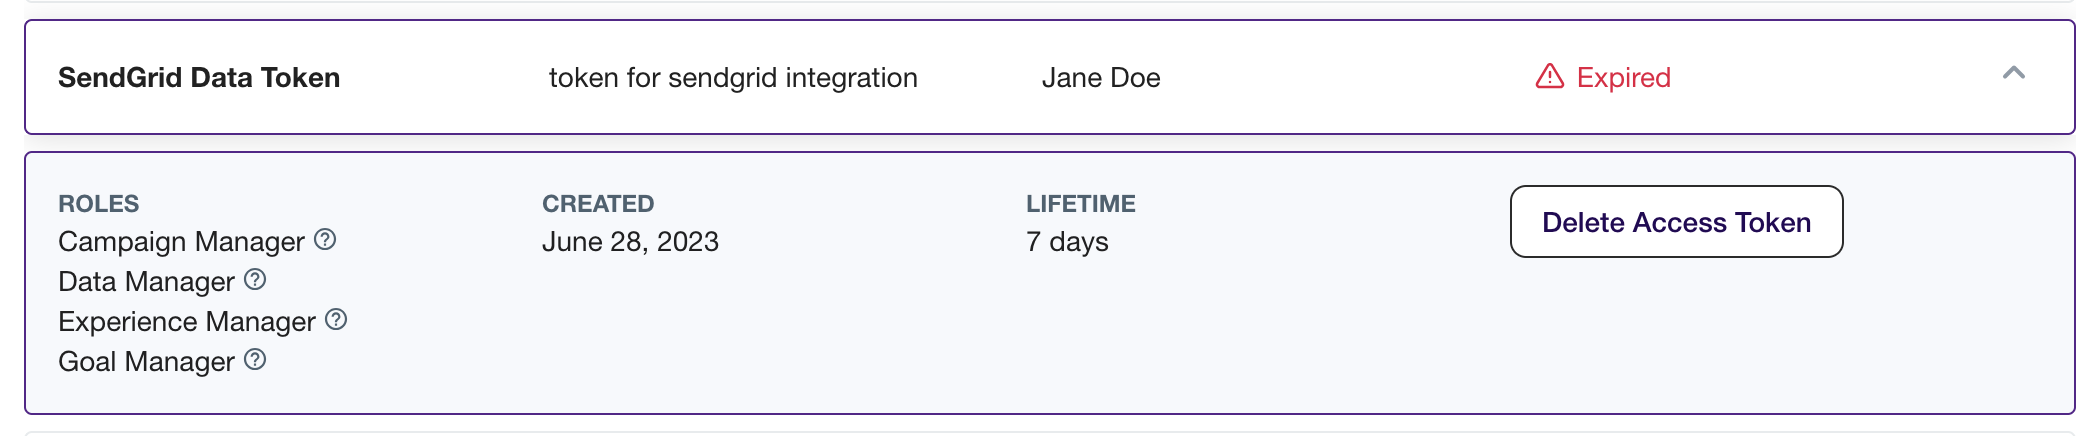
You can also click on a specific token to see the list of roles the token has been granted, the lifetime of the token, the created date, and an option to delete the token.
Creating a new API Token
To create your first token, click the Create New button and fill out the following fields on the modal that appears:
| Field | Description |
|---|---|
| Name | Token name. |
| Description | Though optional, it's helpful to add a description so each token's purpose is clear. |
| Expiration | Token expiration length. Current options include 90 days, 30 days, seven days, and No expiration, which means the token is perpetually valid unless manually deleted. |
| Roles | Each token can be tailored to have the precise access needed and no more. |
Click Generate token to create your token. You will be prompted with a one-time dialog window that contains the access token. Once you dismiss this dialog, it is impossible to see it again, so please copy and paste it somewhere secure.
Deleting an existing API token
When an API token is no longer needed, or you otherwise wish to remove one or more tokens, click on the token from the list, then click the Delete Access Token button to proceed with the deletion.
This operation is not reversible and you will be prompted twice before each token is deleted. Anyone or anything depending on that token will break once the token is deleted.
Updated 2 months ago