Authorizations
What are Authorizations?
Channel tool authorizations refer to the permissions granted to various integrations that allow our platform to access and use data from third-party channels. These integrations can include email service providers, social media platforms, and advertising networks.
Once permission has been granted, Lytics surfaces "Authorizations," which allow you to manage and maintain the connection to your channel tools over time. This document outlines how to create and manage auths to ensure the long-term health of your data pipeline.
Creating Authorizations

Authorizations are currently accessed from your account navigation menu by selecting Account > Security > Authorizations.

Within the Authorizations section of the interface, you will see a list of existing Authorizations and a button to "+ Create New," clicking this button will take you to the Authorization wizard, where you will:
- Choose the provider.
- Select the desired authorization method.
- Add a name (label), description, and complete the configuration options.
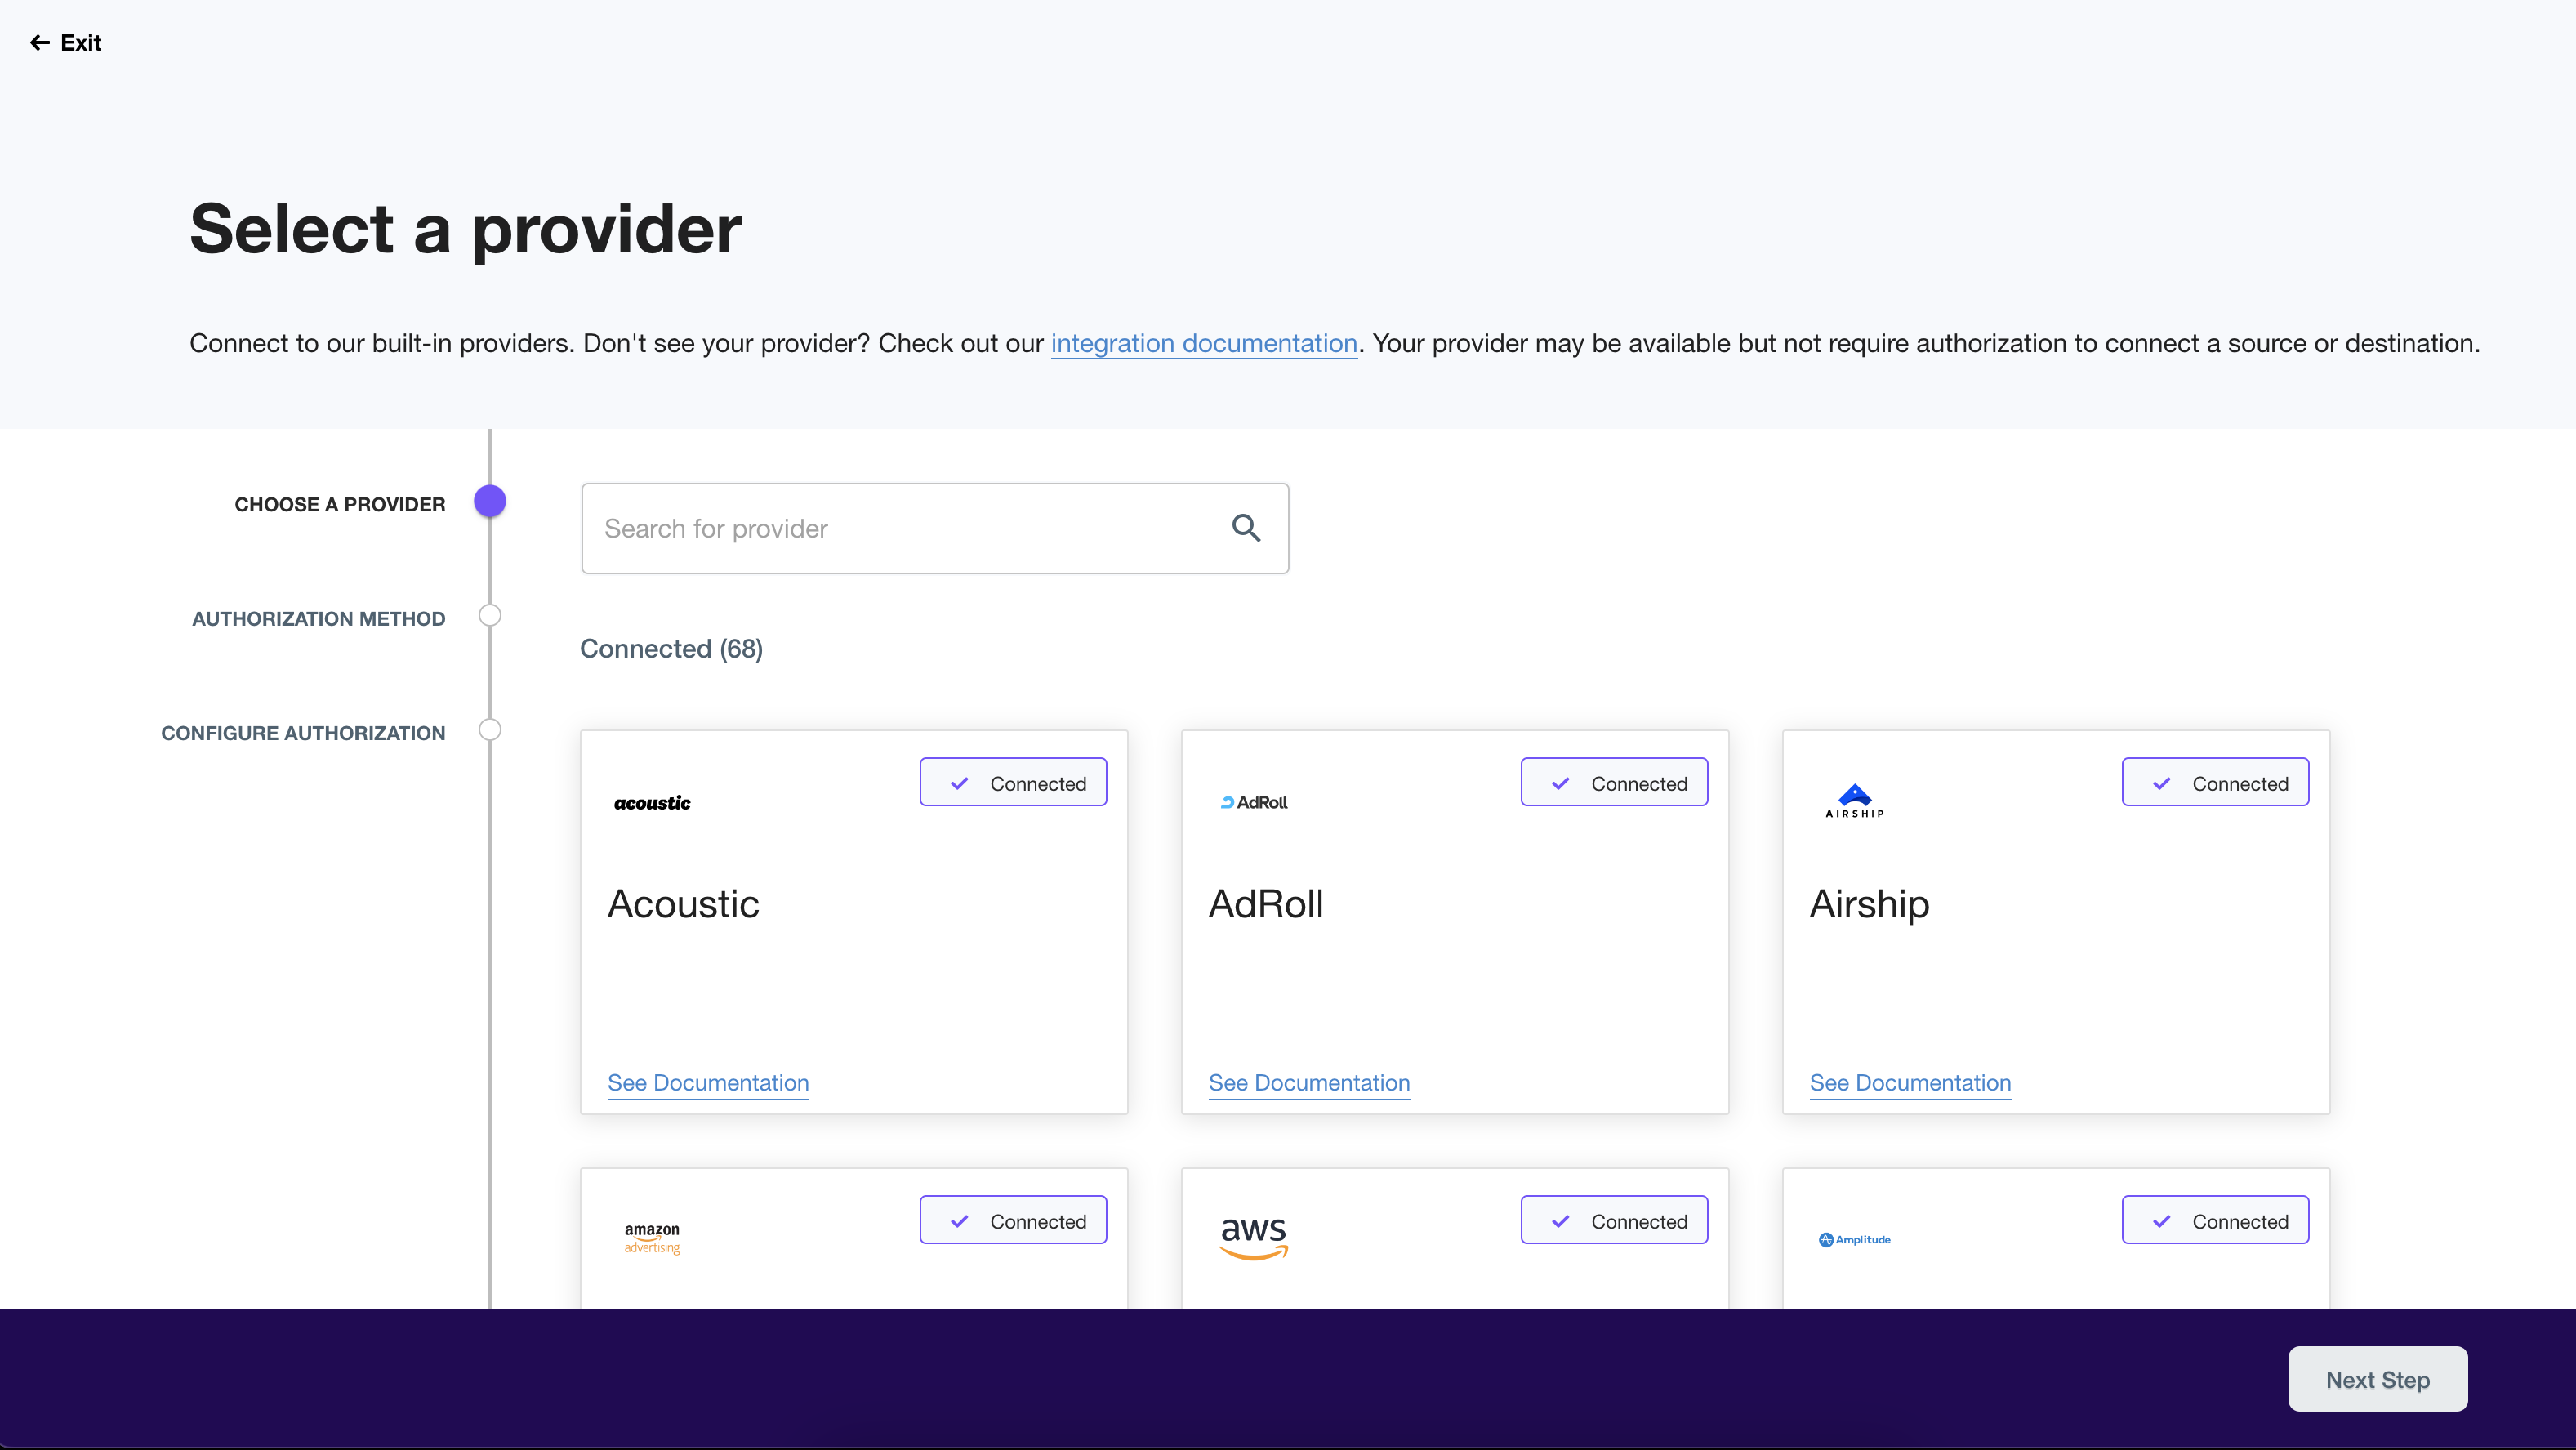
You will need authorization for most jobs when going through the job creation wizard in Lytics. At the "Choose Authorization" step, you can opt to create a new authorization which will direct you to the authorizations wizard in a new tab. You will be prompted to choose the method and configure the authorization before configuring your job.
Authorization Methods
Note that some integration providers only have one authorization method, but others offer multiple methods such as API keys, OAuth, etc. Specific methods may enable different jobs, such as real-time vs. bulk audience exports. If you are unsure which method to use, you can find more information in your provider's integration documentation.
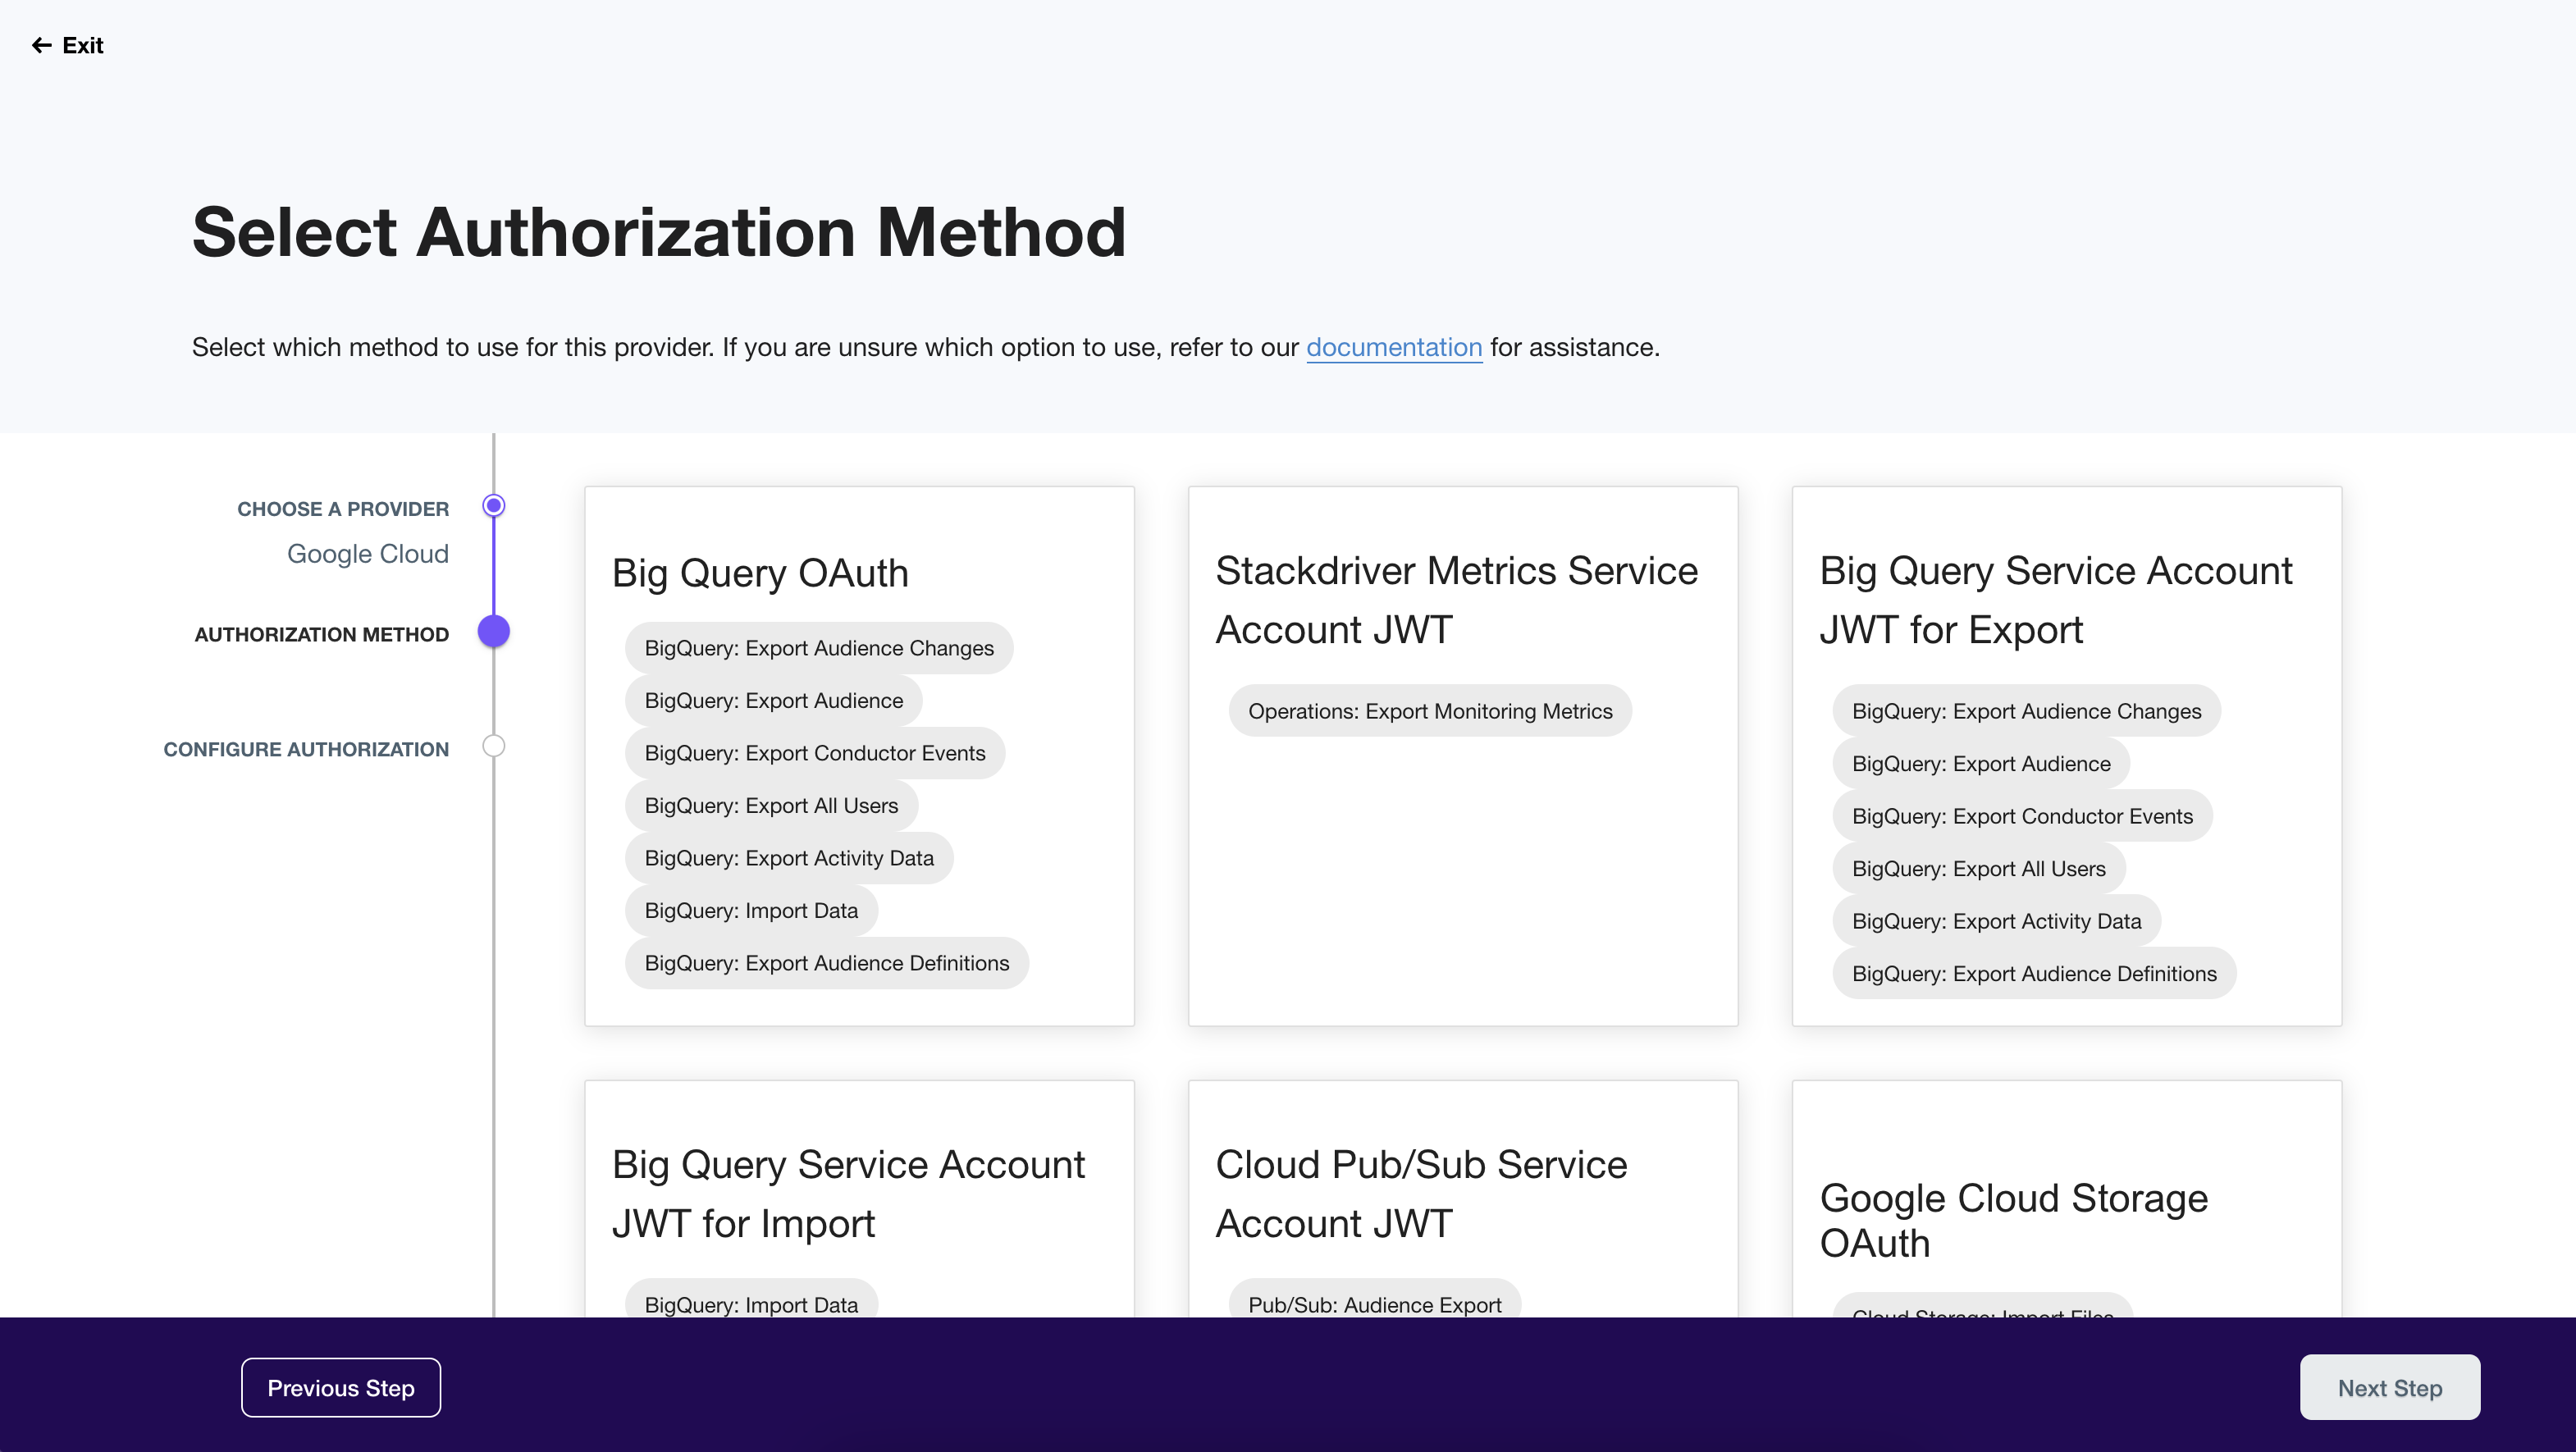
For example, if you are looking to import event data from Google Cloud Pub/Sub into Lytics, there is only one method from the list of Google Cloud authorization methods that supports the Import Data (Cloud Pub/Sub) job in Lytics.
Managing Authorizations
The Authorization Summary provides essential details about each authorization to help ensure an integration is appropriately set up to enable data to flow in and out of Lytics. At the top of the summary page, you’ll see the following information:
- Provider: The third-party tool that this authorization connects to.
- Method: Indicates how the authorization was made, such as API keys, OAuth, personal or business users, etc.
- Health: Indicates whether the Authorization is valid and active.
- Owner: Lytics user who created the authorization.
- Created At: The date the authorization was initially created.
- Last Updated: The date the authorization was most recently edited.

What determines authorization health?
Lytics checks the status of authorizations daily to help you proactively resolve authorization issues. Our API will return one of three possible statuses, depending on the data available for your provider:
Healthy: The authorization is valid and active.Unhealthy: The authorization is invalid and inactive.Unknown: The authorization status is unknown.
If your authorization is marked "Unhealthy," Lytics cannot verify that it has the requisite access and permissions. Visit the Authorization page for your provider and confirm that the authorization credentials you entered have the necessary permissions in the external tool.
If adjusting permissions in the external tool does not apply or is not an option, you may need to create a new authorization to use with your jobs in Lytics. You can optionally delete the unhealthy authorization.
Edit or Delete Authorizations
You can edit or delete authorizations directly in the Lytics UI using the buttons at the top right of each authorization summary page. The edit option allows you to rename the authorization and revise the description, but the configuration options cannot be changed. If you need a different configuration, you must create a new Authorization, and you can delete the previous one.
You can only delete an authorization if no active jobs use it. If there are associated jobs with a running, sleeping, or paused status, you must delete those associated jobs before deleting the authorization. Likewise, you will need to delete any imported Experiences that are actively using an authorization before deleting that authorization.
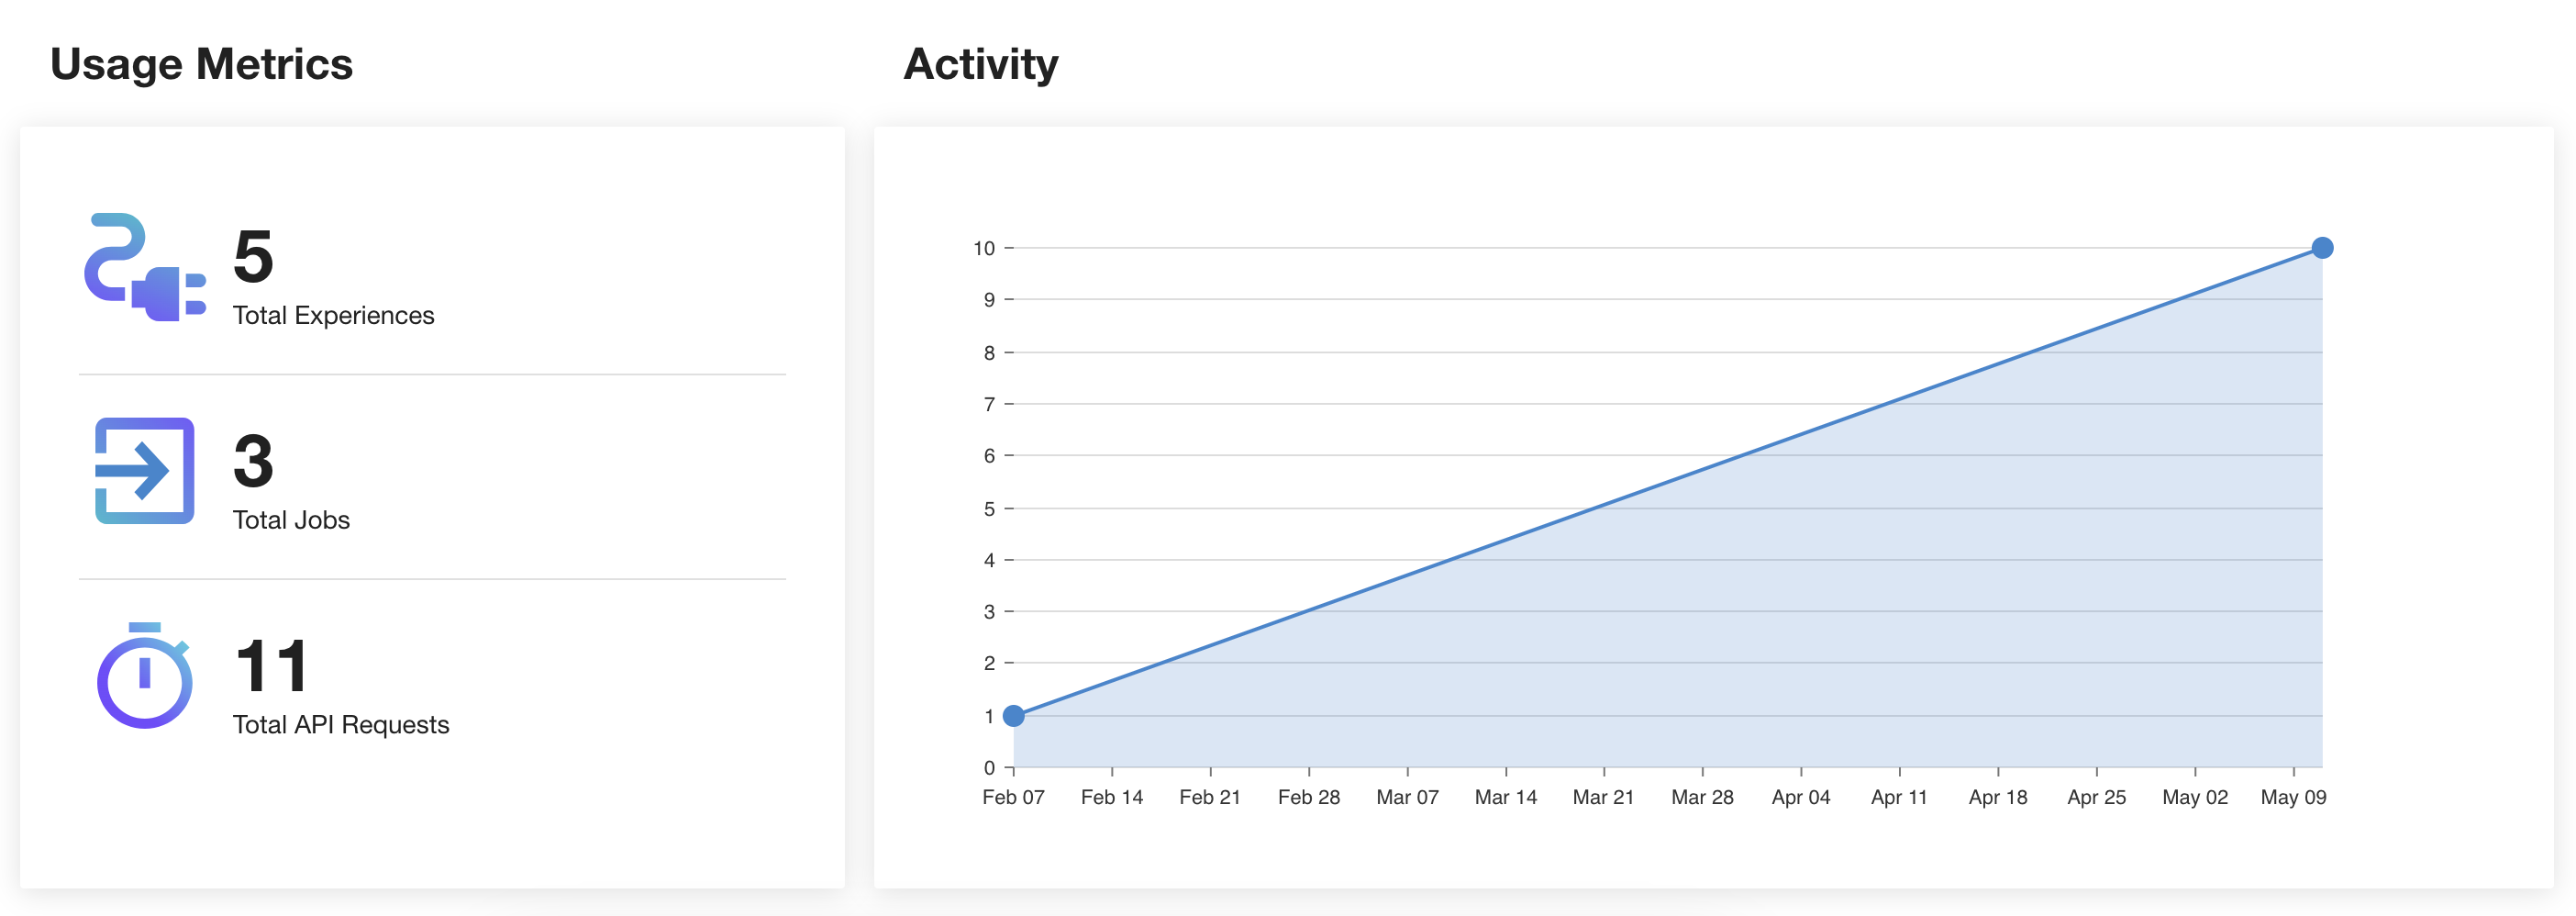
Activity Metrics
Once metrics are available for each authorization, this chart will become populated with the number of requests made using the authorization. You can adjust the date window and toggle to view the metrics hourly, daily, weekly, or monthly, depending on the available data.
Authorization metrics are currently only available for select providers (including Facebook, Iterable, Salesforce, SendGrid, and others), but metrics support is being added for all providers.
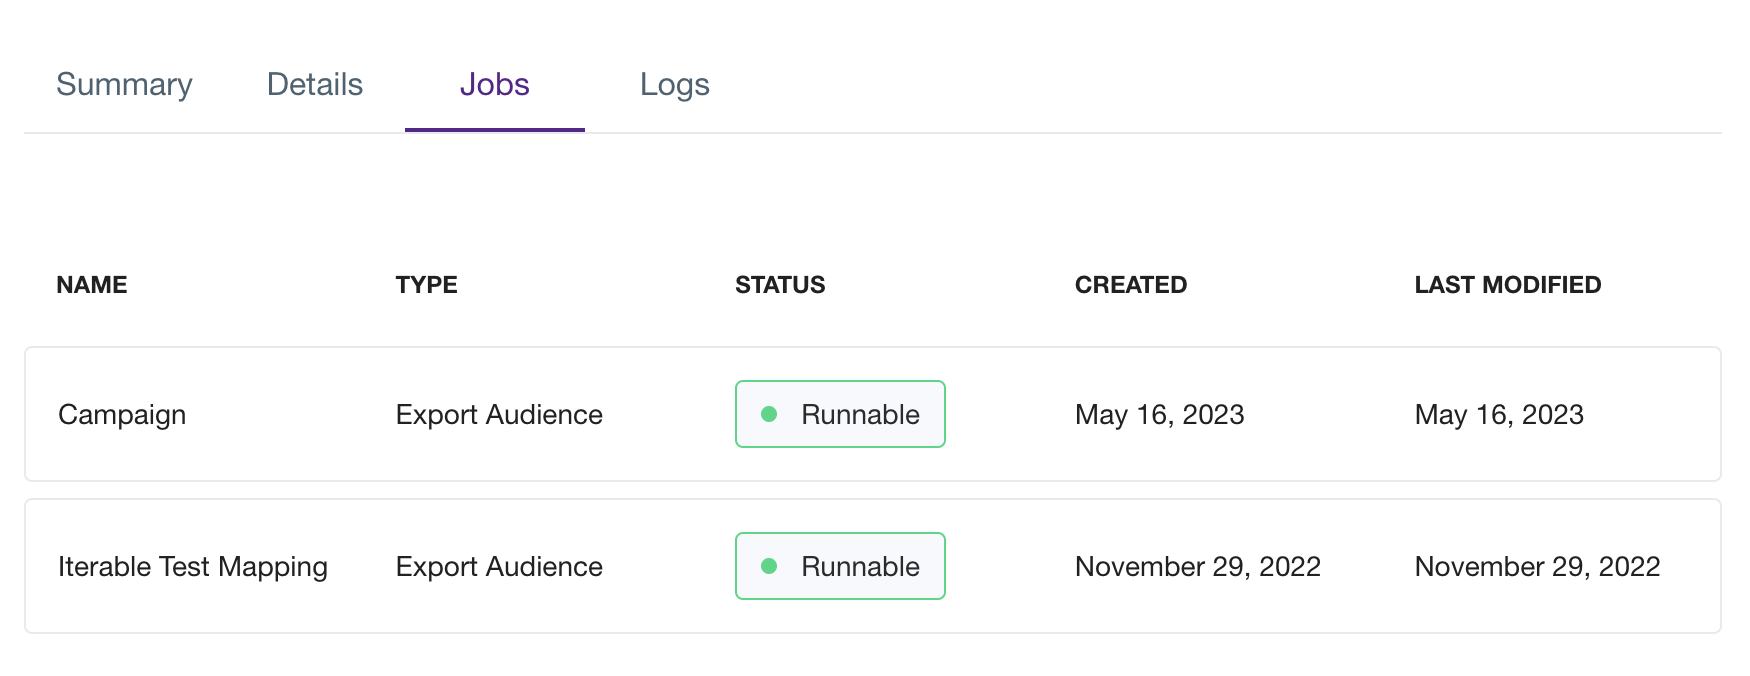
Associated Jobs
This table provides a helpful organization of all active jobs using the current authorization. Jobs can be sorted by name, type, status, and creation date. Click on a job to view more details on the job summary page.
Authorizations Dashboard
Authorizing the connection between Lytics and other providers allows you to create jobs to import, export, and enrich your first-party data.
Navigate to Account > Security > Authorizations to find your Authorizations Dashboard, which gives an overview of all authorizations in your account and their usage.
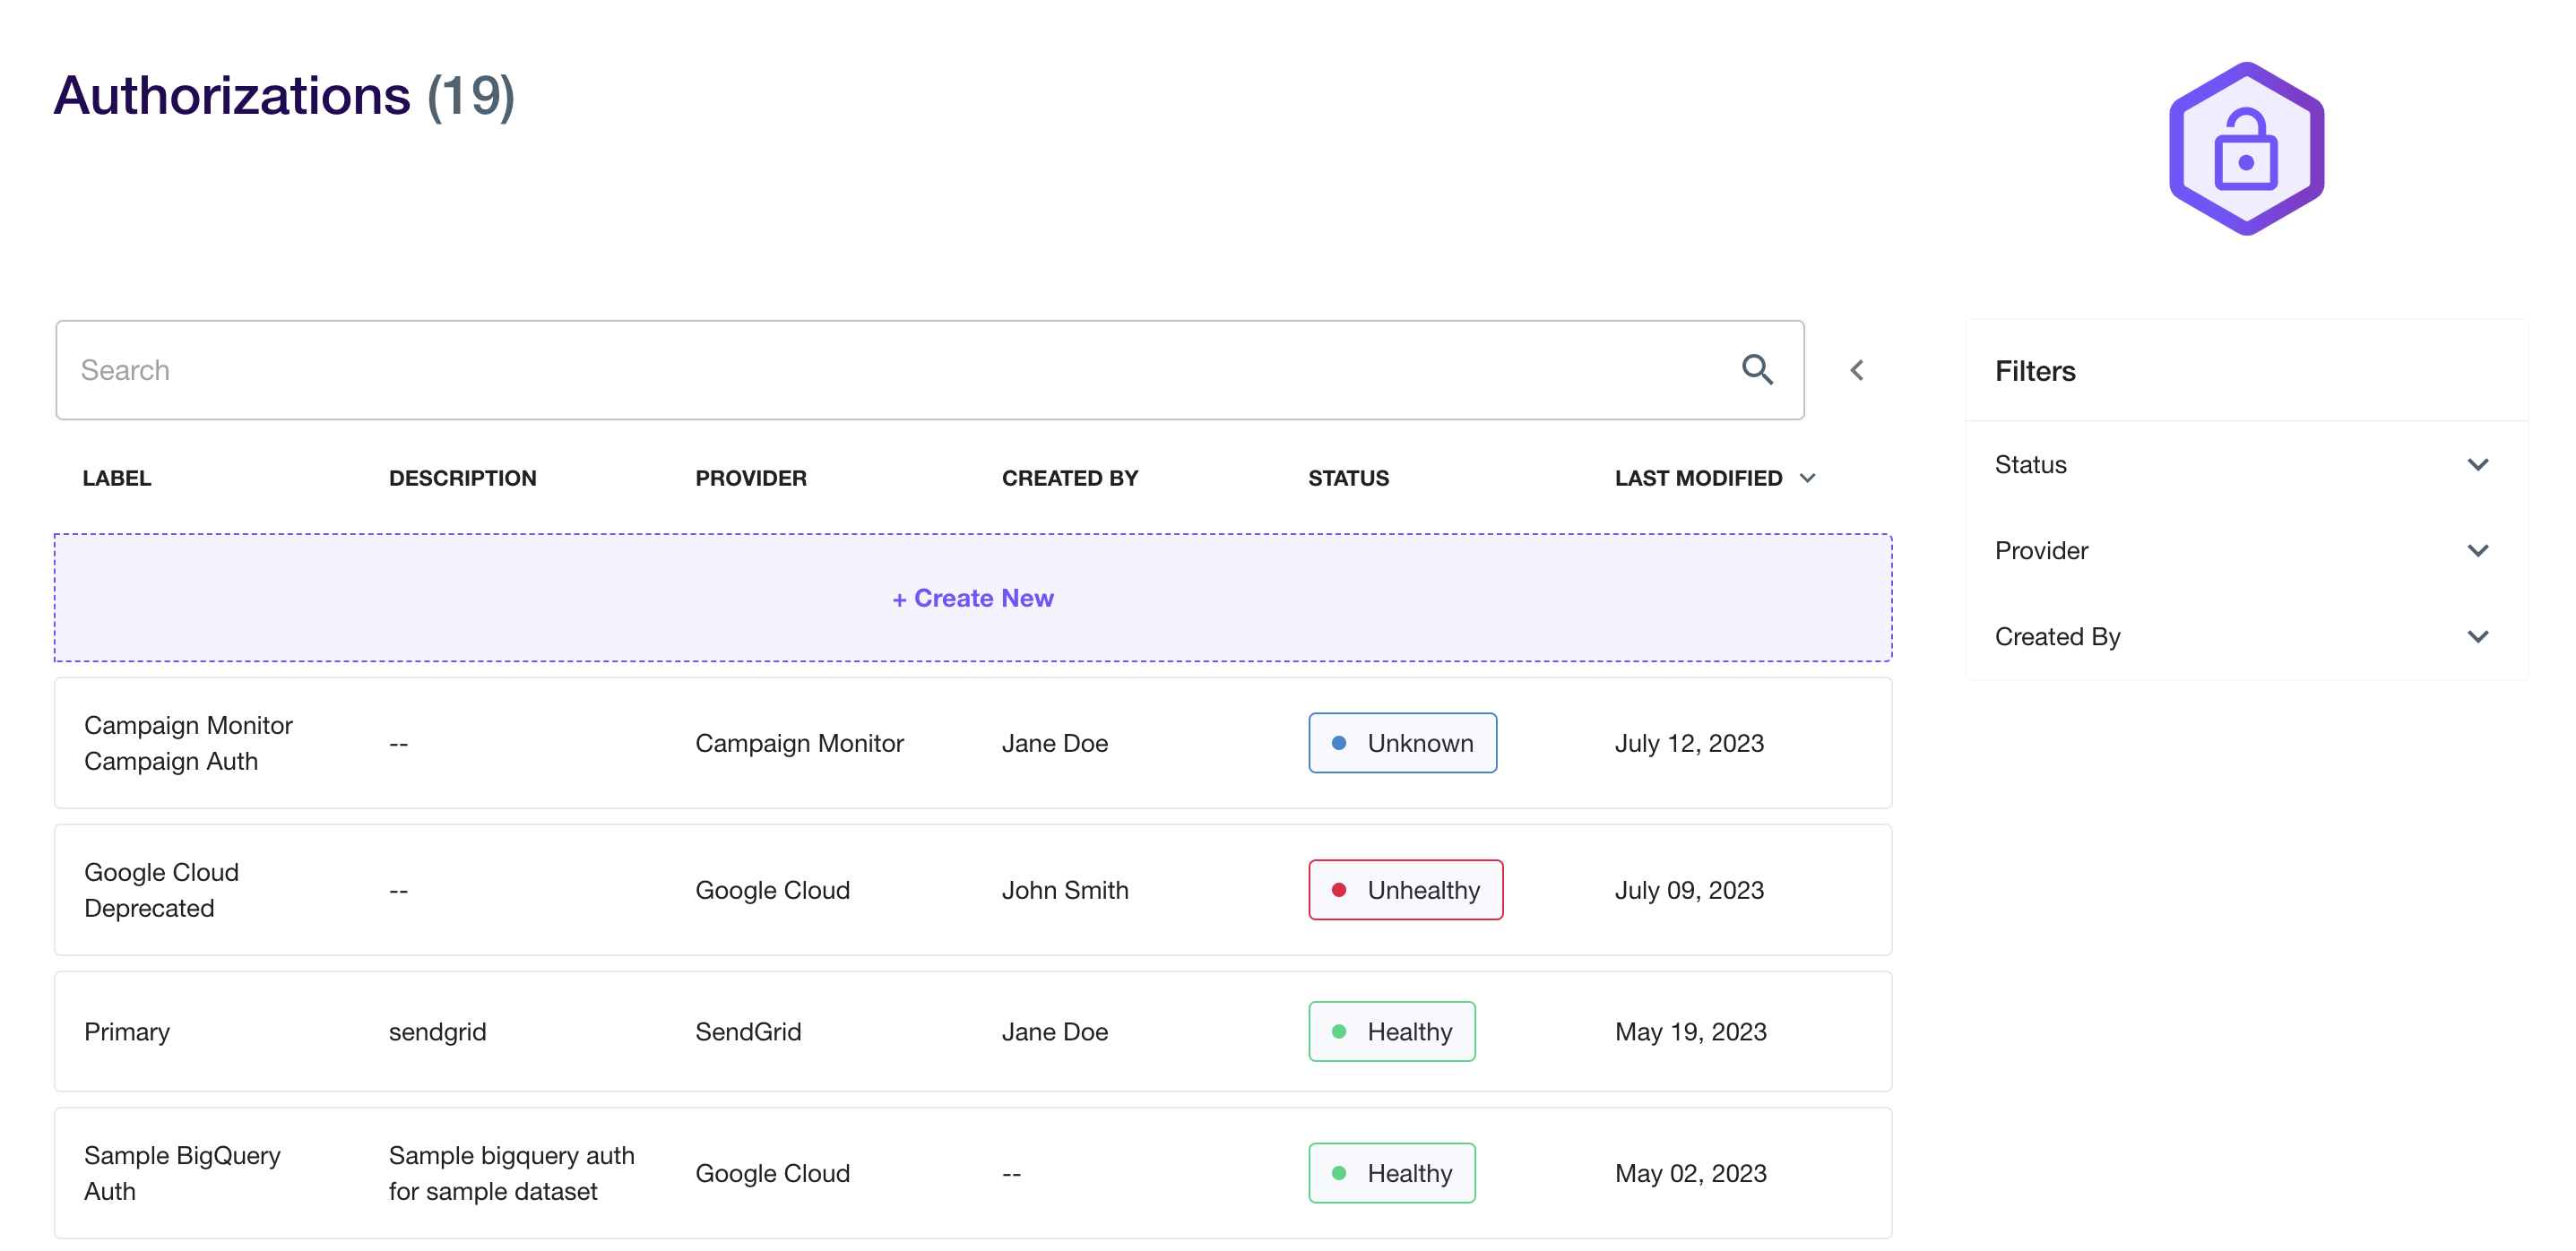
All authorizations are displayed in a table and are sortable by the following fields:
- Label: The name of the authorization as defined by your input for the "label" field.
- Description: Optional text field to differentiate authorizations. This is particularly useful when you have multiple Authorizations for a given provider.
- Provider: The third-party tool that the authorization is connecting to Lytics.
- Status: Indicates whether the authorization is valid and active.
- Created By: Lytics user who created the authorization.
- Last Modified: Date the authorization was last edited.
Click on a specific authorization to view its summary page, which will provide more details and allow you to edit or delete the authorization.
Updated 5 months ago
