

Google Drive
Overview
Google Drive is a file storage service that allows one to store and share files. Integrating Lytics with Google Drive allows you to export Lytics user profiles and user fields to files in the drive.
Authorization
If you haven't already done so, you will need to set up a Google Drive account before you begin the process described below.
If you are new to creating authorizations in Lytics, see the Authorizations documentation for more information.
- Select Google Cloud from the list of providers.
- Select the authorization method. Note that different methods may support different job types. Google Drive supports the following authorization methods:
- Enter a Label to identify your authorization.
- (Optional) Enter a Description for further context on your authorization.
- Complete the configuration steps needed for your authorization. These steps will vary by method.
- Click Save Authorization.
Google Sheets OAuth
This authorization allows us to access the Google Sheet service for your Google drive account.
- Select Google Sheets Oauth authorization method.
- From the user selection window, select the Google account you want to use from the list of accounts.
- Click Allow.
Export Audience
Use this export job to populate Google Sheets with Lytics user profile and user fields.
Integration Details
- Implementation Type: Server-side Integration.
- Implementation Technique: REST API Integration.
- Frequency: Batch Integration, configurable.
- Resulting data: User Fields will be exported to Google Sheets.
This job utilizes Google Sheets API to create Google Sheet and write user profile fields.
Once started, the job will:
- Create a new Spreadsheet with the name
Lytics {segment slug} {date}. - If configured, a header row with each field being exported is written.
- For each user in to the Lytics audience, the values for the field being exported are written in the sheet row by row.
- Once all the users are exported, the job will go to sleep for the configured amount of time.
- On the next run, the job will create a new internal sheet in the main spreadsheet and repeat the export from step 2.
Fields
You can select any Lytics user fields to export to Google Sheets. Lytics allows you to select user fields as part of the workflow configuration described below.
Configuration
Follow these steps to set up and configure an export job for Google Cloud in the Lytics platform. If you are new to creating jobs in Lytics, see the Destinations documentation for more information.
- Select Google Drive from the list of providers.
- Select the export Google Sheets Export Audience from the list.
- Select the Authorization you would like to use or create a new one.
- Enter a Label to identify this job you are creating in Lytics.
- (Optional) Enter a Description for further context on your job.
- Select the audience to export.
- Complete the configuration steps for your job.
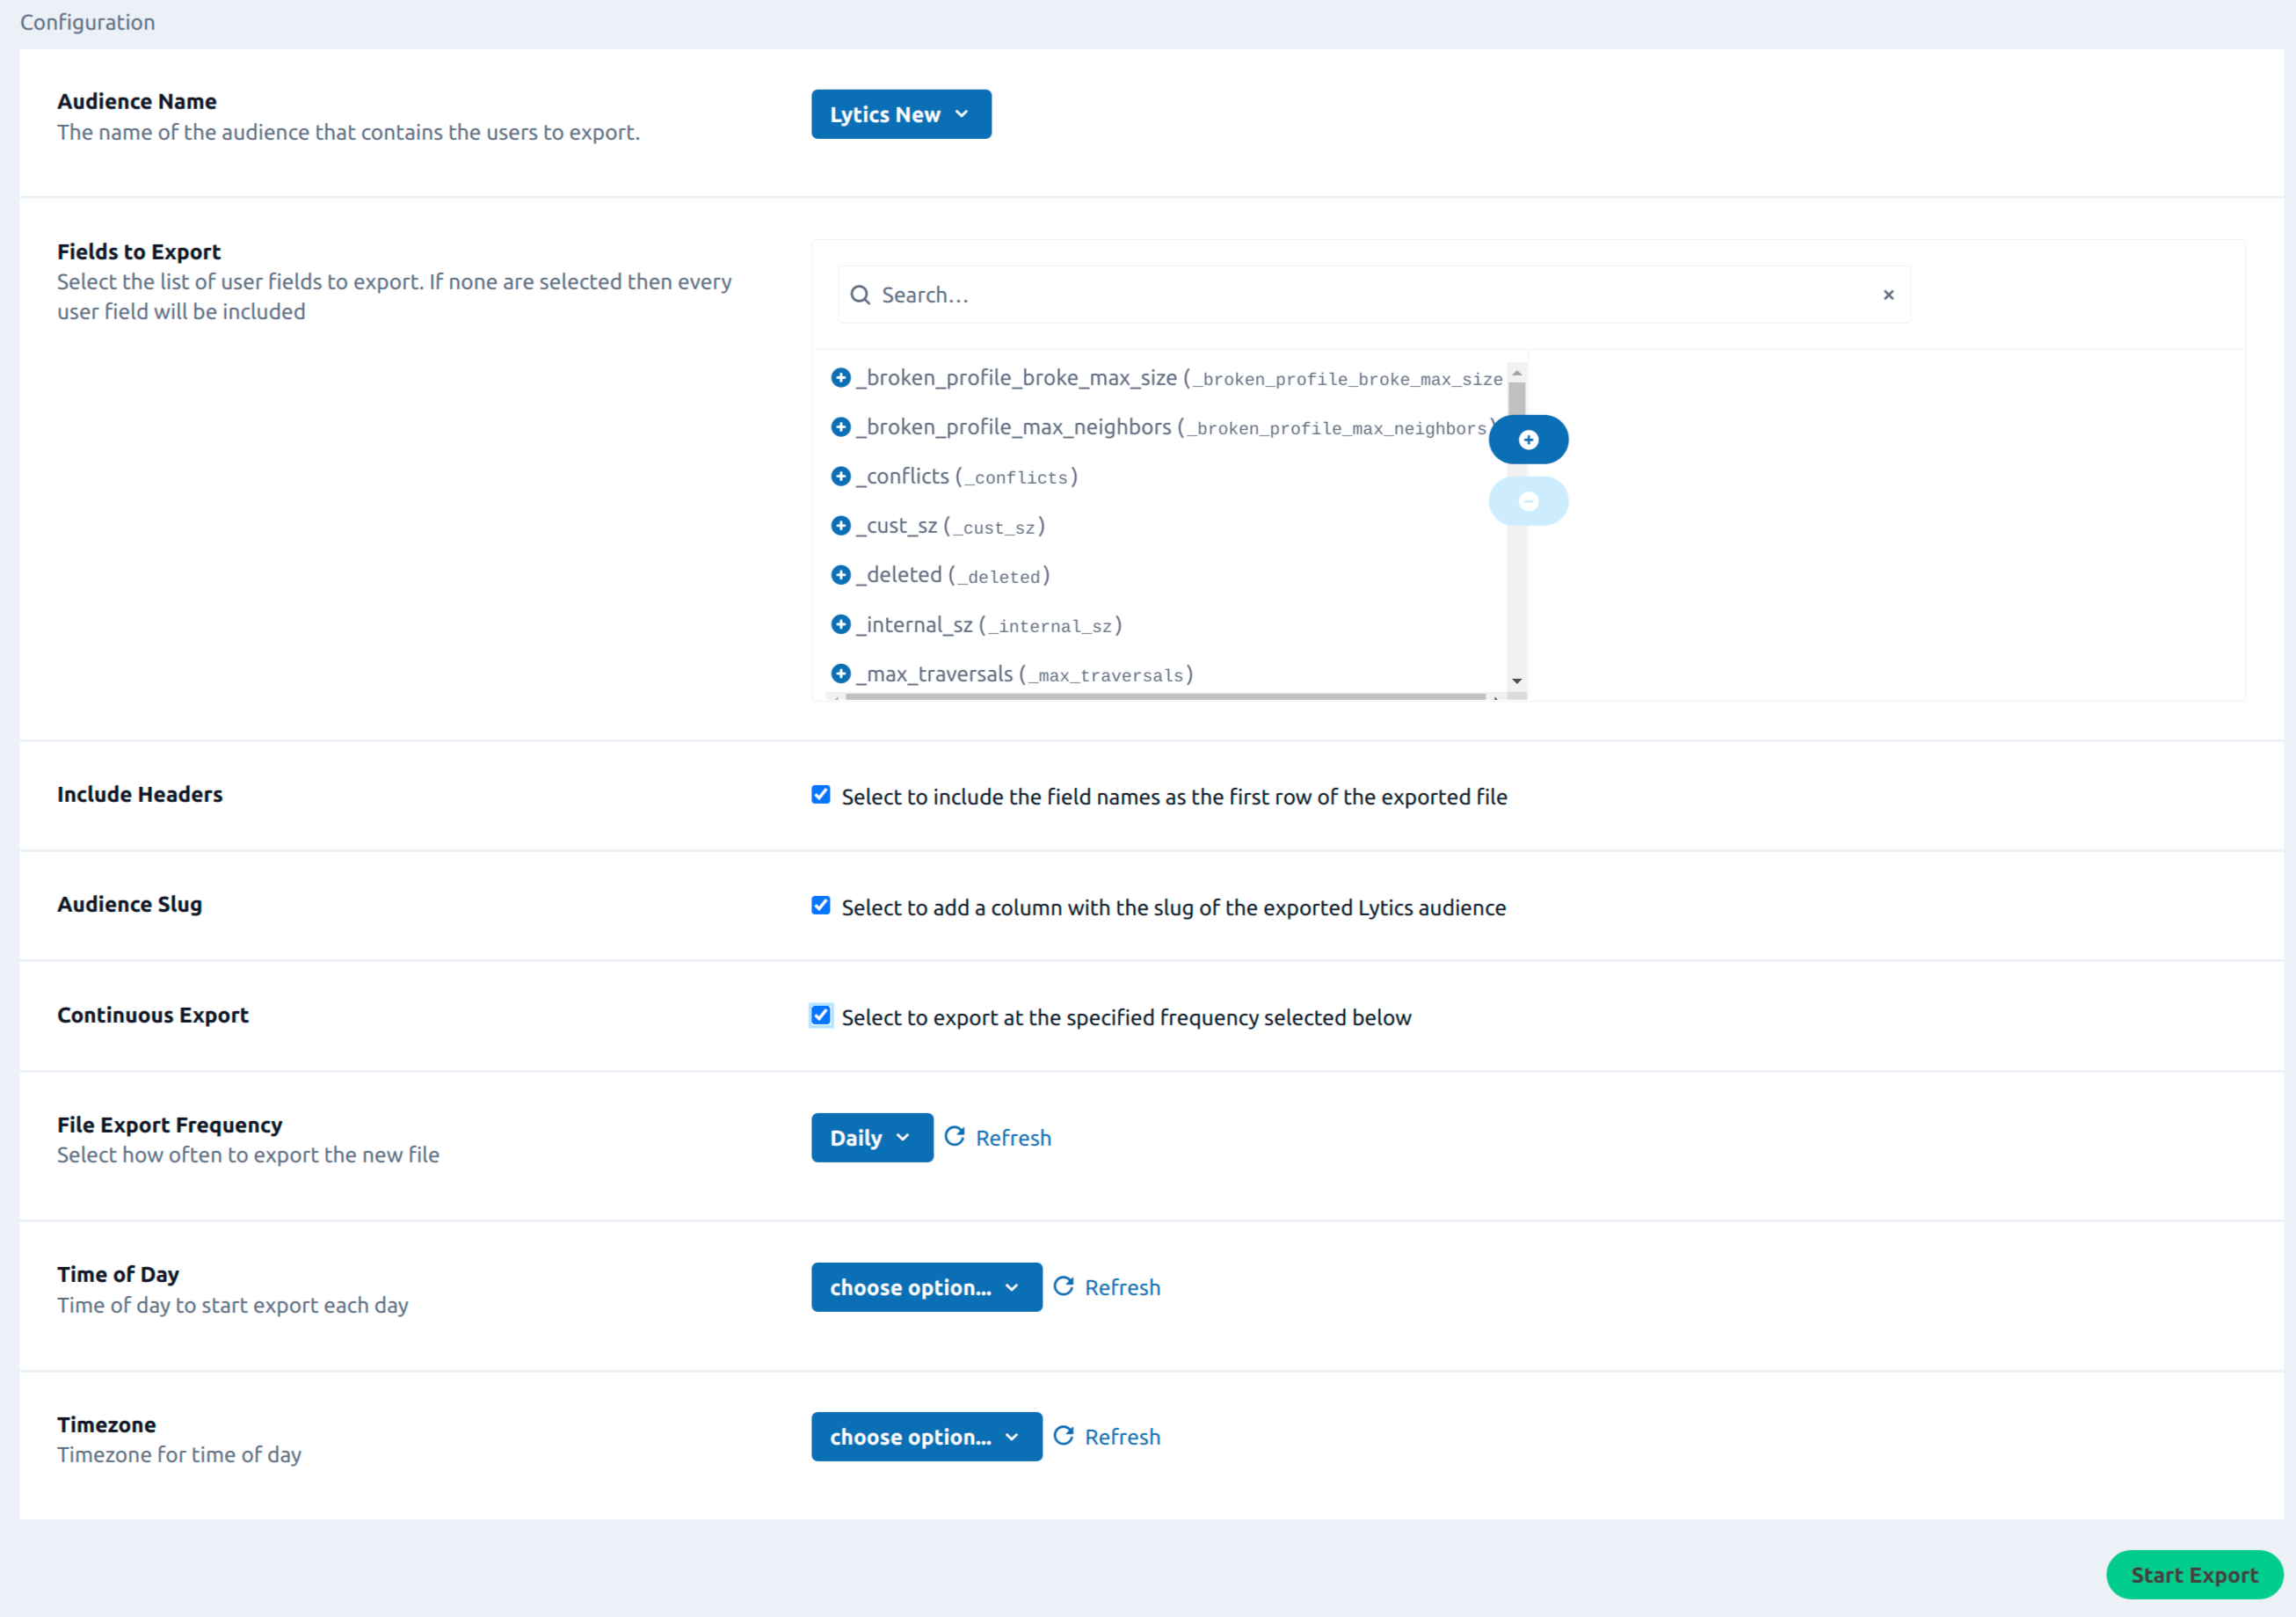
- (Optional) From the Fields to Export input, select the list of user fields to export. If none are selected then every user field will be included.
- (Optional) Select the Include Headers checkbox to include the field names as the first row in the Google Sheets.
- (Optional) Select the Audience Slug checkbox to add a column with the slug of the exported Lytics audience.
- (Optional) Select the Continuous Export checkbox to continuously run the export job at the specified frequency.
- (Optional) From the File Export Frequency input, select how often to export the new file.
- (Optional) From the Time of Day input, select time of day to start export job each day.
- (Optional) From the Timezone input, select timezone for time of the day for running the export job.
- Click the Start job button to start the job.

Import Data
Import custom data directly from Google Sheets.
Integration Details
- Implementation Type: Server-side Integration.
- Implementation Technique: REST API Integration.
- Frequency: Batch Integration.
- Resulting data: Raw Event Data.
The Google Sheets Import retrieves raw data from a single spreadsheet and maps it to its header values.
Steps/Pattern:
- Reads all of the data from the start row indicated, as well as the header row
- Maps data to the header values for each row
- Emits all row data to the selected data stream
- If set to run continuously, job sleeps until the next run and then reads values starting from the last row imported
Fields
Fields imported through Google Sheets will need custom data mappings.
Configuration
Follow these steps to set up and configure an import job for Google Drive in the Lytics platform. If you are new to creating jobs in Lytics, see the Data Sources documentation for more information.
- Select Google Drive from the list of providers.
- Select the import Google Sheets Import from the list.
- Select the authorization you would like to use or create a new one.
- Enter a Label to identify this job you are creating in Lytics.
- (Optional) Enter a Description for further context on your job.
- Complete the configuration steps for your job.
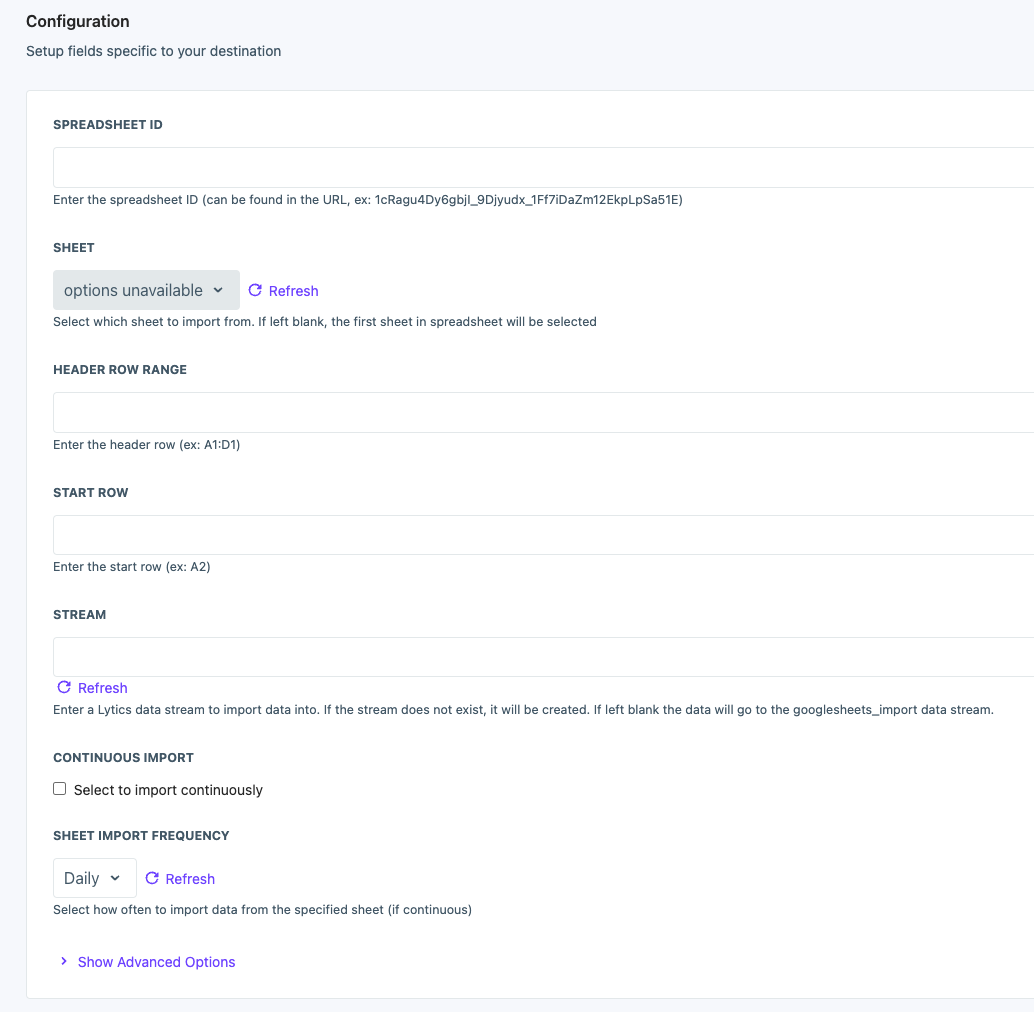
- In the Spreadsheet ID text box, enter the spreadsheet ID.
- In the Sheet drop-down, select the specific sheet you'd like to import from. If nothing is selected, the first sheet in the spreadsheet is selected.
- In the Header Row text box, enter the header row (ex: A1:D1).
- In the Start Row text box, enter the start row (ex: A2).
- (optional) Select the Continuous Import checkbox, to select to import continuously.
- (optional) From the Sheet Import Frequency input, select how often to import data from the specified sheet (if continuous).
- (Optional) Toggle Show Advanced Options.
- (optional) From the Time of Day input, select time of day to start the import, ignore for hourly imports.
- (optional) From the Timezone input, select timezone for time of day.
- Click the Start job button to start the job.
