

Zendesk
Overview
Zendesk is a customer support and ticket tool that makes communicating with customers and employees easy.
Connect Zendesk and Lytics to get a complete view of how your users are engaging with your brand. Lytics brings together all of the behavioral data from your marketing tools and can connect that data to your Zendesk tickets and users. This enables you to prioritize tickets based on user engagement or suppress marketing materials to users who have open tickets.
Authorization
If you haven't already done so, you will need to set up a Zendesk account before you begin the process described below. If you are new to creating authorizations in Lytics, see the Authorizations documentation for more information.
- Select Zendesk from the list of providers.
- Select the method for authorization. Note that different methods may support different job types. Zendesk supports the following authorization methods:
- Zendesk API Key: for Zendesk User Imports and User Exports
- Zendesk Connect API Key: for Zendesk Connect Audience Exports
- Enter a Label to identify your authorization.
- (Optional) Enter a Description for further context on your authorization.
- Complete the configuration steps needed for your authorization. These steps will vary by method.
- Click Save Authorization.
API Key
Use this authorization method for Zendesk User Imports and User Exports. To connect to Zendesk using an API Key, you will need three pieces of information:
- Your Zendesk Email Address: This is the email address that you login to Zendesk with.
- Subdomain: This is what comes after
://and before.zendesk.comin the URL when you are using Zendesk. - API Key: To obtain your API key, navigate to your Zendesk API Settings. Enable token access to the API and copy your token:

Once you have retrieved your API Key:
- Enter the following:
- Zendesk Email Address
- API Key
- Subdomain
- Description: a sentence to help you identify the authorization.
You are now ready to start a Zendesk Import or Export job.
Connect API Key
Use this authorization method for Zendesk Connect Audience Exports.
- Enter the following:
- API Key: your Zendesk Connect API Key. This is the private key which can be found in your Zendesk Connect account under Settings > Environments.
- Description: a sentence to help you identify the authorization.
You are now ready to start a Zendesk Connect Audience Export job.

Import Tickets and Users
Import Zendesk users and tickets to leverage Lytics Insights and behavioral scoring to make sure you're reaching the right users with the right messages.
Integration Details
- Implementation Type: Server-side Integration.
- Implementation Technique: REST API Integration
- Frequency: Users are imported in Batch Integration every 15 minutes.
- Resulting data: User Profiles and User Fields.
This integration utilizes the Zendesk Support API to import user data. Once the import is started the job will:
- Retrieve all users in your Zendesk account via the
/api/v2/search.jsonendpoint. - Retrieve all tickets in your Zendesk account via the
/api/v2/incremental/tickets.jsonendpoint. - Ingest all users and tickets and emit them to the
zendesk_usersandzendesk_ticketsdata streams in Lytics. - Sleep for 15 minutes.
- On subsequent runs, only users and tickets that have been modified since the last time they were imported will be retrieved.
Fields
The following fields are included in the default mapping of the zendesk_users stream:
| Source Field | Lytics User Field | Description | Type |
|---|---|---|---|
| id | zd_userid unique id | Zendesk User ID | string |
email unique id | Email Address | string | |
| emaildomain | Email Domain | string | |
| name | name | Full Name | string |
| external_id | zd_external_id | Zendesk External ID | string |
| locale | zd_locale | Zendesk Locale | string |
| phone | zd_phone | Zendesk Phone Number | string |
| role | zd_role | Zendesk Role | string |
| timezone | zd_timezone | Zendesk Timezone | string |
| tags | zd_user_tags | Zendesk User Tags | string |
The following fields are included in the default mapping of the zendesk_tickets stream:
| Source Field | Lytics User Field | Description | Type |
|---|---|---|---|
| requester_id | zd_userid unique id | Zendesk User ID | string |
| channels | All Channels Used | []string | |
| created_at | last_active_ts | Last Active on Any Channel | date |
| last_channel_activities | Last Activity By Channel | map[string]time | |
| created_at | zd_created_dt | Last Zendesk Ticket Created Date | date |
| created_at | zd_first_created_dt | First Zendesk Ticket Created Date | date |
| has_incidents | zd_has_incidents | Zendesk User Has Incidents | string |
| id | zd_id | Zendesk Ticket ID | string |
| created_at | zd_last_created_dt | Last Zendesk Ticket Created Date | date |
| organization_id | zd_org_id | Zendesk Organization ID | string |
| organization_name | zd_org_name | Zendesk Organization Name | string |
| organization_tags | zd_org_tags | Zendesk Organization Tags | string |
| via_channel | zd_platforms | Zendesk Platform Submitted Via | []string |
| satisfaction_rating_score | zd_satisfaction_scores | Zendesk Ticket Satisfaction Scores | []string |
| status | zd_status | Zendesk Ticket Status | []string |
| subject | zd_subjects | Zendesk Ticket Subjects | []string |
| submitter_id | zd_submitter_ids | Zendesk Ticket Submitter IDs | []string |
| tags | zd_tags | Zendesk Ticket Tags | []string |
| id | zd_ticket_ct | Zendesk Ticket Count | int |
| url | zd_ticket_urls | Zendesk Ticket URLs | []string |
| type | zd_types | Zendesk Ticket Types | []string |
| zd_yymm | Zendesk User Submitted Tickets Counts | map[string]intsum |
Configuration
Follow these steps to set up and configure an import job for Zendesk in the Lytics platform. If you are new to creating jobs in Lytics, see the Data Sources documentation for more information.
- Select Zendesk from the list of providers.
- Select the Import job type from the list.
- Select the Authorization you would like to use or create a new one.
- Enter a Label to identify this job you are creating in Lytics.
- (Optional) Enter a Description for further context on your job.
- Select the Tickets checkbox to import all Zendesk tickets.
- Select the Users checkbox to import all Zendesk users.
- Click the Start Import button.

Export Users
Export Lytics audiences to behavioral data and scoring from Lytics to reach the most relevant users in your Zendesk Support account.
Integration Details
- Implementation Type: Server-side Integration
- Implementation Technique: REST API Integration
- Frequency: Batch Integration daily.
- Resulting data: Your Zendesk user profiles will be updated with data from the fields you select in the work configuration. Lytics audience membership is also added as attributes on the Zendesk profiles.
This integration utilizes the Zendesk Support API to import user data. Once the import is started the job will:
- Scan the members currently in the audiences configured in Audiences to Include. If no audiences are configured, all Lytics users will be exported.
- Send the users in batches of 100 via the
/api/v2/users/update_many.jsonendpoint. - Configured fields are sent in the requests so that fields are updated in Zendesk on every run.
- If the steps for Including Lytics Audience Information below are followed, fields will be added corresponding to the audiences the user is a member of. If Audiences to Include is populated, only those configured audiences will be added. Otherwise, all of the user's audiences will be added.
- After all users are sent, the job will sleep for 24 hours and then repeat the process.
Fields
By default, Lytics exports the following fields to Zendesk: Export Users:
| Lytics User Field | Description | Zendesk Field | Type |
|---|---|---|---|
| full_name | Full Name | Full Name | string |
| first_name | First Name | First Name | string |
| last_name | Last Name | Last Name | string |
Configuration
Follow these steps to set up and configure an export job for Zendesk in the Lytics platform. If you are new to creating jobs in Lytics, see the Destinations documentation for more information.
- Select Zendesk from the list of providers.
- Select the Export job type from the list.
- Select the Authorization you would like to use or create a new one.
- Enter a Label to identify this job you are creating in Lytics.
- (Optional) Enter a Description for further context on your job.
- Select the audiences to export.
- Complete the configuration steps for your job.
- If you wish to include audience information on the profiles exported to Zendesk, follow the instructions for Including Lytics Audience Information below.
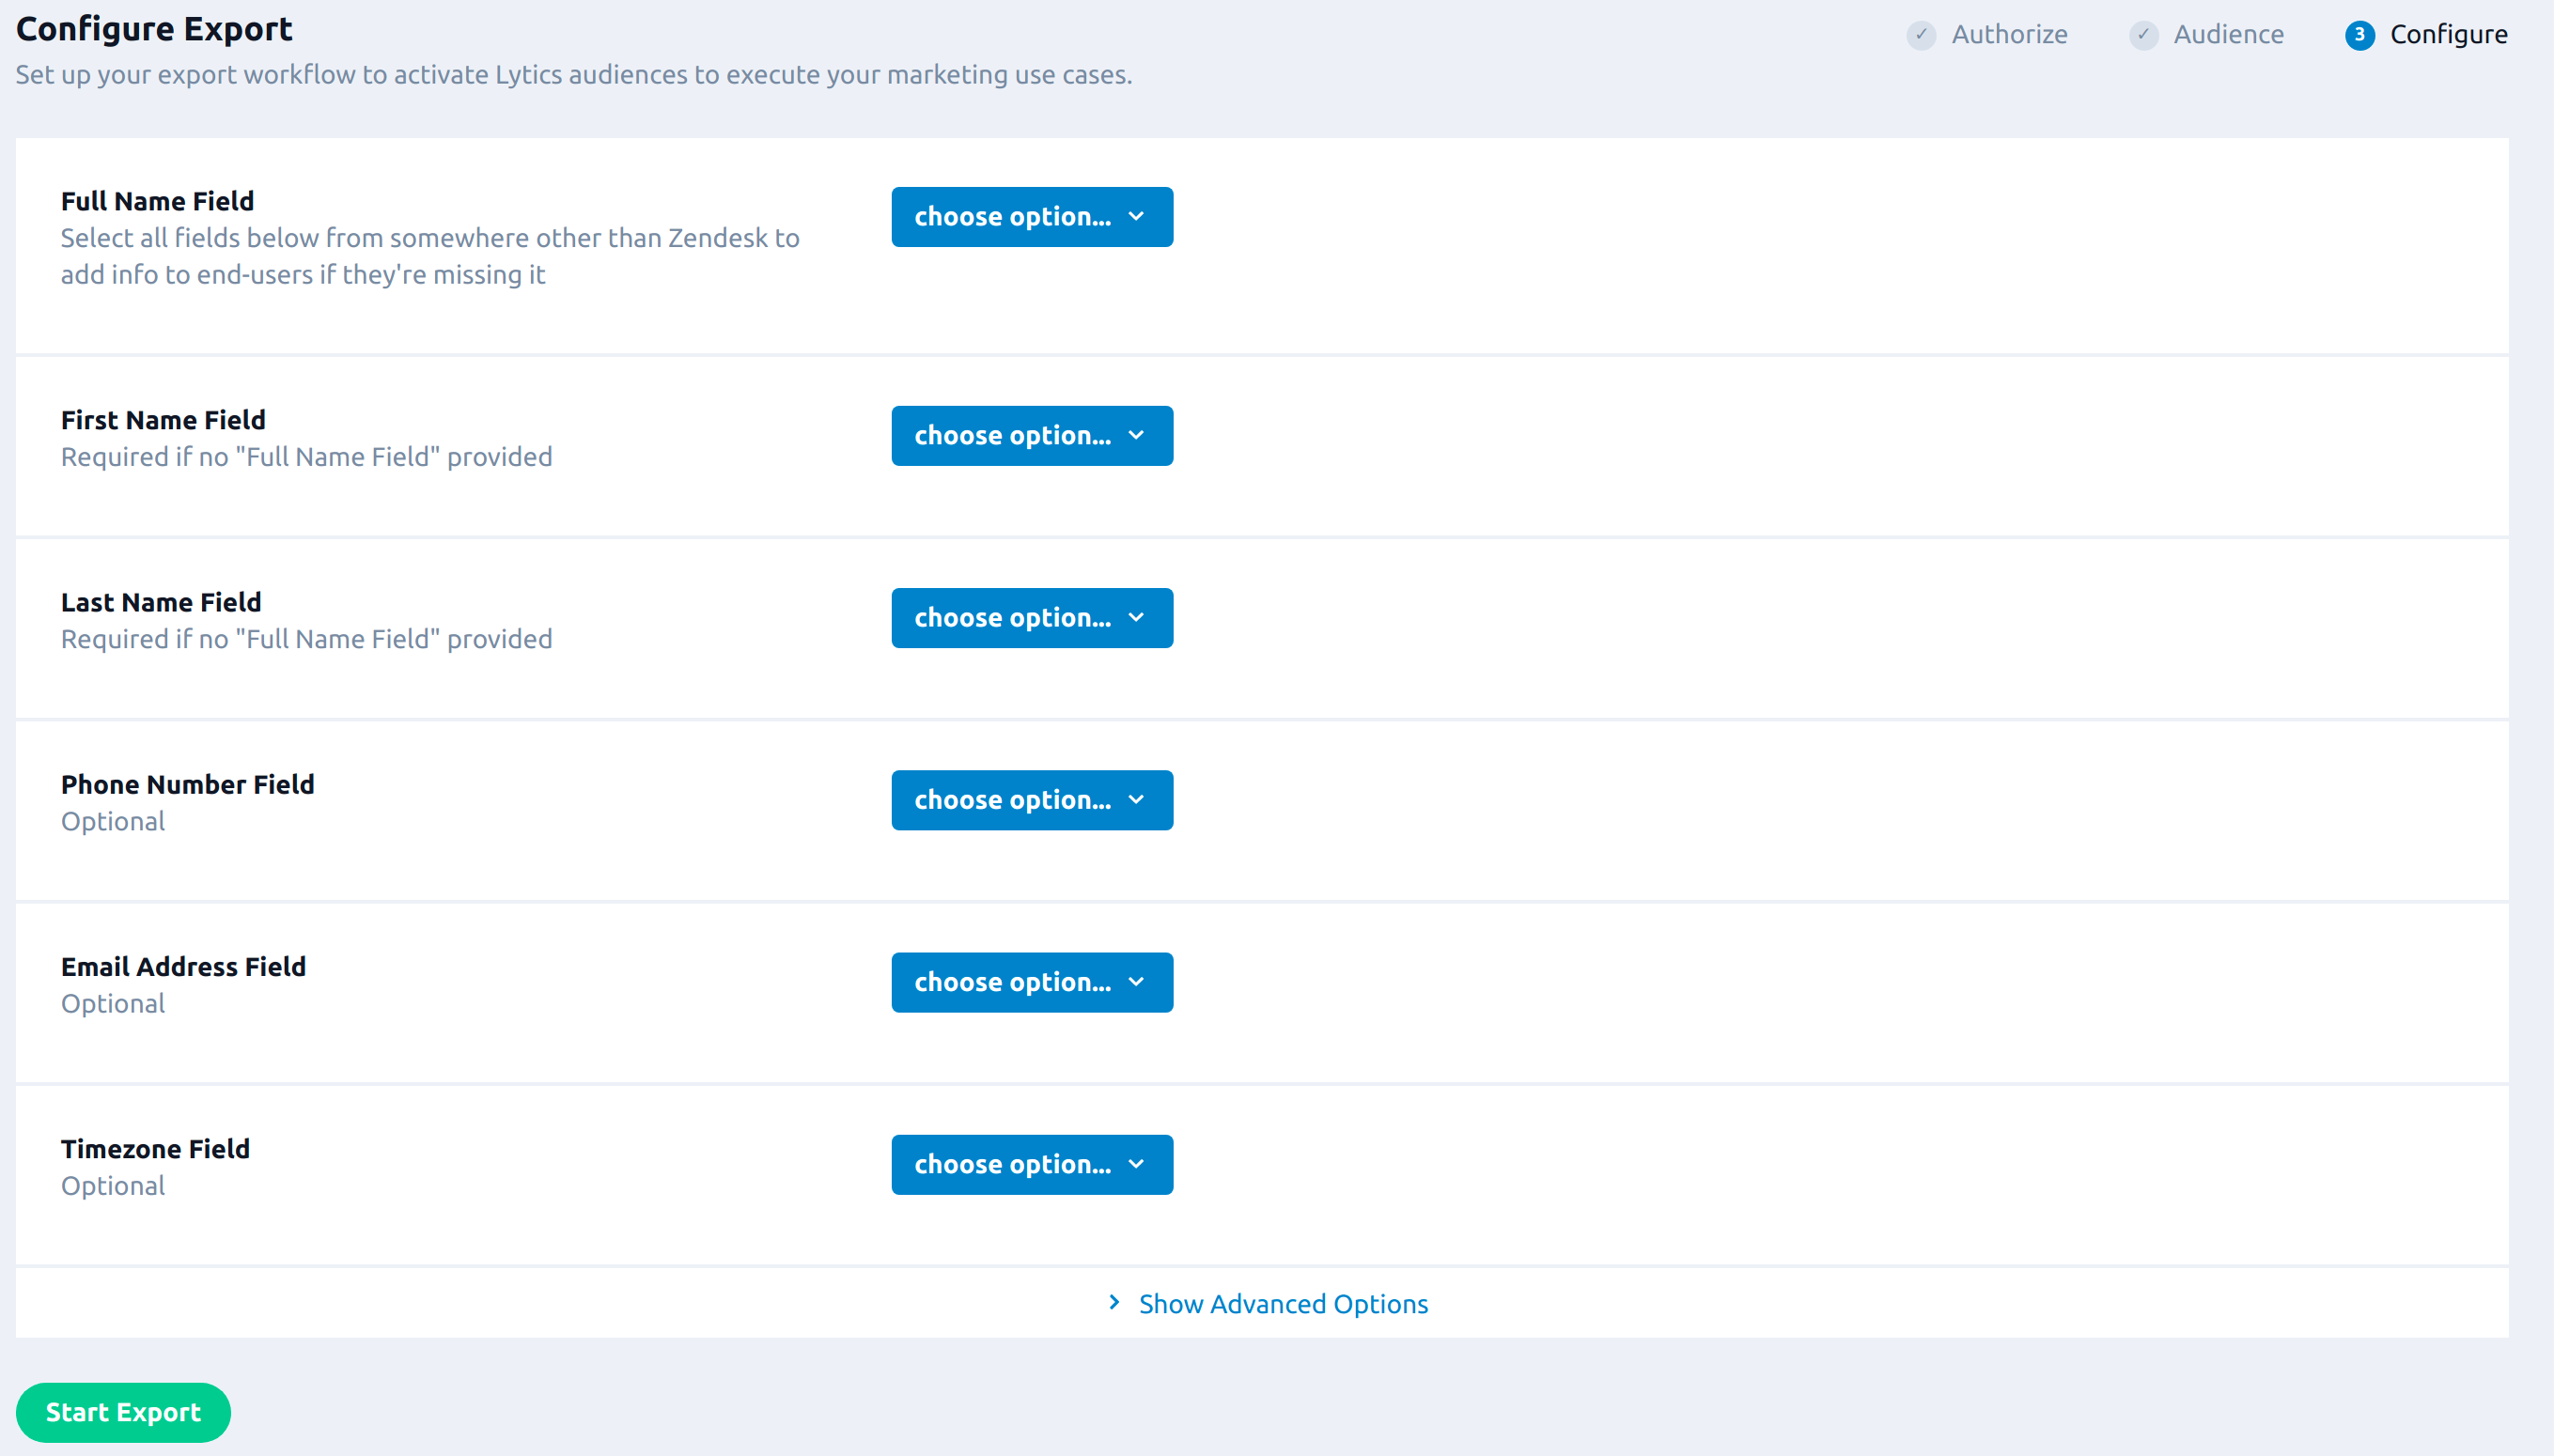
- From the Full Name Field input, select the field that contains a user's full name.
- From the First Name Field input, select the field that contains a user's first name. Note that this is required if "Full Name Field" is not provided.
- From the Last Name Field input, select the field that contains a user's last name. Note that this is required if "Full Name Field" is not provided.
- From the Phone Number Field input, select the field that contains a user's phone number.
- From the Email Address Field input, select the field that contains a user's email address.
- From the Timezone Field input, select the field that contains a user's timezone.
- Click on the Show Advanced Options tab to expand the advanced configuration.
- From the Audiences to Include input, select the list of Lytics audiences you want to export to Zendesk. If this is left blank, all audiences that a user is a member of will be exported to Zendesk.
- From the Time of Day input, select the time of day to start export each day.
- From the Timezone input, select the timezone for the time of day.
- Click the Start Export button.

Including Lytics Audience Information
The first step in adding Lytics audience information to a Zendesk user is to create a new field in Zendesk to receive this information.
Start by clicking the gear Settings icon in Zendesk at the left of the screen. Then click on User Fields under the "Manage" heading, and click on the Text field type to create a new field:

Click Create Field and you're ready to get Lytics audience information into Zendesk.
Start a Zendesk Export like in the section above and use the audience selector to tell Lytics which lists you want to be visible in Zendesk.
After you click Start Export, your Zendesk users will be updated with the names of the Lytics audiences they belong to. Lytics will update this information daily, along with any other fields you selected in the configuration steps above.
Zendesk Connect Audience Export
Zendesk Connect manages proactive customer communication across channels, to deliver better customer experiences at scale. Export Lytics audiences to Zendesk Connect to reach your desired audiences on Zendesk Connect channels.
Integration Details
- Implementation Type: Server-side Integration.
- Implementation Technique:
REST API Integration with Audience Trigger Integration - Frequency: Real-time Integration
- Resulting data: User Profiles and User Fields.
Users are updated in Zendesk according to the Identifier Field selected in the configuration. If the user does not yet exist in Zendesk, it will be created.
User fields selected in the configuration will be added to the Zendesk profile as user attributes. An additional attribute will be added, which will include the slug of the Lytics audience being exported and the current membership status for the user in the audience, e.g. lytics_test_audience: true.
This integration utilizes the Zendesk Connect API to send user data. Once the export is started the job will:
- Enter events will be generated for all current members of the audience if the Existing Users option is selected during the configuration.
- Every time a user enters or exits the audience, the export will send the user and its fields via the
/v2/identify/batchendpoint. If the event is an enter, the audience slug attribute will be set totrue. If the event is an exit, the audience slug attribute will be set tofalse. - Mapped fields are updated in Zendesk every time an event for the user is processed.
Fields
By default, Lytics exports the following fields to Zendesk Connect.
| Lytics User Field | Description | Zendesk Connect Field | Type |
|---|---|---|---|
| Email Address | first_name | string | |
| first_name | First Name | first_name | string |
| last_name | Last Name | last_name | string |
Configuration
Follow these steps to set up and configure an export job for Zendesk in the Lytics platform. If you are new to creating jobs in Lytics, see the Jobs Dashboard documentation for more information
- Select Zendesk from the list of providers.
- Select the Export job type from the list.
- Select the Authorization you would like to use or create a new one.
- Enter a Label to identify this job you are creating in Lytics.
- (Optional) Enter a Description for further context on your job.
- Select the audience to export.
- Complete the configuration steps for your job.
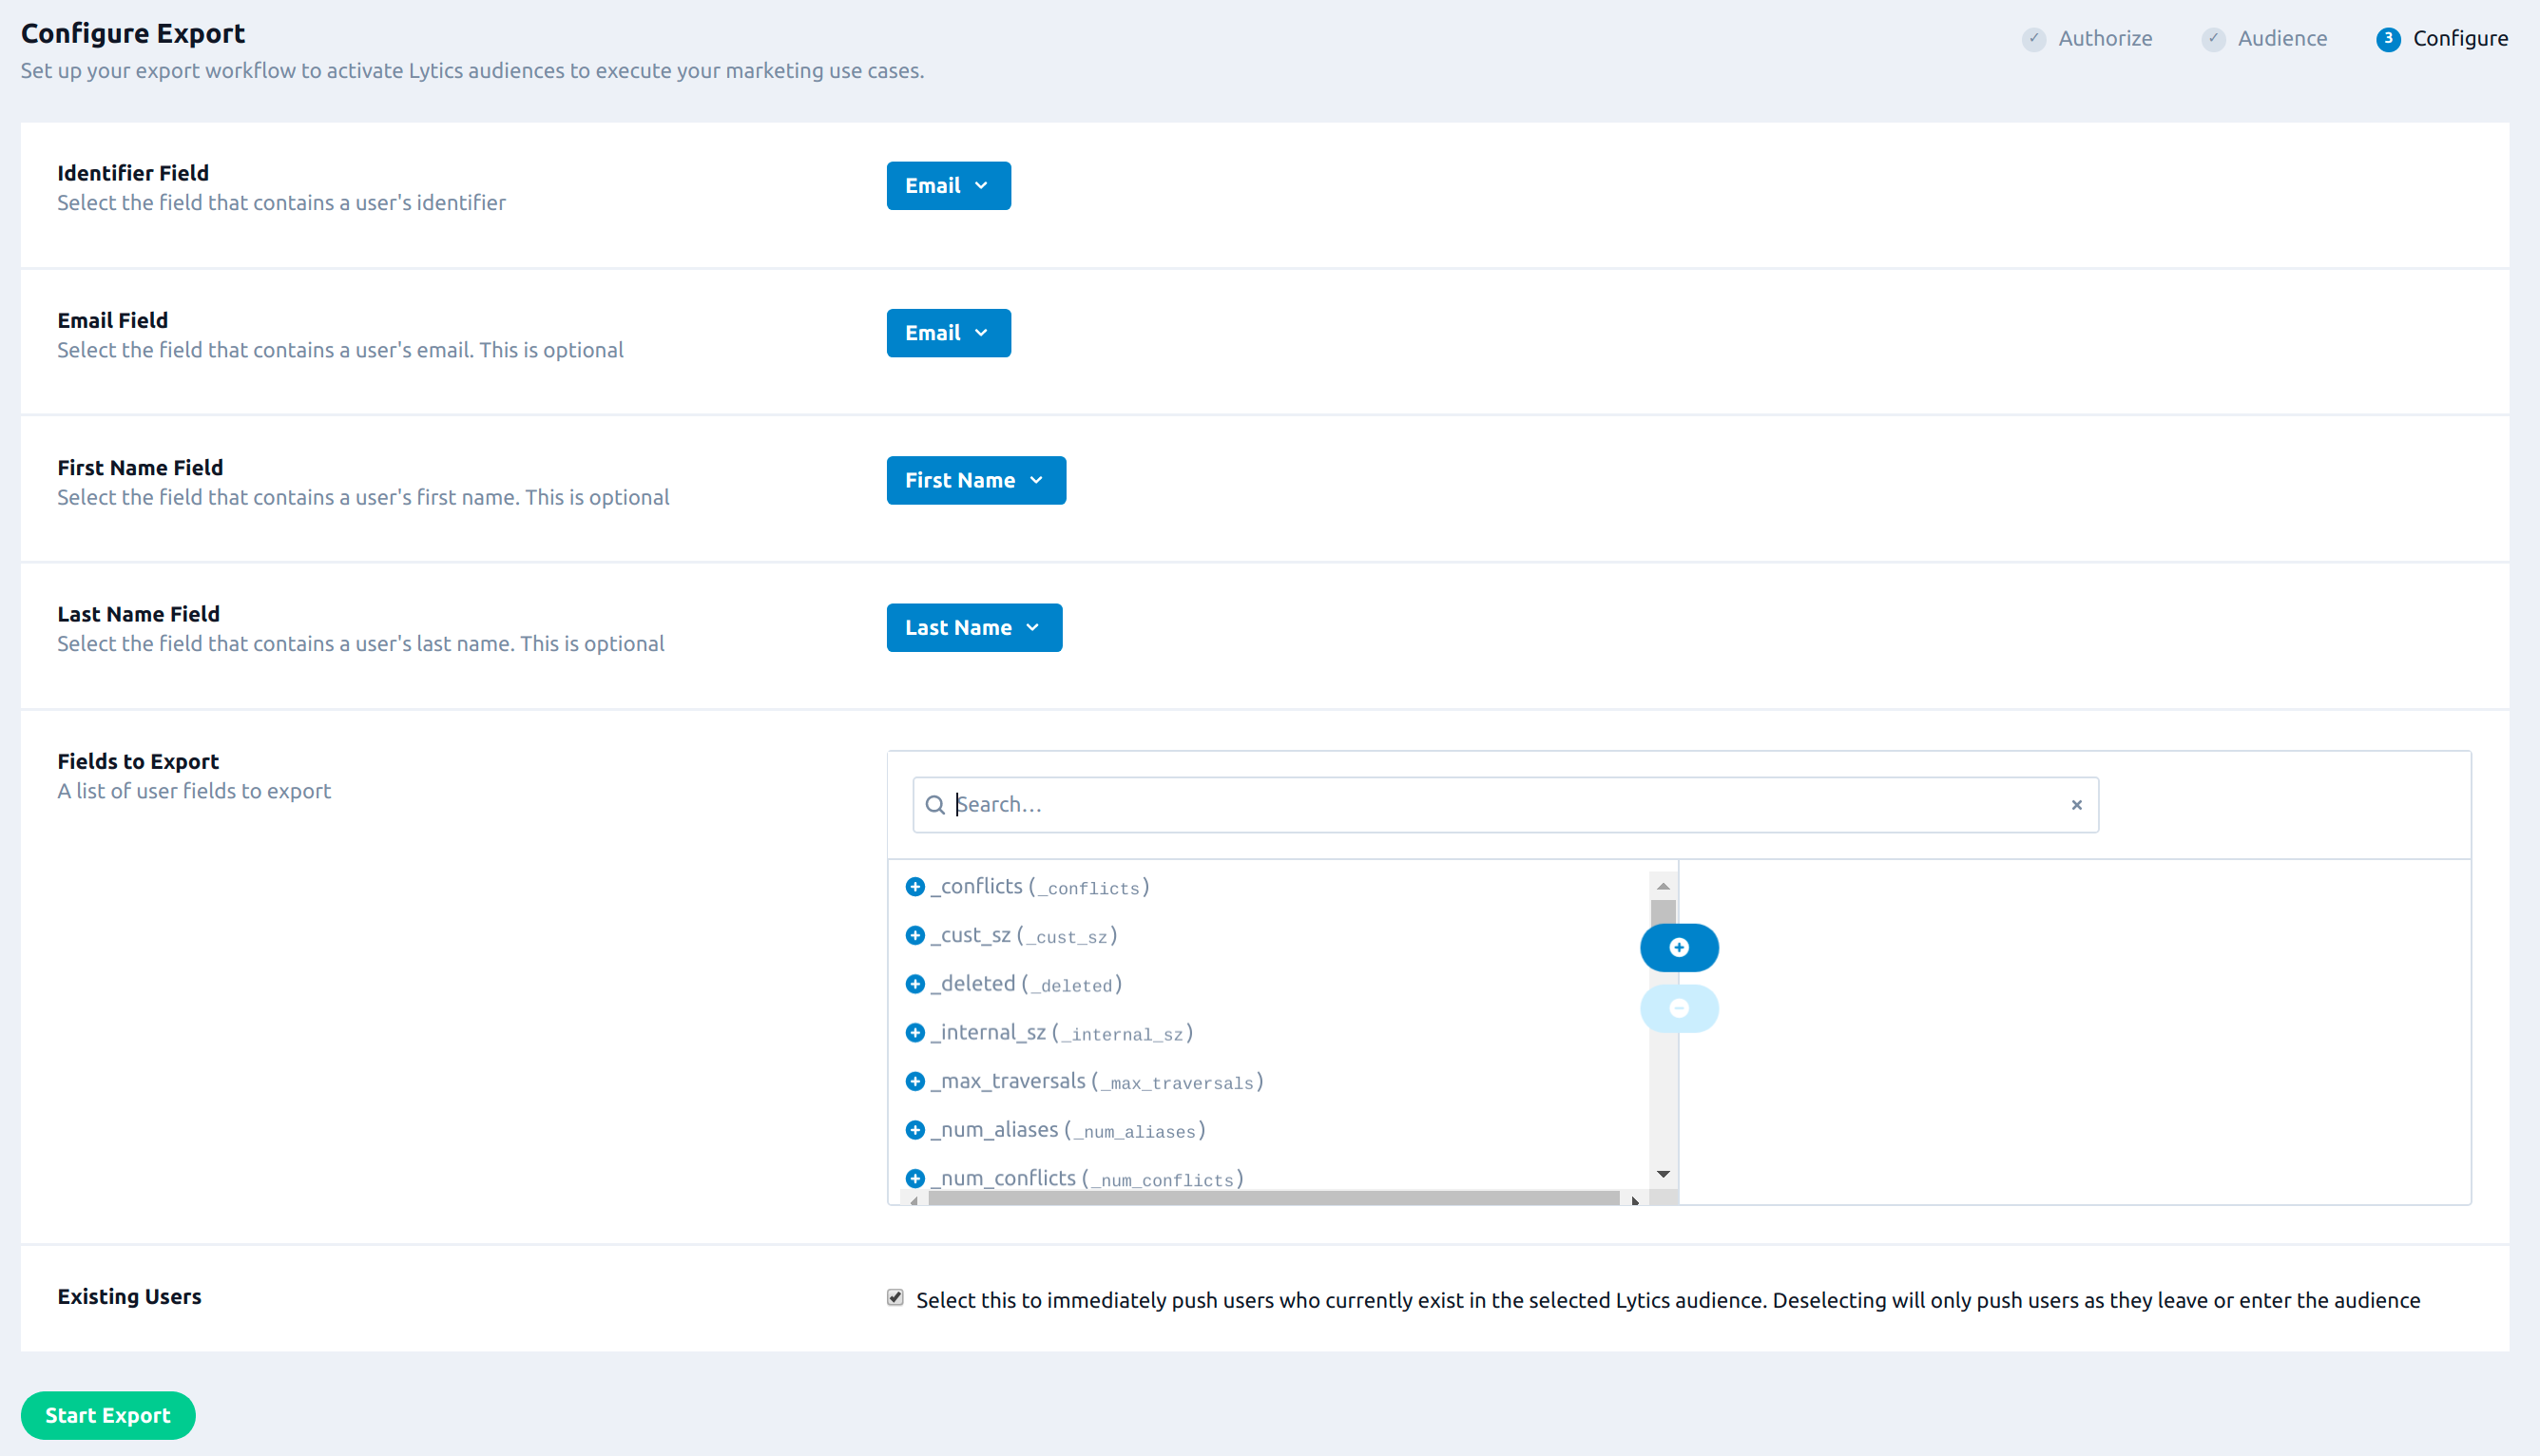
- From the Identifier Field input, select the field that contains a user's identifier.
- (optional) From the Email Field input, select the field that contains a user's email.
- (optional) From the First Name Field input, select the field that contains a user's first name.
- (optional) From the Last Name Field input, select the field that contains a user's last name.
- (optional) From the Fields to Export input, select a list of user fields to export.
- Select the Existing Users checkbox, select to immediately push users who currently exist in the selected Lytics audience. Deselecting will only push users as they leave or enter the audience.
- Click the Start Export button.

Updated about 2 months ago