

Experiences
Lytics Experiences have replaced the legacy Personalize functionality, as such Personalize campaigns are no longer supported by Lytics. If your account has not yet migrated from Personalize to Experiences, you may access our legacy documentation here.
Experiences Quick Start
Overview
Experiences allow you to present tailored messaging to specific audiences. These messages can be on your website using Lytics Experiences, appear on a third-party ad platform like Facebook, or emails delivered through an email service provider like SendGrid.
Since you can control the audience being targeted, you can deliver Experiences that make sense for some users but not others. You can even recommend products or content based on each user's unique content affinities and behaviors. Experiences allow you to treat your customers as individuals rather than over-messaging them with generic offers and newsletters.
Common uses of Experiences include:
- Present an email capture form to anonymous users but not to users who have already shared theirs.
- Let only eligible users know about a targeted sale or promotion.
- Keep your audience engaged by serving content recommendations tailored to their browsing behavior.
- Limit Facebook ads to users who are likely to engage with them, saving your advertising budget.
You can create and import new Experiences as well as browse existing Experiences (including those that are associated with a Goal) by navigating to the Experiences tab
Add your first Experience
The set up for each Experience is slightly different, so whether you are creating an on-site Lytics Experiences or connecting to one of our out-of-the-box Integrations, the simplest way to get started with experiences is to create a new Experience and allow our Experience Editor to navigate you through each of the steps.
Managing Experiences
Experience List View
Within the Experiences tab in the Lytics app, you will find a list of all of your Experiences. From this view you can
- Add Experiences
- Browse Experiences
- View the Status of your Experiences
- Navigate to Experience summary pages to work with individual Experiences
See below for more information around each of these activities.
Adding Experiences
Creating New Experiences
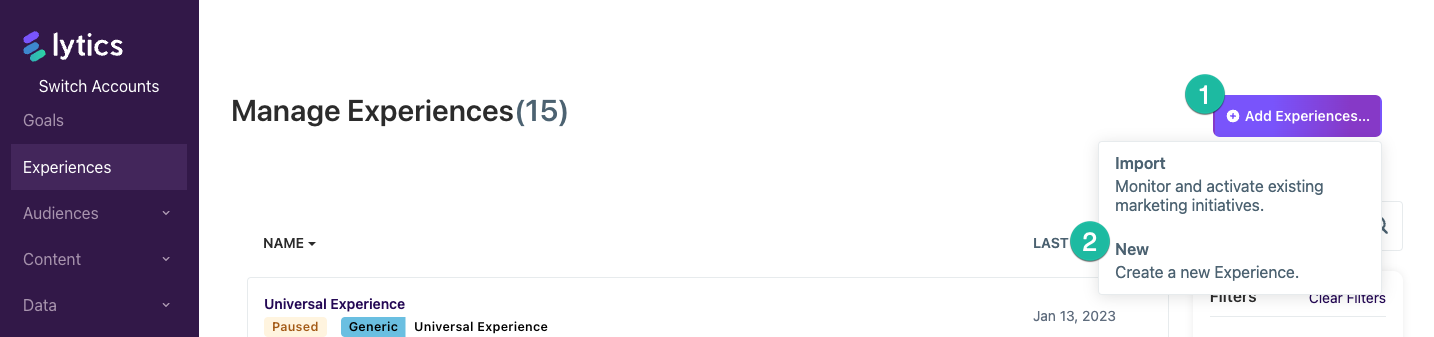
Create a new Experience within the Experiences tab by clicking the Add Experiences button near the top of the page. Selecting the New option will guide you through the Experience Editor steps for any Experience (Lytics, Out-of-the-Box Integrations, or Generic)
The New option allows you to select from the full list of providers.
Importing Experiences
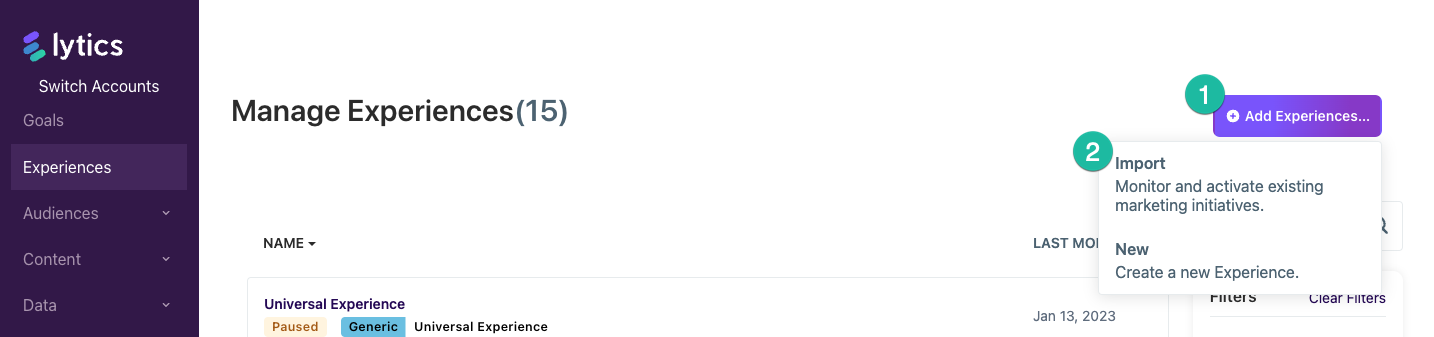
If you want to import external marketing initiatives from out-of-the-box integrations that support Experiences, you can do so within the Experiences tab as well. Click the Add Experiences button near the top of the page and select the Import option to be guided through the Experience Editor steps for these supported integrations.
The Import option navigates you to directly to a list of the out-of-the-box integration providers.
Browsing Experiences
Search:
The easiest way to find an Experience is to use the Search box to the right of the Experience list. As you enter your search term, the Experiences list will display any matching Experiences.
Filter:
To the right of the Experience list you can filter Experiences based on their...
- Channel: The channel is associated with the Provider you selected when creating the experience
- Integration: The Provider you selected when creating the Experience
- Status: Life-cycle and health of the Experience
- Type: Whether or not the Experience is associated with a Goal
Imported Experiences that haven't been activated yet will be tagged as Externally Managed
Sort:
By default, the list of Experiences is sorted by Name. If you choose to sort by date Last modified instead, your preferences will be saved for the next time you visit.
Experience Statuses
An Experience status indicates what life-cycle the Experience is in and the health of whether it is exporting a Lytics audience to a third-party tool in real-time.
Below is a complete list of Experience statuses:
-
Draft: A complete, or partially complete Experience that has not yet been activated.
-
Active: An Experience that can be seen by your users (and has not passes its end date).
-
Paused: An Experience that was activated but has been paused. To edit an Experience that has been running, you must pause it first.
-
Scheduled: An Experience that will be activated at a start date set in the future.
-
Externally Managed: An imported Experience from a third party tool that hasn't been configured with a Lytics audience. Complete the configuration by editing the Experience in the Experience editor.
-
Ended: An Active Experience that has passed its end date.
-
Error: An Experience that failed to export audience data to the appropriate tool.
-
Warning: An Experience that encountered issues when attempting to export audience data to a third party tool. It may recover on its own, or proceed to an error status after a number of failed attempts to export data.
Experience Summary View
Once you have created or imported Experiences they will be populated as a list within the Experiences tab. Click on an Experiences from the list to enter the Experiences summary. From this summary page you can...
- See an overview of the Experience
- Activate, pause or resume Experiences
- Edit an existing Experience
- Delete an existing Experience
See below for more information about each of these activities.
Experience Overview
Within the Experience summary you will find important information about your Experience. The summary includes:
- Experience Status
- Experience Performance Reporting
- Experience Intelligence Report
- Sample Audience Members (a small sample of users in the target audience that are eligible for the experience)
- Activity (recent activity around changes made to the Experience)
- Details (an overview of the configuration of the Experience)
Activating Experiences
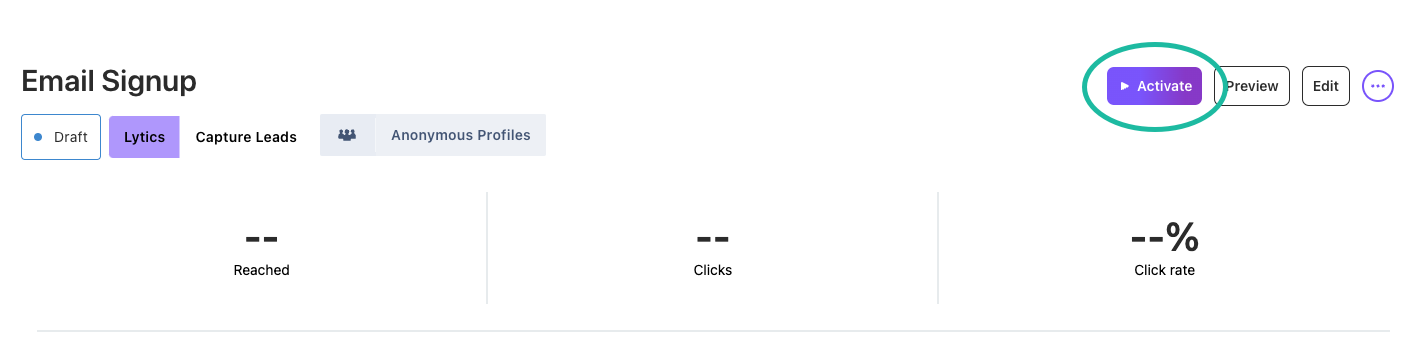
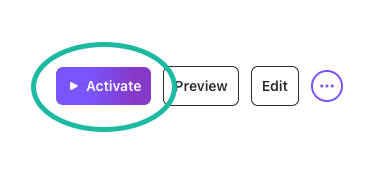
From the Experience summary page you are able manage the activation of individual Experiences using the following buttons on the righthand side of the summary page.
- Activate: An Experience has not been previously activated, and is currently marked with the Draft status, can be activated.
- Pause: Campaigns currently marked as Active can be paused
- Resume: Any previously activated Experiences that are currently paused can be resumed
Editing Experiences
Within the Experiences section of the Lytics app, you can edit an existing Experience by clicking on the desired Experience. This will navigate you to the Experience summary page. Here you can click on the Edit button to enter the Experience Editor for this Experience.
You cannot edit an Experience while it is activated, so you will not be able to enter the Experience editor at that point. If you need to edit an Active Experience, you can Pause it from the Experience summary page.
Once you have made and saved your edits, you can then Resume the experience from the Experience summary page

Deleting Experiences
To delete an experience from Lytics, click on the Experience you wish to delete from within the Experiences list. You will be navigated to the Experience summary page where you can delete the experience from the options menu.

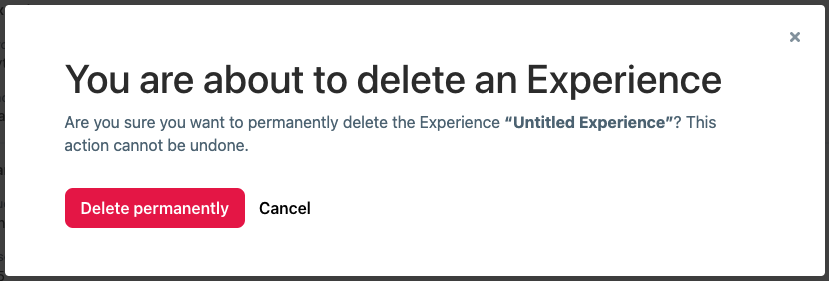
You will be asked to confirm that you wish to delete the experience, click the Delete permanently button to complete the deletion.
Experience Editor
The Experience editor is used to create, save, edit, and activate marketing Experiences. Combined with audiences created in the audience builder, sophisticated Experiences can be built to deliver the right message to your users at the right time.
To enter the Experience editor, you can either add an experience or edit an experience. The available steps of the Experience editor are dictated by the Experience provider you select.
Experience Providers
- **Lytics: **Lytics Experiences allow you to create personalized campaigns on your website to capture leads, recommend content, drive traffic, etc without having to connect Lytics to an additional tool. The Lytics Javascript tag must be installed on your website for you to take advantage of this feature.
- **Out-of-the-Box Integrations: **Experiences added to Lytics from these providers allow you to monitor performance and activate audiences from the Lytics UI; however, the management of external Experiences still happens inside your channel tools.
- Generic: These experiences simply offer the ability to include a placeholder Universal Experience within the Goals Canvas and export a Lytics audience, with all of the nested Goal Stage filter logic, to any tool you choose.
Lytics Experiences
Use Lytics Experiences to personalize a website with modals, slide outs, sticky bars, etc. This does not require connecting to another tool.
Experience Editor Steps for Lytics Experiences
Select a Provider and Tactic
Select a Provider and Tactic
If you are creating or importing a new Experience, you will be given a choice of Experience providers - providers are the tools that deliver your Experience. The selection of Lytics as a provider will prompt you to select a tactic from a list of options. The following tactics are available for Lytics Experiences:
- Drive Traffic - Increase traffic to a specific URL.
- Capture Leads - Convert unknown users to known users with a simple lead capture form.
- Present a Message - Communicate a simple message, such as a global coupon or an announcement.
- Recommend Content - Use content collections to recommend articles, products, or any other type of content to your users.
Once you've chosen your tactic, the Experience editor will take you though each step.
Choose URL (unique to the Lytics Drive Traffic tactic)
Choose URL
Choosing a URL to promote is the first step in the Experience editor for a Drive Traffic Experience of the Lytics provider. This step does not apply to Experiences of any other tactic or Provider.

This step allows you to enter the destination you want to link as a call to action in your Drive Traffic Experience. The protocol is preset to <https://> but can be changed to <http://>. Enter the rest of the URL into the input field.
Customize Form (unique to the Lytics Capture Leads tactic)
Customize Form
Specific to the Collect Leads tactic of Lytics Experiences, this step is for selecting what information you collect on the form.
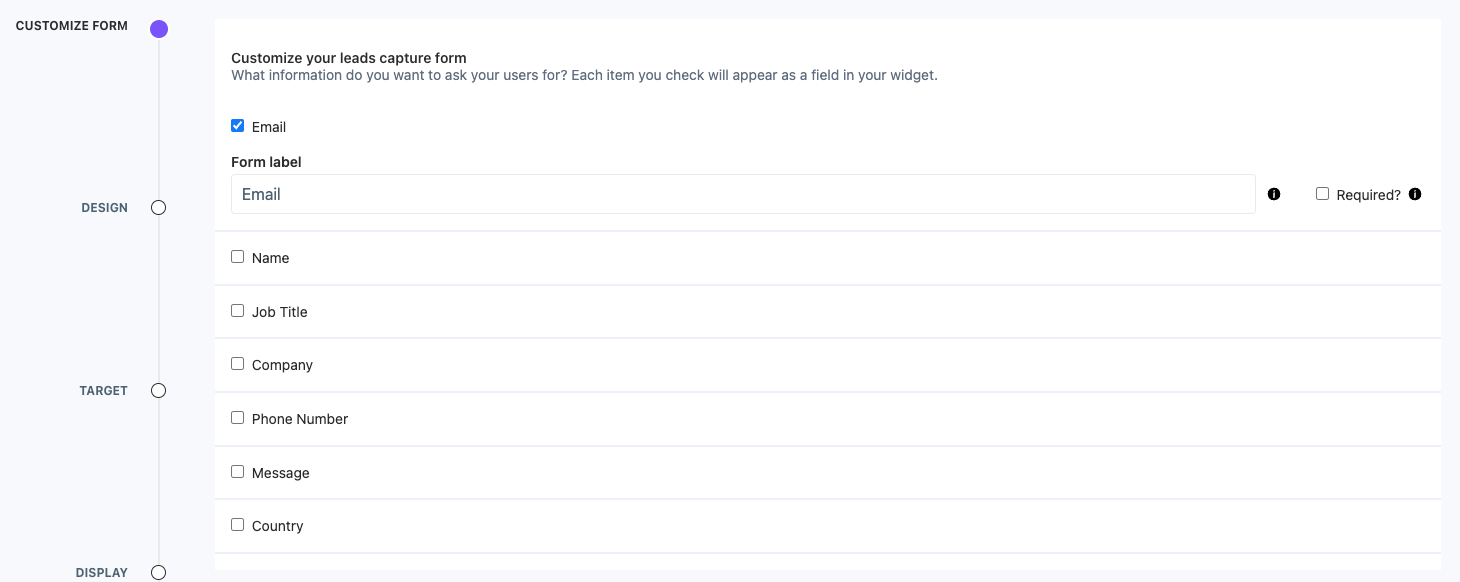
Here you will configure which form fields will be shown and thus what information you capture about your user.
- Enable fields by selecting the checkbox next to the desired field.
- Form labels have default text input that appears when the field is selected. You can rename these labels to suit your use case.
- Require fields with the Required? checkbox at the right of the text field.
Choose Content (unique to the Lytics Recommend Content tactic)
Choose Content
The Recommend Content Experience type is used to surface content (an article, a blog post, a product page) to visitors. Each recommendation is personalized to the individual. This could be used to keep visitors engaged by surfacing what to read next, or assist casual perusers by prompting a starting point.
Furthermore, the Experience can be configured to only a set of pages or a subset of your total audience. This allows you to limit the recommendations from showing up on auxiliary pages like the home page, company page, or checkout page. It can also only be shown to users with high usage. This way low usage visitors can be targeted with a more aggressive campaign.
Choosing content is the first step for a Recommend Content Experience.
Lytics provides a variety of filters and options for tailoring what content can be recommended and how the recommendation algorithm should rank the content.
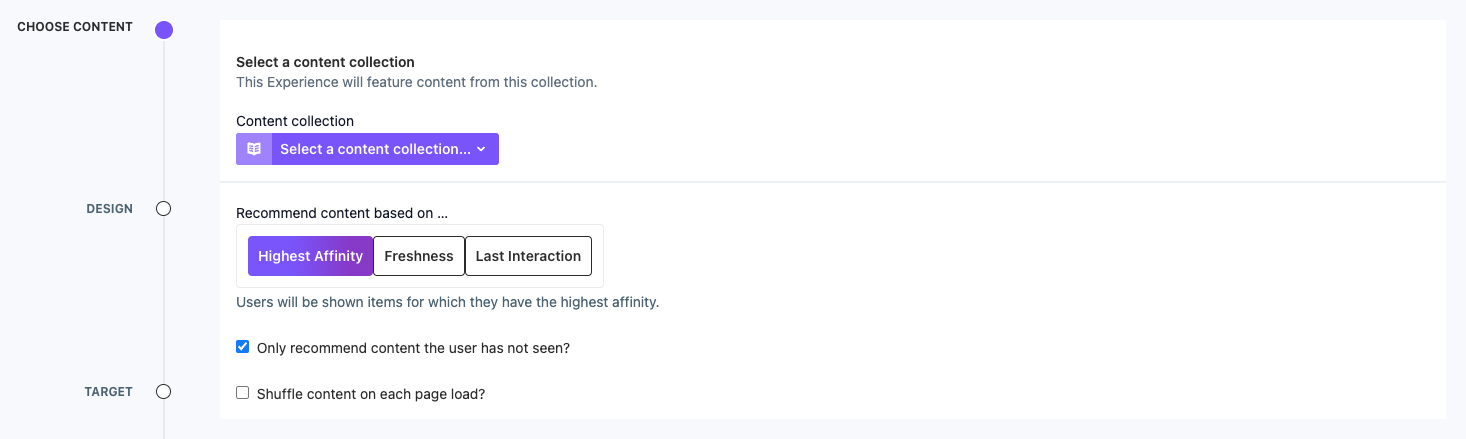
Choosing a content collection
A content collection allows you to limit the scope of documents that can be recommended by your Experience. If you're creating a summer seasonal experience, for example, you wouldn't want articles that are out of season. A content collection is how you define which articles are appropriate to recommend.
Use the Select a content collection dropdown to choose an existing collection or to create a new one. Clicking on New content collection will take you to the collection builder. The state of your Experience will be saved, and after creating your new collection, you will automatically be returned to the Experience editor.
Choosing recommendation settings
The Lytics content recommendation engine allows you to configure the way in which the Experience will recommend content.
The recommendation settings work within the limits set by the content collection. If your content collection includes articles published six to twelve months ago and you choose the Recently Published method, then the Experience will begin recommending six-month-old articles, which are the most recently-published articles within the collection.
Recommendation method
The recommendation methods control how the recommendation engine ranks the content.
- Highest Affinity: Choose the content that a user is most likely to be interested in. This is the default setting.
- Freshness: Choose the content that was most recently published or updated.
- Last Interaction: Choose the content based on what a user has engaged with most recently.
New content only
The Only recommend content the user has not seen? checkbox controls whether previously viewed content will be included among the recommendations. Leave this setting checked to ensure that a user won't be recommended content they have viewed in the past.
Shuffle content
The Shuffle content on each page load? checkbox controls whether a user should be recommended different content if they encounter the Experience again (e.g. after reloading). Check this setting to vary the content that is recommended on subsequent requests or leave it unchecked to show the single best recommendation.
Design
Design
The design step is present in the editor for all Experiences of the Lytics provider. It lets you customize the appearance and content of the widget displayed to your users on your website. This step offers layout and position options as well as a custom CSS option.
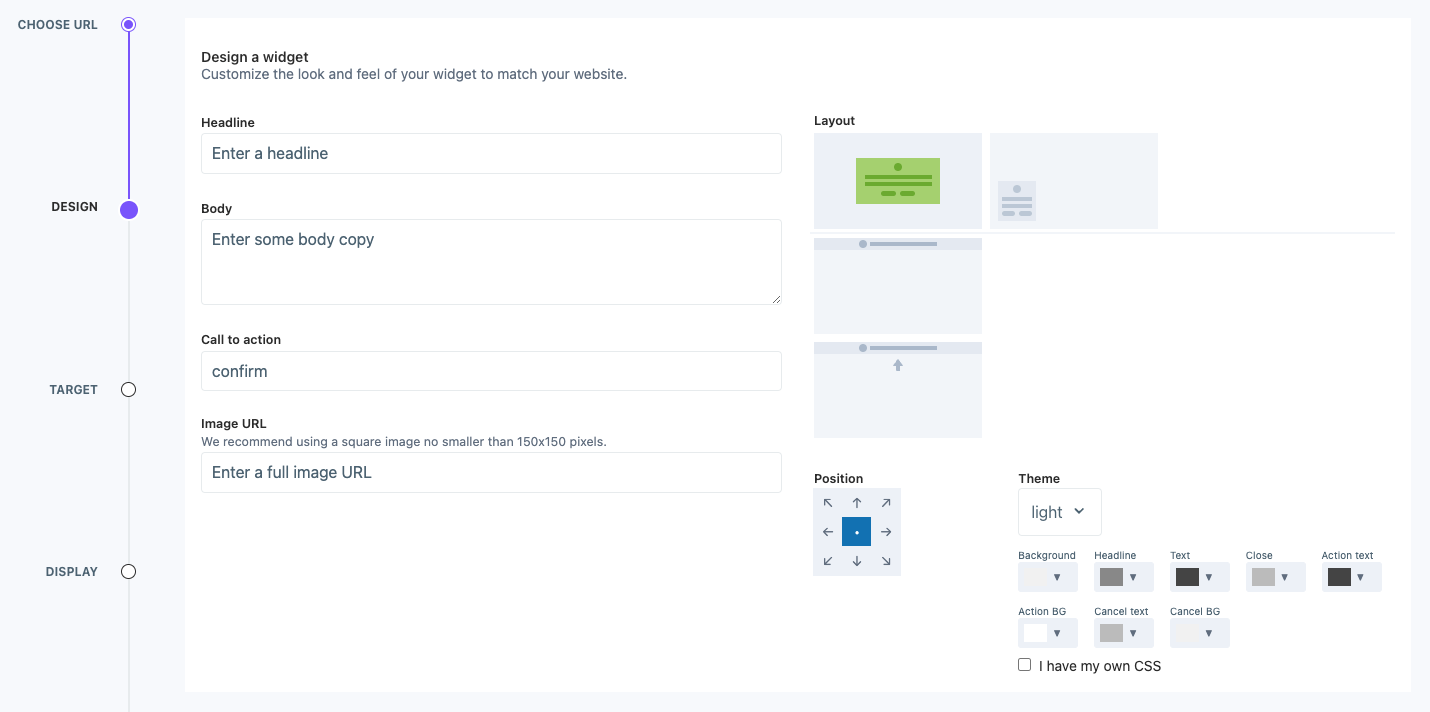
Choosing a layout
First, choose your Experience's layout. There are five different layout options, and their availability depends on the tactic you selected.
- Modal: A full screen takeover Experience that can be closed by clicking outside the modal, clicking the close button of the modal, or taking the intended call-to-action.
- Slideout: A small widget that occupies a corner of the screen. It does not interrupt the user's current task.
- Bar: A short widget that takes the full width of the screen and sits at the top of the page.
- Sticky Bar: A bar that scrolls with the page.
- Gate: A modal that cannot be closed unless the call to action is fulfilled.
Campaign type layout compatibility
| Layout | Drive Traffic | Collect Leads | Present a Message | Recommend Content |
|---|---|---|---|---|
| Modal | ✔ | ✔ | ✔ | ✔ |
| Slideout | ✔ | ✔ | ✔ | ✔ |
| Bar | ✔ | ✔ | ||
| Sticky Bar | ✔ | ✔ | ||
| Gate | ✔ |
Adding content
Different content fields are supported by different Experience layouts or tactics.
| Layout | Modal | Slideout | Bar | Sticky Bar | Gate |
|---|---|---|---|---|---|
| Headline | ✔ | ✔ | ✔ | ||
| Message | ✔ | ✔ | ✔ | ✔ | ✔ |
| Tactic | Drive Traffic | Capture Leads | Present a Message | Recommend Content |
|---|---|---|---|---|
| Call to action | ✔ | ✔ | ||
| Image URL | ✔ | ✔ | ✔ |
Including an image for your Experience is optional, the image will be shown above or beside the messaging of the Experience. Any image you include must be hosted publicly as this input takes a URL but not an upload.
Setting position
Experience widgets can be displayed in different positions depending on their layout. The available positions will show up as a darker gray while the active position is blue.

| Layout | Modal | Slideout | Bar | Sticky Bar | Gate |
|---|---|---|---|---|---|
| Top-left | |||||
| Top-center | ✔ | ✔ | |||
| Top-right | |||||
| Center-left | |||||
| Center-center | ✔ | ✔ | |||
| Center-right | |||||
| Bottom-left | ✔ | ||||
| Bottom-center | ✔ | ||||
| Bottom-right | ✔ |
Theming the Experience
There are three ways to theme your Experience.
-
Choose a theme: Lytics provides Light and Dark themes you can select.
-
Build a custom theme: There are eight color options available to build a theme in the Experience editor:
- Background: The color of the background color of the Experience.
- Headline: The text color of the headline message.
- Body Text: The text color of the body text.
- Close Button: The color of the '×' shape used as a close button.
- Submit Button Text: The color of the text in the submit/call-to-action button.
- Submit Button: The background color of the submit/call-to-action button.
- Cancel Button Text: The color of the text in the cancel/dismiss button.
- Cancel Button: The background color of the cancel/dismiss button.
-
Use Custom CSS: Use your own custom CSS to match the Experience's styling with your site's design. Experiences are built using the Pathfora SDK. Read about using custom CSS with Pathfora.
Target
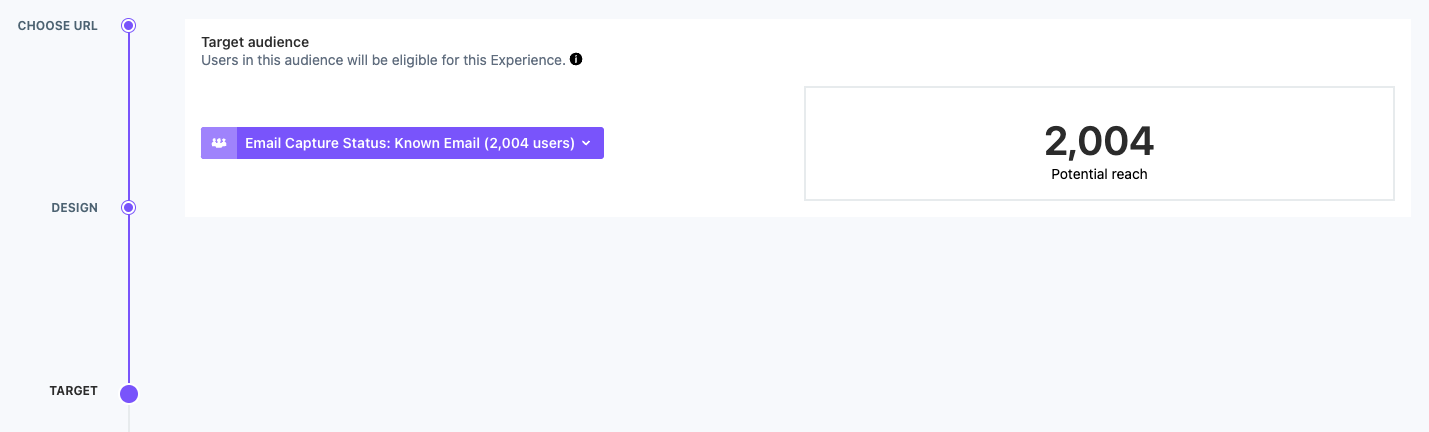
Target
The audience step in the Experience editor allows you to configure the target audience for your Experience. Use the dropdown to select from among your pre-built audiences. Click New audience at the bottom of the dropdown menu if you need to build a new one and you will be directed to the audience builder.
Standalone Experiences
This step is required for standalone Experiences, such as a one-off email campaign or a seasonal ad promotion. Once you have selected an audience, Potential Reach displays how many people will be eligible to receive this Experience.
Experiences part of a Goal
This step is optional if your Experience is part of a Goal on the Lytics Canvas. Here you can add additional filtering to your Experience. Any audience you choose will be combined with the Stage audience, resulting in a more targeted Experience with a smaller audience. You can also leave this blank if you don't want additional targeting.
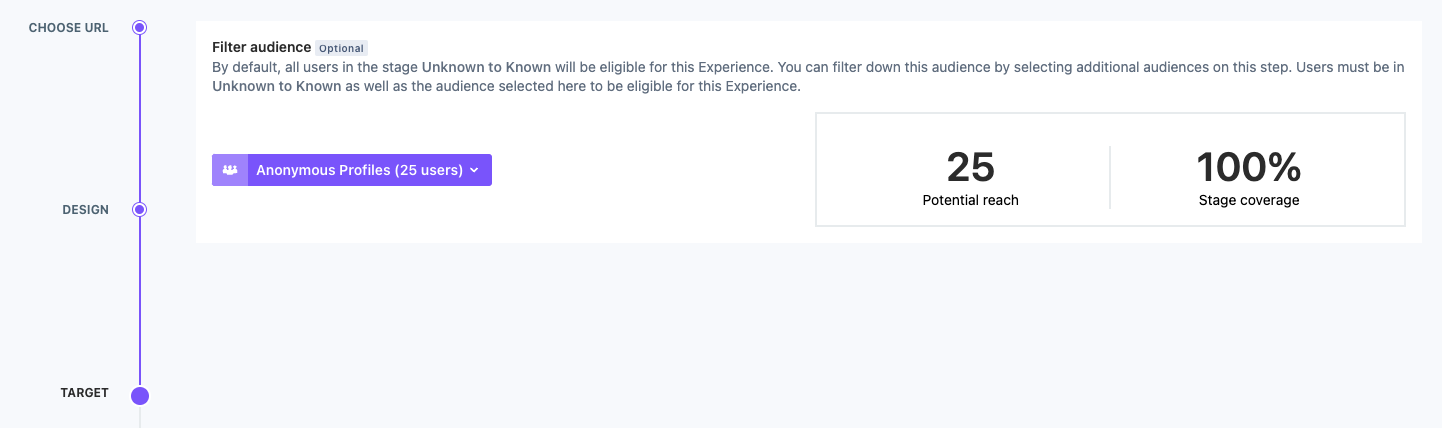
The Potential reach displays how many people will be eligible to receive this Experience. The Stage coverage metric displays what percentage of the stage will be eligible to receive this Experience.
Adjusting your Target
If your Experience is not providing the desired results, you can pause your Experience and target a new audience. Just keep in mind that the metrics are for the Experience and won't explicitly indicate changes you made. You can also make changes directly to the target audience, and the potential reach of the Experience will be adjusted automatically.
Finding the Right Fit for Your Content
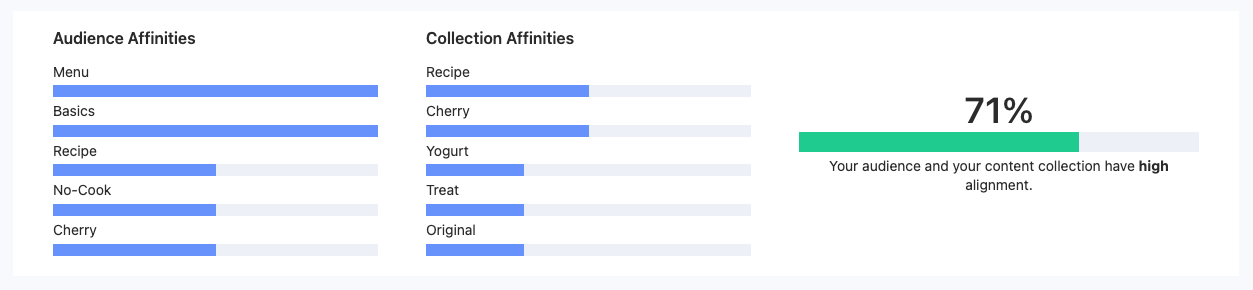
When creating a new Recommend Content Experience, you will see a content alignment score in the Target Audience step of the Experience Editor. Lytics calculates the alignment percentage by comparing the affinities of your target audience to the affinities in your selected content collection.
Use the alignment score information to ensure you are recommending content or products that are relevant for your customers, which can help improve engagement and conversion rates of your marketing campaigns.
For a quick demonstration of using the affinity alignment score while building a content recommendation, watch this video.
Display
Display
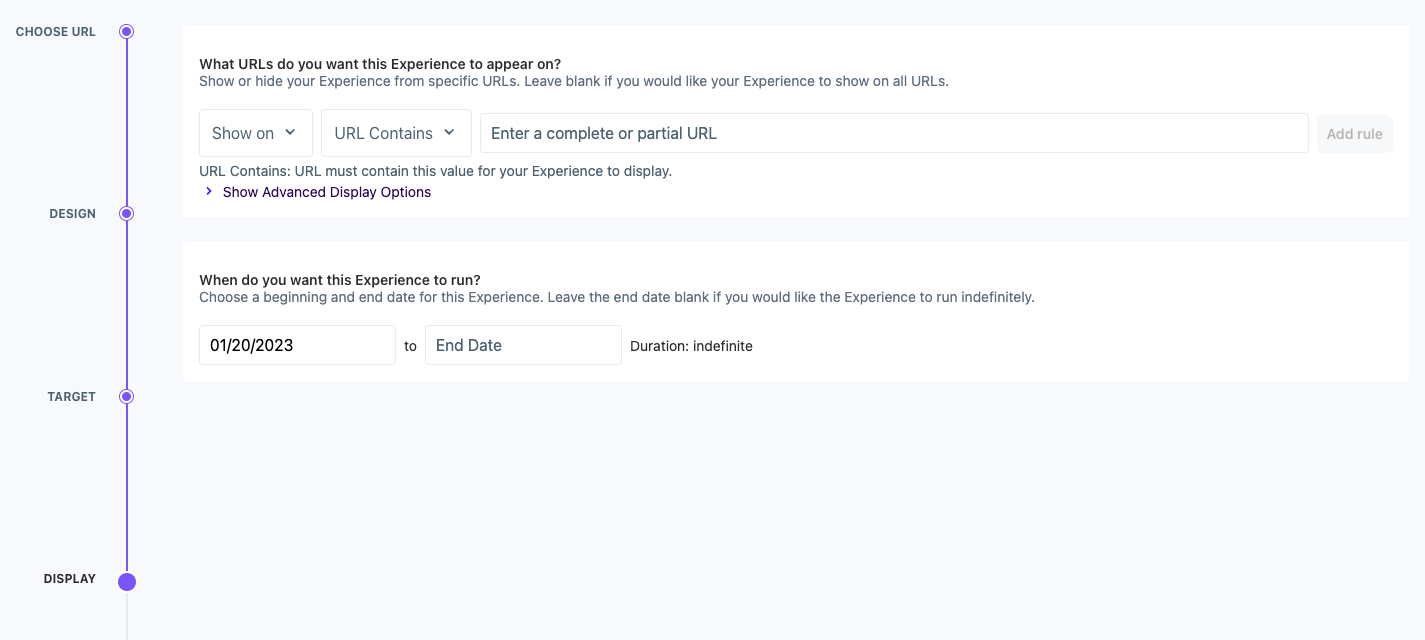
The display step is present in the editor for all Experiences of the Lytics provider. Use the Display Step to set where and when the Experience will show up for your users. Set rules for which URL(s) an Experience can be displayed on, the triggers for displaying it, the frequency with which it appears, and the date range during which the Experience is available to show.
Prior to activating your Experience, ensure that the display URL is included in your URL Allowlist for Orchestrate account setting.
Appears on
Appears on rules are an optional tool used to specify which webpages within your site the Experience will (or will not) be shown on. This can be a fixed list of pages or expressions that match many pages. There are four URL-matching strategies offered, and rules can be used in combination.
- URL Contains – The text specified must be included in the URL.
- Simple Match – A fuzzy match that removes the URL protocol and query string before matching.
- Exact Match – The URL must match what is typed exactly, including protocol and query parameters.
- Regular Expression – A regular expression (sometimes referred to as Regex) to be executed client-side with JavaScript for complex matching requirements.
Each of these URL-matching strategies can be used to create a rule determining when the Experience is shown with Show on selected, or to specify the cases where the Experience should not be displayed with Hide on.
Appears on use cases
Consider the following use cases, and some suggested solutions using the appears on rules.
Only show the Experience on the home page
Only show the Experience on the home page
Solution: Show on a Simple Match for www.lytics.com.
Displays for:
<https://www.lytics.com><http://www.lytics.com><http://www.lytics.com?ad_campaign=1ed387faed>
Does not display for:
<http://www.lytics.com/blog><https://activate.getlytics.com>
Show the Experience on the blog, but nowhere else
Show the Experience on the blog, but nowhere else
Solution: Show on URL Contains /blog/
Displays for:
<http://www.lytics.com/blog/><http://www.lytics.com/blog/some-post-in-the-past><https://www.lytics.com/blog/tag/customer-data-platform?referrer=thegreatgoogle>
Does not display for:
<https://www.lytics.com/><http://www.lytics.com/careers>
Gate a specific resource
Gate a specific resource
Solution: Show on an Exact Match for <https://www.lytics.com/resources?id=a763efd12c>
Displays for:
<https://www.lytics.com/resources?id=a763efd12c>
Does not display for:
<http://www.lytics.com/resources?id=a763efd12c><https://www.lytics.com/resources?id=a763efd12c&something=that-will-404>
Show a referral thank you message on integration pages
Show a referral thank you message on integration pages
Solution: Show on a match for the Regular Expression \/integrations\/.+?\?.*?ref=our_partner
Displays for:
<http://www.lytics.com/integrations/campaignmonitor?ref=our_partner><http://www.lytics.com/integrations/campaignmonitor?session=125929&ref=our_partner><http://www.lytics.com/integrations/adroll/?ref=our_partner><https://www.lytics.com/integrations/segment?ref=our_partner&qp=true>
Does not display for:
<http://www.lytics.com/integrations/campaignmonitor?ref=some_stranger><http://www.lytics.com/integrations?ref=our_partner><http://www.lytics.com/blog/adroll?session=125929&ref=our_partner>
Show the Experience anywhere on the site except the careers pages
Show the Experience anywhere on the site except the careers pages
Solution: Use two rules in combination.
Show on URL Contains lytics.com
Hide on URL Contains /careers
Displays for:
<http://www.lytics.com/blog/><https://www.lytics.com>
Does not display for:
<http://www.lytics.com/careers><http://www.lytics.com/careers/content-writer>
Advanced Display Options
The Advanced Display Options allow you to respond to the user's interaction with your site, using the state of their active web session to determine when an Experience is displayed. These are all optional and can be used in combination.

Display triggers
- Show after x page views – Do not show the Experience until the requisite number of pages have been visited.
- Show after x seconds – Do not show the Experience until the requisite number of seconds in the session have elapsed.
- Show after x% page scroll – Do not show the Experience until the user has scrolled a certain percent of the way down the page.
- Show on exit intent – Do not show the Experience until the user is about to abandon the site.
When using triggers in combination, note that the conditions function as an ALL conditions met, not ANY condition met. If you set an Experience to Show after 5 page views and to Show after 70% page scroll, when your user scrolls to 70% of the third page, the Experience will not show because only one of the two conditions have been met.
Display frequency
- Show up to x times per user, ever – After the specified number of times displaying the Experience, suppress its display forever for the current user.
- Show up to x times per user per session – After the specified number of times displaying the Experience, suppress its display for the current user. This count resets when the user ends their current session.
If you set an Experience to Show up to 5 times per user, ever and Show up to 2 times per user per session, and a user is shown the Experience twice each on their first two sessions, for their third session they will be shown the Experience for the final time.
If you set an Experience's frequency to Show up to 2 times per user per session and a trigger of Show after 5 page views, your user will see the Experience upon reaching the sixth page, again on reaching the seventh page, and not again during their session.
When user clicks CTA
- Hide after x clicks – Hide the Experience after the user has clicked the call-to-action the specified number of times.
- Hide for x time – How long an Experience should remain hidden, in seconds/hours/days/weeks.
- Hide permanently – Instead of hiding an Experience for a set amount of time, never show it again for the current user.
When user clicks cancel or close
These are the same options as above, but applied to when the user has seen the Experience but not clicked the CTA.
Pathfora Overrides
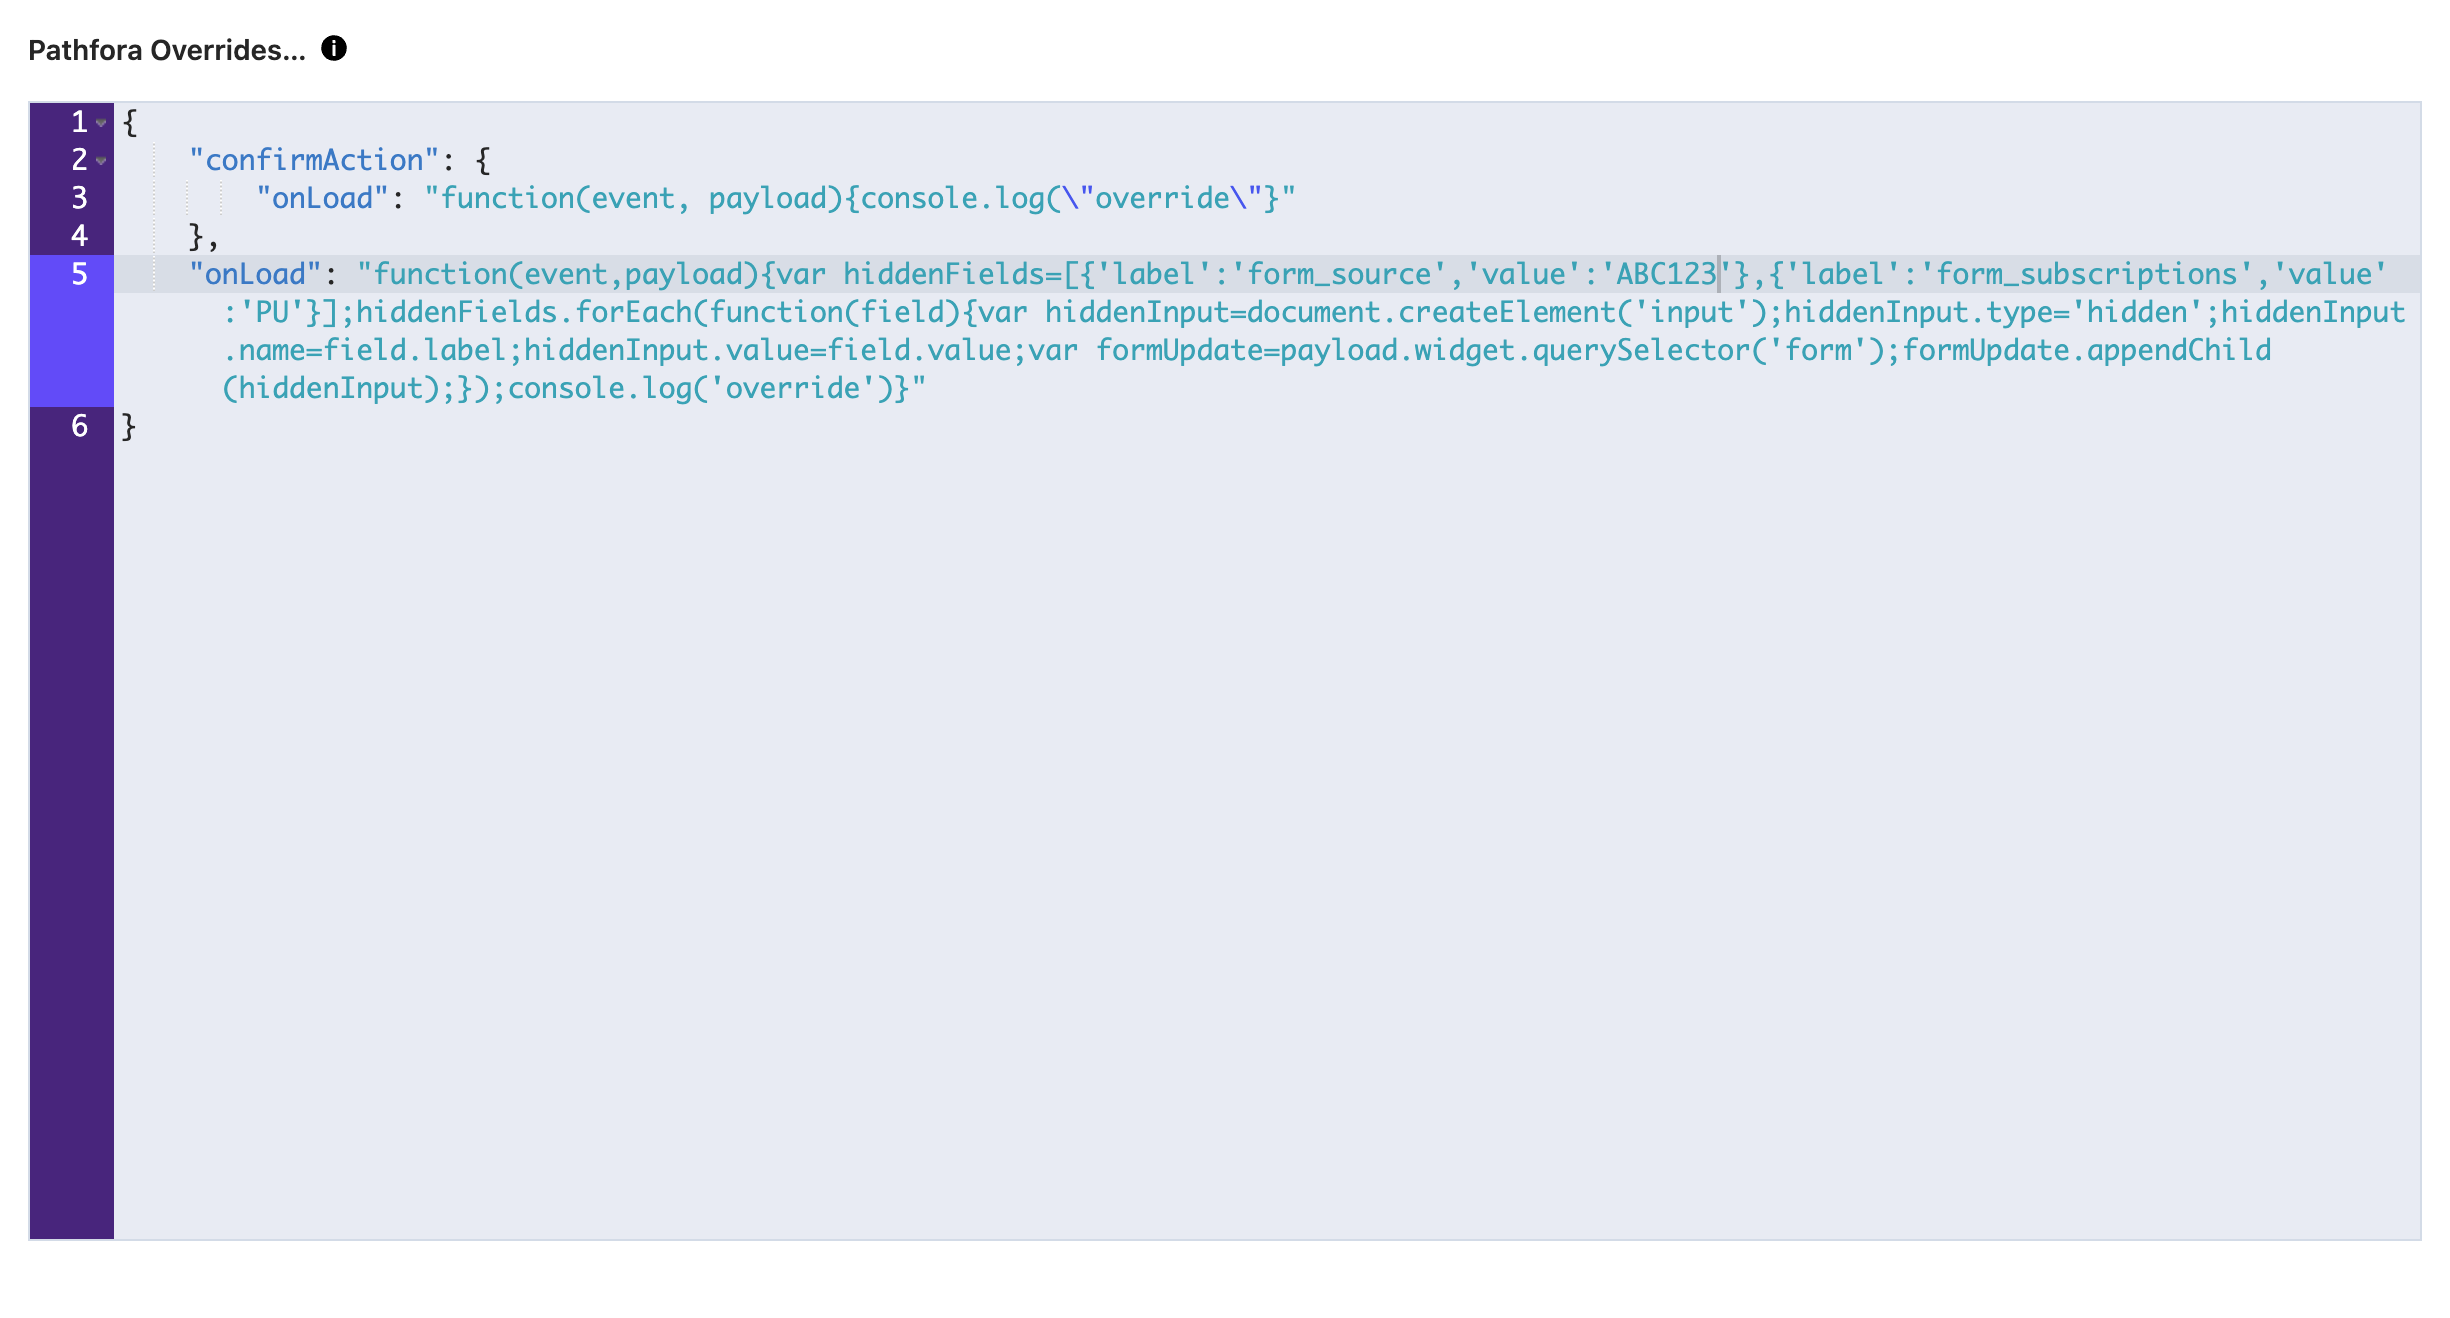
Pathfora is a very powerful client-side personalization SDK. In addition, it is open-sourced. Because anyone is invited to contribute to Pathfora, providing clear controls for all features is impossible. As a result, we provide a technical but friendly interface for using "overrides." Overrides allow you to leverage the full power of pathfora for functionality such as custom load and callback handlers and advanced customization and styling.
In the coming weeks, we'll extend our documentation to outline several common patterns for leveraging overrides. For those looking for initial information, don't hesitate to contact your primary account contacts. For others that are already leveraging overrides directly via our APIs, you will also see a representation and area for managing those overrides directly within the "Advanced Settings" in the Experience wizard, as pictured below.
Date Range
Set the date range for when the Experience will be shown to your users. The start date will be populated with the current day, so that your Experience will start immediately without you needing to set anything.
You can set a start date in the future and Activate the Experience ahead of time; it will have a "scheduled" status and then switch automatically to "active" on the start date.
The end date is not required. If you do not set an end date, the Experience will run indefinitely as long as it is active. End dates cannot be in the past, nor can they precede the start date.
The date range is inclusive, so if you set a start date of 3/21/2022 and an end date of 3/23/2022, the experience will run for 3 days. On 3/24/2022, the Experience will switch from "active" status to "ended" on its own and users will no longer see it.
Review
Review
The review step is the final step for all Experiences of the Lytics provider. It provides an at-a-glance view of everything you've chosen for your Lytics Experience.
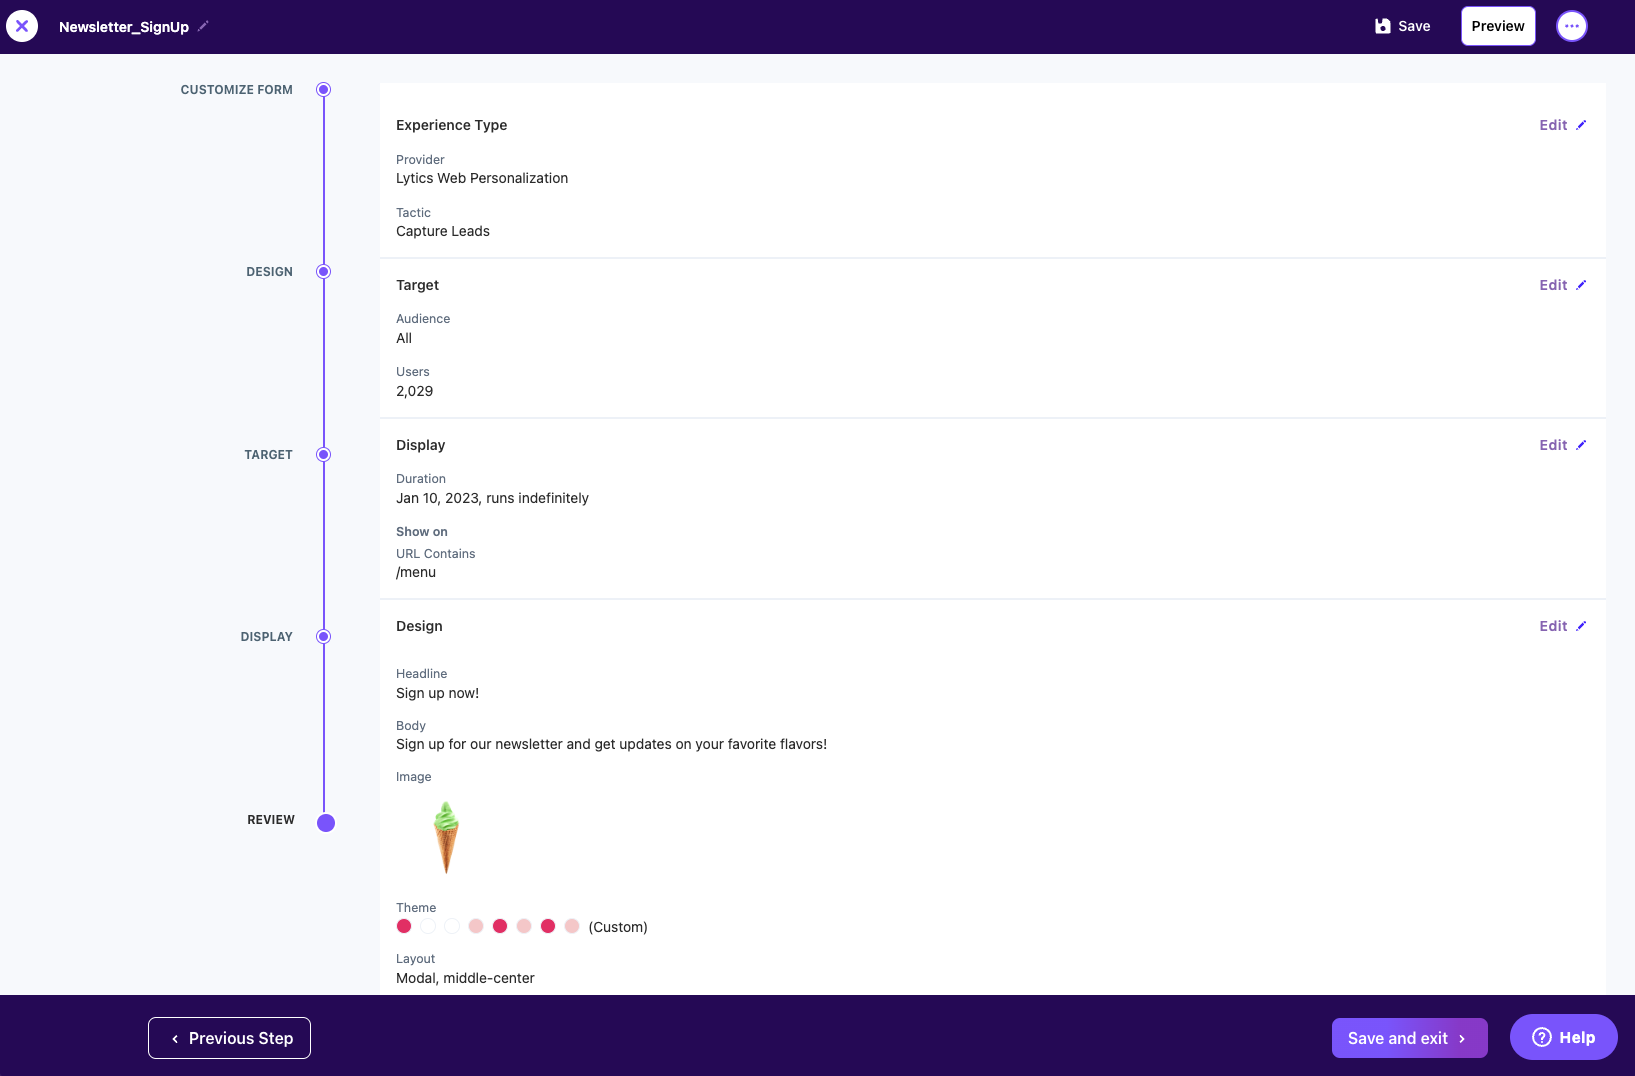
Though there is nothing you need to do on this step, it does give you an opportunity to check that all your selections are listed as you expect before you activate the Experience.
Previewing
Use the Preview button in the top right of the screen to see how your experience will look when it's active on your site. Simply enter the URL you want to see the preview on in the modal that appears, and you'll be directed to your site but with the experience running as it will once it becomes activated. From this preview state you can get a better idea of how/when the experience is triggered and see what your users will see.
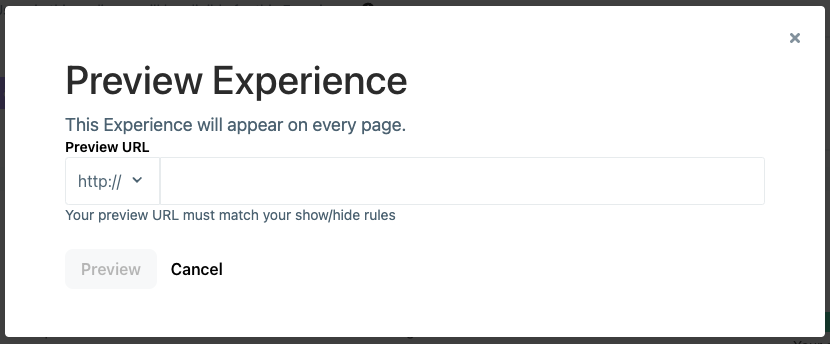
The URL you enter must match the appears on conditions you set in the display step. The target audience, however, is ignored for previewing ease.
Save and Exit
Save and Exit
When you first enter the Experience editor, you will see a Save button in the top right corner which allows you to save your progress at any time.
If you have made it to the final step within the Experience Editor (Review for Lytics Experiences), the Next Step button will now be a Save and Exit button. Click on this button to save and exit your Experience. If you have previously saved your Experience and made no other changes this will simply allow you to exit the Experience Editor.
After the Experience has been saved once, the button will become a Save button that is only enabled when you make further changes.
Name your Experience
If you have not yet named the Experience at the time you save, you will be prompted to do so at this time, and the Experience's tactic will be suggested as a default.
When creating a new Experience within Lytics, name it including the purpose and any categorization (e.g. Drive sales: Holiday). When working with existing Experiences from your third party tools, name the imported experiences on Lytics with the same/similar names as in the external tool.
Discard Changes
Unsaved Experiences
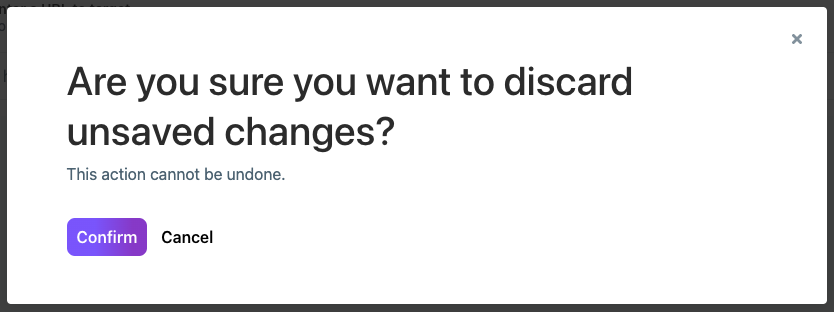
At any point you may discard your unsaved Experience by clicking on the Close button (X) in the top left corner of the Experience Editor and then clicking Confirm when asked "Are you sure you want to discard unsaved changes?"
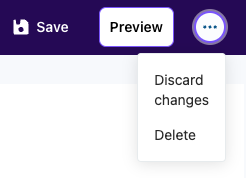
You may also select the Delete option from the more options (...) menu in the top right corner of the Experience Editor and click Delete permanently when prompted.
Both methods will remove you from the Experience Editor without saving.
Previously Saved Experiences
If you have previously saved the Experience and have returned to make edits, you may discard all changes you've made since your last save by clicking on the Close button (X) in the top left corner of the Experience Editor (and clicking Confirm when prompted) or by selecting the Discard Changes option from the more options menu (...) in the top right column.
The former will discard changes and exit the Experience Editor. The latter method will allow you discard changes, but stay within the Experience Editor where you can make new edits.
Permanently Delete
You may permanently delete previously saved experiences from within the Experience Editor by selecting the Delete option from the more options menu (...) in the top right column and clicking Delete permanently when prompted.
Activating your new Lytics Experience
Prior to activating your Experience, ensure that the display URL is included in your URL Allowlist for Orchestrate account setting.
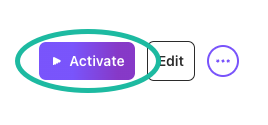
Once you have completed the steps in the Experience Editor and saved your Experience you can Activate it from the Experience summary page. You will be directed to this page once you exit the Experience Editor.
Out-of-the-Box Integration Experiences
You can import existing marketing initiatives currently managed by your channel providers, which enables you to quickly gain insights about the campaigns you’re already running. You can then take action by connecting these Experiences to your Lytics audiences.
To import an experience, click the Add Experience button in the Manage Experience page. You can select either the New or Import options in order to import experiences from our out-of-the-box integrations. Both options will direct you to the same flow.
You can monitor out-of-the-box Integration experiences and activate audiences for them within Lytics, but the management of external Experiences still happens inside your channel tools. Pausing or deleting imported Experiences in Lytics simply stops the audience syncing process. It does not pause or delete the campaign in your channel tool.
Experience Editor Steps for Out-of-the-Box Integration Experiences
Select a Provider and Tactic
Select a Provider and Tactic
From the provided list, you will choose a provider from the list of out-of-the-box integrations. Each provider has a single tactic selection associated to it.
You will need then need to configure the experience based on that selected provider. Below you will find an overview of the steps for navigating the Experience Editor for out-of-the-box integrations. For more detailed information for specific integrations, use the links below to navigate to the the integration documentation for your selected provider:
- Facebook (Tactic: Import Ad Set)
- Google Ads (Tactic: Import Ad Group)
- Iterable (Tactic: Import Campaign)
- Mailchimp (Tactic: Import Campaign or Automation)
- Mapp (Tactic: Import Campaign)
- Salesforce Marketing Cloud (Tactic: Import Journey)
- SendGrid (Tactic: Import Campaign)
- The Trade Desk (Tactic: Import Ad Group)
Choose Authorization
Choose Authorization
After selecting your provider, you will be prompted to select or create an authorization to connect the integration. Existing authorizations will be shown. If you have multiple accounts within a particular channel, you will choose which account to import from.
If you don’t have an authorization, you will be prompted to add one before continuing. To create a new authorization, click the Add new authorization button, which will take you to a modal where you can enter the appropriate credentials. For provider-specific documentation on creating authorizations, see the below documentation for your selected integration.
Import
Import
After you have selected your Authorization you will then select the campaigns you want to import into Lytics (you may select up to 10 at a time). The total number of Experiences you can bring into Lytics is only limited by the amount in your connected provider. However, to have meaningful and accurate reporting, it's recommended to only import Experiences that will add value to the use cases you are activating within Lytics.
Completed campaigns that have already "ended", will not show on the list of importable Experiences. Those that are saved as drafts, paused, or currently running, those will be available to import.
Target
Target
Once you have imported an Experience, you will activate it by adding a Lytics audience. This lets you enrich your existing campaigns with Lytics behavioral audiences, content affinities, and Delivery Optimization.
The Target step in the Experience editor allows you to configure the target audience for your Experience. Use the dropdown to select from among your pre-built audiences. Click New audience at the bottom of the dropdown menu if you need to build a new one and you will be directed to the audience builder.
Configure Integration
Configure Integration
The Configure step in the Experience Editor allows you to configure how the audience for your Experience will be exported to the third-party tool you are using. In order to successfully activate and export an Experience to your provider tool, you will need to correctly configure the Experience. See below for links to the configuration documentation for each supported integration.
Configure Delivery
Configure Delivery
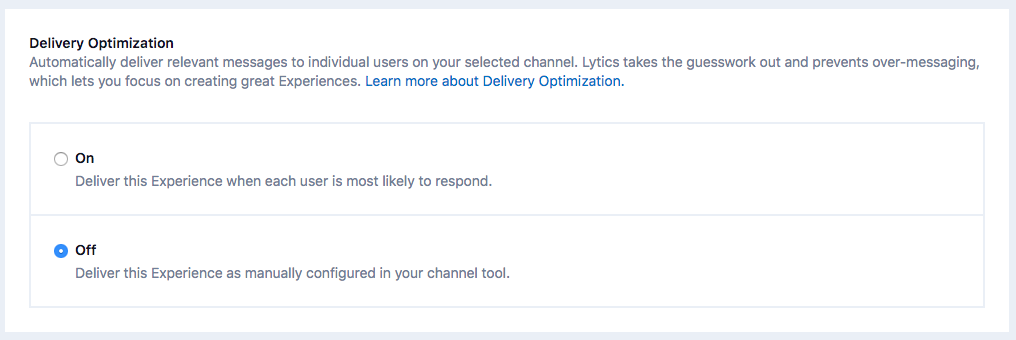
Delivery Optimization takes the guesswork out of deciding who to send what message, and when. For the third party Experience providers built-in to the Lytics Canvas, you can use this option to automatically determine when to deliver messages to individual users on those channels.
This step in the Experience editor allows you to toggle Delivery Optimization On or Off. If you do nothing, it will remain off. You can turn it on to help prevent over-messaging and let you focus on creating great Experiences, rather than manually building delivery logic rules that are complicated to manage and execute.
How does Delivery Optimization work?
Lytics uses data science to determine the optimal delivery time of an Experience for individual audience members. The delivery time is based on when an audience member last interacted with your brand via the channel of the Experience, as well as their behavior when that interaction happened. Experience decisioning also uses the Experience's performance measured by click-through rate (CTR) to estimate engagement likelihood.
The actual delivery of an Experience is always controlled by the downstream tool, where there could be additional logic necessary to deliver the Experience. Lytics Delivery Optimization simply controls when the user data is triggered to send to your third-party tool.
Consider the Experience tactic when determining if you want to turn Delivery Optimization on. For Experiences using real-time delivery such as Iterable triggered emails, Delivery Optimization can help improve user engagement by reaching each user at the ideal time.
In other circumstances such as sending a one-time blast email through SendGrid for a sale promotion, you'll likely want to leave Delivery Optimization off and simply push a list of all current users into the audience so that you can send the campaign as soon as you're ready. If Delivery Optimization was enabled, you may not see users exported to SendGrid until they "need" to receive a message (the most optimal time).
Save and Exit
Save and Exit
When you first enter the Experience editor, you will see a Save button in the top right corner which allows you to save your progress at any time.
If you have made it to the final step within the Experience Editor (Configure Delivery for out-of-the-box integrations), the Next Step button will now be a Save and Exit button. Click on this button to save and exit your Experience. If you have previously saved your Experience and made no other changes this will simply allow you to exit the Experience Editor.
After the Experience has been saved once, the button will become a Save button that is only enabled when you make further changes.
Name your Experience
If you have not yet named the Experience at the time you save, you will be prompted to do so at this time, and the Experience's tactic will be suggested as a default.
When creating a new Experience within Lytics, name it including the purpose and any categorization (e.g. Drive sales: Holiday). When working with existing Experiences from your third party tools, name the imported experiences on Lytics with the same/similar names as in the external tool.
Discard Changes
Unsaved Experiences
At any point you may discard your unsaved Experience by clicking on the Close button (X) in the top left corner of the Experience Editor and then clicking Confirm when asked "Are you sure you want to discard unsaved changes?"
You may also select the Delete option from the more options (...) menu in the top right corner of the Experience Editor and click Delete permanently when prompted.
Both methods will remove you from the Experience Editor without saving.
Previously Saved Experiences
If you have previously saved the Experience and have returned to make edits, you may discard all changes you've made since your last save by clicking on the Close button (X) in the top left corner of the Experience Editor (and clicking Confirm when prompted) or by selecting the Discard Changes option from the more options menu (...) in the top right column.
The former will discard changes and exit the Experience Editor. The latter method will allow you discard changes, but stay within the Experience Editor where you can make new edits.
Permanently Delete
You may permanently delete previously saved experiences from within the Experience Editor by selecting the Delete option from the more options menu (...) in the top right column and clicking Delete permanently when prompted.
Activating your new Out-of-the-Box Integration Experience
Once you have completed the steps in the Experience Editor and saved your Experience you can Activate it from the Experience summary page. You will be directed to this page once you exit the Experience Editor.
UTM Tracking
In addition to tracking default UTM variables when users visit your website, Lytics supports two custom UTM parameters specific to tracking clicks from out-of-the-box Integration Experiences.
When to use custom UTM parameters
You may be recommended by the Lytics Experience Insights to add UTM parameters to an Experience. The Lytics insights system will check the target URL of your eligible imported Experiences to see if it has these parameters configured and advise you on which Experiences are missing them.
For most email providers click information is collected automatically through webhooks or APIs, but for ads this is the only way of recording user attribution. Lytics highly recommends using these UTM parameters in your ad Experiences as it will not only allow you to build and target audiences of users who have converted on your ad in Lytics, but it will also inform Lytics decisioning and insights as the platform builds a better understanding of which users respond to which Experiences.
Custom UTM parameters
Use the following custom UTM parameters in any links coming from your external Experiences.
| Name | Value |
|---|---|
utm_lytics_experience | The ID of the object from the third party tool (e.g. ID of the ad set for a Facebook Experience) |
utm_lytics_source | Slug of the provider (e.g. facebook for a Facebook ad set) |
These variables allow us to link the website visit with a click from the Experience. Thus recording what users clicked on what Experience.
Using these UTMs will only work if the website linked from your ad has the Lytics JavaScript Tag installed.
Adding the parameters
The steps for adding these parameters may differ by provider, but generally speaking you can add them directly to the target URL of your Experience, for example:
https://www.lytics.com?utm_lytics_source=facebook&utm_lytics_experience=23847
Please refer to the providers that have specific docs on how to add these parameters:
User field
The UTM parameter is recognized by Lytics and mapped to the user field Converted on Experience (URL Param) which is available in the audience builder so that you can create audiences of users who have clicked on your Experiences. The key of this map field will contain the External ID) of your Experience and the value will be the number of times the user clicked on the ad set.

If you find that the number of users in an audience utilizing this field does not match the conversion count you are seeing on your Experience summary page, it is important to remember the source of these numbers is different. Usually for ad providers, metrics are aggregate numbers imported directly from the API of the ad tool. If you added the tracking URL parameter to your ad after publishing, you may see a smaller user count when utilizing the user field.
Generic Experiences
Generic Experiences allow you to export your Lytics audience to any tool you choose. Since you will not be able to monitor the performance of this Experience from Lytics, it's primary use cases are to act as a placeholder for..
- An Experience of an integration that is not built into the Lytics Goal Canvas
- An Experience of a custom implementation using webhooks or inline web personalization.
Generic Experiences allow you to produce audiences with all the nested targeting rules of a Stage within a Goal to make the audience mutually exclusive of the other Stages. As such, Generic Experiences should only be used for Experiences included in a Stage of a Goal.
Unlike out-of-the-box integration Experiences, Delivery Optimization and Experience reporting is not available for Generic Experiences, so Generic Experiences should only be used for Experiences included in a Stage of a Goal.
Experience Editor Steps for Generic Experiences
Select a Provider and Tactic
Select a Provider and Tactic
From the provided list, you will choose a Generic as the provider. Generic Experiences only support one tactic:
- Universal Experience - Create a general Experience to be used with any use case or integration supported by the Lytics platform.
Target
Target
The Target step in the Experience editor allows you to configure the target audience for your Experience. Use the dropdown to select from among your pre-built audiences. Click New audience at the bottom of the dropdown menu if you need to build a new one and you will be directed to the audience builder.
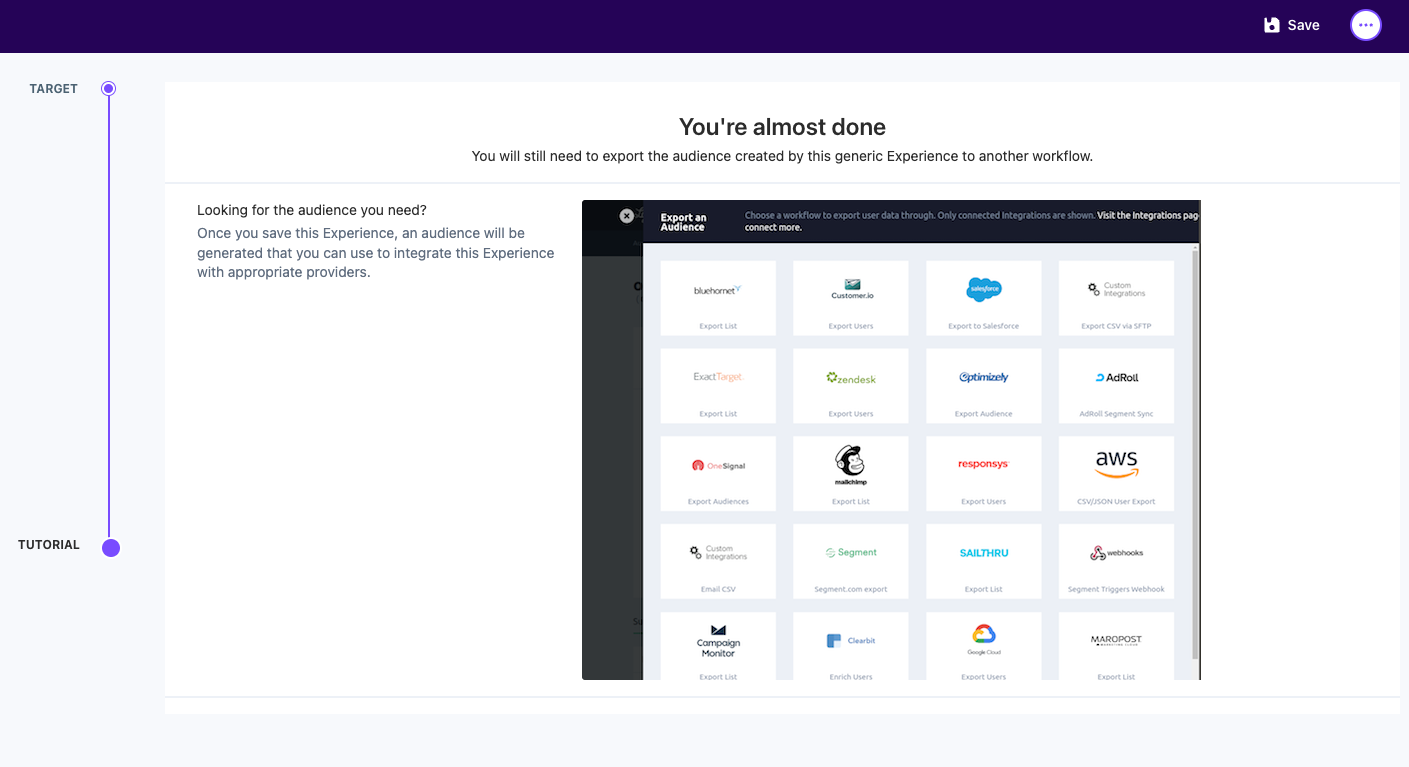
Tutorial
Tutorial
This step offers a quick overview of the additional steps you will need to take to activate your Audience for this Experience
Save and Name
Name, Save and Exit
Upon saving and naming you Experience, an audience will be generated.
If you are still within the Experience Editor the Tutorial screen will be updated to provide a link to the generated audience.
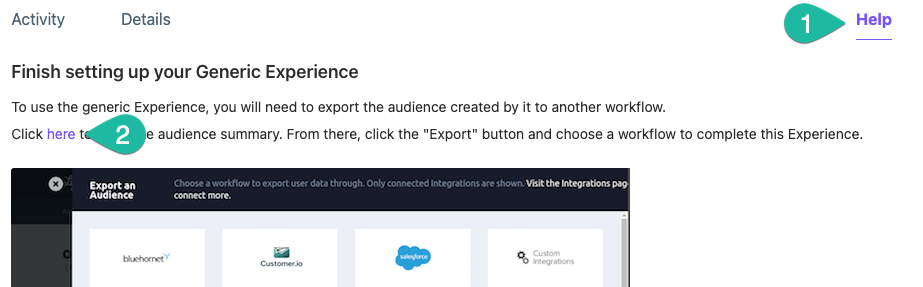
If you have exited the Experience Editor you can find this link by clicking the Help link in the Experience summary page.
Save your Experience
When you first enter the Experience editor, you will see a Save button in the top right corner which allows you to save your progress at any time.
If you have made it to the final step within the Experience Editor (Tutorial for Generic Experiences), the Next Step button will now be a Save and Exit button. Click on this button to save and exit your Experience. If you have previously saved your Experience and made no other changes this will simply allow you to exit the Experience Editor.
After the Experience has been saved once, the button will become a Save button that is only enabled when you make further changes.
Name your Experience
If you have not yet named the Experience at the time you save, you will be prompted to do so at this time, and the Experience's tactic will be suggested as a default.
When creating a new Experience within Lytics, name it including the purpose and any categorization (e.g. Drive sales: Holiday). When working with existing Experiences from your third party tools, name the imported experiences on Lytics with the same/similar names as in the external tool.
Discard Changes
Unsaved Experiences
At any point you may discard your unsaved Experience by clicking on the Close button (X) in the top left corner of the Experience Editor and then clicking Confirm when asked "Are you sure you want to discard unsaved changes?"
You may also select the Delete option from the more options (...) menu in the top right corner of the Experience Editor and click Delete permanently when prompted.
Both methods will remove you from the Experience Editor without saving.
Previously Saved Experiences
If you have previously saved the Experience and have returned to make edits, you may discard all changes you've made since your last save by clicking on the Close button (X) in the top left corner of the Experience Editor (and clicking Confirm when prompted) or by selecting the Discard Changes option from the more options menu (...) in the top right column.
The former will discard changes and exit the Experience Editor. The latter method will allow you discard changes, but stay within the Experience Editor where you can make new edits.
Permanently Delete
You may permanently delete previously saved experiences from within the Experience Editor by selecting the Delete option from the more options menu (...) in the top right column and clicking Delete permanently when prompted.
Activating your new Generic Experience
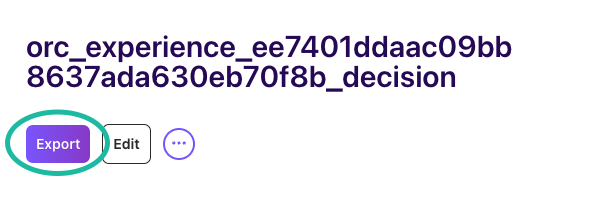
Once you have completed the steps in the Experience Editor and saved your Experience you will need to navigate to the created audience and export it to the integration of your choice.
Navigate to the created audience in the Experience summary page by clicking on Help and then the link found within the Finish setting up your Generic Experience section.
Export the audience from the Audience summary page.
Experience Reporting
Experience Performance Reporting
On the Experience summary page, you will find Experience performance reporting. This reporting contains three metrics for the campaigns you’ve created or imported into Lytics. Use these metrics to establish a baseline of your campaign performance and measure growth over time.
| Name | Description | Updated |
|---|---|---|
| Reached | Number of unique users who have been reached by the Experience: unique impressions for ads, or unique opens for emails. | Every 2 hours |
| Clicks | Number of unique users who have clicked the Experience. | Every 2 hours |
| Click Rate | Percentage equal to (number of unique users who have clicked on the Experience / number of unique users who have been reached by Experience. | Every 2 hours |
Reached and Clicks are point-in-time counts, not cumulativeThe Reached and Clicks metrics reflect the current number of unique users who presently qualify (those that still have the impression or click recorded), recomputed on each entity scan — much like segment sizes. They are not an ever-increasing lifetime total, so the count can legitimately go down as profiles leave the active population, for example through:
- anonymous or inactive profiles being aged out,
- profile deletes (API, GDPR, or
_deleted),- identity merges collapsing two profiles into one,
- per-field retention or capacity on the impression map, or
- reindex / generation changes.
None of these are data errors — they reflect normal CDP profile lifecycle.
Experience Intelligence Report
In addition to the Experience Performance Reporting, the Experience Intelligence Report gives you additional information about your Experiences. It adds the following modules to your Experience summary page (as well as in the Goal Intelligence Report for Experiences within Goals):
- Experience Insights
- Goal Attribution (for Experiences used within Goals)
- Content Recommendations
- Data Science Performance Simulation
Experience Insights
The Insights module displays how many Insights have been generated for your account in the last week. Lytics Experience Insights are the combination of a fact and an action. The fact is a metric about your audience or campaign data, and the action is a recommendation on how to improve engagement and conversions.
Leverage Insights while evaluating and planning your campaigns to make data-driven iterations and achieve your goals more efficiently.
| Name | Description | Updated |
|---|---|---|
| Insights | Insights combine a metric and a recommended action to improve customer engagement. | Weekly |
See Insights Introduction to learn more.
Goal Attribution
The Goal Attribution module displays metrics around how conversions on your Experience relate to conversions on your Goal. The percentage compares the total number of people reached by the Experience and those who converted. For Facebook Ads with UTM parameters included, Lytics will capture conversion data at the user level.
Use this metric to determine which campaigns to invest more or less in based on how they contribute toward your larger marketing Goal.
| Name | Description | Updated |
|---|---|---|
| Attribution Rate | Percentage equal to (attributed conversions for an Experience / number of users that engaged with the Experience). | Weekly |
| Attribution Graph | Number of users who have converted on both your Experience and your Goal in the past week. | Weekly |
Content Recommendation
The Content Recommendation module surfaces content that is likely to resonate with your users based on their past behavior. Lytics analyzes and classifies the content on your website through the Lytics JavaScript Tag. The relevancy percentage is calculated by determining the total number of users with various content affinities and comparing this to the total number of users within the audience that visited your site.
Create and deliver more content that aligns with your users’ interests to drive engagement and conversions.
| Name | Description | Updated |
|---|---|---|
| Topic Relevance | Percentage of the audience that has an affinity for this topic. | Weekly |
| Content Recommendations | Suggestions for content to serve to users in the target audience for your Experience. | Weekly |
See Content Affinity Introduction and Content Recommendation to learn more.
Data Science Performance Simulation
The Data Science Performance Simulator module displays “simulated” conversion rate metrics that compare how your campaign audience performed against Lytics out-of-the-box, behavioral audiences. This gives a risk-free preview of how effective your campaigns could be when leveraging behavioral scores and custom models powered by Lytics data science.
You can activate Lytics data science audiences and custom models in your campaigns by upgrading from the free trial.
| Name | Description | Updated |
|---|---|---|
| Conversion Rate | Percentage equal to (number of users who have clicked on the Experience / number of all users who have ever been eligible to receive the Experience). This is equivalent to the click rate from the Experience Performance module. | Every 2 hours |
| Simulated Conversion Rate with Behavioral Scoring | Percentage equal to (number of users who have clicked on the Experience who are also in the Highly Engaged Lytics segment / number of users who have been reached by the Experience who are also in the Highly Engaged Lytics segment). | Every 2 hours |
| Simulated Conversion Rate with SegmentML | Percentage equal to (number of users who have clicked on the Experience who are also in the threshold Segment for the SegmentML model of the parent stage / number of users who have been reached by the Experience who are also in the threshold Segment for the SegmentML model of the parent stage). | Every 2 hours |
See Data Science Introduction to learn more.