

Microsoft
Overview
Microsoft Advertising is a powerful ad management tool that is designed for advertisers of any experience level.
Connect Microsoft Advertising with Lytics to access predictive user audiences in your Microsoft Advertising account. You can use your rich, behavioral-driven audiences as the target for your ads, or build lookalikes off of these audiences to reach more users who are likely to engage with your brand.
Authorization
If you haven't already done so, you will need to set up a Microsoft Advertising account before you begin the process described below.
- Select Microsoft from the list of providers.
- Select the method for authorization. You may authorize in one of two ways:
OAuth 2.0
Before you begin Make sure you've accepted the Customer Match terms within the Microsoft Advertising UI. If you need help finding the terms, the Microsoft Advertising account team can help. When creating the authorization in Lytics, you need to have the “Super Admin” permission level within Microsoft Advertising. To check user permissions, go to the toolbar within the Microsoft Advertising UI and then Tool > Account Access.
If you are new to creating authorizations in Lytics, see the Authorizations Dashboard documentation for more information.
- Enter your Microsoft login credentials in the login popup and accept the prompt to let Lytics have access to write to your Microsoft Advertising account.
- After accepting the terms, you will be redirected back to Lytics.
- In the Label text box, enter a name for the authorization.
- (optional) In the Description text box, enter a description for this authorization
- Click Save Authorization.
UET CAPI Token
You would need a conversion token in order to add this authorization. Refer to Microsoft's documentation on how to get conversion token.
- Select the Microsoft UET CAPI Token method for authorization
- In the Label text box, enter a name for the authorization
- (Optional) In the Description text box, enter a description for this authorization
- In the Token text box, enter your conversion token.
Export Audience
Sync your Lytics audiences with Microsoft Advertising customer match lists to target those users in the Microsoft Advertising platform.
Integration Details
- Implementation Type: Server-side Integration.
- Implementation Technique: SOAP API Integration, File Based Transfer Integration
- Frequency: Batch Integration hourly.
- Resulting data: A Microsoft Advertising customer match list populated with users from the Lytics audience selected.
This integration utilizes the Bing Ads API to send user data. Once the export is started the job will:
- Request a Bulk Upload URL from Microsoft in the selected Customer Account.
- Build up a CSV of emails, hashing non-hashed emails with SHA256 encryption, and after 8 minutes, uploading the file to the supplied bulk upload URL.
- Check the status of the upload via the Bulk Upload Status and report any errors.
- The first upload will create a new customer match list in Microsoft Advertising with the configured List Name along with a system generated description containing the Lytics audience name and the job ID.
- Sleep for the rest of the hour before sending another batch of emails.
Fields
Lytics exports the following required field to Microsoft.
| Lytics User Field | Description | Microsoft Field | Type |
|---|---|---|---|
| Email Address | string |
Configuration
Follow these steps to set up and configure an export job for Microsoft in the Lytics platform. If you are new to creating jobs in Lytics, see the Destinations documentation for more information.
Before you begin Make sure you've accepted the Customer Match terms within the Microsoft Advertising UI. If you need help finding the terms, the Microsoft Advertising account team can help. When creating the authorization in Lytics, you need to have the “Super Admin” permission level within Microsoft Advertising. To check user permissions, go to the toolbar within the Microsoft Advertising UI and then Tool > Account Access.
- Select Microsoft from the list of providers.
- Select Export Audience from the list of destinations
- Select the Authorization you would like to use or create a new one.
- Enter a Label to identify the job you are creating in Lytics.
- (Optional) Enter a Description for further context on your job.
- Select the Audience to export.
- From the Microsoft Account ID input, select the Ad Account where the Customer List will be created. The list will also be associated with the Manager Account of the selected Ad Account.
- In the List Name text box, enter a name for the Customer List in Microsoft.
- From the Email Field input, select the field that contains email address. If the email address in not SHA256 hashed, the email address will be hashed before sending to Microsoft.
- (optional) Membership Duration enter the membership duration in days for the users in the list. Enter -1 for no expiration.
- (optional) Select the Scope of the Microsoft audience. If you select Customer, the audience will be available across all accounts. If you select Account, the audience will not be available for association with campaigns and ad groups that are not in that account
- Click the Complete button to start the job.
UET Conversions Export
Send Lytics audience events to the Microsoft Advertising Conversions API to enhance ad campaign performance and conversion tracking.
Integration Details
- Implementation Type: Server-side Integration.
- Implementation Technique: API Integration - Audience Trigger Integration.
- Frequency: Batch Integration
- Resulting data: Microsoft server events populated with Lytics user fields value for the users from the selected Lytics Audiences.
This integration uses the Microsoft's UET Conversion API to send the Lytics audiences events. Once the job is started, it will:
- Scan the Lytics audiences.
- Adds event information, user's data parameters and the custom data parameter. It then sends the payload to Microsoft CAPI endpoint.
- The export will run continuously. As users enter or exit the Lytics audience, they will be added to a batch. The batch will be sent to Microsoft every five seconds or until the batch reaches 1,000 users, whichever happens first.
Fields
The integration sends Lytics user fields to Microsoft's Conversion API. An example payload:
{
    "continueOnValidationError": true,
    "data": [
        {
            "adStorageConsent": "G",
            "customData": {
                "lytics_field1": "Value1",
                "lytics_field2": "Value2"
            },
            "eventId": "0473bcd3-b7d1-56c0-9049-9289d5599b95",
            "eventName": "sample_event",
            "eventTime": 1765236624,
            "eventType": "custom",
            "userData": {
                "em": "dbd8928a943dbd80caca9e33c6ff8adb8a6a32511626114d47b9048b7496fe12",
                "externalId": "0473bcd3-b7d1-56c0-9049-9289d5599b95"
            }
        }
    ]
}
Configuration
Follow these steps to set up and configure an export job for Microsoft CAPI in the Lytics platform. If you are new to creating jobs in Lytics, see the Destinations documentation for more information.
-
Select Microsoft from providers.
-
Choose the UET Conversions Export job type.
-
Select the Authorization you would like to use or create a new one.
-
Enter a Label to identify this job you are creating in Lytics.
-
(Optional) Enter a Description for further context on your job.
-
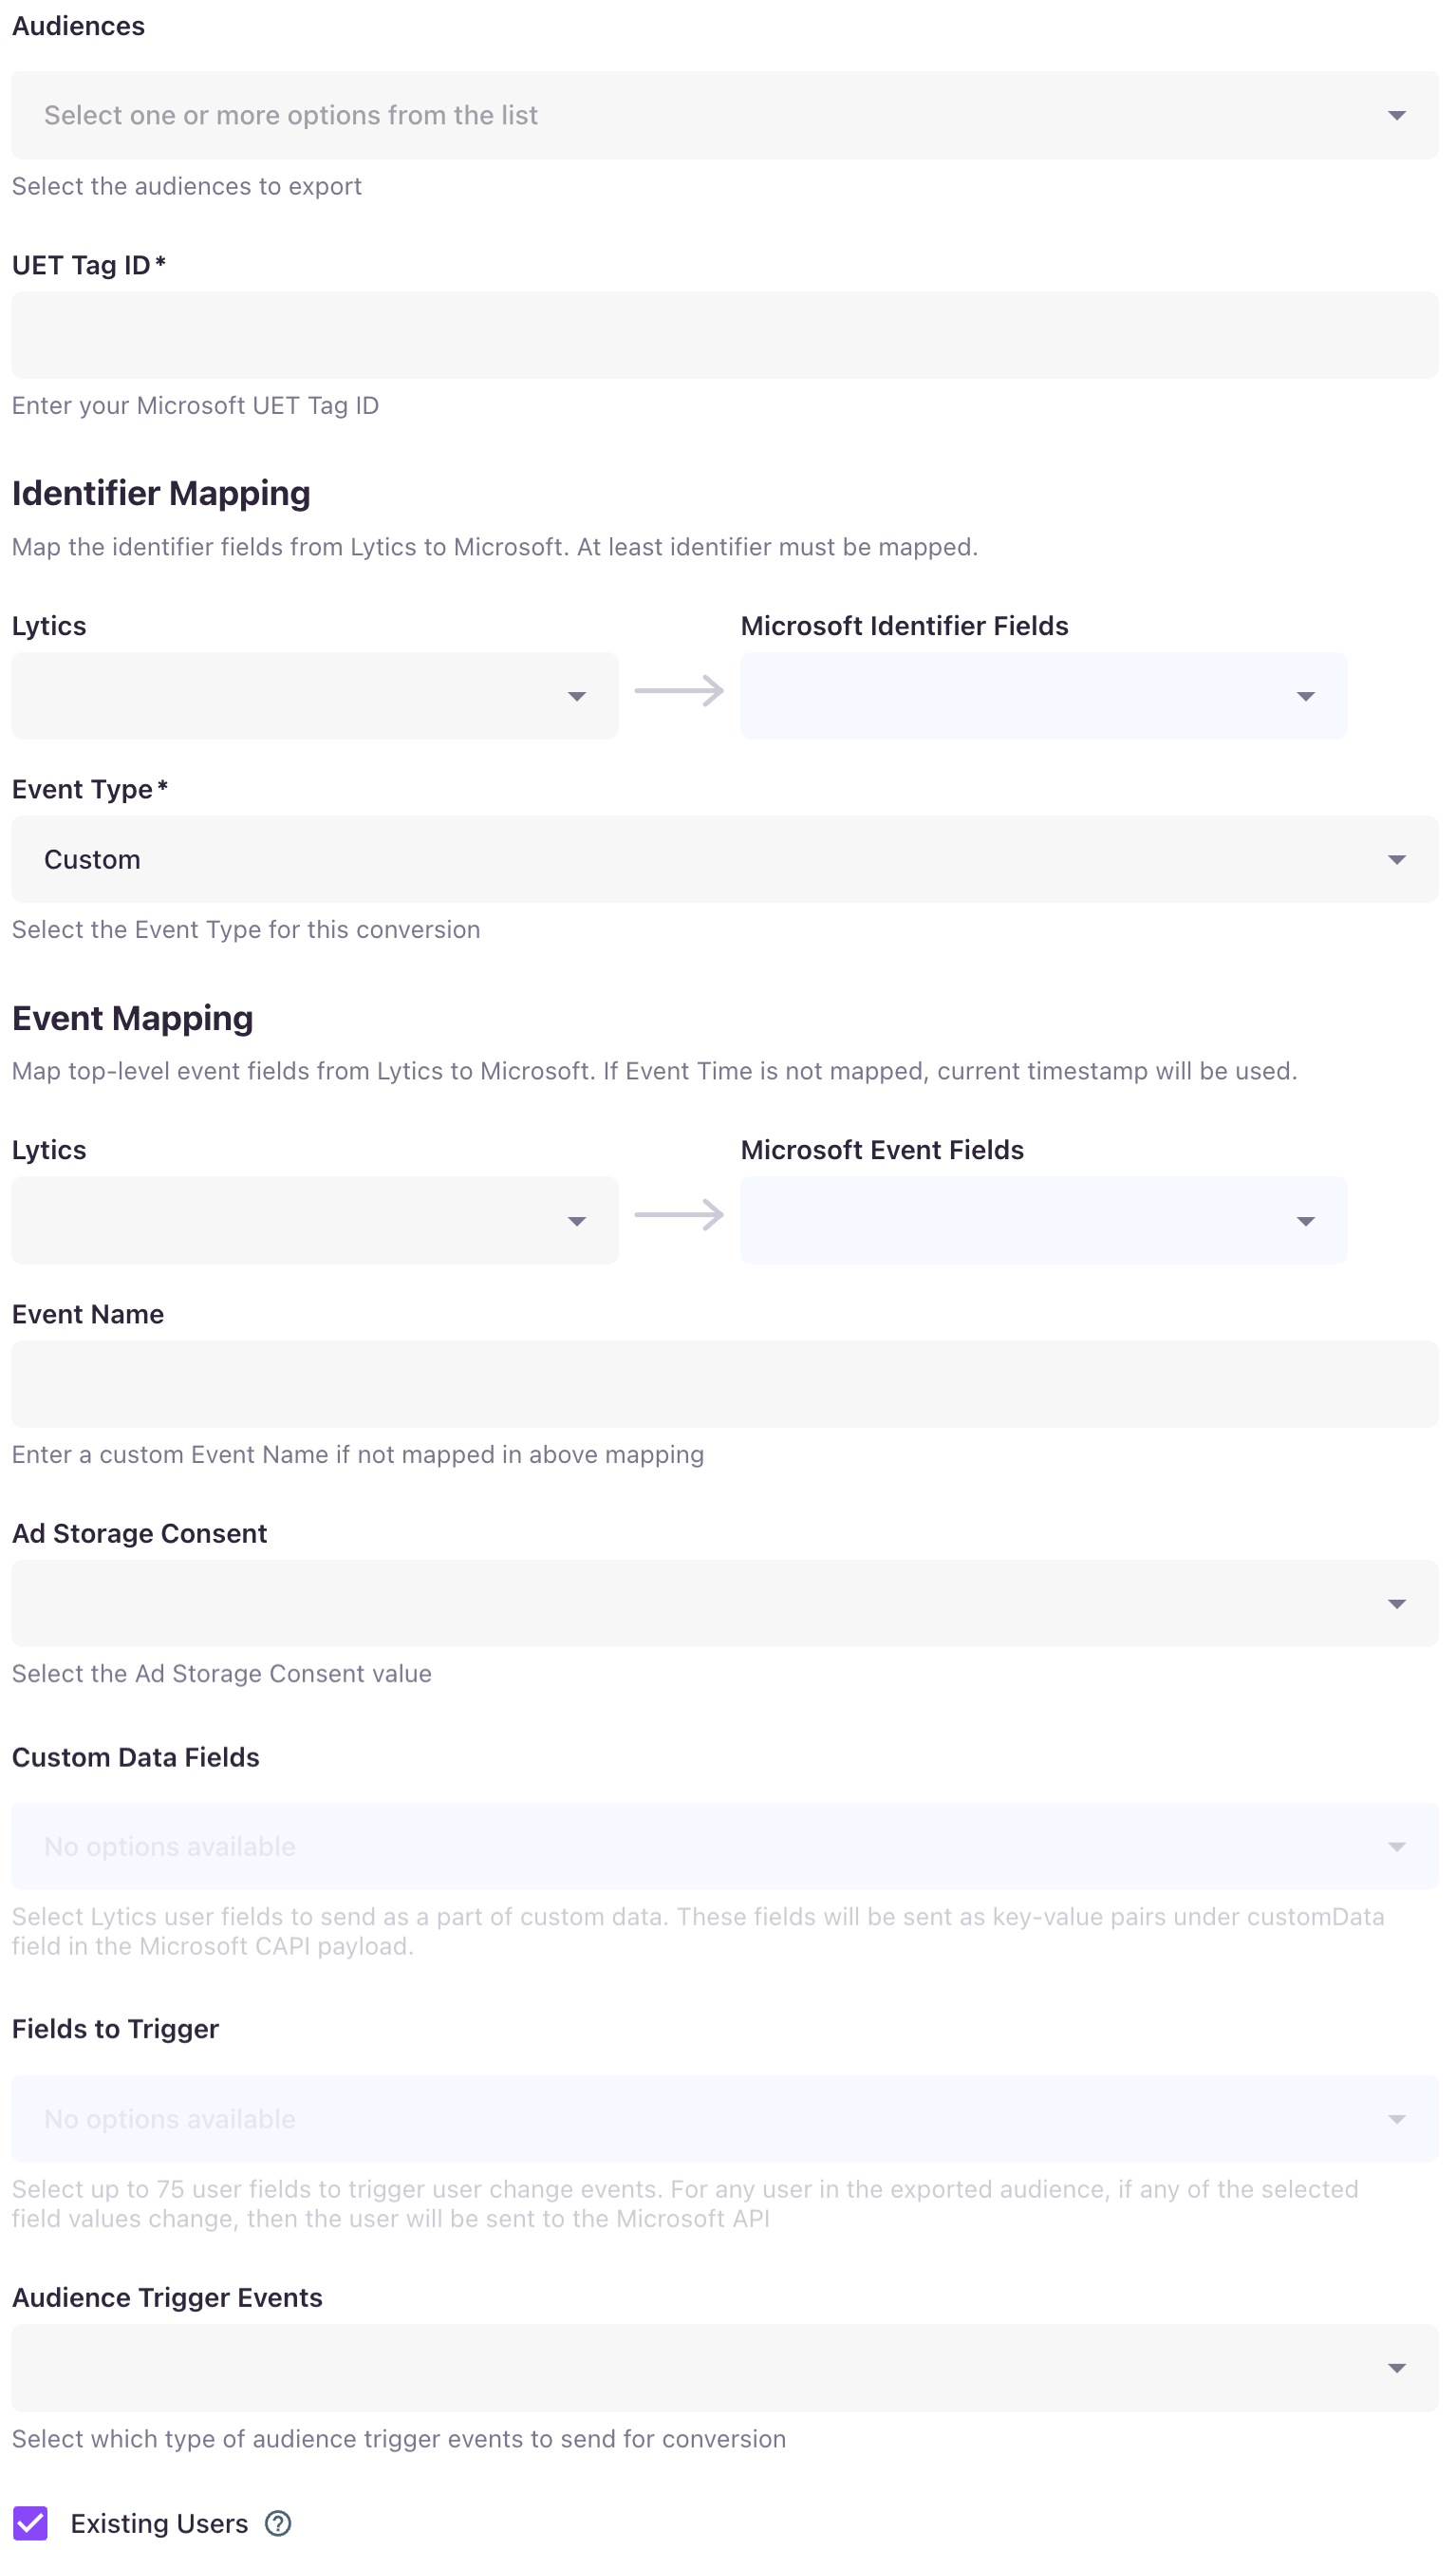
Select the target Audiences to export.
-
Enter your UET Tag ID.
-
From the Identifier Mapping map all the Identifier fields from Lytics to Microsoft by selecting the Lytics field on the left, and its Pinterest destination on the right. At least one identifier must be mapped. Lytics automatically applies hashing when required by Microsoft specifications.
-
Select an Event Type (
Page Load or Custom). Defaults toCustom. -
(Optional) From the Event Mapping map Lytics user fields to Microsoft event fields (Event Time, Event Name, Event ID and more). If Event Time is not mapped, the current timestamp will be used.
-
(Optional) In the custom Event Name text nox, enter the event name if not mapped using a Lytics field in above Event Mapping.
-
(Optional), Select Ad Storage Consent (Granted or Denied).
-
(Optional) Using the Custom Data Fields input, select any additional Lytics userfields to send to Microsoft as custom data parameters
-
(Optional) Using the Fields to Trigger input, select up to 75 user fields to trigger user change events. For any user in the exported audience, if any of the selected field values change, then the user will be sent to the Microsoft conversion api.
-
(Optional) From Audience Trigger Events, select which type of audience trigger events to send to Microsoft conversion api.
-
(Optional) Select the Existing Users checkbox to send the users who already exist in the selected Lytics audiences
-
Click Start Export.
Updated 7 months ago