

Google Cloud Pub/Sub
Overview
Google Cloud Pub/Sub is a fully-managed messaging service that lets you send and receive messages in real-time between independent applications.
This integration supports both importing and exporting data using Cloud Pub/Sub in real-time.
Importing data results in a continuous update of new users or existing user profiles supplemented with activity data. This differs from other import integrations that usually only import once every hour or every day. You can then use this data to build and refine your existing Lytics audiences to power better, cross-channel campaigns.
Exporting data results in a continuous update of new and existing user profiles on a Pub/Sub Topic of your choice.
Authorization
If you haven't already done so, you will need to set up a Google Cloud Pub/Sub account before you begin the process below. You will use a service account to access your Cloud Pub/Sub data. See Google's authentication documentation for details on the differences between user accounts and service accounts.
To authorize this integration, you will need to authenticate by creating a service account JWT JSON token.
Configure service account
You will need a service account credential file to use this authorization type. If you do not have one, follow the instructions in Google's documentation to create one. You will need to give Lytics one of the following roles depending on how you want to configure your workflow:
Pub/Sub Adminlevel permissions allows Lytics to create and receive new subscriptions without any problems.Pub/Sub Editorlevel permissions will also work.
For importing into Lytics, the following IAM roles need to be added to the service account:
pubsub.topics.listpubsub.topics.getpubsub.subscriptions.getpubsub.subscriptions.consumepubsub.topics.attachSubscriptionpubsub.subscriptions.create(Optional, but you must provide an existing subscription if your role does not have this action.)
For exporting events to PubSub, you will need the following IAM roles added to the service account:
pubsub.topics.listpubsub.topics.getpubsub.topics.publishpubsub.topics.create(Optional, but you must provide an existing topic if your role does not have this action.)
Authorize integration
If you are new to creating authorizations in Lytics, see the Authorizations documentation for more information.
- Select Google Cloud from the list of providers.
- Select the Cloud Pub/Sub Service Account JWT method.
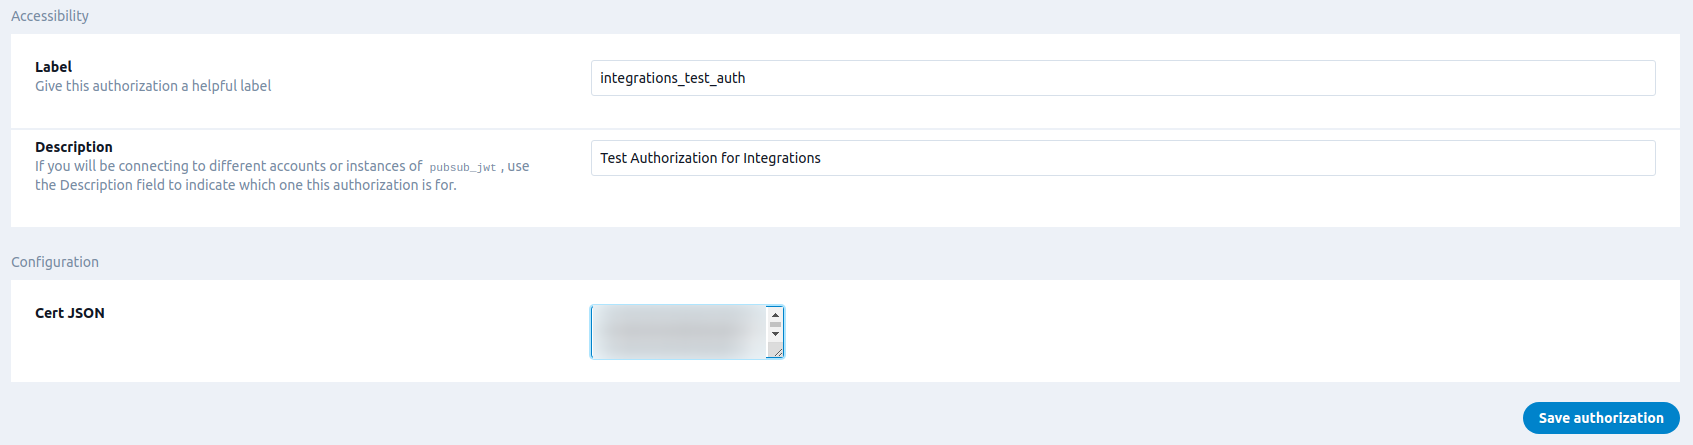
- Enter a Label to identify your authorization.
- (Optional) Enter a Description for further context on your authorization.
- In the Cert JSON textbox, copy the contents of your service account's credential file.
- Click Save Authorization.

Import Events
Importing user and activity data from Cloud Pub/Sub in real-time results in new users or existing user profiles supplemented with activity data. You can use this data to build and refine your existing Lytics audiences to power better, cross-channel campaigns.
The integration is similar to AWS Kinesis Streaming or Azure Event Hubs. It requires you to set up a Cloud Pub/Sub Topic, which you publish JSON messages to. Lytics then listens (subscribes) to this Topic and receives those messages.
Integration Details
- Implementation Type: Server-side Integration.
- Implementation Technique: REST API Integration
- Frequency: Real-time Integration
- Resulting data: Raw Event Data, User Fields, and Content (if mapped).
This integration utilizes the Cloud Pub/Sub API methods of receiving events from a publisher. Specifically we use the Golang library. You are the publisher who sends (publishes) events through a user-created object known as a Topic. Lytics manages an object called a Subscription, which receives the data (events) from the Topic you created. The continuously running job works like this:
- Through the service account token you created in the authorization step, Lytics creates a new client, which manages and receives events using the subscription.
- Lytics verifies the Topic ID you provide in the job configuration, and creates a connection to the Subscription associated with this Topic. If no Subscription exists or is provided, Lytics creates a new Subscription in the following format:
lytics\_subscription\_RANDOM_WORKFLOW_ID. - The Topic is the "publisher", whereas the Subscription is the "receiver". This means you must publish/send data to this Topic from your account, which Lytics will then receive and process.
- The job will continue to get events in real-time as soon as events are published on the Topic.
- The events are sent to a user-selected stream which then gets added to user profiles or creates new user profiles.
Fields
Data imported by this job will be sent to a new or existing data stream in your account which you can define as part of the configuration. You will need to map the raw event data into user or content fields. You may reach out to Lytics Support for assistance with mapping your custom data.
Configuration
Follow these steps to set up and configure an import of events from Google Cloud Pub/Sub into Lytics. If you are new to creating jobs in Lytics, see the Data Sources documentation for more information.
- Select Google CLoud from the list of providers.
- Select the Import Data (Cloud Pub/Sub) job type from the list.
- Select the Authorization you would like to use or create a new one.
- Enter a Label to identify this job you are creating in Lytics.
- (Optional) Enter a Description for further context on your job.
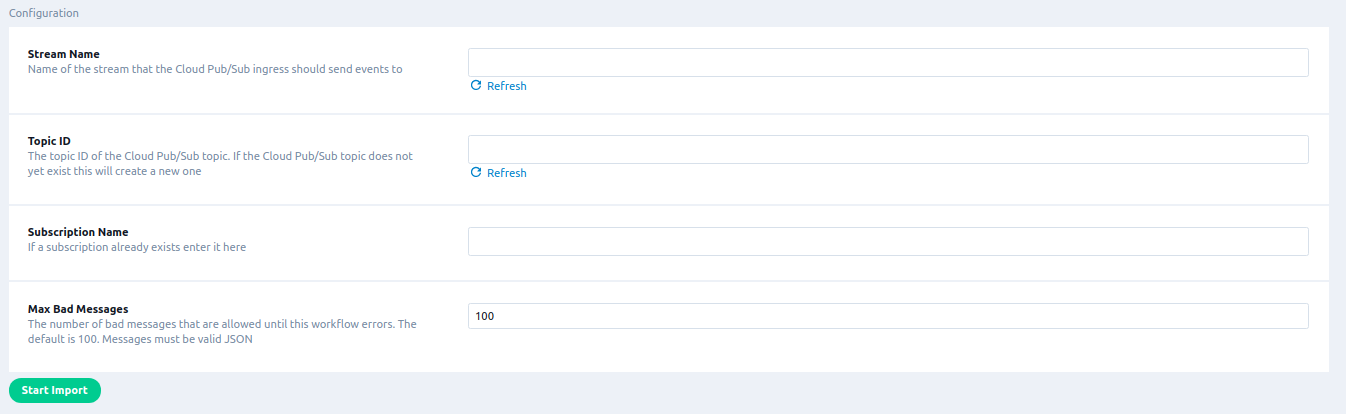
- In the Stream text box, either select or type in the stream you would like to send these events to.
- Enter the Topic ID you would like Lytics to receive events from.
- (Optional) Enter an existing Subscription Name that you would like to receive events on or leave it blank and Lytics will create a new one named
lytics_subscription_RANDOM_ID. - By default, after 100 bad messages (usually because they are not JSON), the job will error. If you would like to change the maximum number of bad messages before the job errors, enter a number under Max Bad Messages.
- Click Start Import.

Export Audience
Exporting user data to Cloud Pub/Sub allows you to receive real-time audience updates from Lytics on a Pub/Sub Topic in your Google Cloud account.
The integration is similar to Webhooks Audience Triggers. You can either create a topic for Lytics to push to, or the integration can be configured to create one automatically.
Integration Details
- Implementation Type: Server-side Integration.
- Implementation Technique: REST API Integration - Audience Trigger Integration.
- Frequency: Real-time Integration
- Resulting data: Messages on a Pub/Sub Topic. The data attribute of the Pub/Sub messages will be formatted as shown below.
Once configured, the export job will run as follows:
- Confirm the configured Topic ID exists. If it does not and you have selected Create Topic, the job will attempt to create one under the Topic ID configured.
- Listen for Audience changes.
- When a user enters or exits the audience, the event is packaged into a Pub/Sub Message and published to the Topic.
Fields
By default, the integration will populate the data attribute of its Pub/Sub messages with all user fields in a JSON payload of the following format:
{
    "id": "7076027172059065053",
    "data": {
        "_created": "2020-07-15T08:55:43.041-07:00",
        "_cust_sz": 118,
        "_internal_sz": 33,
        "_modified": "2020-07-15T08:55:43.041-07:00",
        "_num_aliases": 1,
        "_num_conflicts": 0,
        "_num_days": 1,
        "_num_events": 1,
        "_num_streams": 1,
        "_split": 12,
        "_streamnames": [
            "default"
        ],
        "_total_sz": 151,
        "channels": [
            "web"
        ],
        "email": "[email protected]",
        "first_name": "Beth",
        "firstvisit_ts": "2020-07-15T08:55:43.041-07:00",
        "hourly": {
            "15": 1
        },
        "hourofweek": {
            "87": 1
        },
        "is_bot": "f",
        "is_mobile": "t",
        "last_active_ts": "2020-07-15T08:55:43.041-07:00",
        "last_channel_activities": {
            "web": "2020-07-15T08:55:43.041-07:00"
        },
        "last_name": "Izzi",
        "lastvisit_ts": "2020-07-15T08:55:43.041-07:00",
        "name": "Beth Izzi",
        "score_frequency": 99,
        "score_intensity": 0,
        "score_momentum": 99,
        "score_propensity": 0,
        "score_quantity": 100,
        "score_recency": 100,
        "segment_events": [
            {
                "id": "42976a269a5e6b9d06c681b1c27292df",
                "event": "enter",
                "slug": "emailzz5",
                "enter": "2020-10-14T13:27:33.916374949-07:00"
            }
        ],
        "user_agent": "python-requests",
        "user_attributes": {
            "value": "681"
        }
    },
    "meta": {
        "object": "user",
        "subscription_id": "36e243f8fd8f4530bbd330fa7fb1a685",
        "timestamp": "2020-10-14T13:27:34.038154562-07:00"
    }
}
Configuration
Follow these steps to set up and configure an export job for Google Cloud Pub/Sub in Lytics. If you are new to creating jobs in Lytics, see the Destinations documentation for more information.
- Select Google Cloud from the list of providers.
- Select the Pub/Sub: Audience Export job type from the list.
- Select the Authorization you would like to use or create a new one.
- Enter a Label to identify this job you are creating in Lytics.
- (Optional) Enter a Description for further context on your job.
- From the Audiences input, select which Lytics Audience(s) to emit events from. Each enter/exit event from the selected audiences will be sent to the Pub/Sub topic.
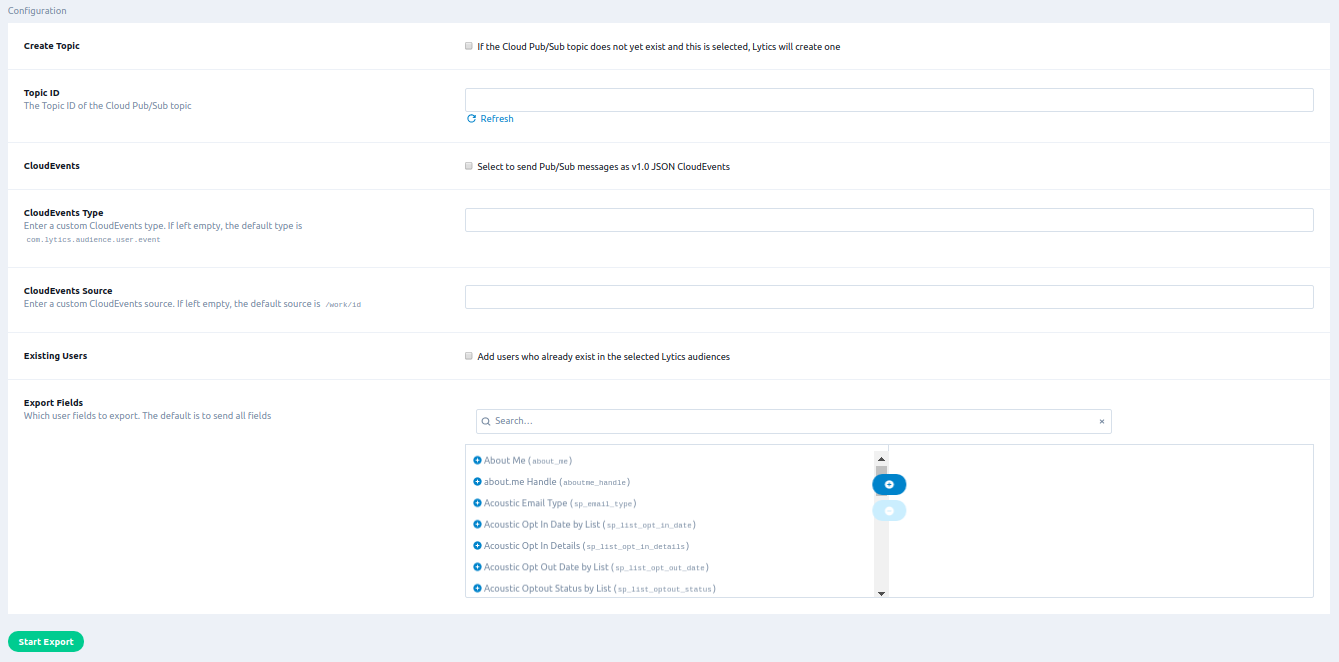
- From the Create Topic checkbox, select whether you would like Lytics to automatically create the Topic. If the Cloud Pub/Sub topic does not yet exist and this is selected, Lytics will create one under the configured Topic ID.
- From the Topic ID text input, enter the Topic ID of the Cloud Pub/Sub topic.
- From the CloudEvents checkbox, select to send Pub/Sub messages as v1.0 JSON CloudEvents.
- From the CloudEvents Type text input, enter a custom CloudEvents type. If left empty, the default type is
com.lytics.audience.user.event. This is only relevant if you have selected CloudEvents. - From the CloudEvents Source text input, enter a custom CloudEvents source. If left empty, the default source is
/work/id. This is only relevant if you have selected CloudEvents. - From the Existing Users checkbox, select whether to add users who already exist in the selected Lytics audiences.
- From the Export Fields input, select which user fields to export. The default is to send all fields.
- Click Start Export.

Export Stream
Export event data from any Lytics data stream to Google PubSub topic. NOTE: Unlike user fields, events are not represented within the Lytics dashboard. Events are the raw data received from integrations as seen in your Data Streams.
Integration Details
- Implementation Type: Server-side Integration.
- Implementation Technique: REST API Integration - Audience Trigger Integration.
- Frequency: Real-time Integration
- Resulting data: Messages on a Pub/Sub Topic. The data attribute of the Pub/Sub messages will be formatted as shown below in fields section below.
Once configured, the export job will run as follows:
- Confirm the configured Topic ID exists. If it does not and you have selected Create Topic, the job will attempt to create one under the Topic ID if configured otherwise topic id will be
lytics_stream_export_{timestamp}. - Listen for any new events coming to the data stream and publishes it to the topic.
NOTE: This job will only export new event coming into the data stream. Existing events will not be exported.
Fields
All fields in the selected stream will be included in the exported table. To see a list of fields in a stream, select the stream name from Data > Data Streams in the Lytics platform. The integration will populate the data attribute of its Pub/Sub messages with all user fields in a JSON payload of the following format:
{
    "data":
    {
        "email": "[email protected]",
        "is_mobile_user": "t",
        "name": "hello world",
        "stream_field1": "value1",
        "stream_field2": "value2"
    },
    "id": "6749754462890942159",
    "meta":
    {
        "object": "event",
        "subscription_id": "test-stream-name",
        "timestamp": "2023-10-06T00:11:23.460613927Z"
    }
}
{
"data":
{
"email": "[email protected]",
"is_mobile_user": "t",
"name": "hello world",
"stream_field1": "value1",
"stream_field2": "value2"
},
"datacontenttype": "application/json",
"id": "5913263539681476769",
"source": "/work/{workid}",
"specversion": "1.0",
"type": "com.lytics.stream.event"
}Configuration
Follow these steps to set up and configure an event export job for Google Cloud Pub/Sub in Lytics. If you are new to creating jobs in Lytics, see the Destinations documentation for more information.
- Select Google Cloud from the list of providers.
- Select the Pub/Sub: Stream Export job type from the list.
- Select the Authorization you would like to use or create a new one.
- Enter a Label to identify this job you are creating in Lytics.
- (Optional) Enter a Description for further context on your job.
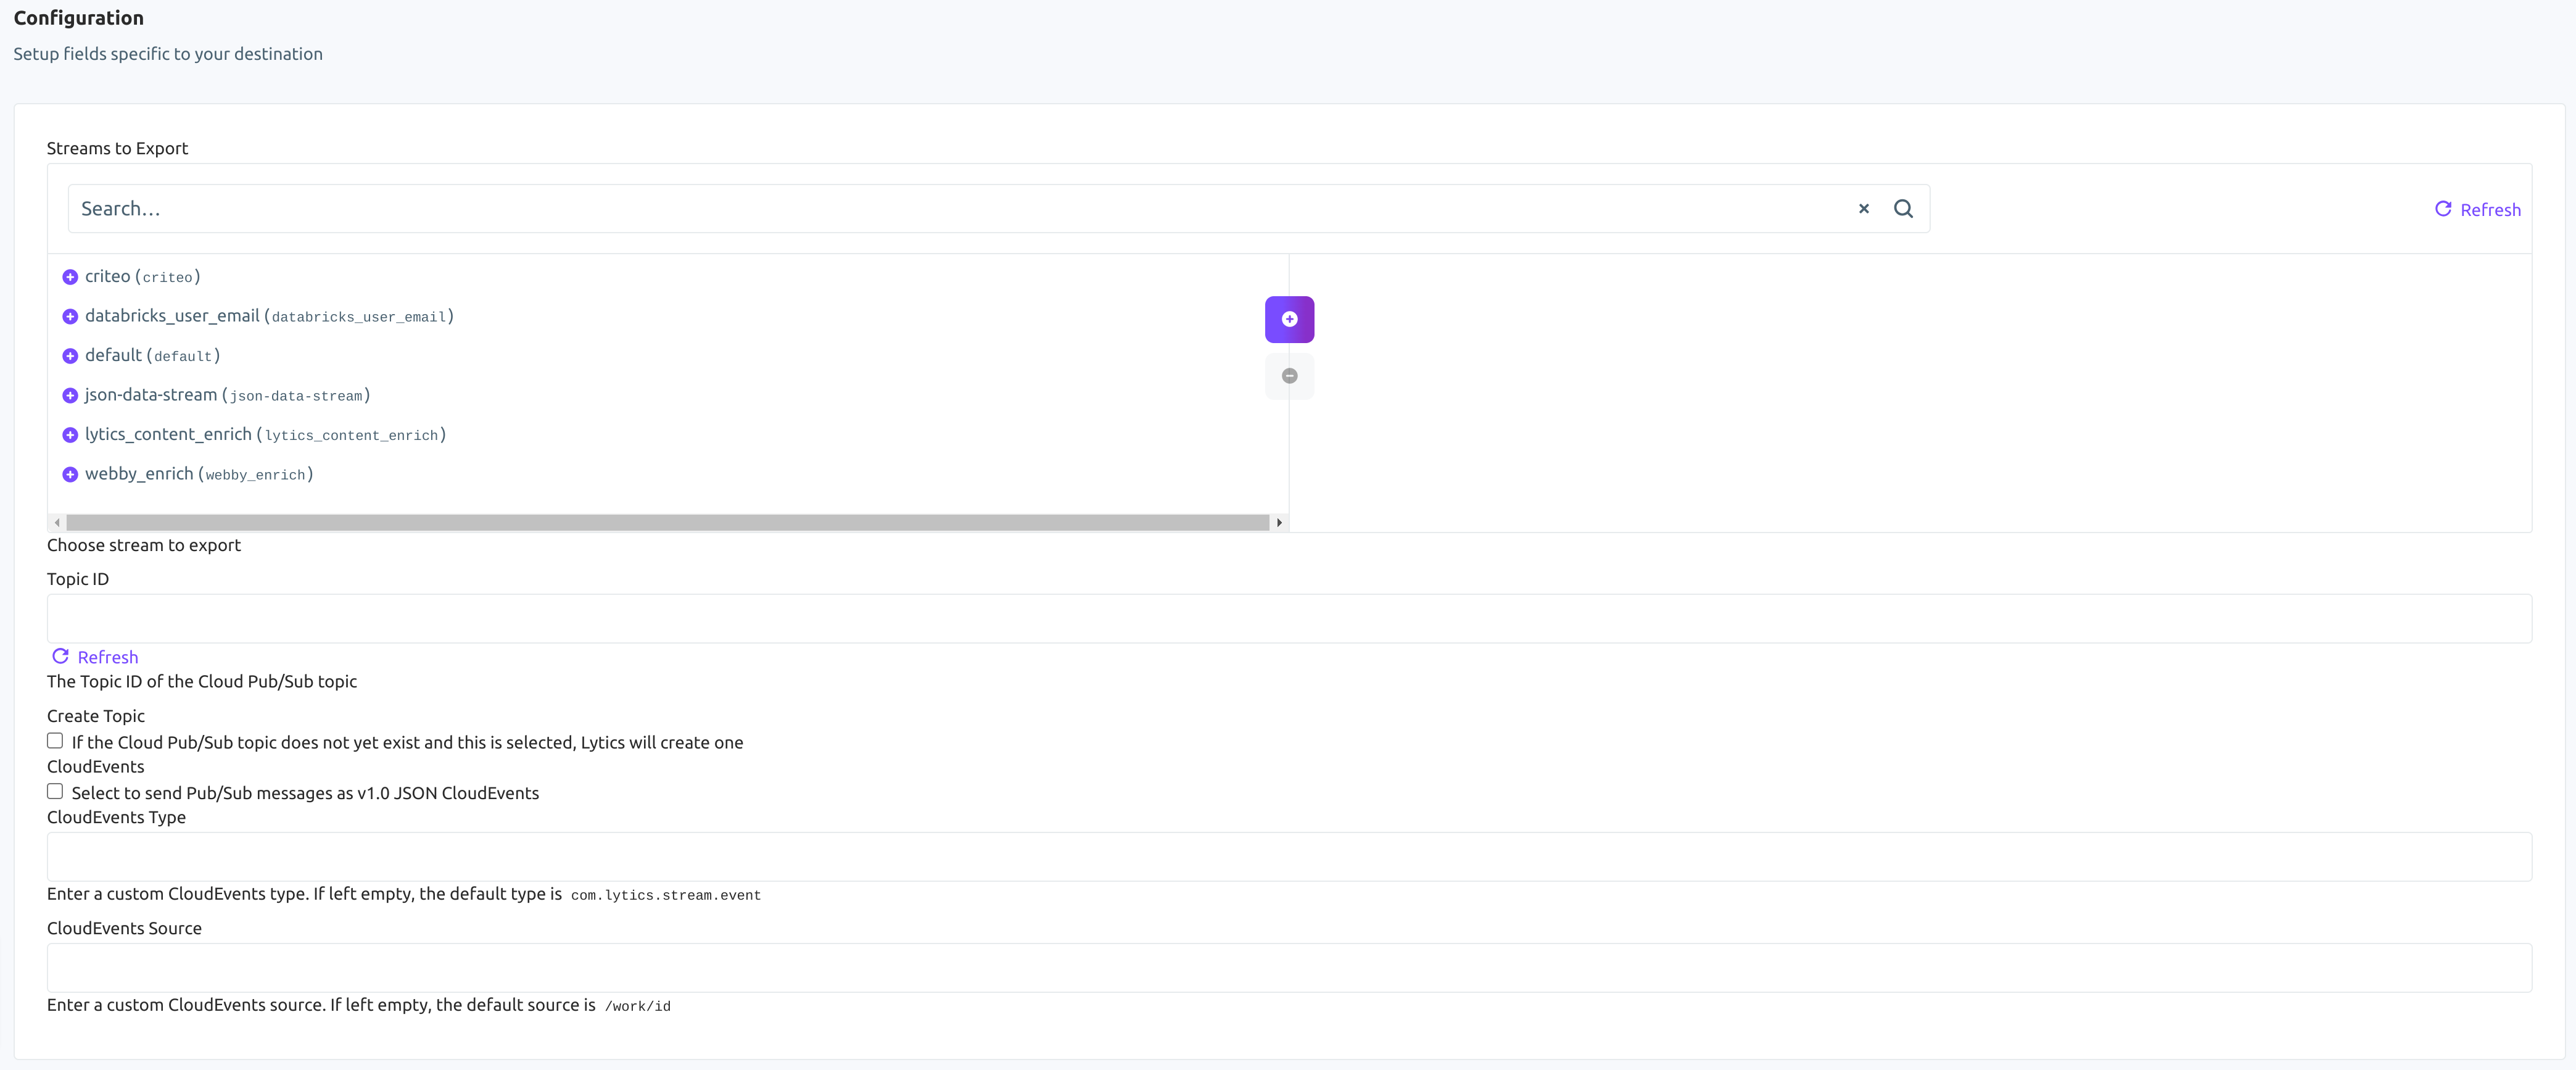
- From the Streams to Export input, select list of streams you would like to export.
- From the Topic ID text input, select the Topic ID of the Cloud Pub/Sub topic where the events will be published. If you wish to create new topic, enter the topic name in the text box.
- Select the Create Topic checkbox if you would like Lytics to automatically create the Topic. If the Cloud Pub/Sub topic entered above does not yet exist and this is selected, Lytics will create one under the configured Topic ID. If no topic id is given, Lytics will create a topic with name format
lytics_stream_export_{timestamp}. - From the CloudEvents checkbox, select to send Pub/Sub messages as v1.0 JSON CloudEvents.
- From the CloudEvents Type text input, enter a custom CloudEvents type. If left empty, the default type is
com.lytics.stream.event. This is only relevant if you have selected CloudEvents. - From the CloudEvents Source text input, enter a custom CloudEvents source. If left empty, the default source is
/work/id. This is only relevant if you have selected CloudEvents. - Click Start Export.
Updated 10 months ago