

Managing Steps
Flow steps are the building blocks of your user journeys. Each step type serves a specific purpose and offers unique configuration options. This guide covers all available step types and their detailed settings.
Overview of Step Types
Flows support four main step types:
-
Trigger: Entry point for users (required, cannot be deleted)
-
Wait & Personalize: Control timing and enable personalization
-
Export: Send data to external systems
-
Conditional Split: Create branching paths based on conditions

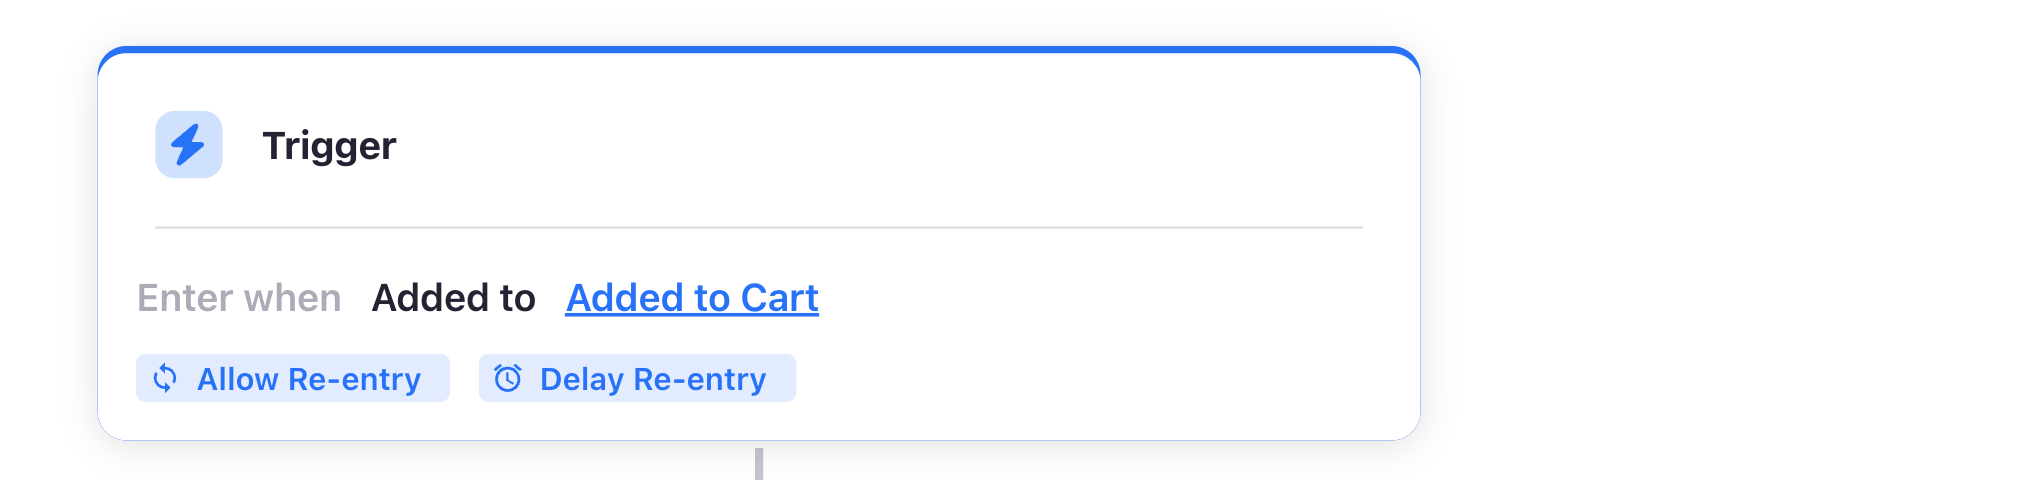
Trigger Step
The trigger step is the entry point for every flow and cannot be deleted. It defines when and how users enter your workflow.
Configuration Options
Audience Selection
- Any valid Audience can be used as the entry trigger
Entry Type Options
| Option | Description | Best For |
|---|---|---|
| Added to | Only new additions to the audience trigger entry | Welcome series, cart abandonment, event-triggered flows |
| Member of | All current members plus future additions enter | Evergreen campaigns, promotions, existing customer outreach |
Re-entry Settings
Control whether users can go through the flow multiple times:
Allow Re-entry
-
No
- Users can only enter the flow once
- Simplest option for one-time campaigns
-
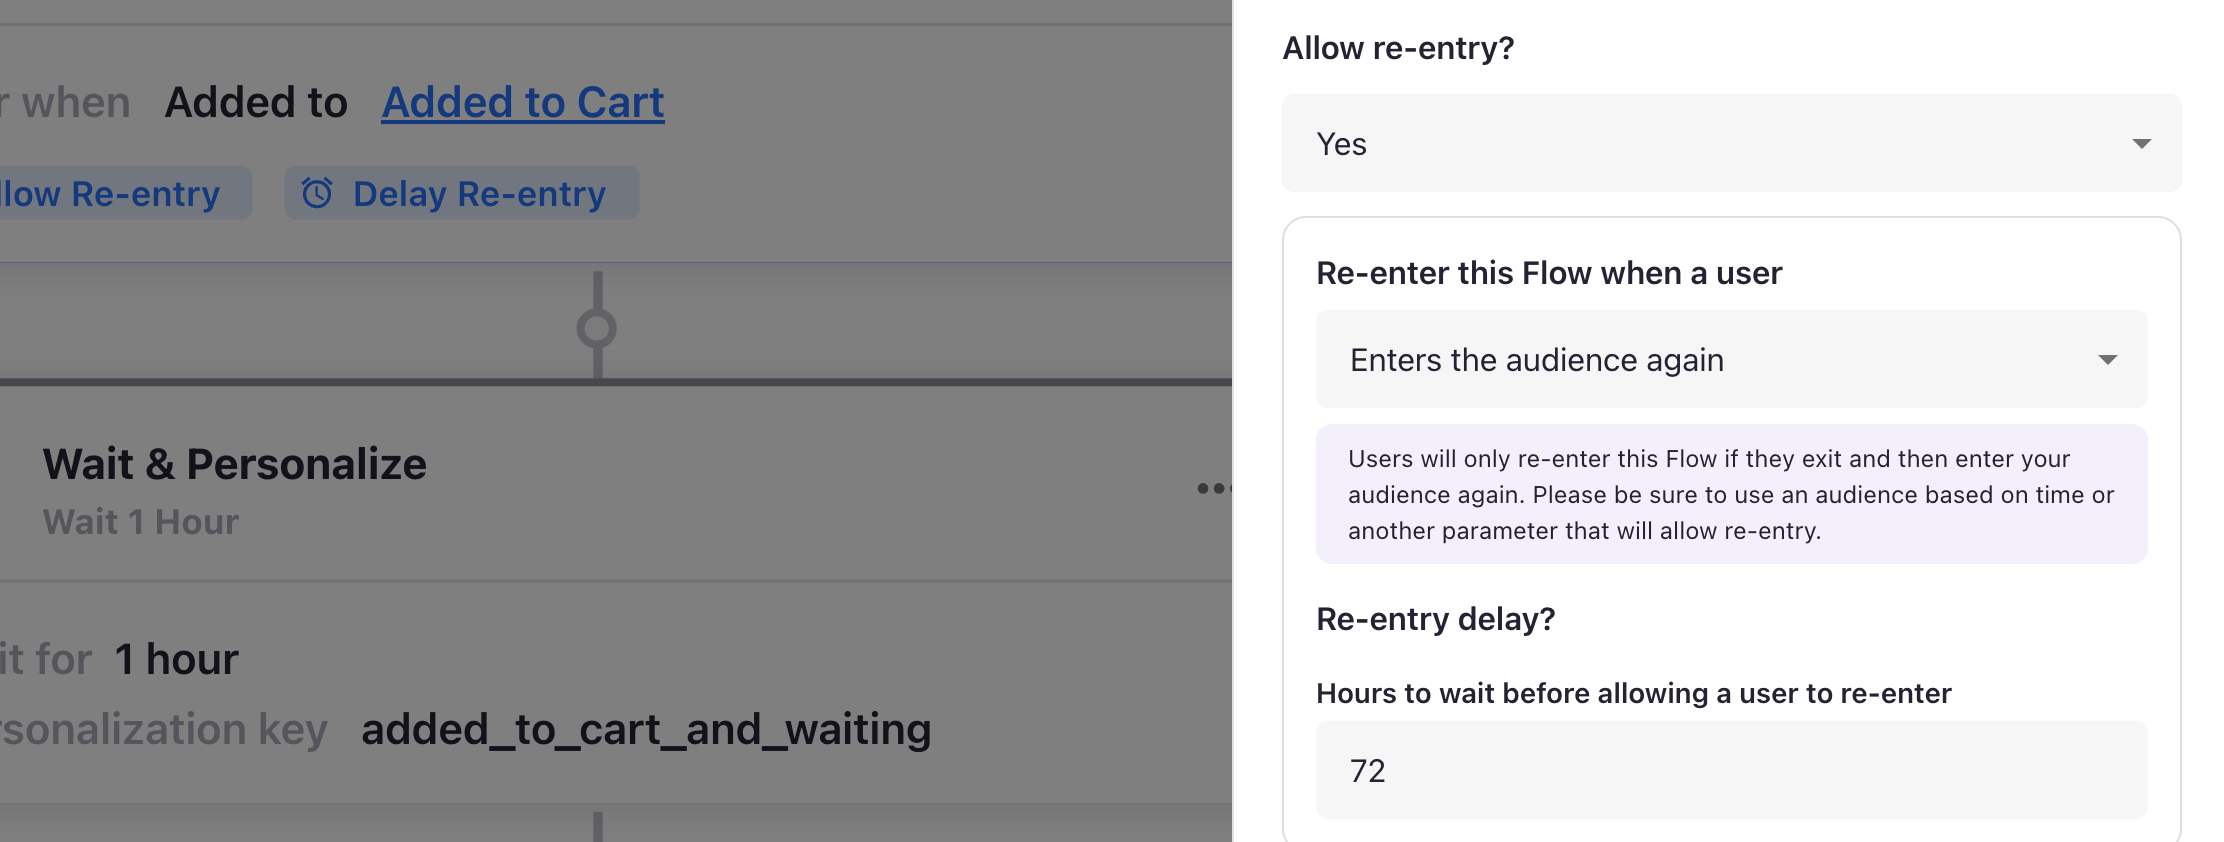
Yes
- Users can go through the flow multiple times
- Great for a number of evergreen campaigns (e.g. cart abandon)
- Presents a variety of configuration to control re-entry
Re-entry Condition
- Enters the audience again
- This option assumes you have time based logic or some other rule built in to cause members to exit your audience. Upon re-entry, they'll be entered into the flow multiple times
- Enters or remains in the audience
- This assumes an audience member has stayed in the audience for a period of time, see re-entry delay below
- Re-entry delay
- Minimum time between flow entries
- Default: 1 hour
- Range: 1 hour to 365 days
- Required when using "enters or remains" option
Examples
Cart Abandonment Trigger
Audience: "Added item to cart in last 24 hours AND no purchase in last 48 hours"
Entry Type: Added to
Re-entry: Enters audience again
Re-entry Delay: 24 hours
Monthly Newsletter Trigger
Audience: "Subscribed to newsletter"
Entry Type: Member of
Re-entry: Enters or remains in audience
Re-entry Delay: 30 days
Wait & Personalize Step
Wait steps control timing in your flows and enable personalization opportunities.
Configuration Options
Choose a wait mode from the Configuration dropdown:
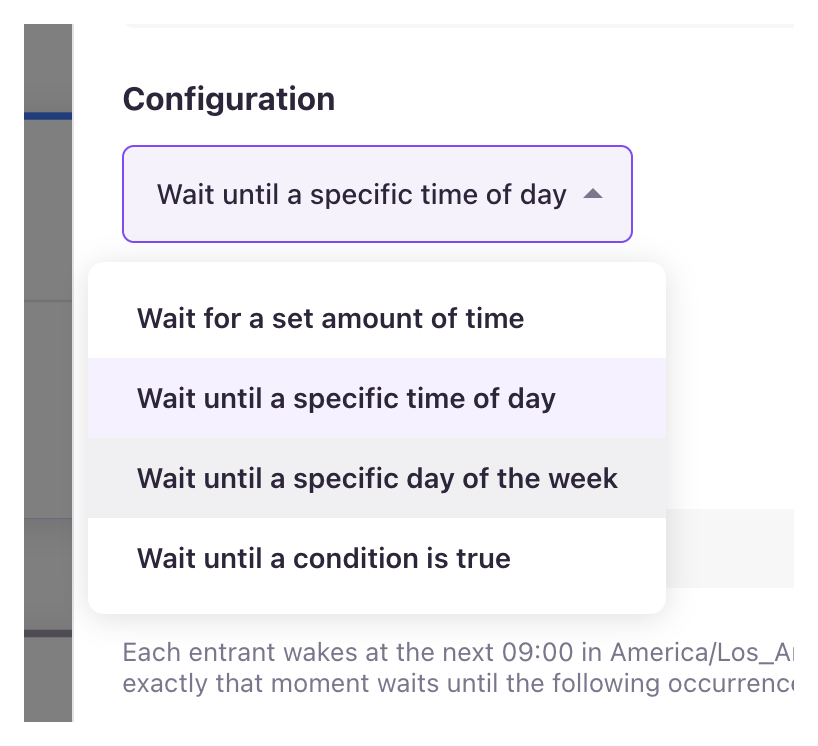
Time-Based Wait
Set a fixed duration for all users:
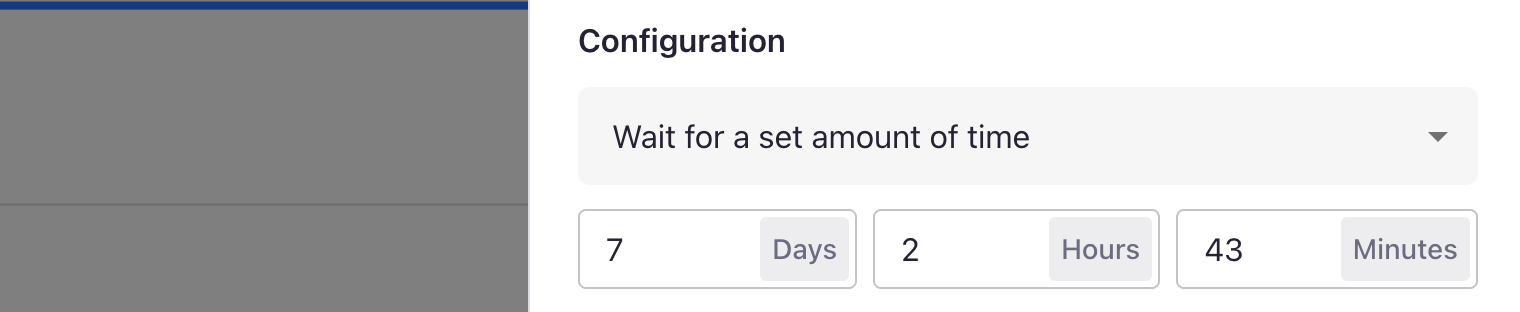
Use Cases:
- Drip campaign timing
- Follow-up sequences
- Cooling-off periods
Time-of-Day Wait
Hold users until a specific time of day, aligned to a calendar clock rather than a relative duration:
- Time — the target time in 24-hour
HH:MMformat (e.g.,09:00) - Timezone — the IANA timezone the time is evaluated in (e.g.,
America/New_York). Defaults to your browser's timezone.
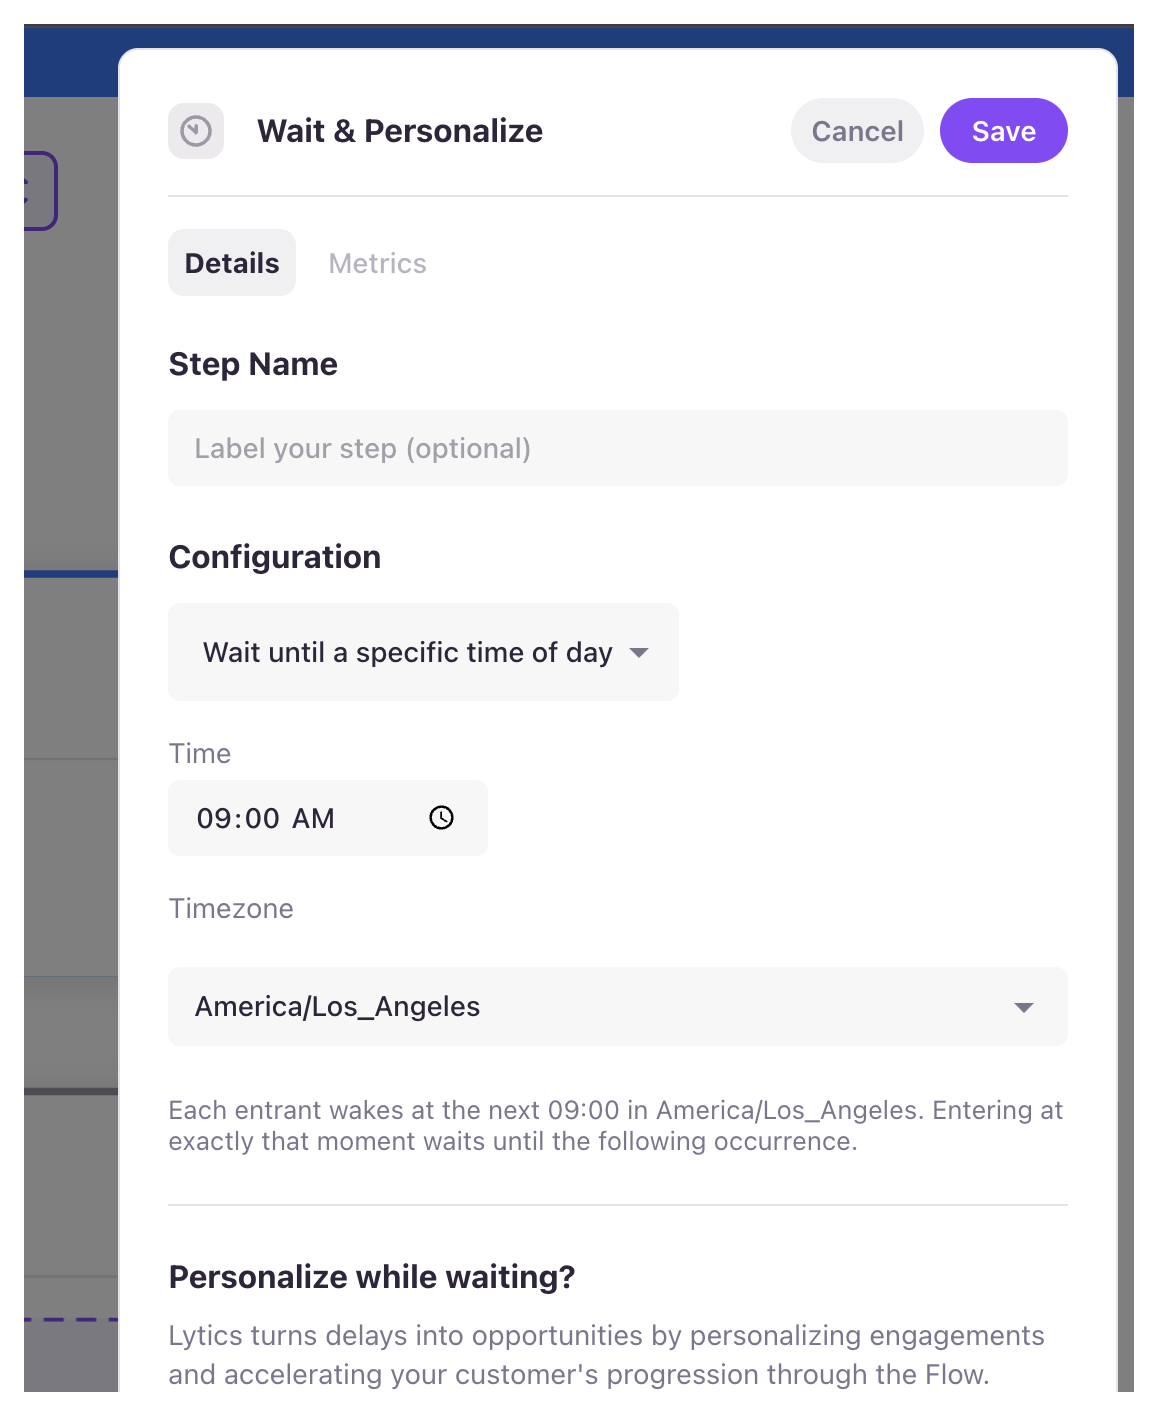
Each user wakes at the next occurrence of that time in the chosen timezone. A user who enters the step at exactly the target time waits until the following day's occurrence.
Use Cases:
- Send during business hours regardless of when a user enters the flow
- Batch actions to a consistent send time
Day-of-Week Wait
Hold users until a specific weekday and time, aligned to the calendar:
- Day of week — the target weekday (Sunday–Saturday)
- Time — the target time in 24-hour
HH:MMformat - Timezone — the IANA timezone the day and time are evaluated in. Defaults to your browser's timezone.
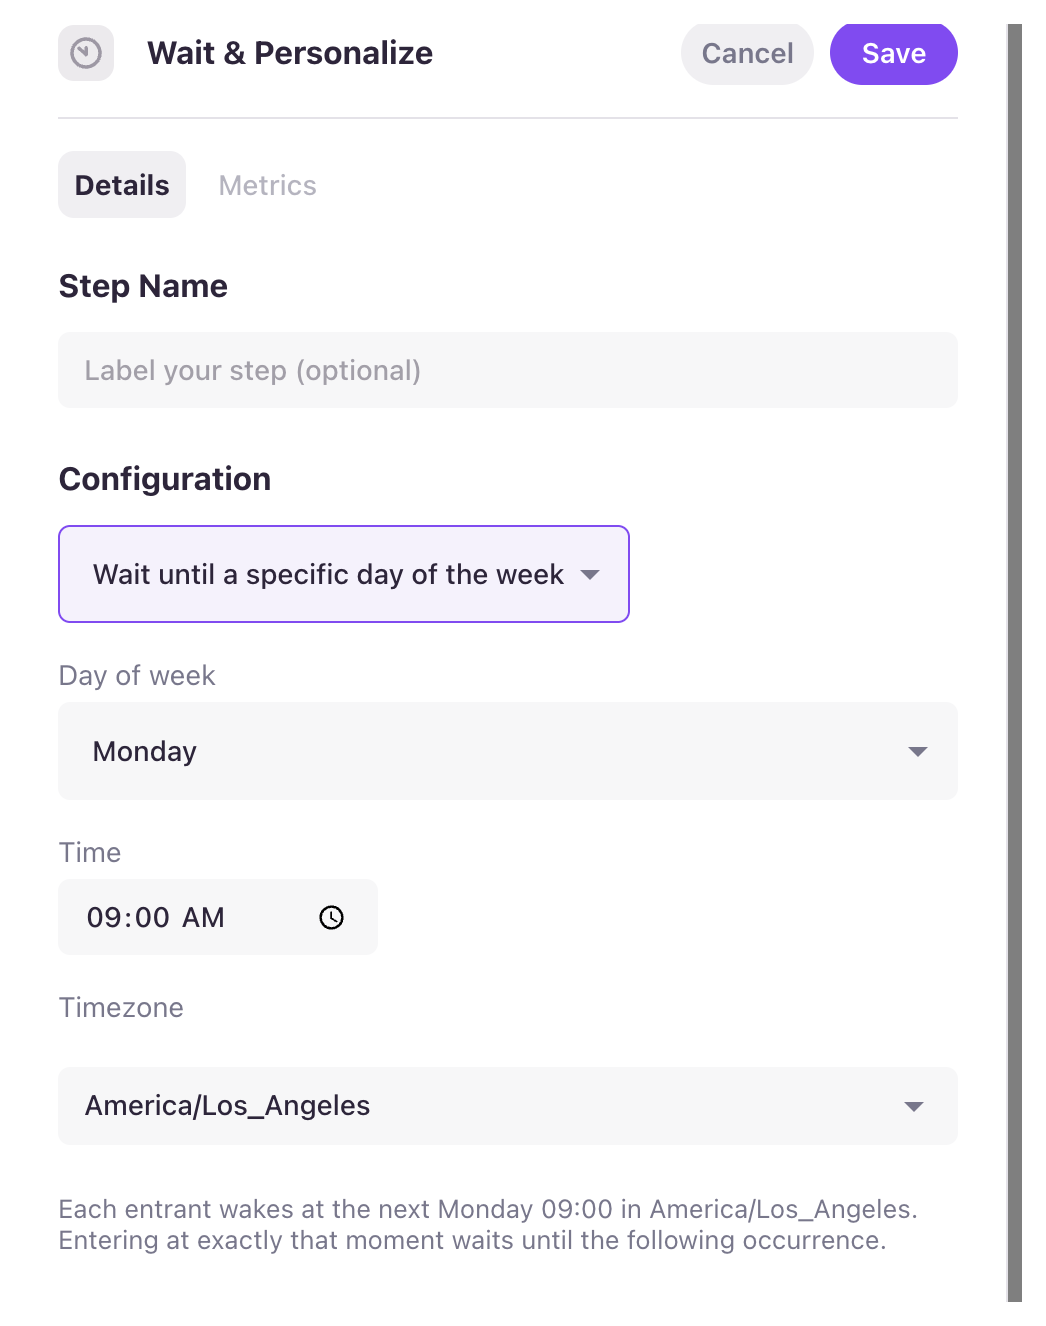
Each user wakes at the next occurrence of that weekday and time in the chosen timezone. A user who enters at exactly that moment waits until the following week's occurrence.
Use Cases:
- Weekly newsletter or digest sends
- Aligning actions to a recurring weekly cadence
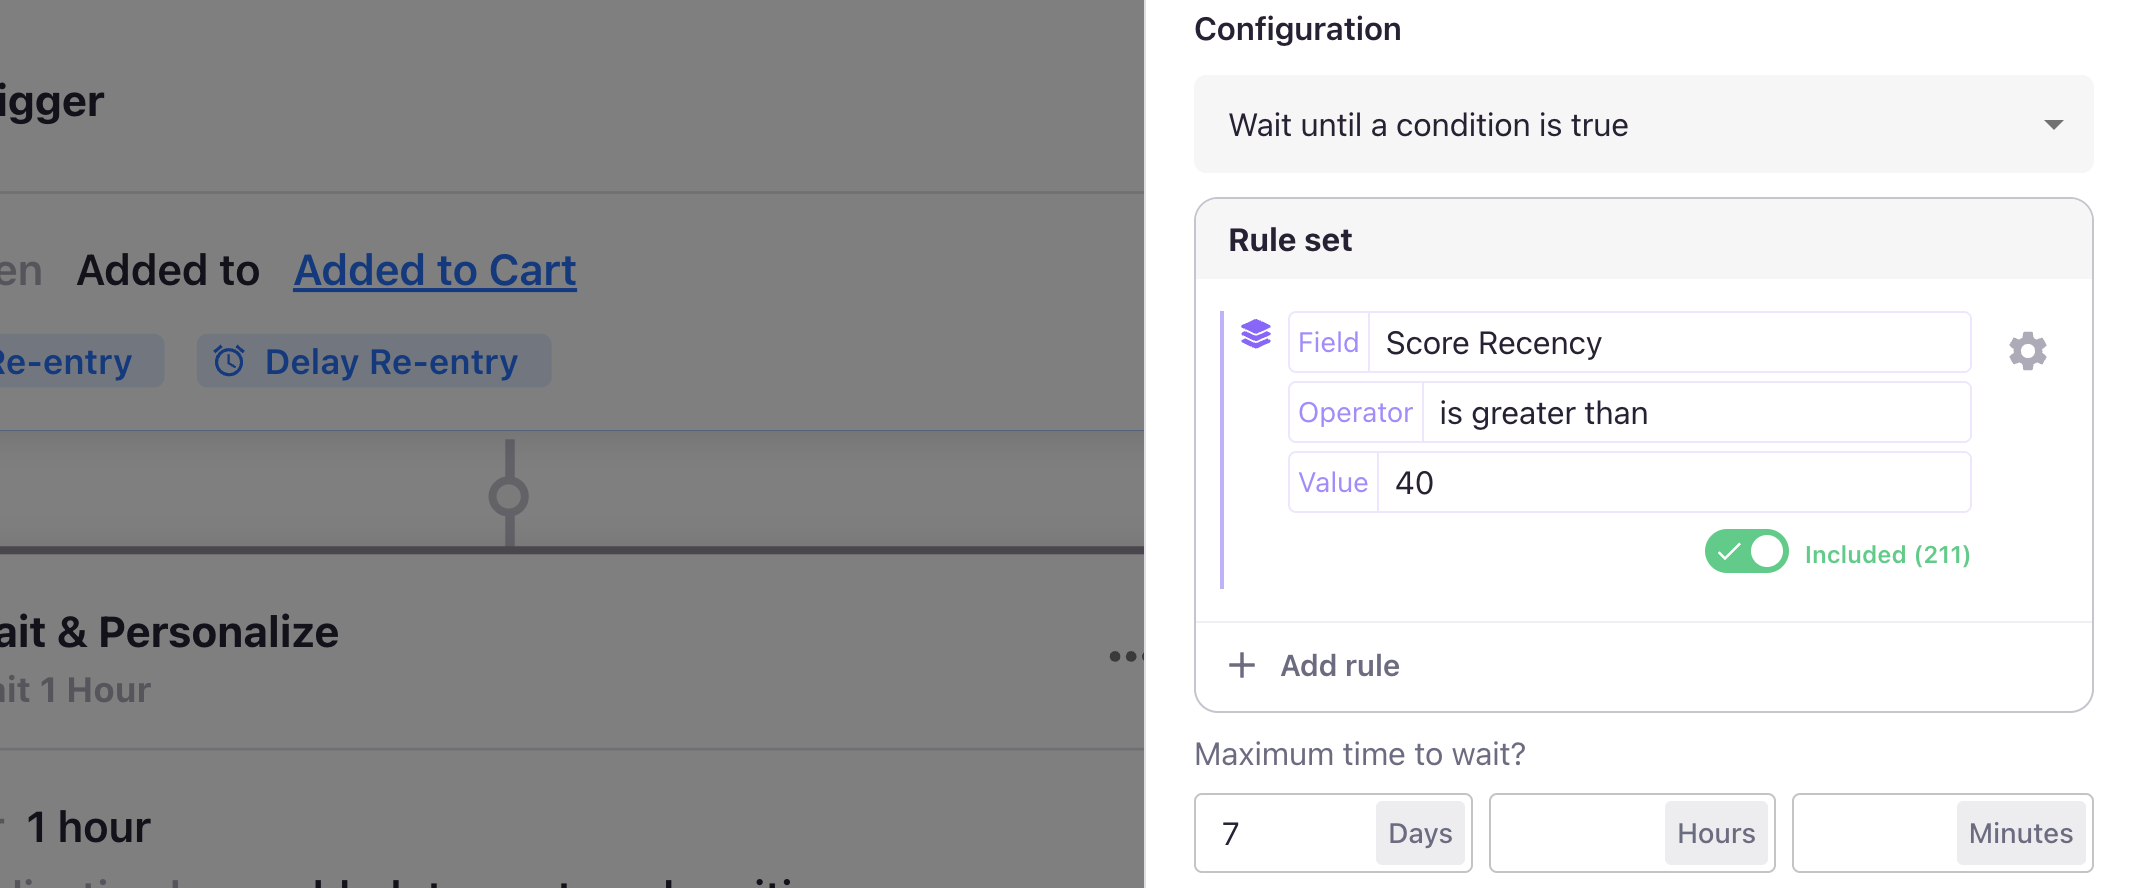
Condition-Based Wait
Wait until specific conditions are met:
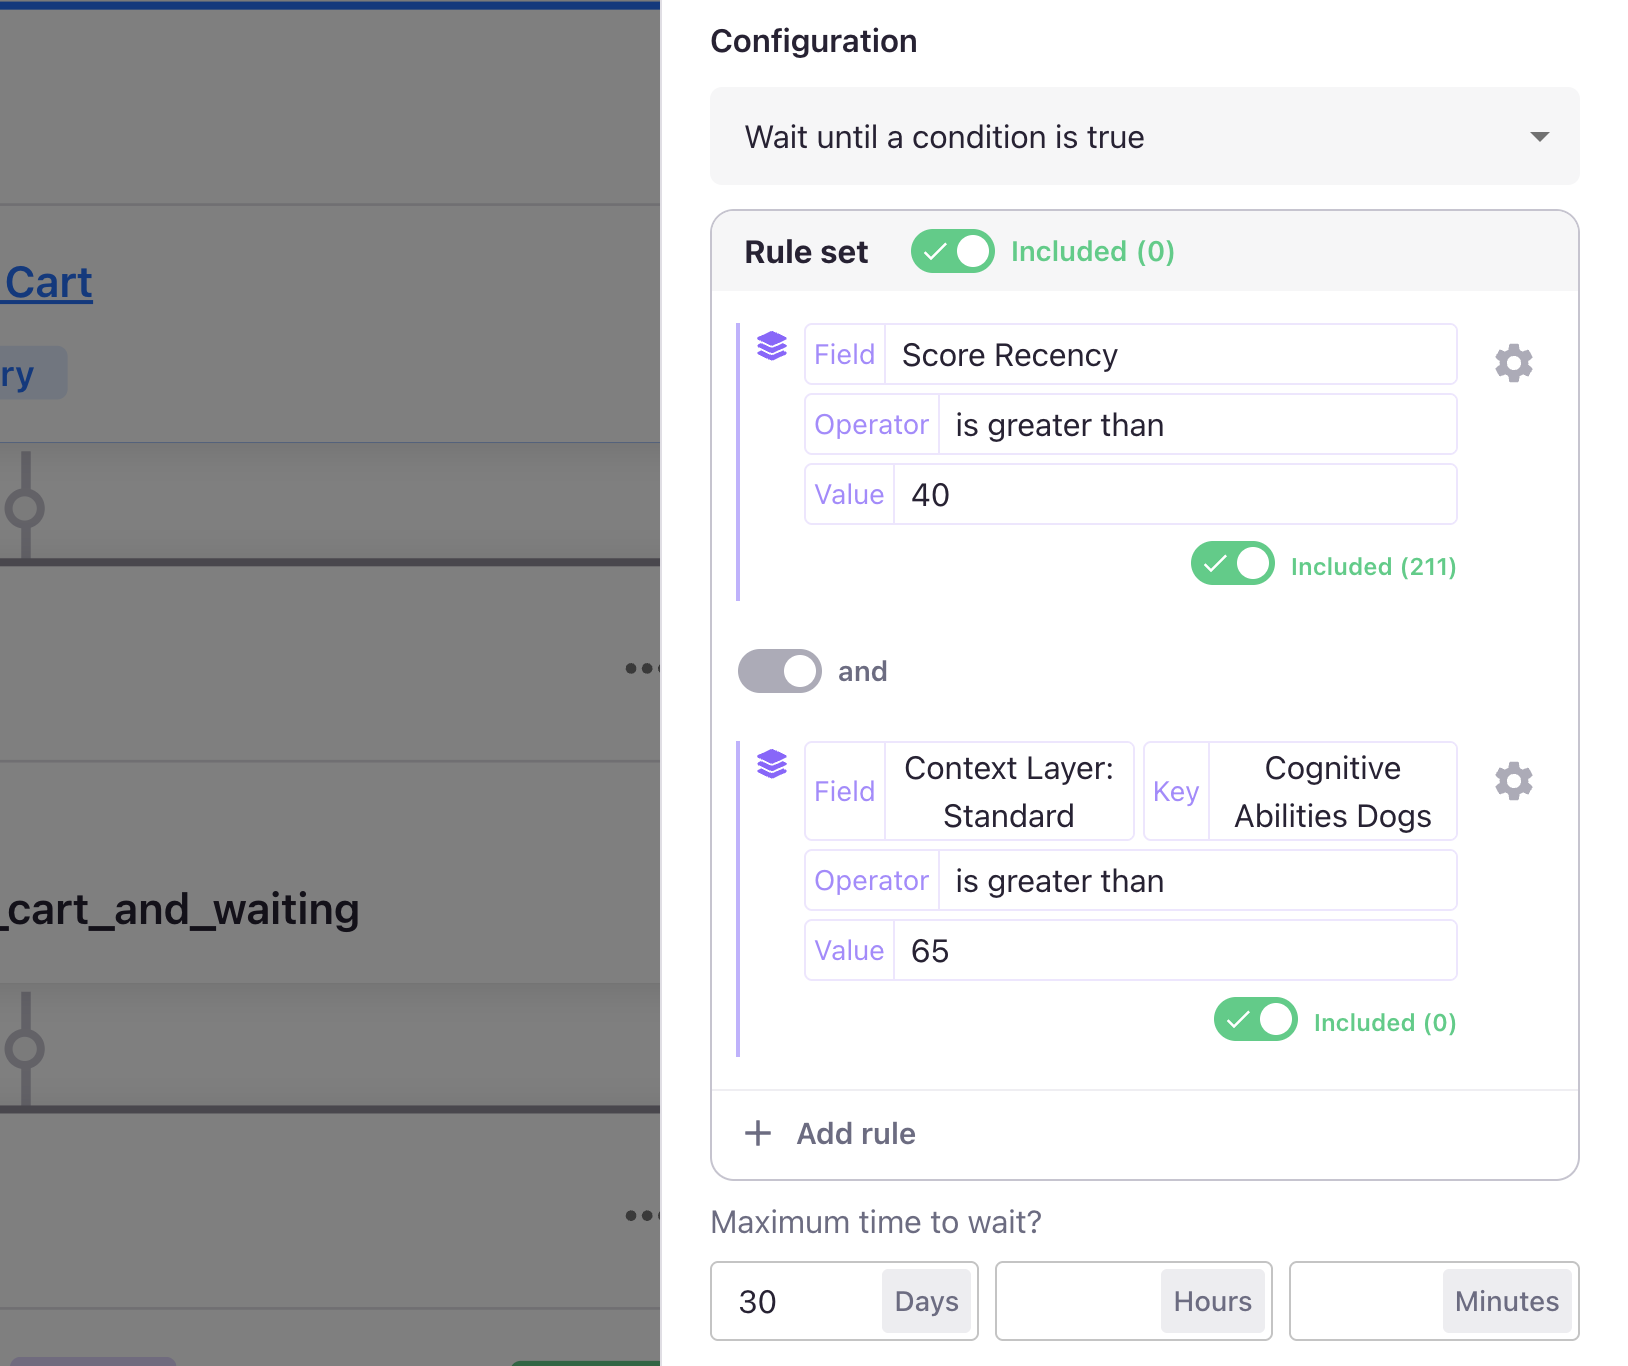
How It Works:
- Uses the same audience builder as other Lytics features
- Evaluates conditions as events stream into the system
- Users progress when conditions are met
- Maximum wait time prevents indefinite delays
Condition Examples:
- Wait until user visits pricing page
- Wait until user downloads a file
- Wait until user's engagement score increases
- Wait until specific custom events occur
Maximum Wait Time:
- Set upper limit to prevent users from waiting indefinitely
- Users progress after max time regardless of conditions
- Recommended to always set a reasonable maximum
Personalization Keys
Enable real-time website personalization based on flow state:
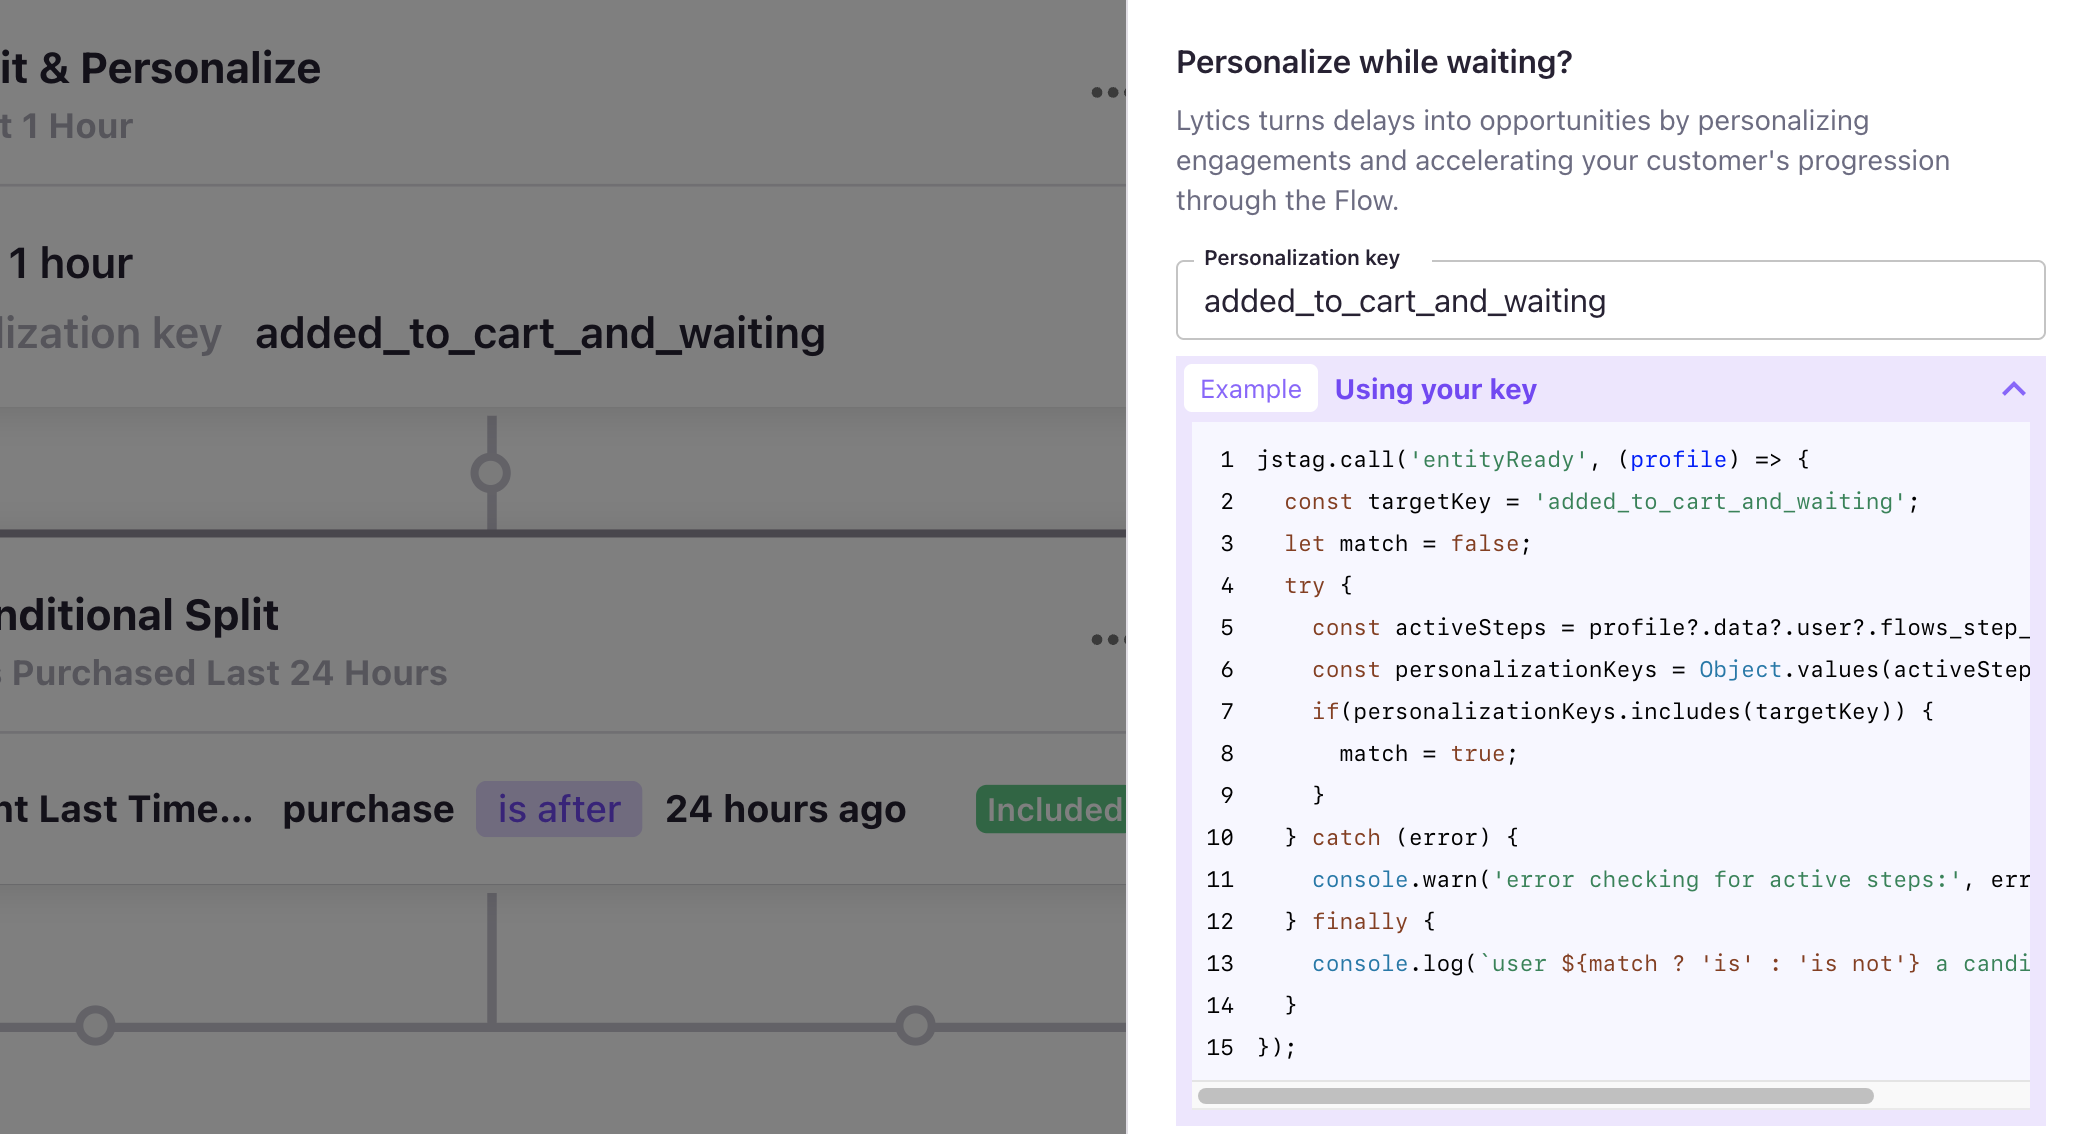
Key Requirements:
- Recommended to be unique across your account
- Use descriptive names (e.g., "welcome-series-day-2")
- No spaces or special characters (use hyphens or underscores)
How Personalization Works:
- User enters wait step with personalization key
- Key is added to user's profile
- Website JavaScript can check for the key
- Display personalized content based on flow state
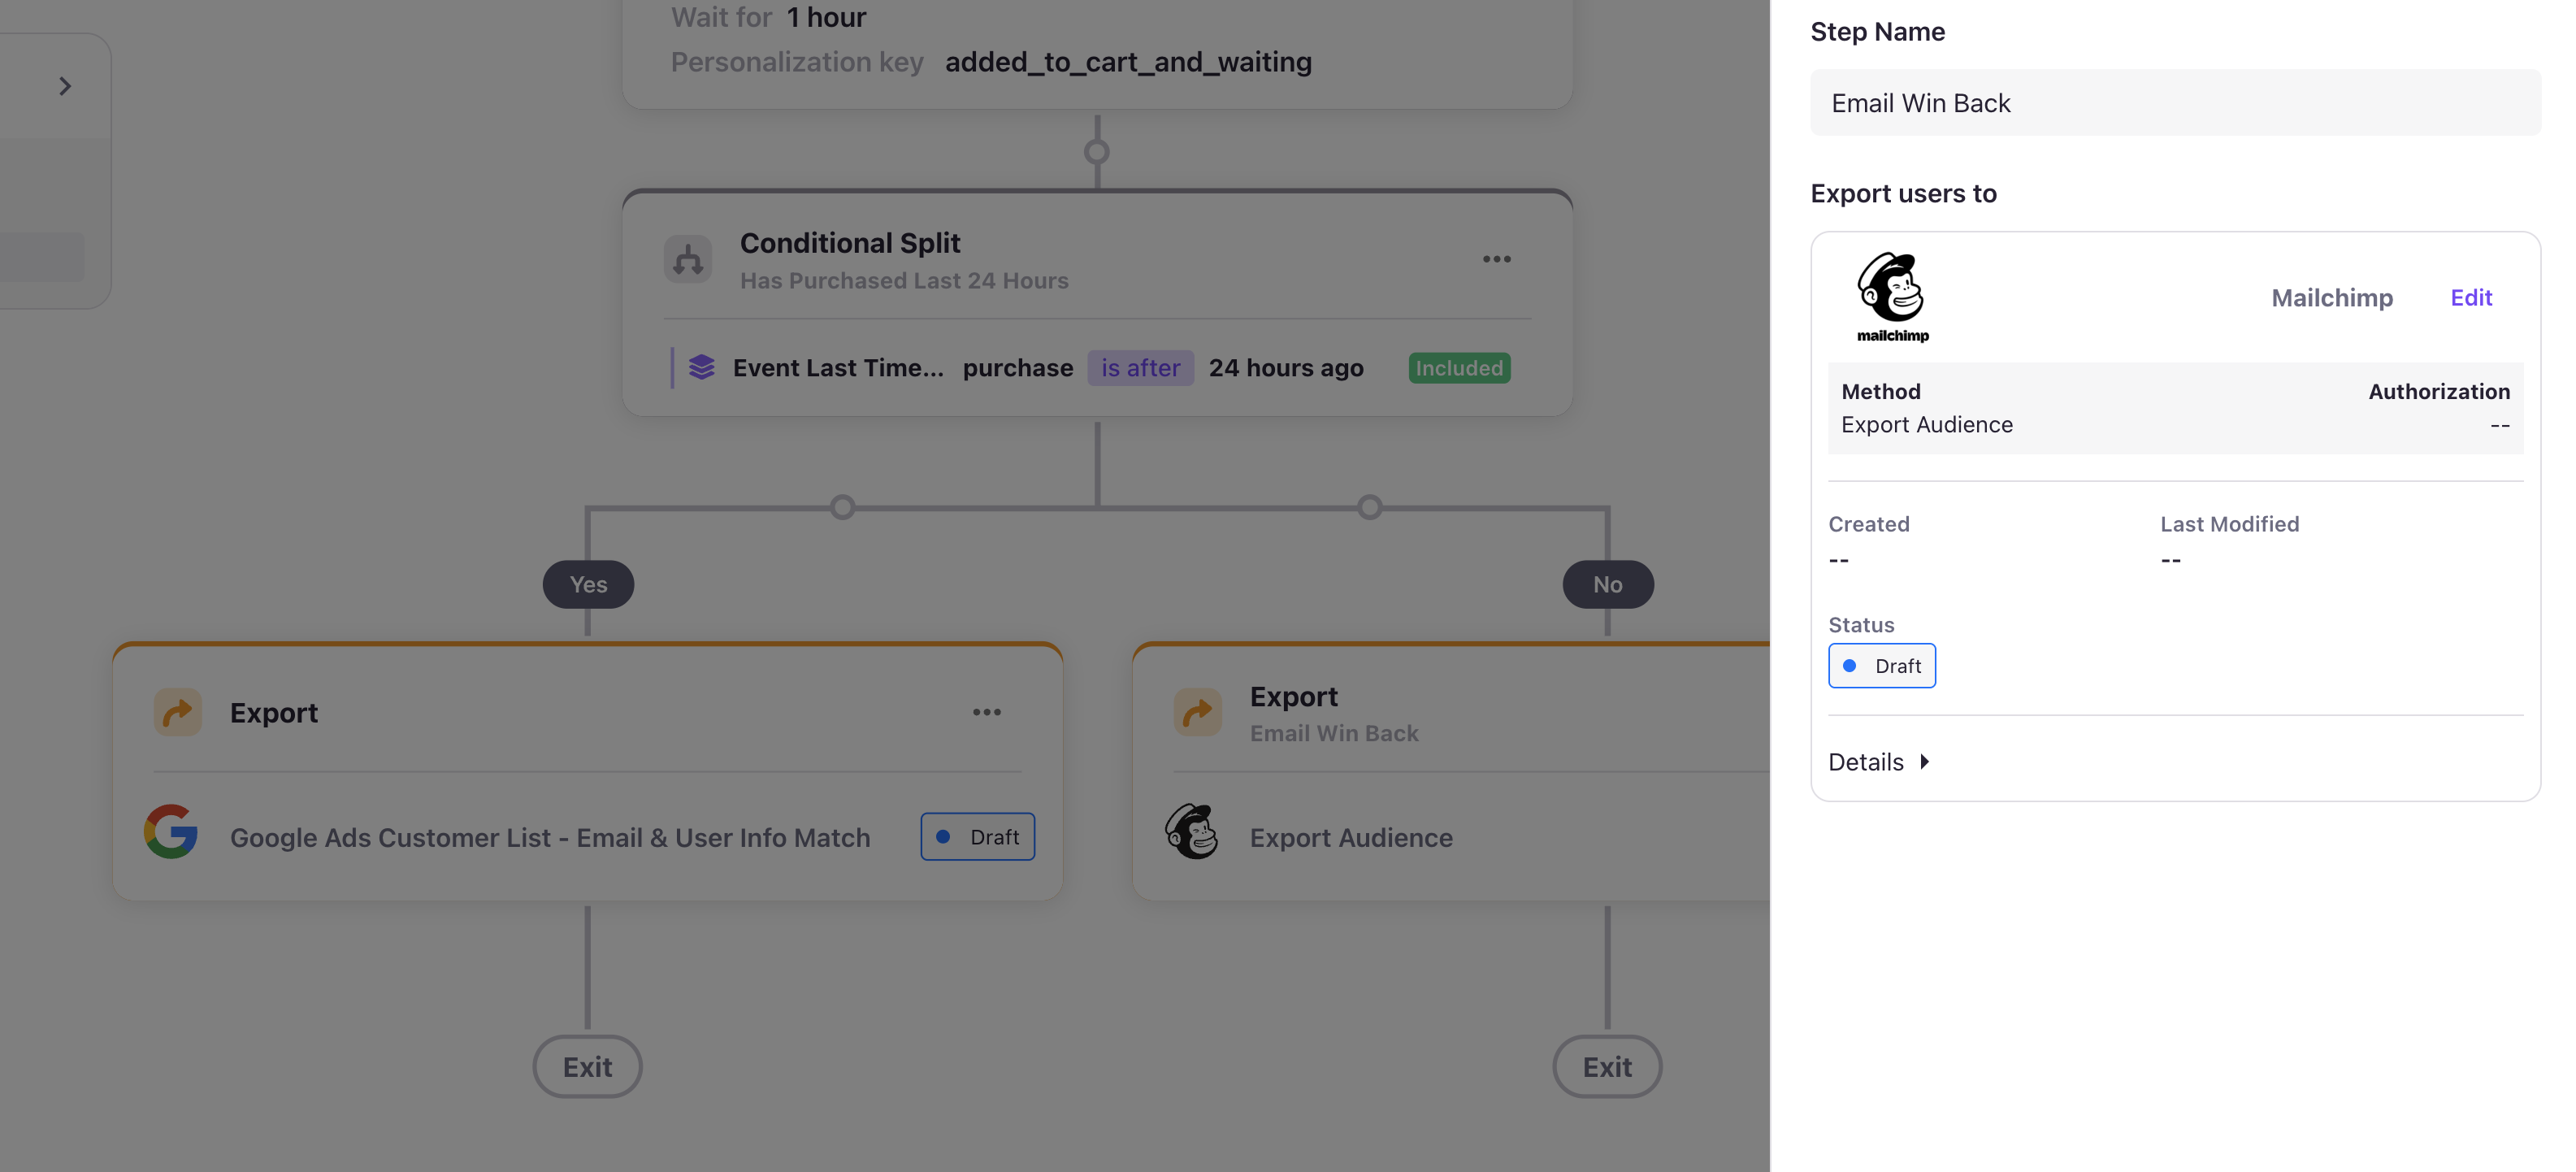
Export Step
Export steps send user data to external systems and are the primary action steps in flows.
Configuration Process
Step 1: Add Export Step
- Click + button to add new step
- Select Export from step types
- Click Configure Export button
Step 2: Choose Export Type
- Browse or search available export providers
- Select your desired destination
- Follow on-screen guidance to configure export (e.g., "Audience Trigger Webhook")
Step 3: Configure Export Settings
Follow the standard Lytics export configuration wizard:
Common Configuration Options:
- Authentication: API keys, OAuth tokens, connection strings
- Destination Settings: Endpoints, database tables, list IDs
- Data Mapping: Which profile attributes to send
- Formatting: JSON, CSV, custom formats
- Frequency: Real-time, batched, scheduled
Step 4: Export States in Flows
Draft State:
- Export configuration is saved but not active
- No data is sent while in draft
- Allows review and refinement before activation
Active State:
- Export is ready to receive and process users
- Required before flow can be published
- Achieved through the "Activate" button in the publish process
Conditional Split Step
Conditional splits create branching paths in your flows based on user attributes or behaviors.
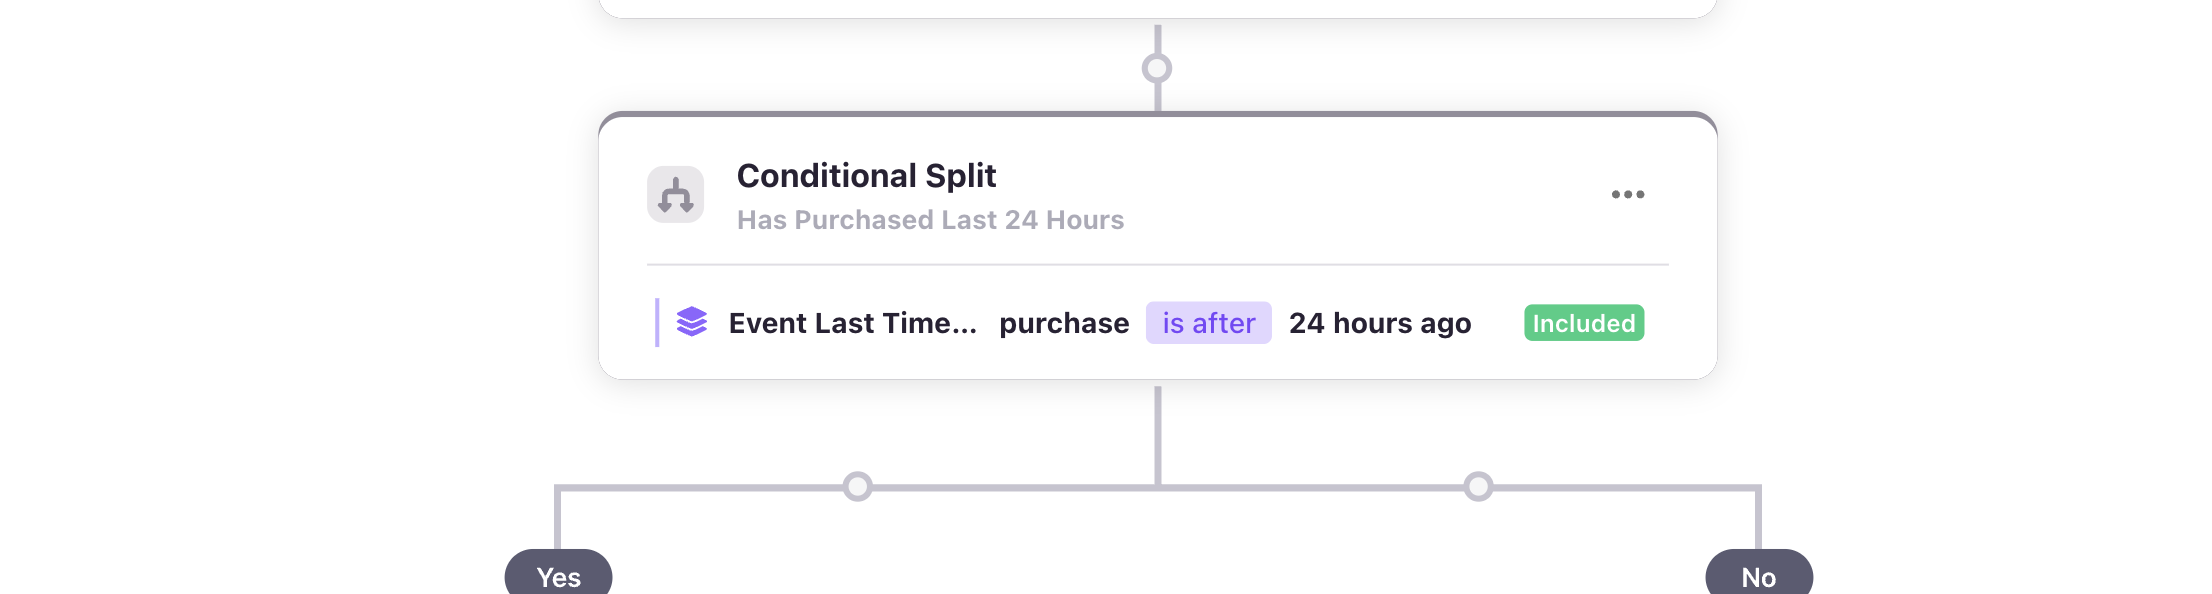
Configuration Options
Condition Builder:
- Uses the same interface as Lytics audience builder
- Supports all profile attributes
- Can combine multiple conditions with AND/OR logic
Building Conditions
Simple Conditions
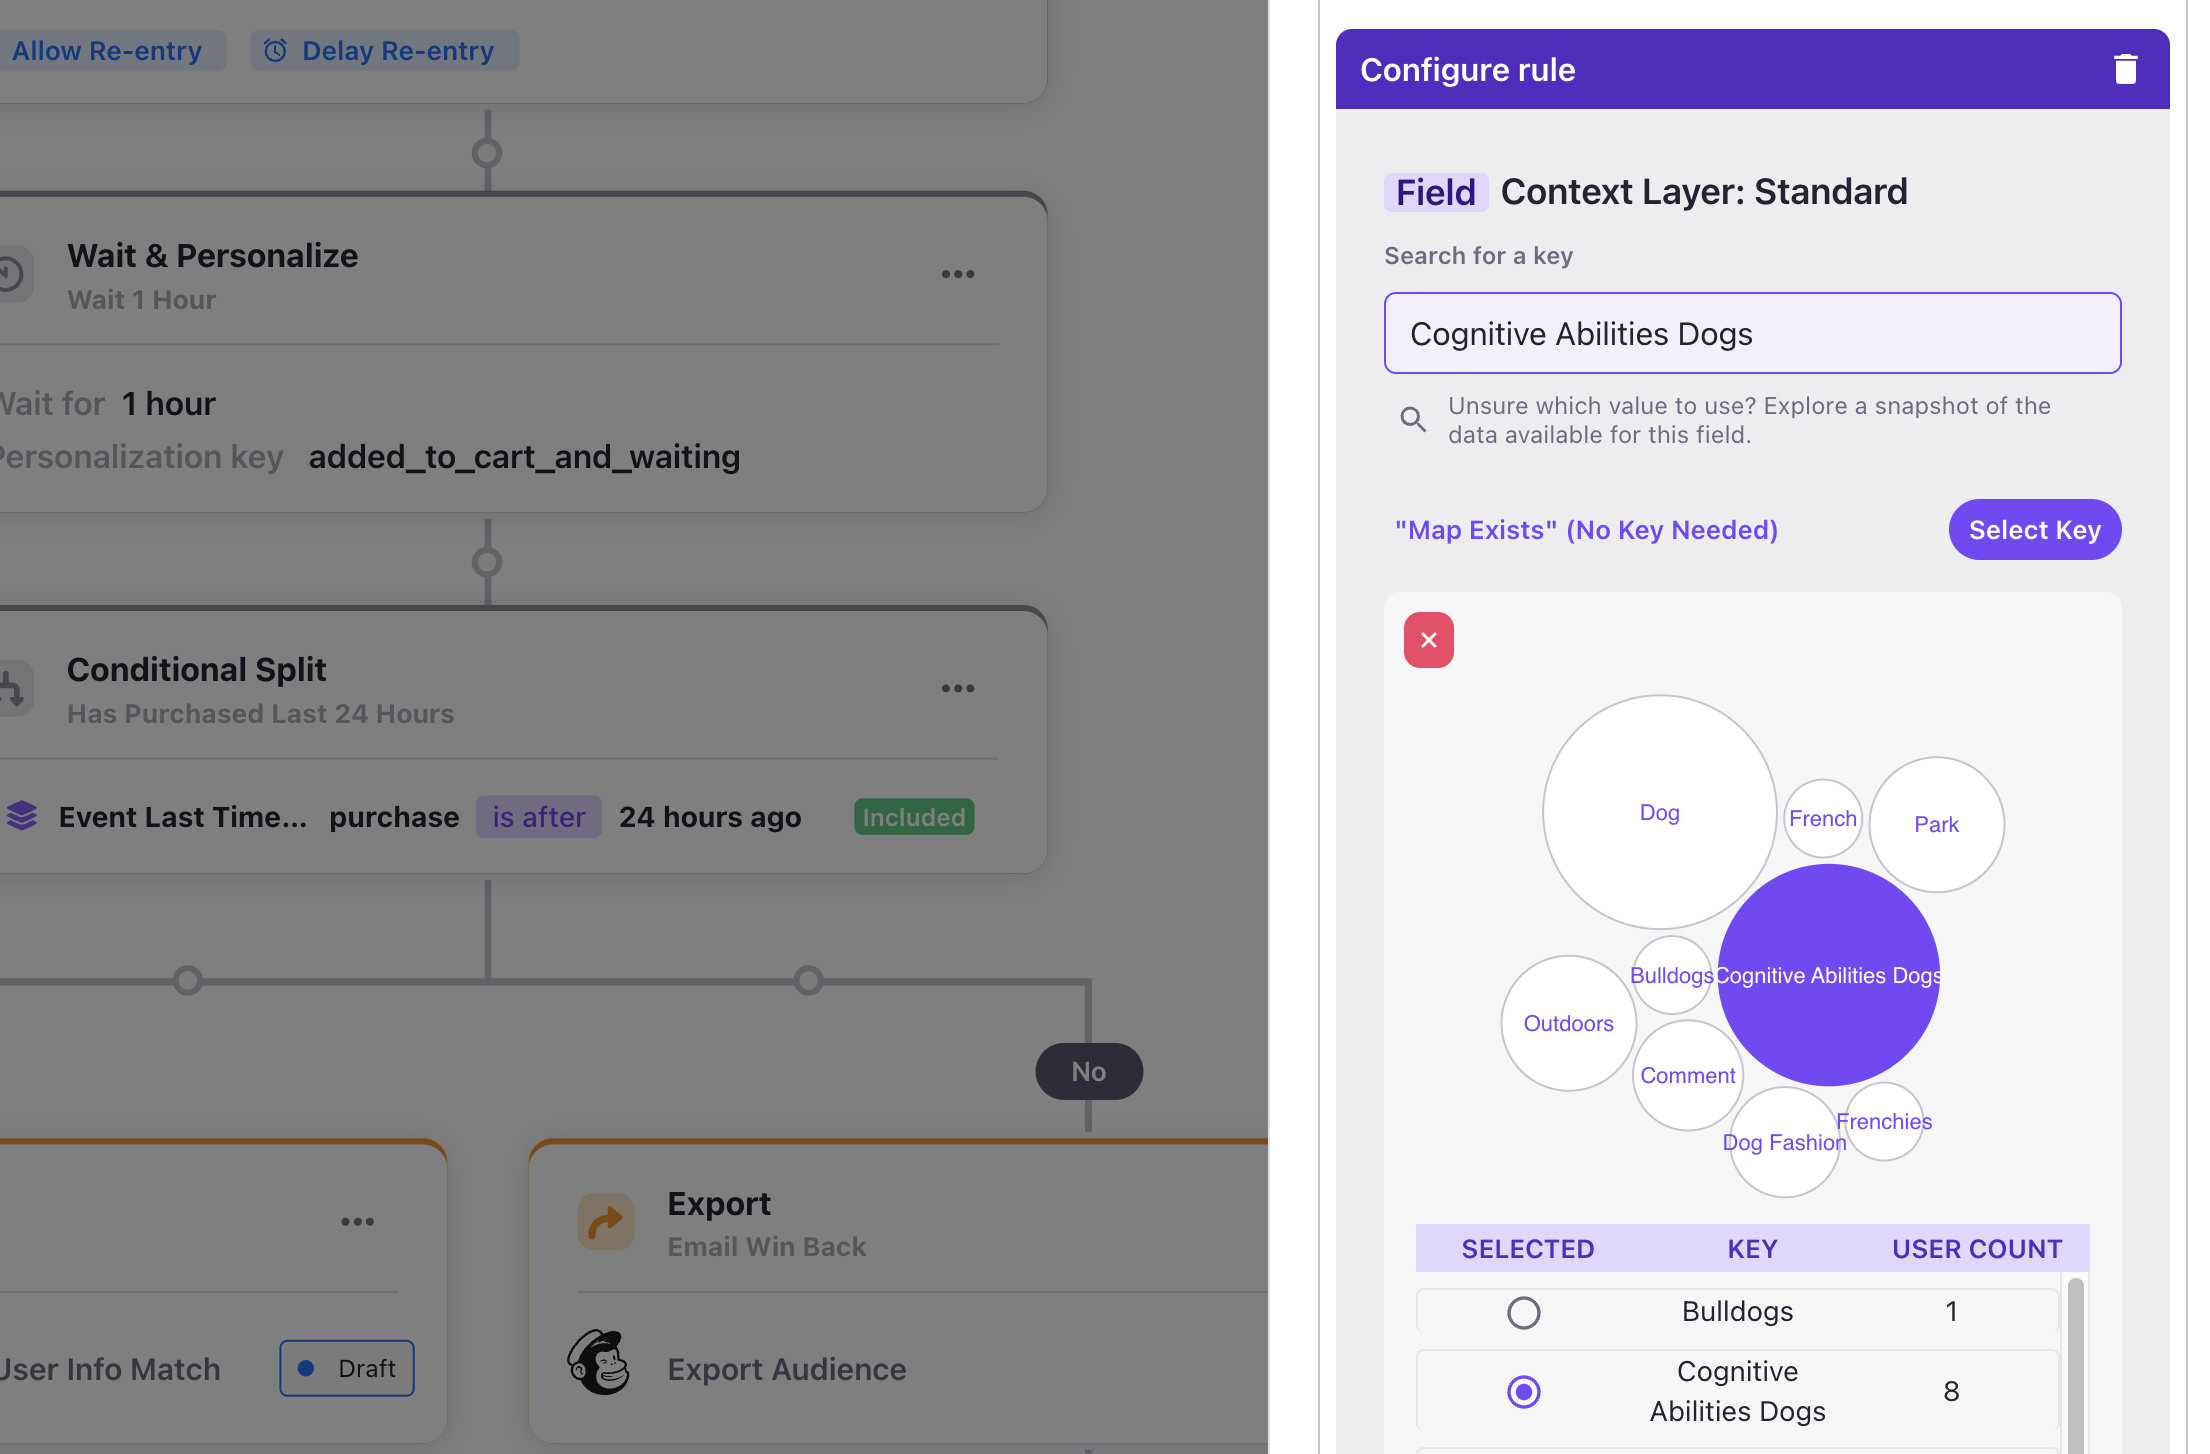
Examples:
- Email domain contains "@company.com"
- Location country equals "United States"
- Last purchase date is within 30 days
- Custom field "subscription_type" equals "premium"
Complex Conditions
Combining Rules:
- Use AND to require all conditions be met
- Use OR to require any condition be met
- Nest conditions for sophisticated logic
Path Behavior
Yes Path (Left):
- Users who meet the defined conditions
- Can connect to any subsequent step type
No Path (Right):
- Users who don't meet the conditions
- Can connect to any subsequent step type
Path Merging:
- Path merging lower down in the flow is not currently supported
Use Cases
Geographic Targeting:
Condition: Location country equals "United Kingdom"
Yes Path: Send UK-specific promotional email
No Path: Send standard promotional email
Engagement-Based Paths:
Condition: Engagement score > 70
Yes Path: Send advanced feature email
No Path: Send basic tips email
Purchase History Splits:
Condition: Total purchases > 0
Yes Path: Customer retention flow
No Path: First-time buyer incentive flow
Company vs Consumer:
Condition: Email domain matches business domain list
Yes Path: B2B sales outreach
No Path: Consumer marketing campaign
Step Management
Adding Steps
- Click the + button after any step
- Select the desired step type
- Configure the step settings
- Save to add to your flow
Deleting Steps
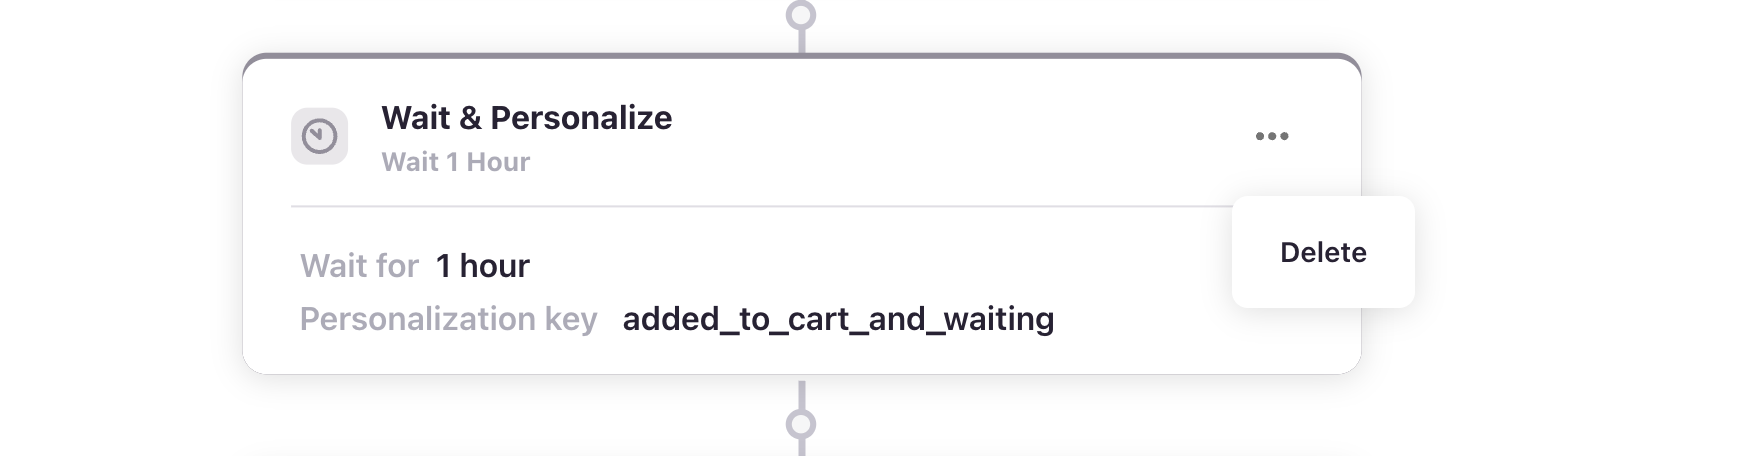
- Click the action menu (⋮) on any step
- Select Delete
- Confirm deletion
- Flow connections automatically adjust
Note: The trigger step cannot be deleted.
Reordering Steps
Steps are connected in sequence and cannot be reordered directly. To change flow order:
- Delete steps you want to move
- Add new steps in the desired order
- Reconfigure the deleted steps
Step Validation
Before publishing, all steps are validated:
Common Validation Errors:
- Wait steps without time or condition specified
- Export steps not configured or activated
- Conditional splits without conditions defined
Validation Process:
- Occurs automatically when attempting to publish
- Displays specific error messages
- Must resolve all errors before publishing
- Validation re-runs each time you attempt to publish
Next Steps
Now that you understand all step types:
- Learn about Publishing and Managing Flows
- Explore Monitoring and Metrics
Updated 13 days ago