

Selligent
Selligent
The Selligent integration provides the ability to export files to Selligent via sftp. Instructions are based on Message Studio 10.
Authentication
Before continuing, make sure that you have already created a Selligent account.
-
When you are ready to create a Selligent authorization, navigate to the Integrations section of Lytics and select the Selligent integration.

-
Select an action you would like to complete.
- Any option will work for creating an auth
-
Create an authentication for Selligent:
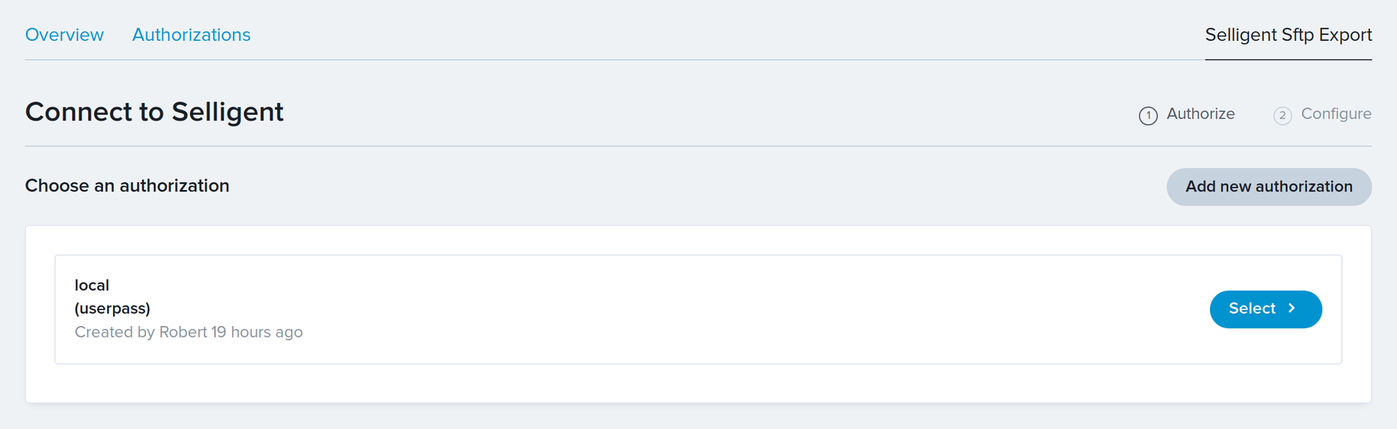
- Select the Add New Authorization button. Note: You will only need to do this once for each SFTP location.
-
Enter authorization details:

These settings will come from Selligent.- Host: The hostname of the SFTP account to use.
- Port: The port number for SFTP account to use.
- Username: The username for the SFTP account to use.
- Password: The password for the SFTP account to use.
- Folder: The folder files will be uploaded to.
- Description: Use this description to tell different Selligent auths apart.
Export to Selligent
Initiating this workflow exports a Lytics Audience to Selligent via SFTP
| Summary | |
|---|---|
| Frequency | Daily |
| Exports to | SFTP |
| Name | export-lytics-segment_slug-timestamp.csv Timestamp format: YYYY-MM-DDTHH:MM:SS |
| Mapped Fields | no |
| Segment Exports | none |
| Type | add, no removal |
-
Connect Lytics to Selligent if you have not previously done so. See Authentication above.
-
Select SFTP Export

-
Select authorization to use.
- Choose an authorization: If you have multiple Selligent accounts authorized in Lytics, then select the one that you would like to use.
-
Configure the work:
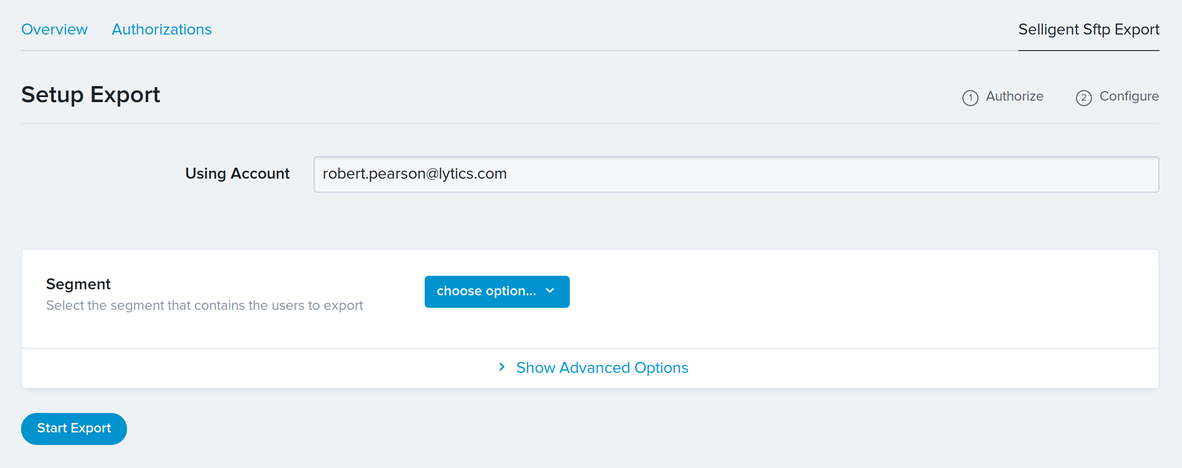
- Segment Name: Select the segment that you would like to export to Selligent.
- Show Advanced Options: expands more configuration options.
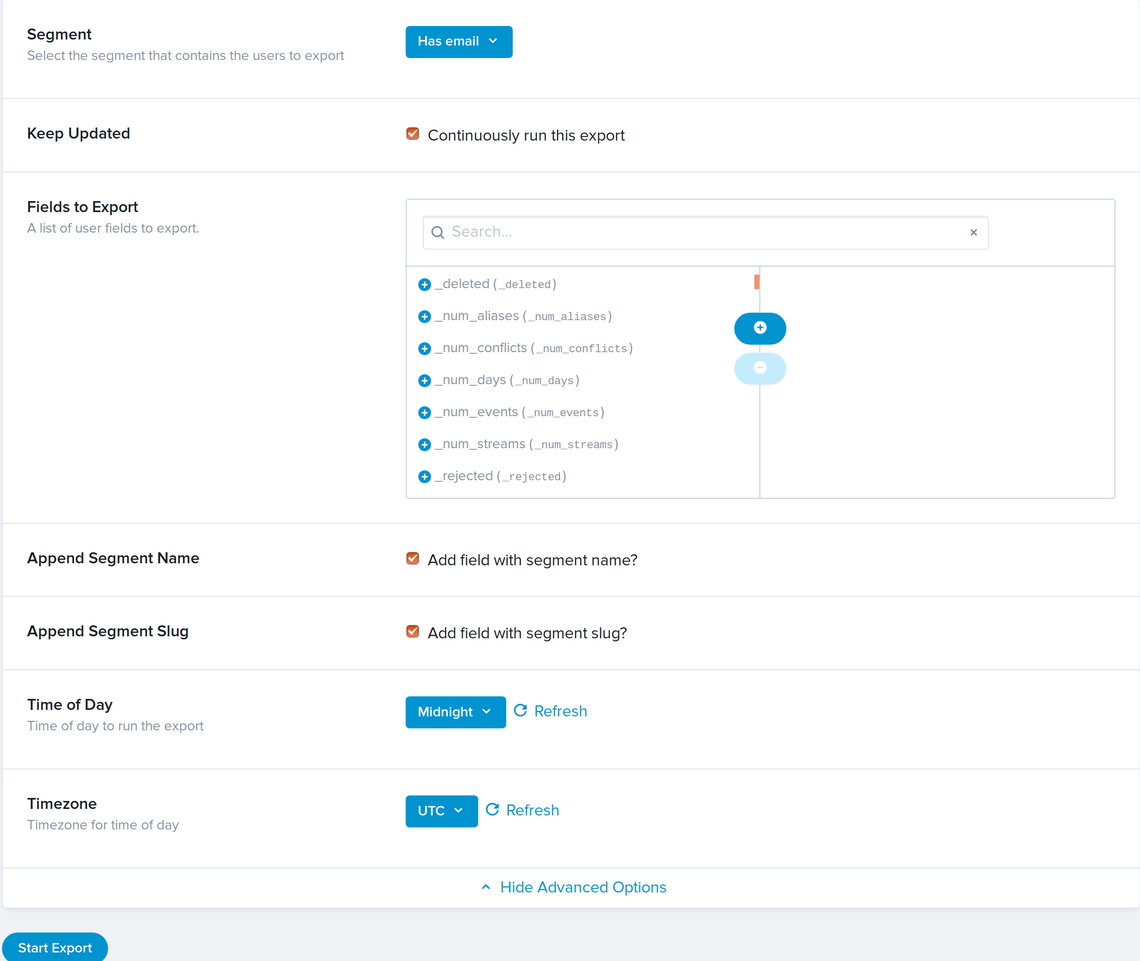
- Keep Updated Run this export daily.
- Fields to Export: Use this to choose only specific fields to export. If it is left blank, then all user fields will be exported.
- Append Segment Name: Adds a column with the name of the segment to each row.
- Append Segment Slug: Adds a column with the slug of the segment to each row.
- Time of Day: Set when this export will run each day if Keep Updated is set.
- Time Zone: Set what timezone to use for Time of Day.
-
Click “Start Export” to begin the export.
-
The file should appear in the sftp folder in a few minutes.
Setup Reoccurring FTP Import in Message Studio
You can configure Internal Profile Data Sources and Profile, Supplemental and Local Interaction Extensions with recurring imports of data via FTP. To set up a recurring import from an FTP source or an External Data Source into your Internal Data Source, or to an Extension that is of type Profile, Supplemental, or Interactions > Internal (also known as Local), perform the following actions:
- In the Message Studio navigation panel, click Data Management, then expand Data Sources.
- Click either Internal Profile or Extensions.
- On the summary tab, choose the data source you want to modify and click Edit.
- Click the Recurring Imports tab or click Next to go to the Recurring Imports step.
- Click Add Import to open the configuration screen.
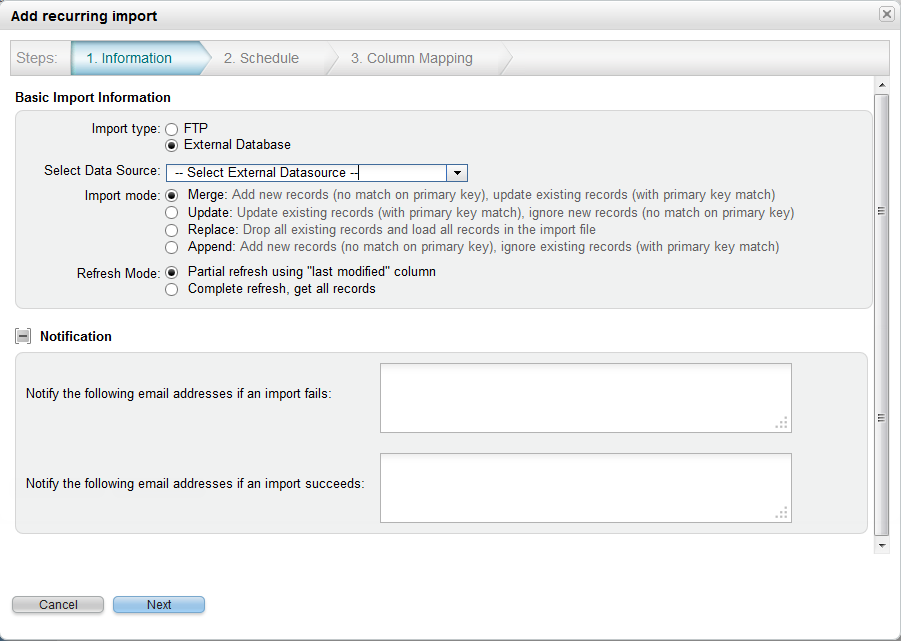
- On the Step 1. Information screen, specify the following parameters:

- Import type—Choose FTP:
- Recurring updates will come from the FTP server at the IP address shown when you mouse-over the Information icon. If you choose this option, enter a common File name prefix (export-lytics-segment_slug) for the file, and enter the File name suffix (.csv). Other characters within the name are wild-carded.
- Import mode—Choose one of the following import modes:
- Merge—Adds new records that don't have a matching primary key; updates records that do have a matching primary key.
- Update—Updates existing records that have a matching primary key; ignores new records that don't have a matching primary key.
- Replace—Drops all records and imports all new data from the file.
- Append—Adds new records that don't have a matching primary key; ignores records that do have a matching primary key.
- Refresh Mode—Select one of the following:
- Partial refresh using "last modified" column—Only imports the data records that indicate they have been modified since the last import.
- Complete refresh, get all records—Imports all data source records.
- Import type—Choose FTP:
- Click Next. The Schedule screen appears.

- On the Schedule screen, specify the following parameters:
- Choose when you want the import run (Manually, Hourly, Daily, Weekly), and the Start Time.
- the lytics export runs daily, so select Daily, Weekly, or Manually
- be sure to set the start time after the lytics export is set to run.
- Click the information icon to see the current date and time.
- Note: If you select Manually, you must go and edit the database then return to this step, highlight the import in the Summary Page and click Run Now.
- Choose when you want the import run (Manually, Hourly, Daily, Weekly), and the Start Time.
- Click Next. The Column Mapping screen should appear, specify the following parameter:
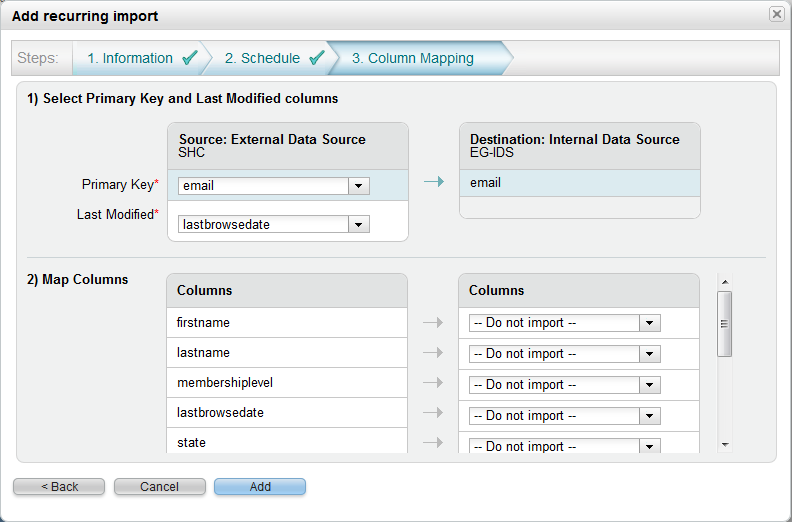
- Primary Key—Select the column in the data source to use as the Primary Key.
- Last Modified—Select the column that contains the last modification date of the records.
- Map Columns—Use the drop-down lists to select the columns in the Internal Data Source (on the left) that map to the External Data Source (on the right) that is providing the updated data.
- Click Add to complete the setup.
Updated 10 months ago