

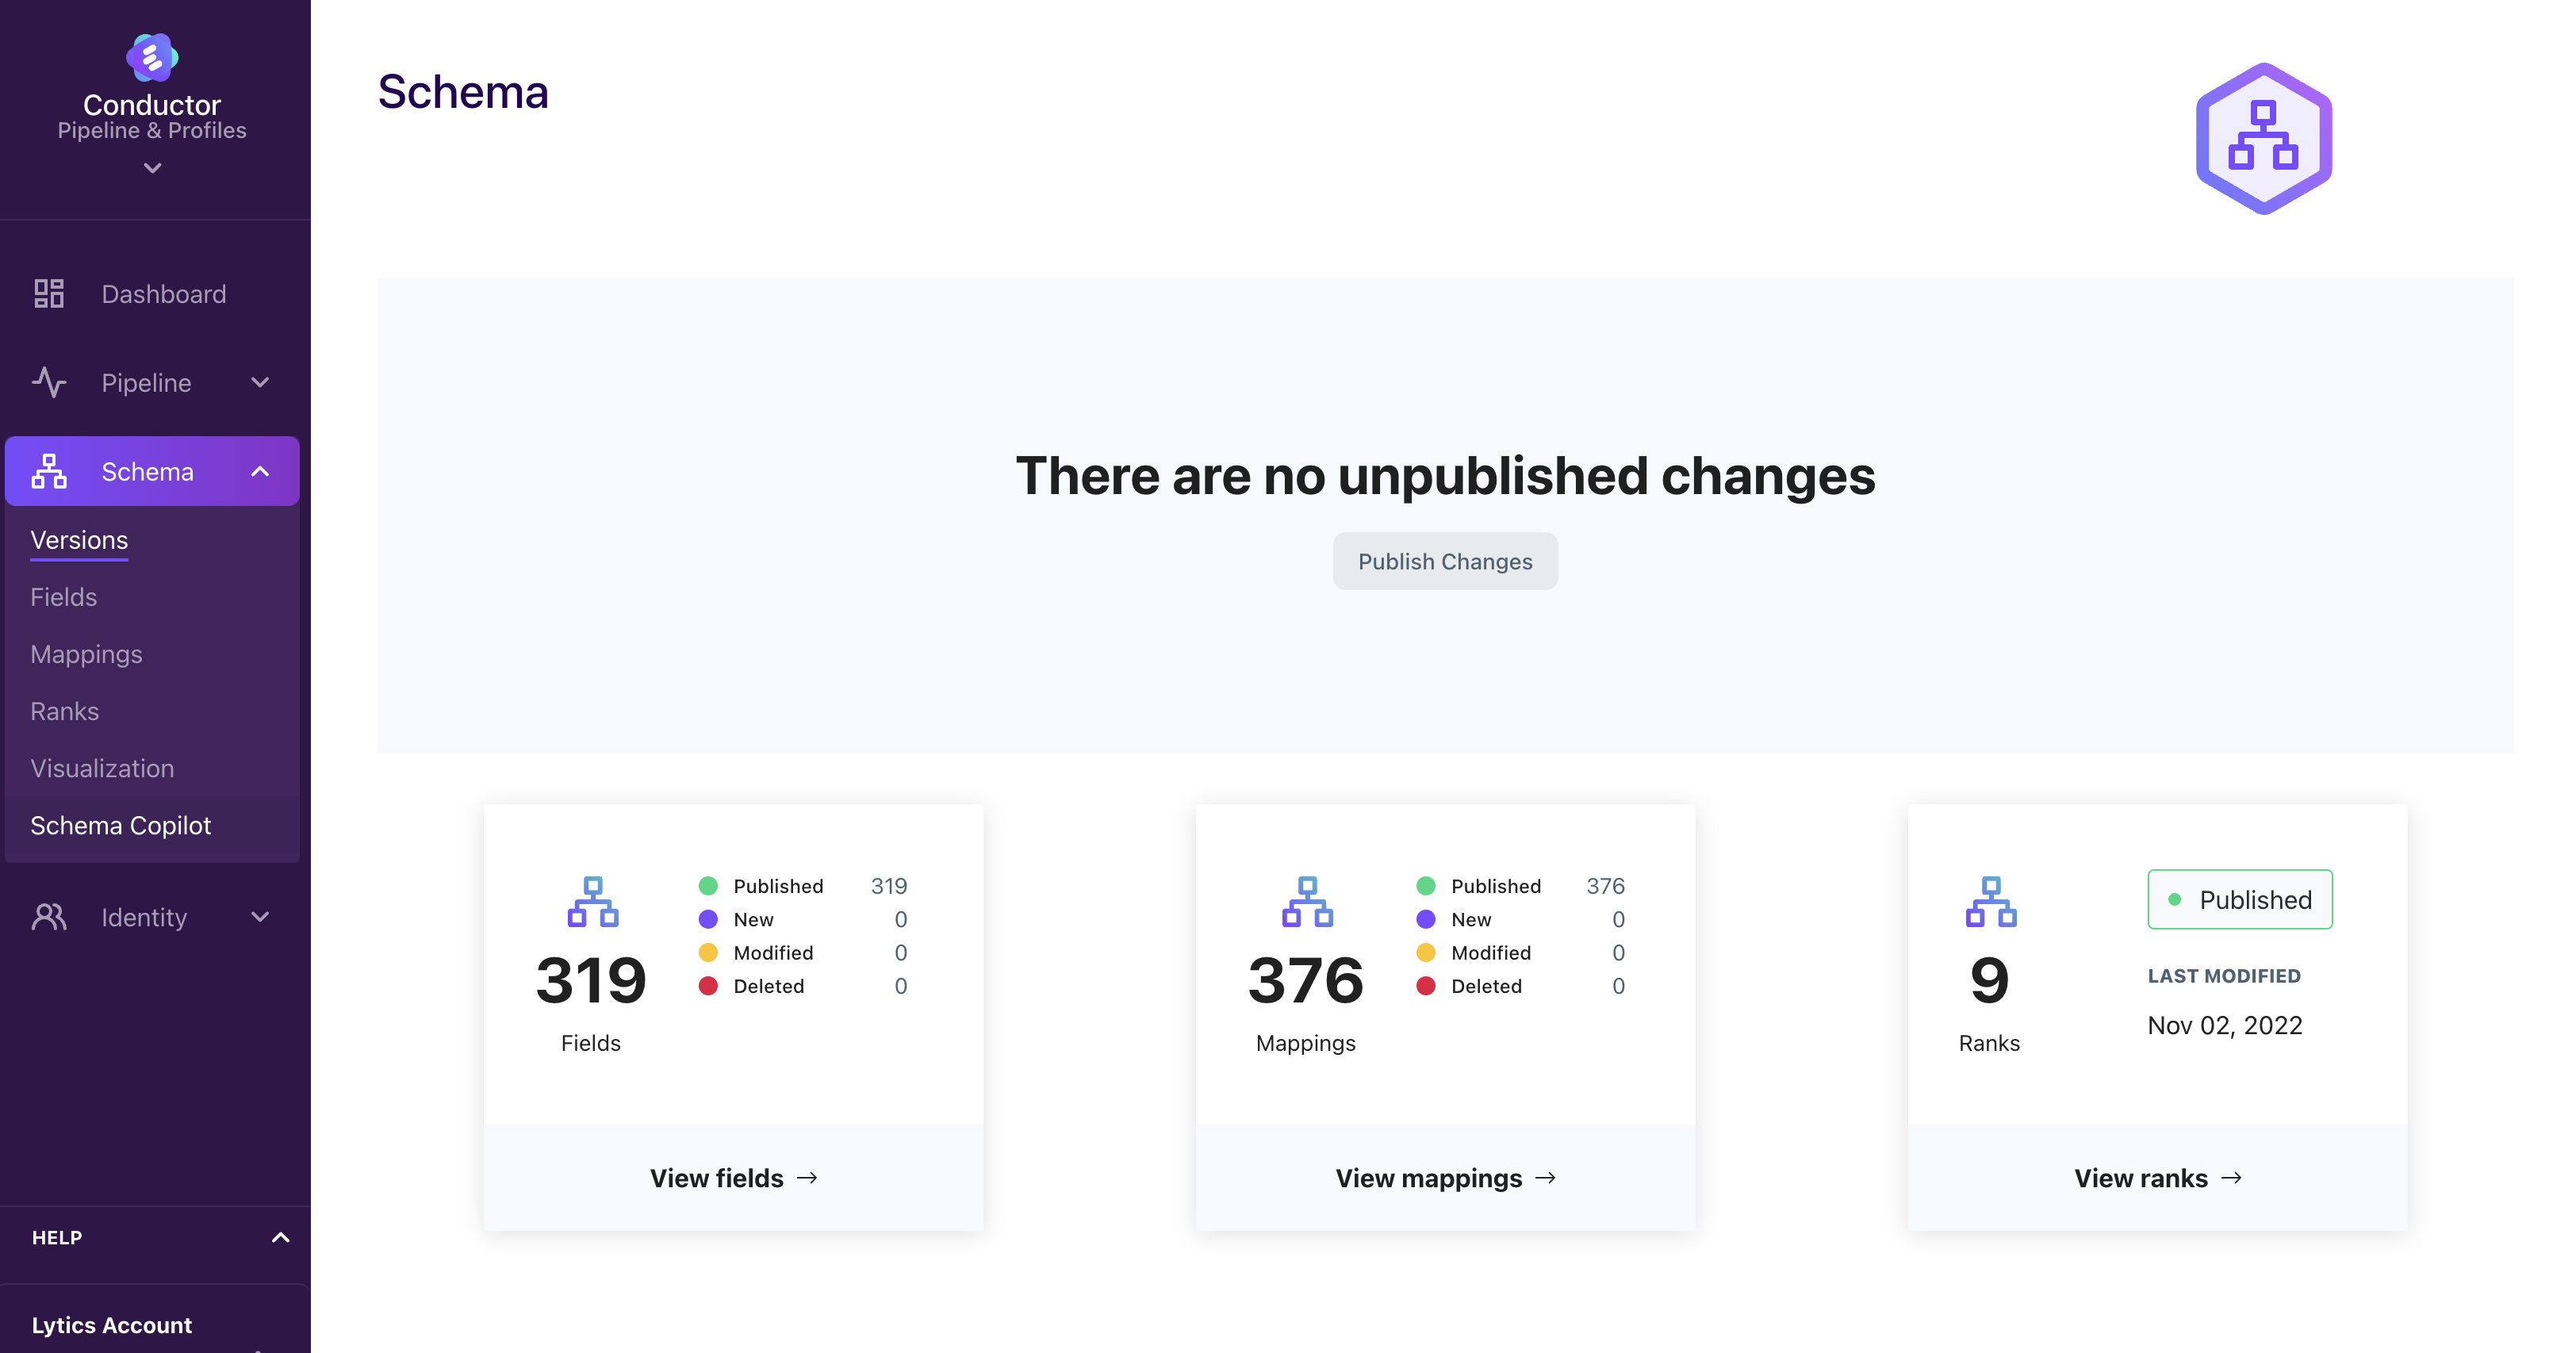
Schema Copilot
Overview
Schema Copilot revolutionizes how users manage data connections, streamlining the integration process with our Customer Data Platform (CDP), Lytics.
Before starting this document, it is important to understand some key fundamentals regarding fields and mappings, which can be found here.
Streamlined Data Integration Process
Integrating custom data into Lytics is simplified into two straightforward steps:
- Schema Definition: Outline the schema to dictate how your new data source should update existing customer profiles.
- Data Stream Creation: Establish a new data stream tailored to your source to ensure seamless data flow.
Features of Schema Copilot
Schema Copilot leverages advanced generative artificial intelligence to comprehensively scrutinize your new data source. It offers intuitive suggestions for fields and mappings, enabling seamless integration of your new data source with the existing schema. This intelligent assistance ensures that your data aligns perfectly with the Lytics platform, enhancing your customer data integration's overall efficiency and accuracy.
Getting Started
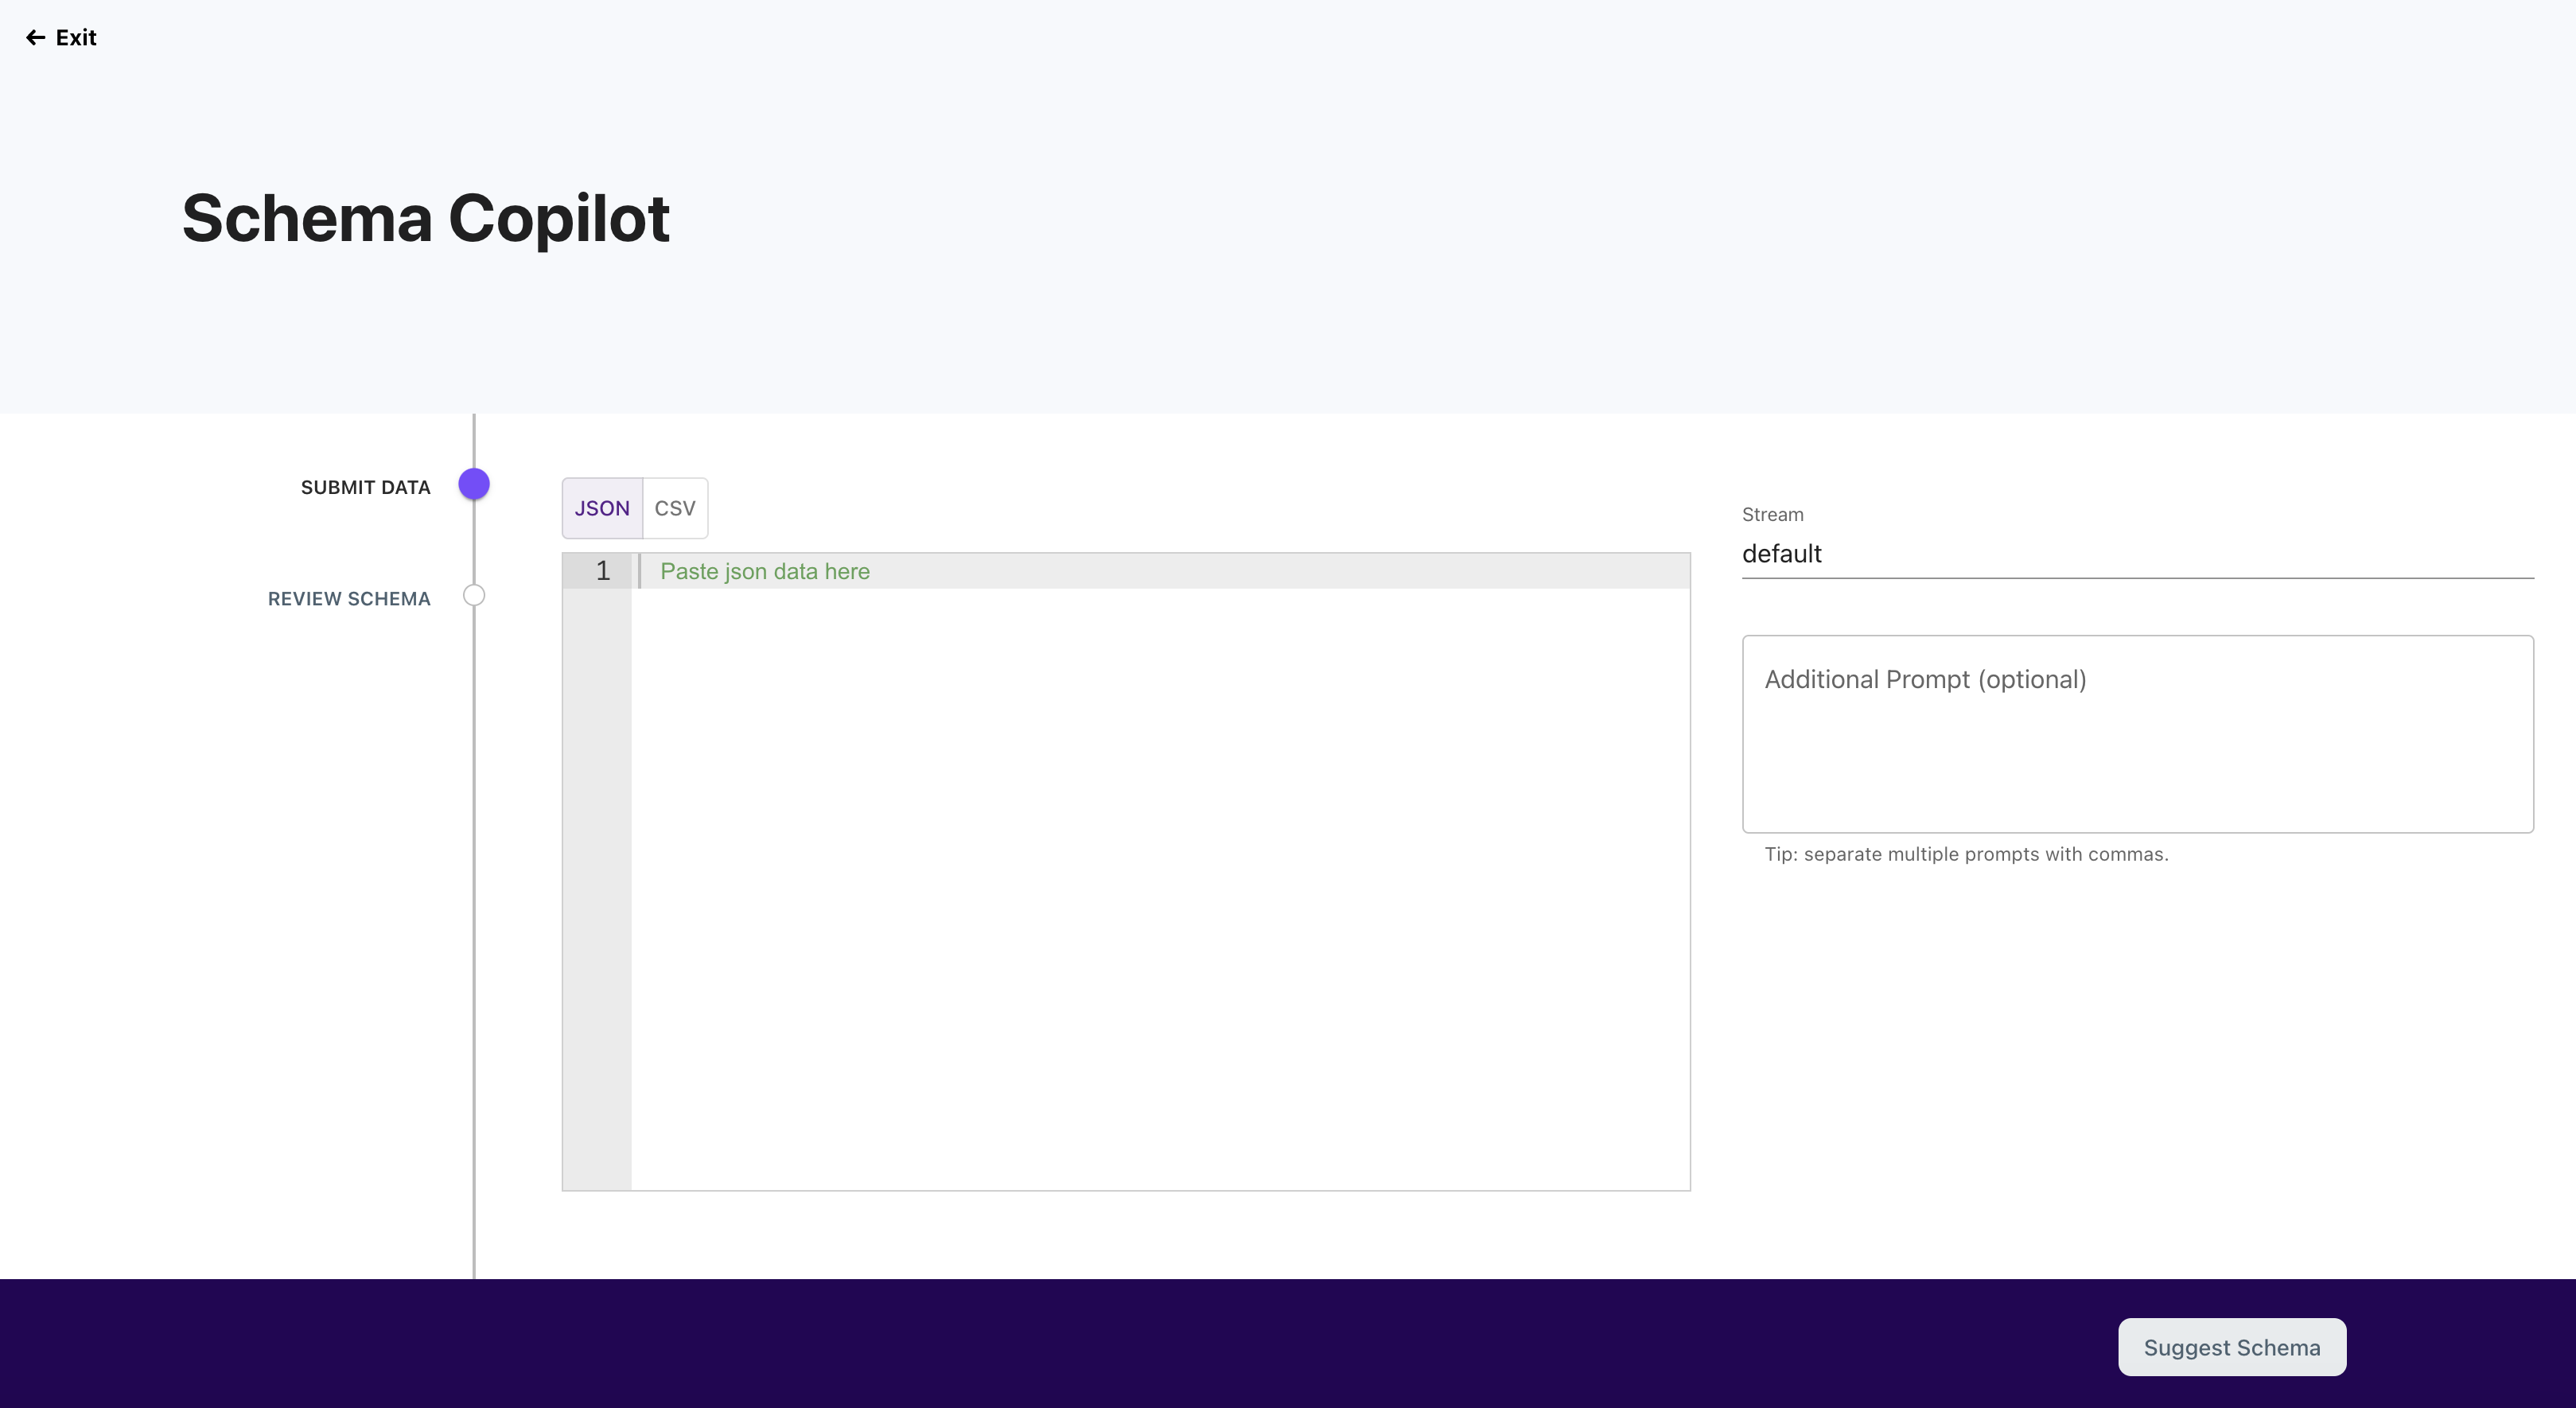
To get started with Schema Copilot:
-
Navigate to the Schema Copilot wizard.
-
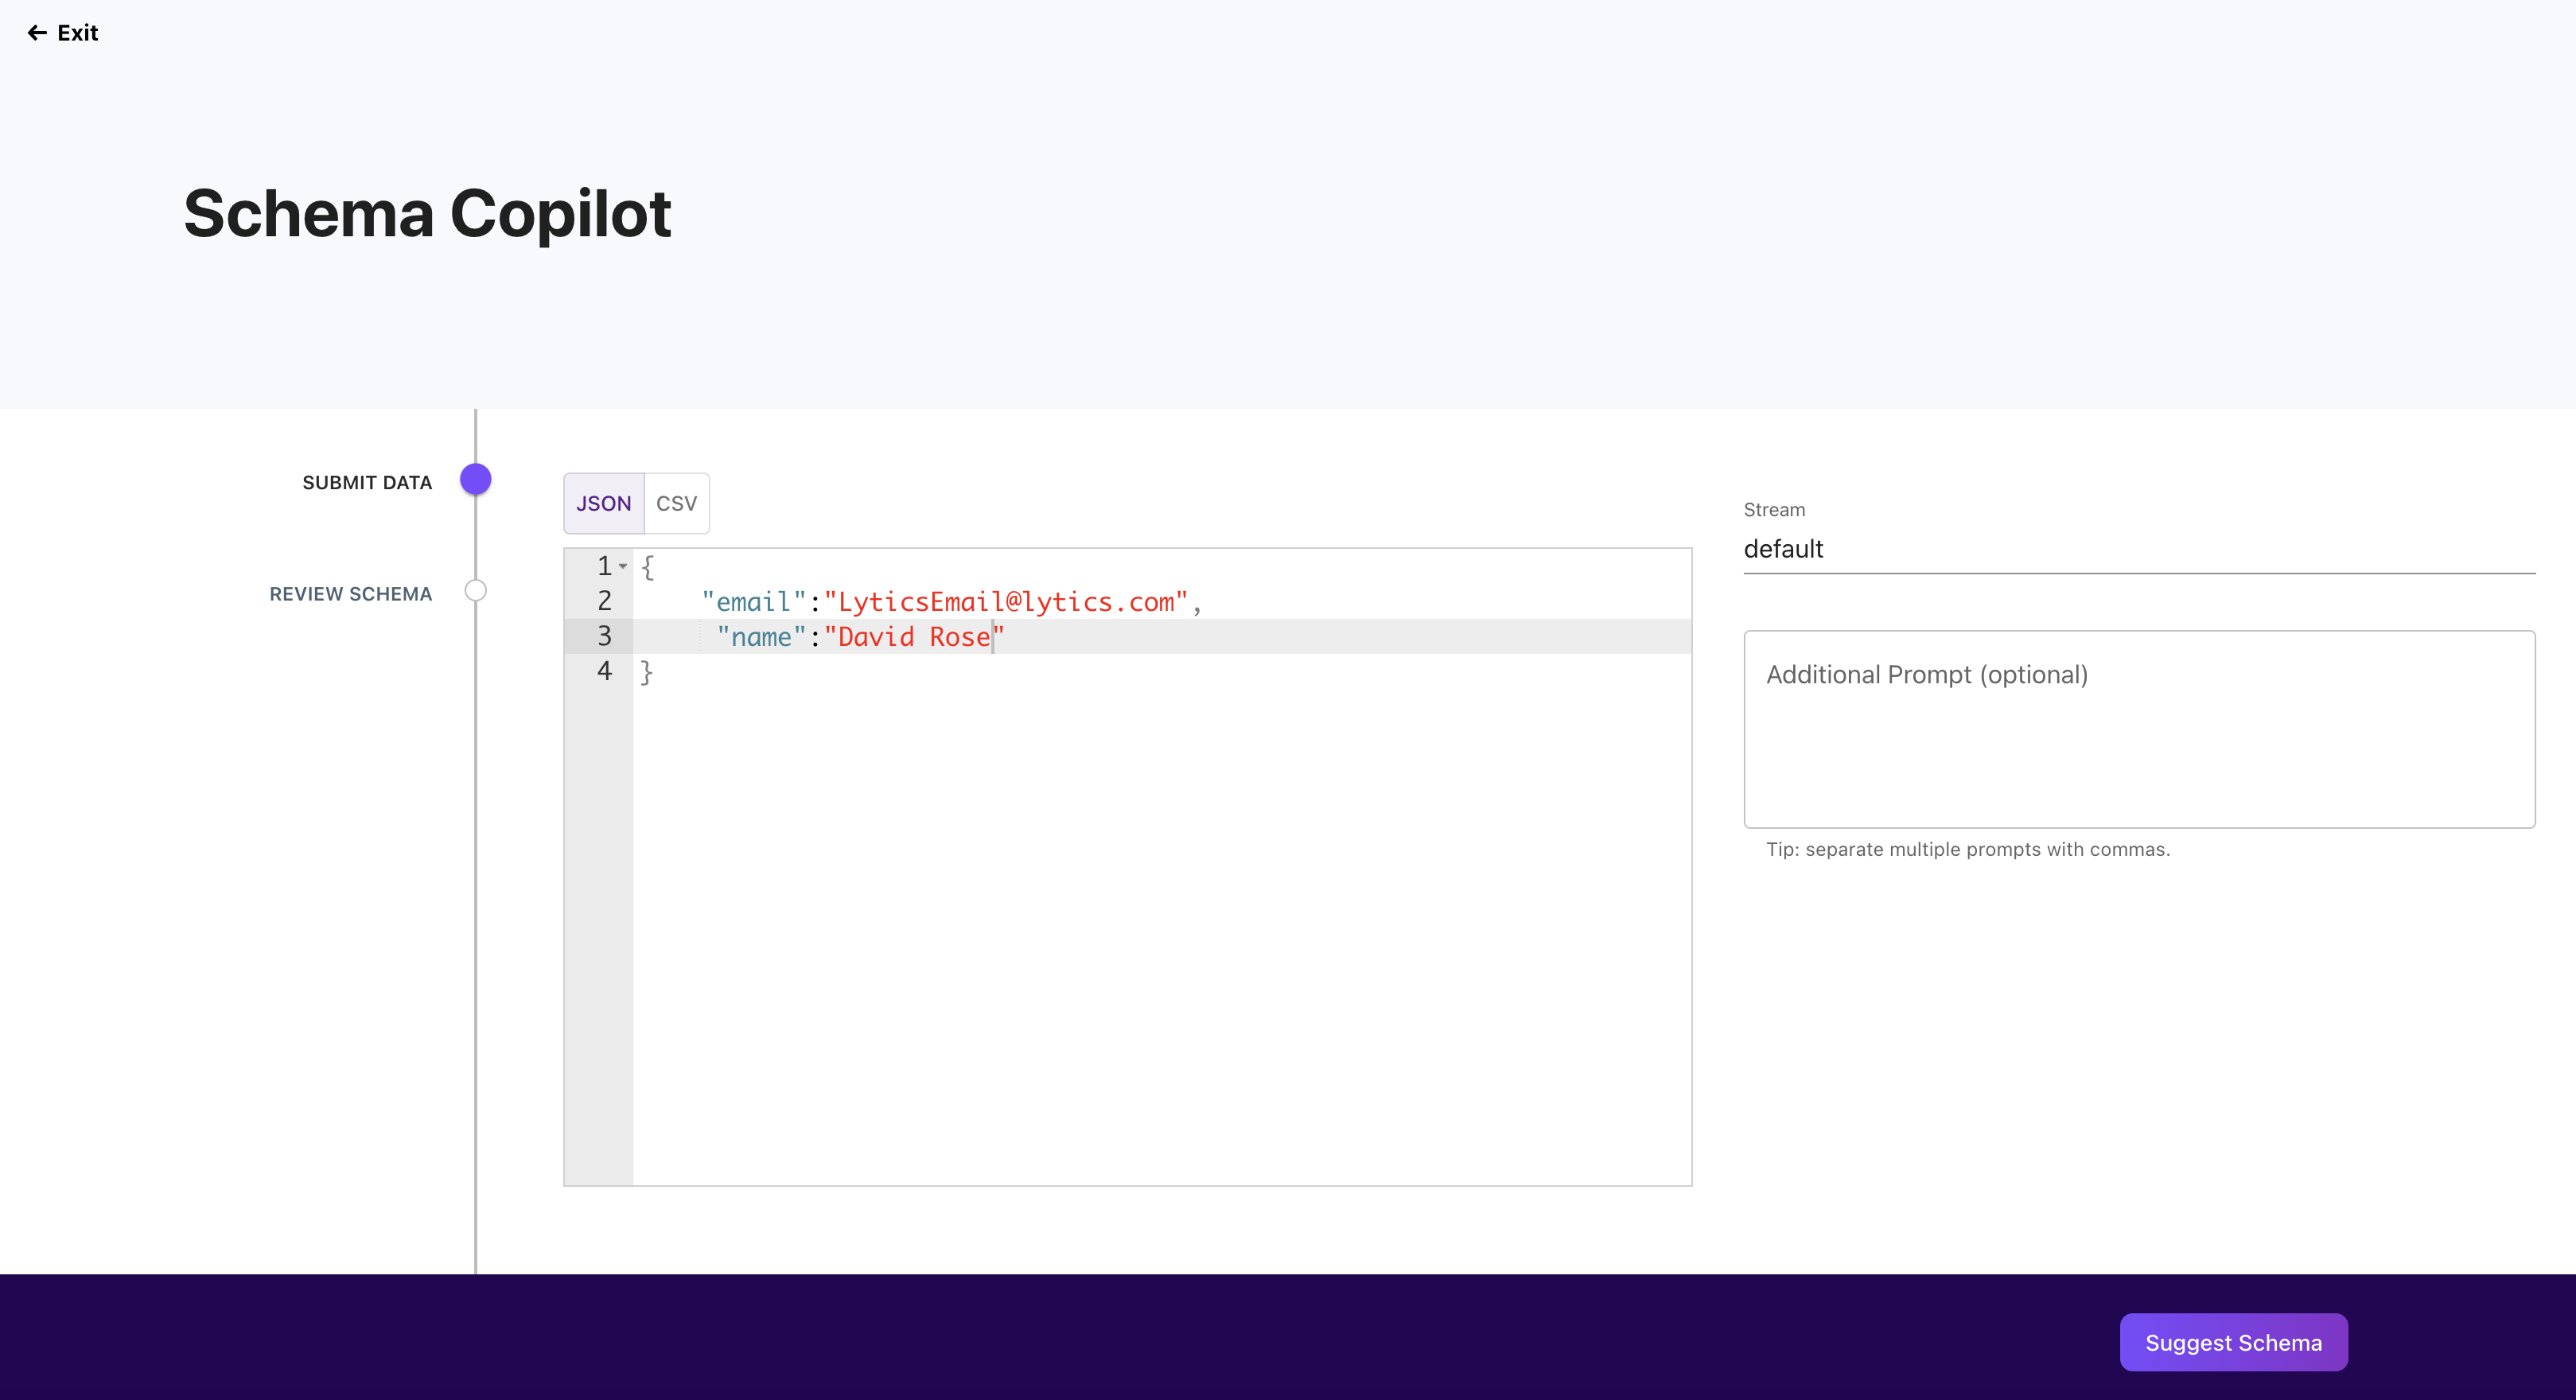
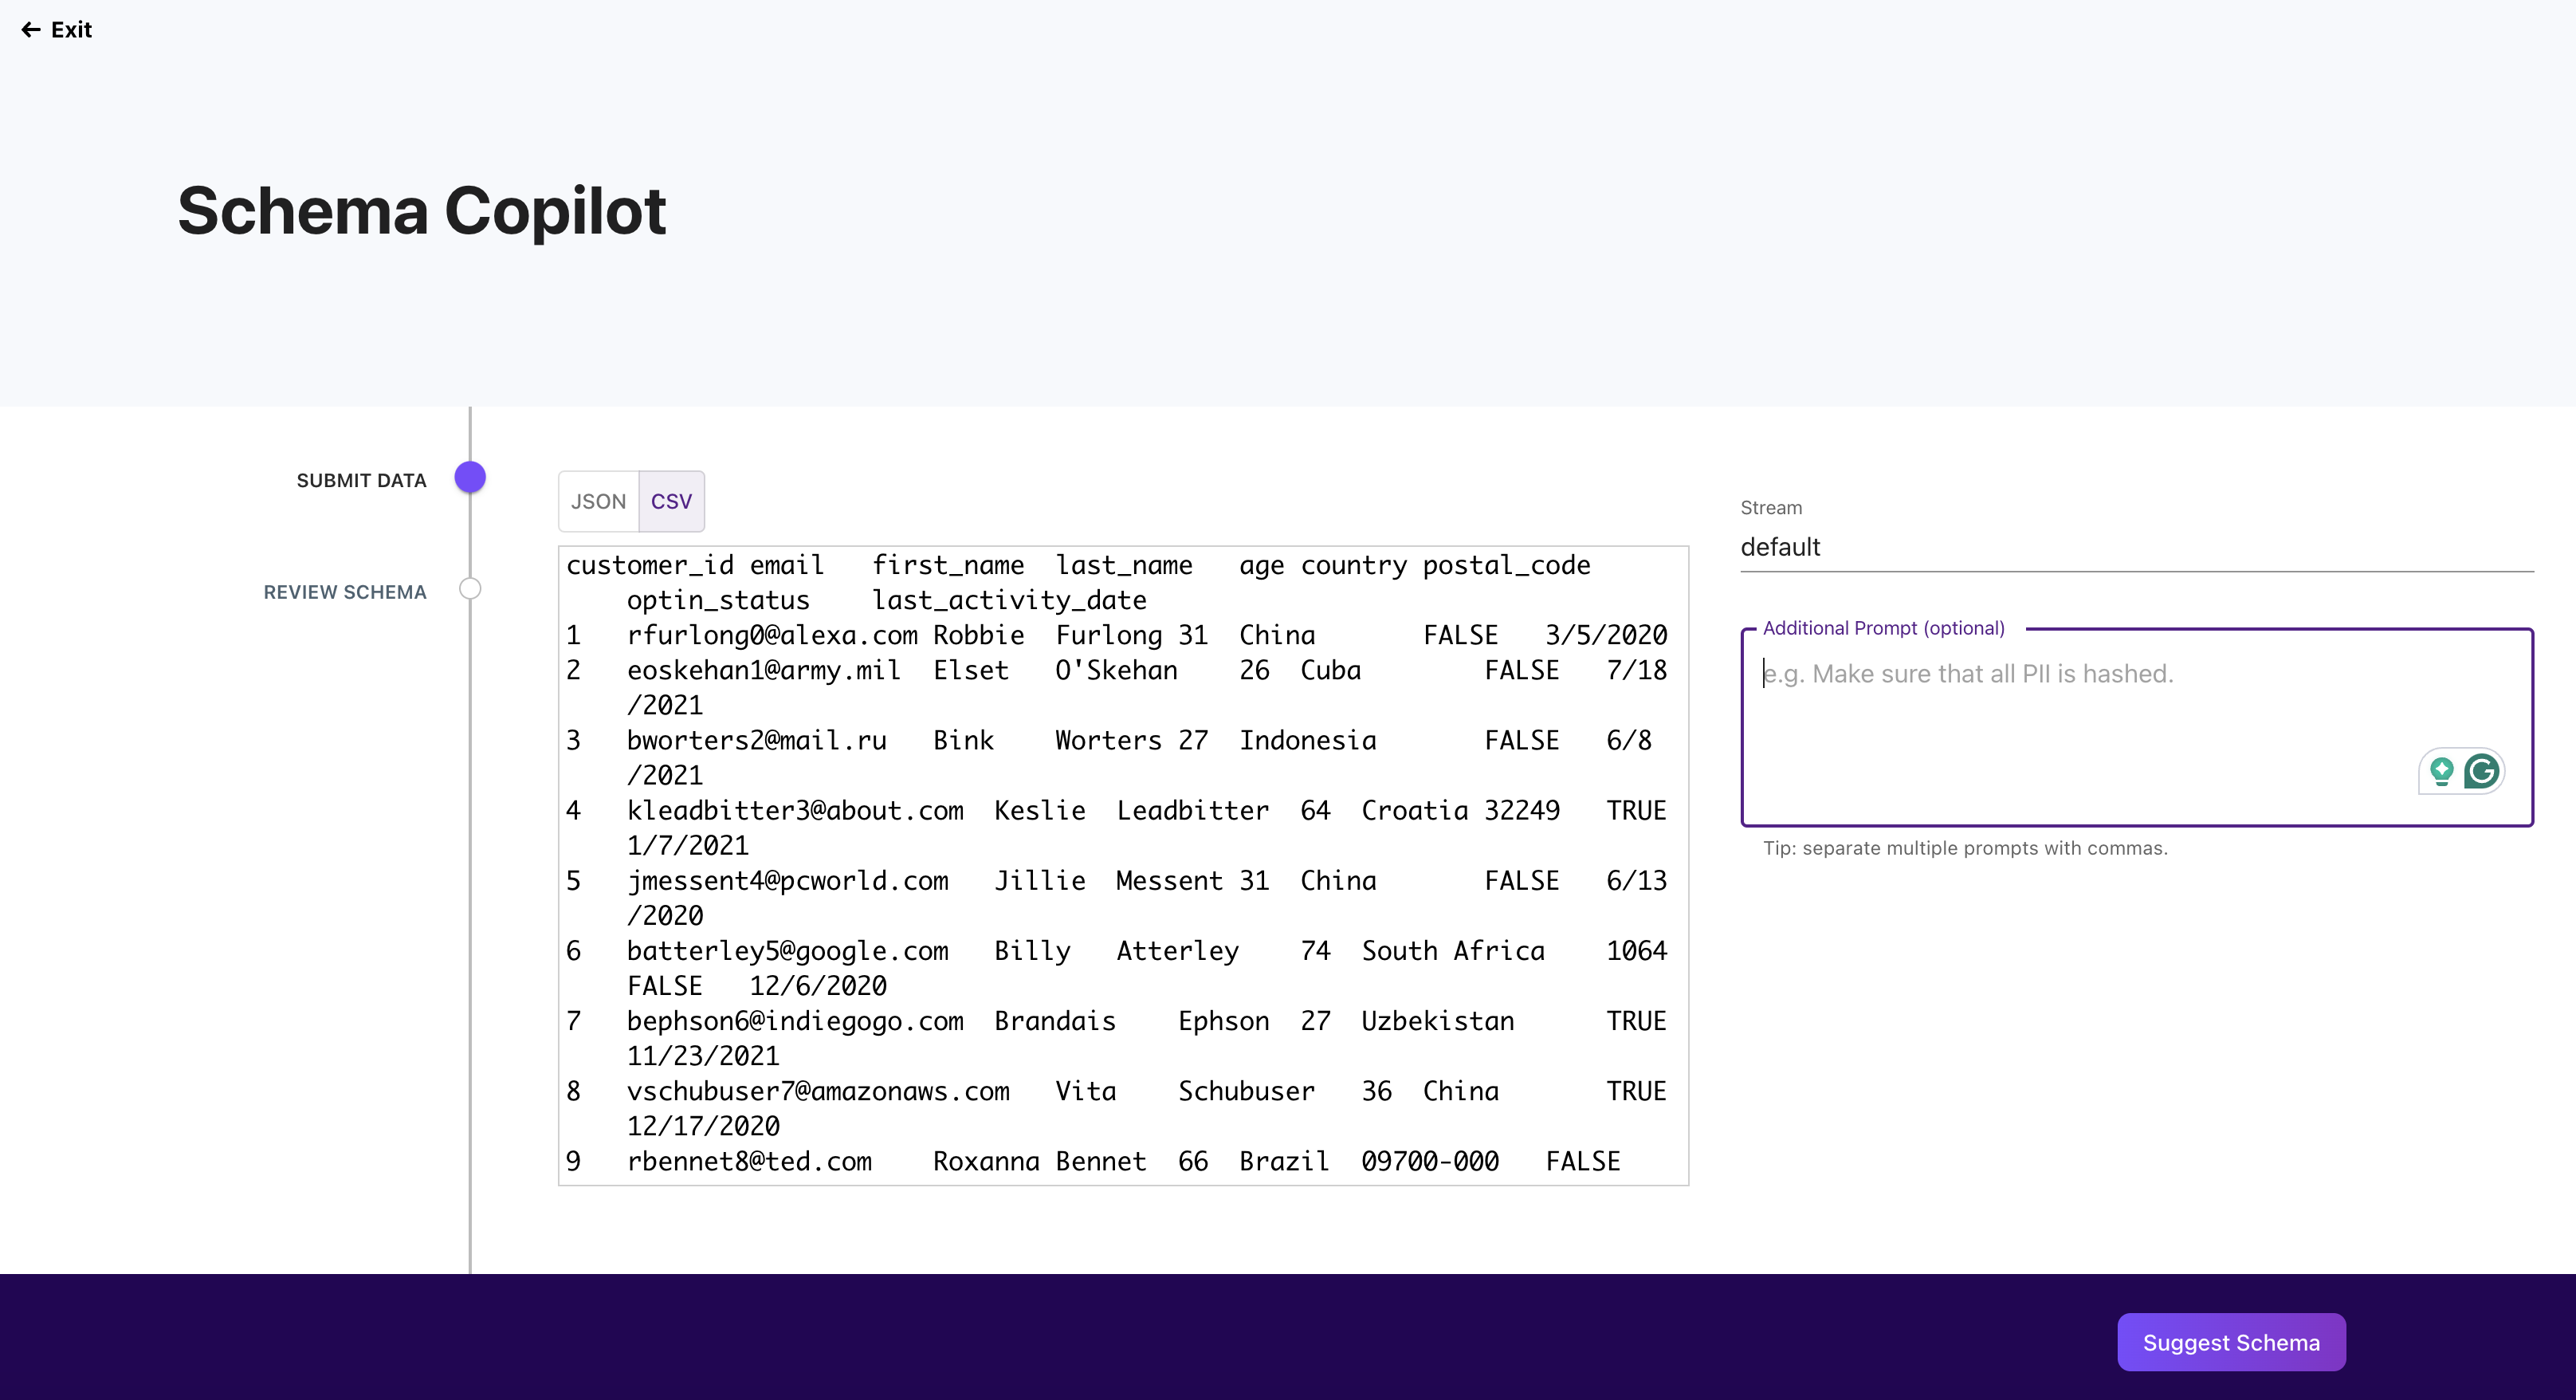
Fill out the "Provide Data" box with an example of your data source's data, either JSON or CSV. In the "Additional Prompt" box, you can also give the model more directives.
-
JSON Example
-
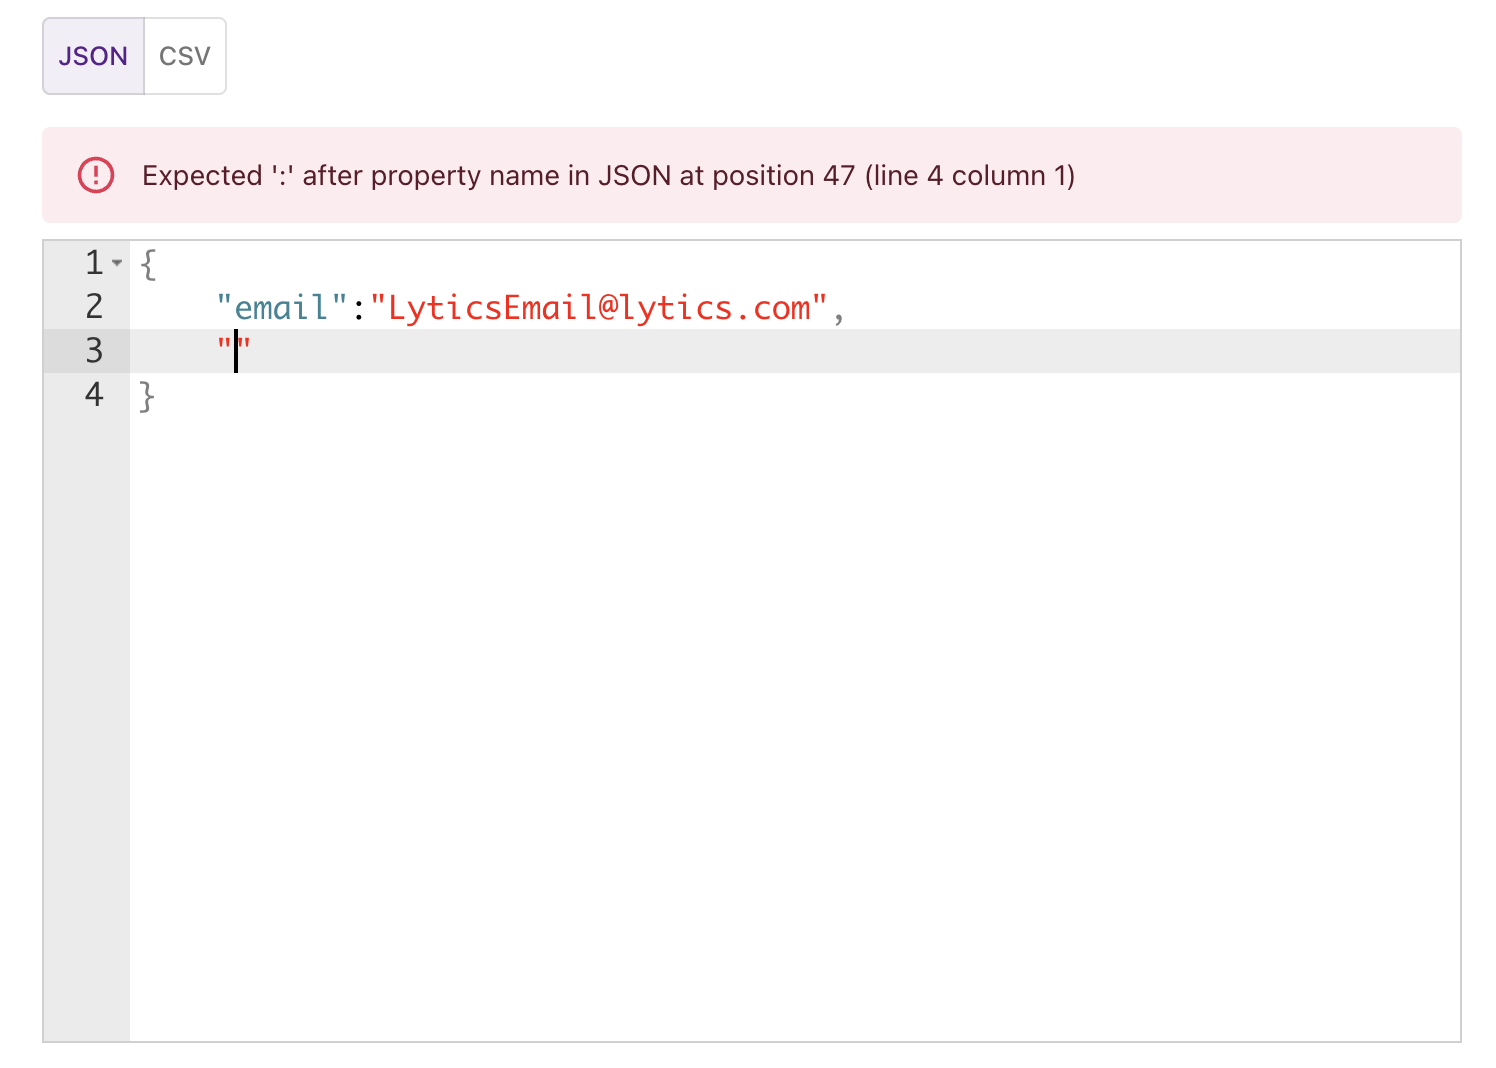
Tip: If you do not correctly input the JSON, you will see an error message on the red banner.
-
-
CSV Example
-
-
Select the stream from which the data is going to be coming in.

-
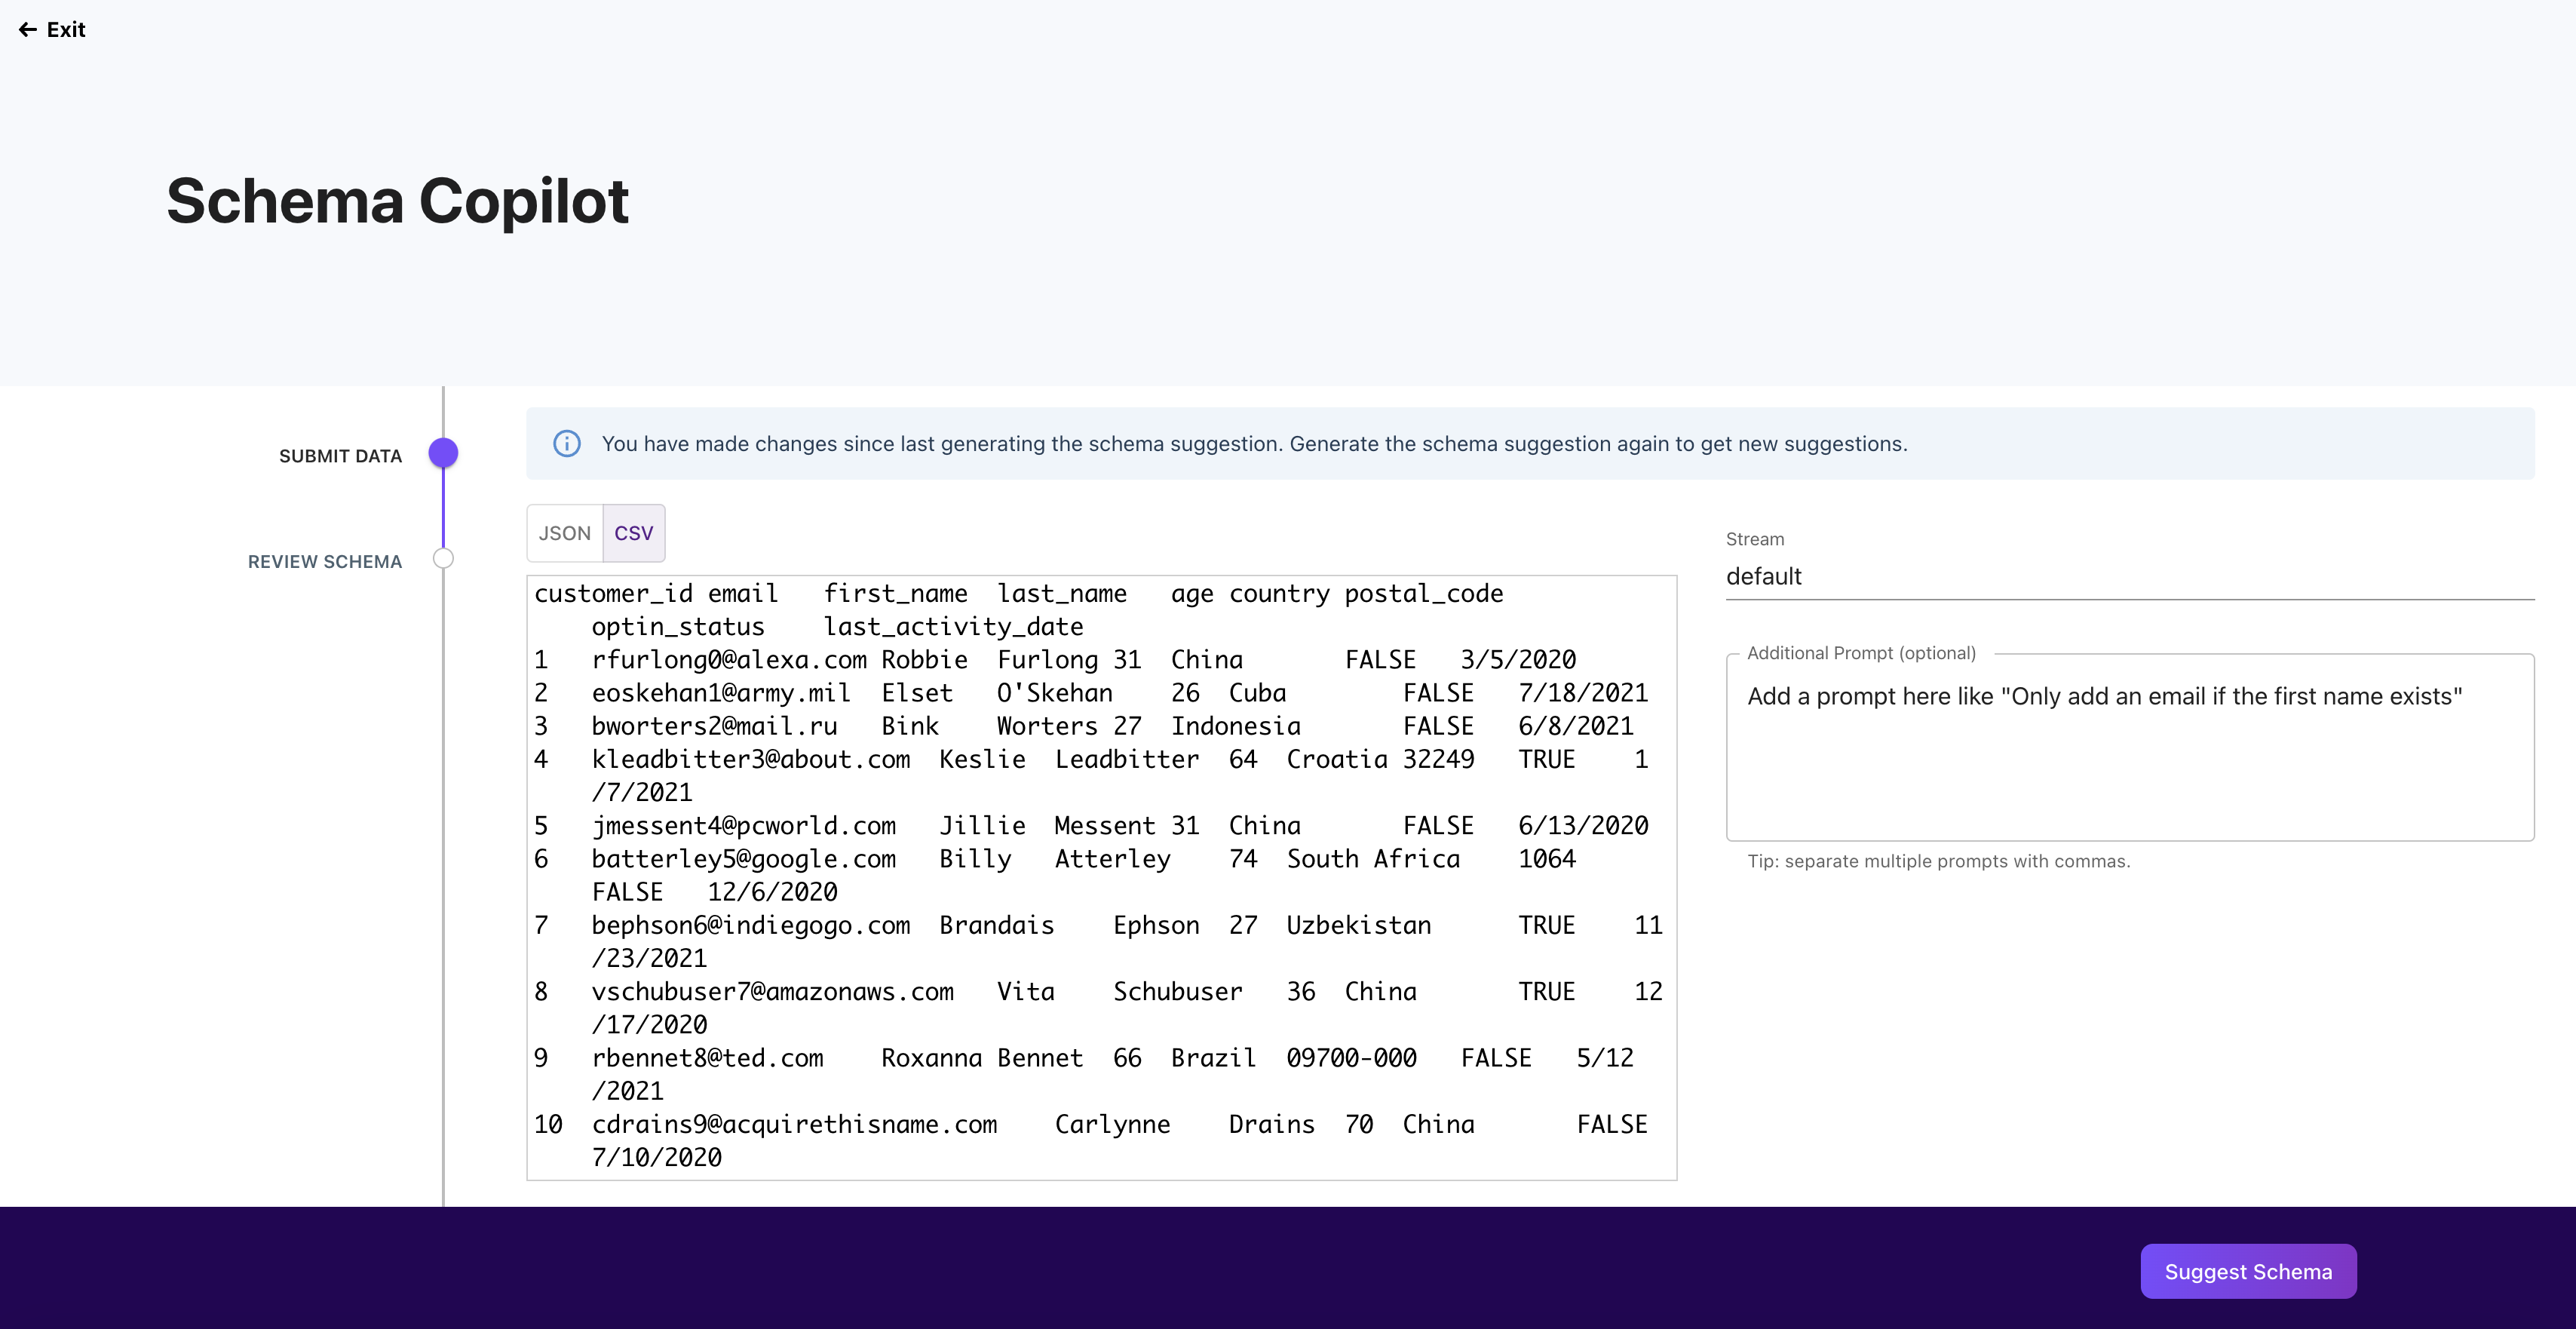
(Optional) If you would like to have more complex data types or only map data in certain conditions you can do that using the "Additional Prompt Box"
-
Example of Adding a prompt based on the CSV file input:
-
Now, on the email mapping for the default stream, you will see a condition that requires the first name to exist.
-
-
Click "Suggest Schema" and review the suggestions in the editable data grid. If you want to accept the suggestions, click "Save Schema." If you don't, you can return to the first step to change your data or prompt or exit the wizard entirely.
-
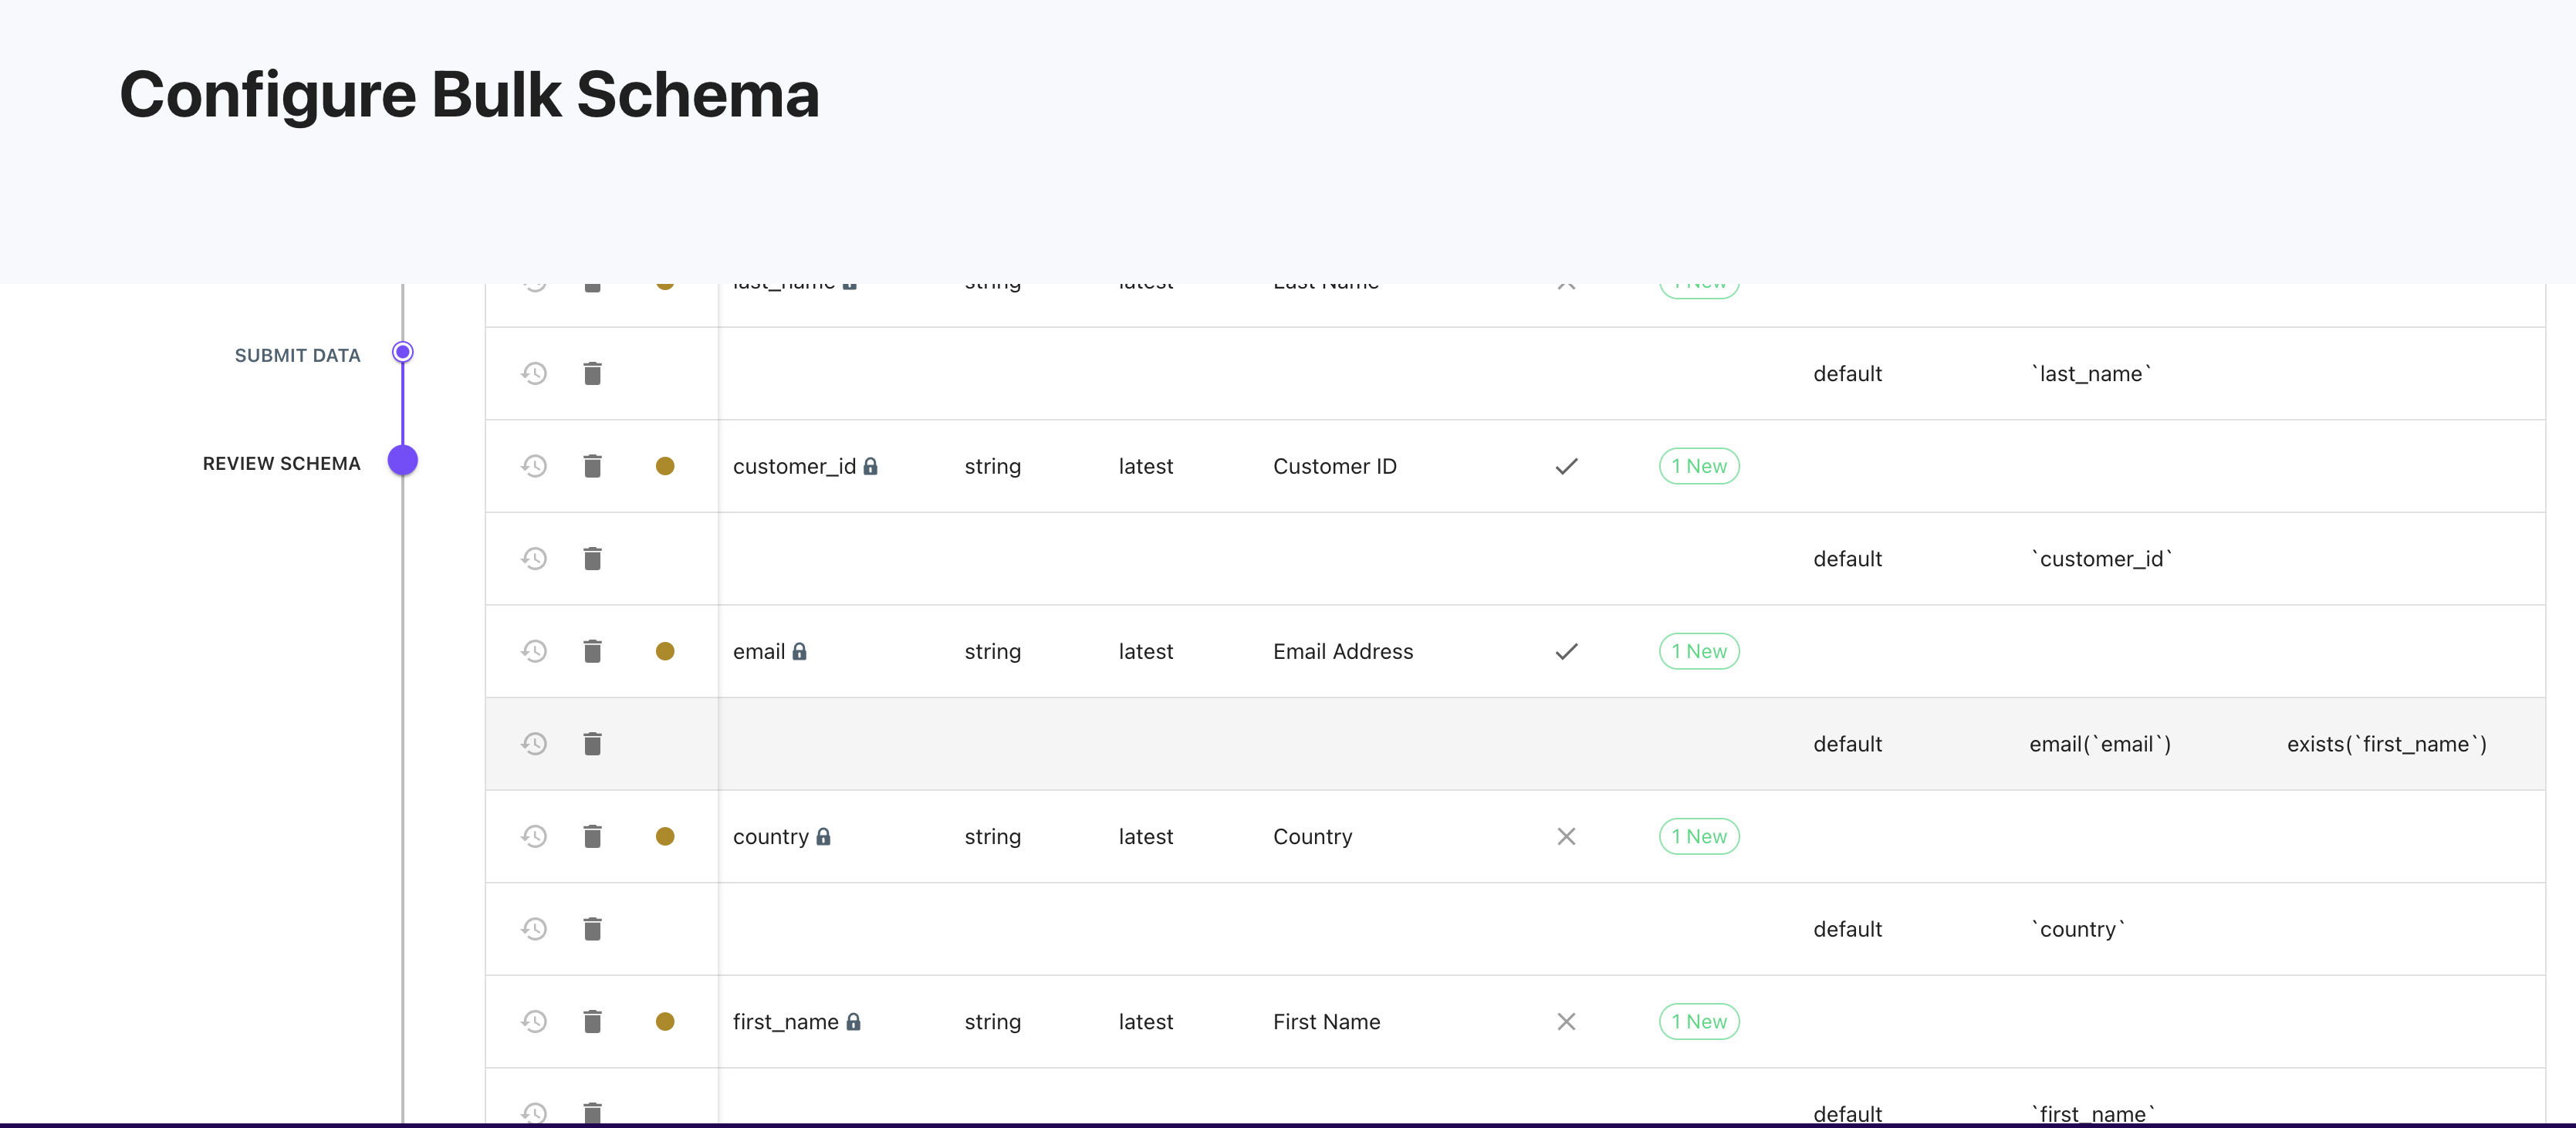
Understanding the Suggested Schema View:
-
Field rows will have the following columns:

- Field Name: The field's name being added or updated. If there is a green dot on this row, the field is new; if the dot is yellow, then the field already exists and is being updated. The lock next to the field indicates that this is an identifier and, therefore, cannot be edited as it would impact the integrity of the profiles already built.
- Type: This will indicate the data type. To better understand Lytics Field data types, please visit here.
- Merge Op: This will indicate how data merges into this field over time and is defined here.
- Description: This is the short description of the field and will act as the field name for the audience builder.
- Is Identifier: This will indicate whether it is an identifier.
- Mappings: The number of mappings recommended for the field based on
-
Mappings will have the following columns:

- Stream: This will be the data source that will populate the mapping. In the example above, the stream is "default," Lytics Jstag's default stream.
- Expression: This is where additional aggregation, cleansing, hashing, string parsing, and manipulation can be done using LQL. Adding more context to the "Additional Prompt" Section will automatically populate some expressions. To learn more about what expressions are available, please look here.
- Condition: Additional logic should be used to decide if the data should map. This will use the LQL syntax.
-
-
-
Once the suggestions are saved, you can publish the changes by clicking "Publish Changes" on your Schema Dashboard.