

AdRoll
Overview
Connecting Lytics and AdRoll allows you to leverage Lytics Audiences in your AdRoll campaigns. When a visitor accesses your site Lytics identifies who they are and what Audiences they are currently a member of. This information is passed to AdRoll via the AdRoll SmartPixel, which is tied to the campaigns within your AdRoll account. As a result, your ads can target audiences based on any aspect of Lytics audiences such as behavioral scores or content affinity, in real-time.
Before You Begin
- Ensure you have installed the Lytics JavaScript Tag. This is required in order to identify your web visitors and pass the audiences they are currently a member of to AdRoll in real-time.
- Access to an Admin username & password in Adroll is required in order to enable the usage of Lytics Audiences within AdRoll.
- An AdRoll SmartPixel ID is required in order to properly target the correct account. The steps outlined below will walk you through how to obtain this ID if you do not already have it handy.
Authentication
First, you need to authorize Lytics to use your AdRoll account.
-
Log into your Lytics account.
-
Open AdRoll integration or Click Data > Integrations and select AdRoll from the integrations list.
-
Click Authorizations.
-
Click Add new authorization.
-
In the Admin Username box, enter your AdRoll admin username.
-
In the Admin Password box, enter your AdRoll admin password.
-
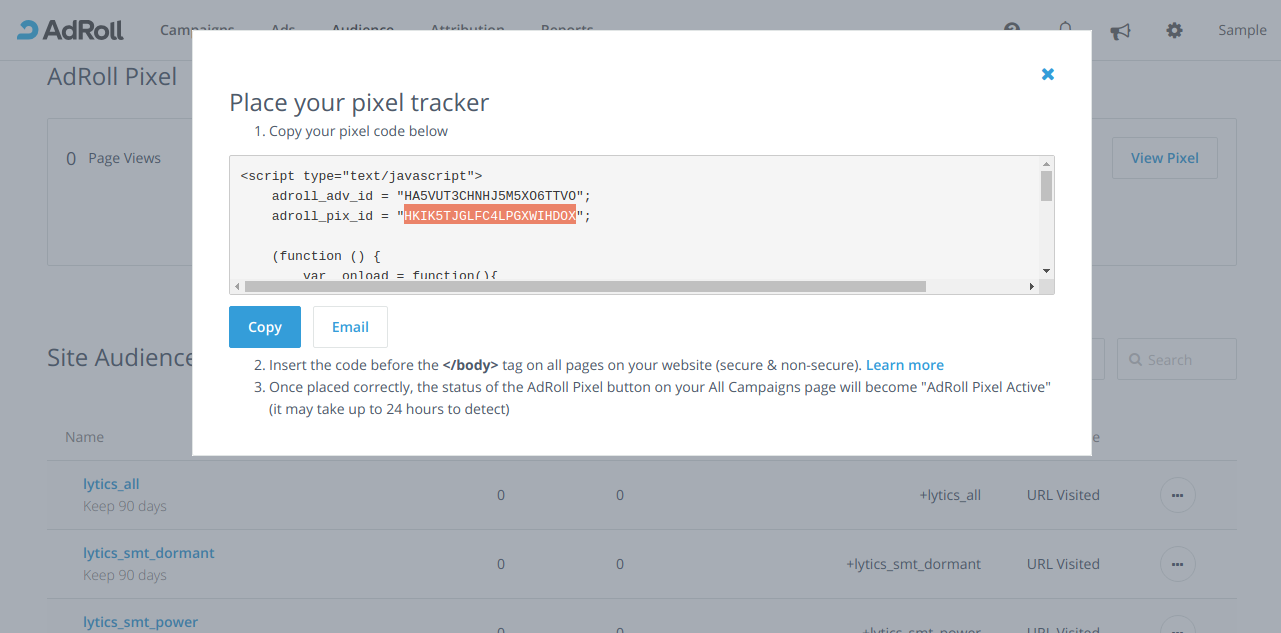
In the Account Pixel box, enter your AdRoll SmartPixel ID.
- Your ID can be found within your SmartPixel. Access that pixel by following AdRoll's documentation. Once you have the pixel pulled up your ID can be found following
adroll_pix_id=in your pixel tag.
- Your ID can be found within your SmartPixel. Access that pixel by following AdRoll's documentation. Once you have the pixel pulled up your ID can be found following
-
In the Description box, enter any description.
-
Click Authorize to save the authorization.


Share Lytics Audience Definitions with AdRoll
| Summary | |
|---|---|
| Frequency | Once, Daily starting from original start time. |
| Campaign content | None |
-
Log into your Lytics account.
-
Click Data > Integrations and select AdRoll from the integrations list.
-
Click the AdRoll Segment Sync tab.
-
Identify the authorization you would like to use and click Select.
-
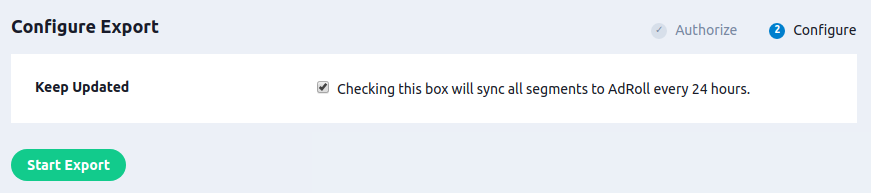
Determine if you would like to keep the audiences in Lytics and AdRoll in sync. If not, ensure the "Keep Updated" option is deselected.
-
Click the Start Export tab.

Lytics will begin adding Audiences to AdRoll immediately but it may take a few minutes to see all audiences depending on total number.
Configure the Lytics JavaScript Tag to Share Visitor Audiences with AdRoll in Real-time
| Summary | |
|---|---|
| Frequency | Real-time |
By default the Lytics JavaScript tag will pass the audiences a current visitor is a member of to AdRoll if the AdRoll SmartPixel is found on the site with the proper ID. If for any reason you would like to prevent the Lytics JavaScript tag from passing data to AdRoll, you can do so by adding AdRoll to the list of blocked integrations in your account settings.
Configure your AdRoll Campaign to Use a Lytics Audience
-
Log into your AdRoll account.
-
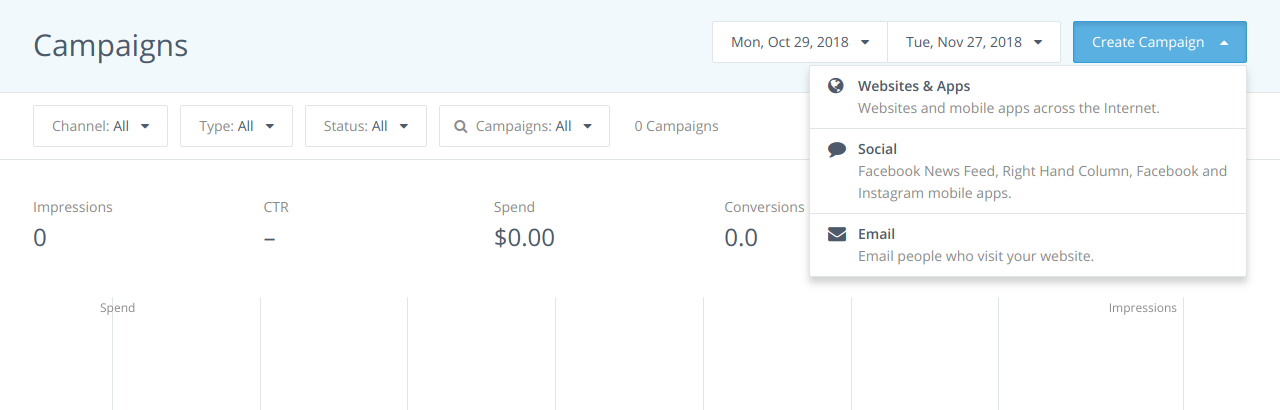
Select Create Campaign.
-
Click Websites & Apps to get started.
-
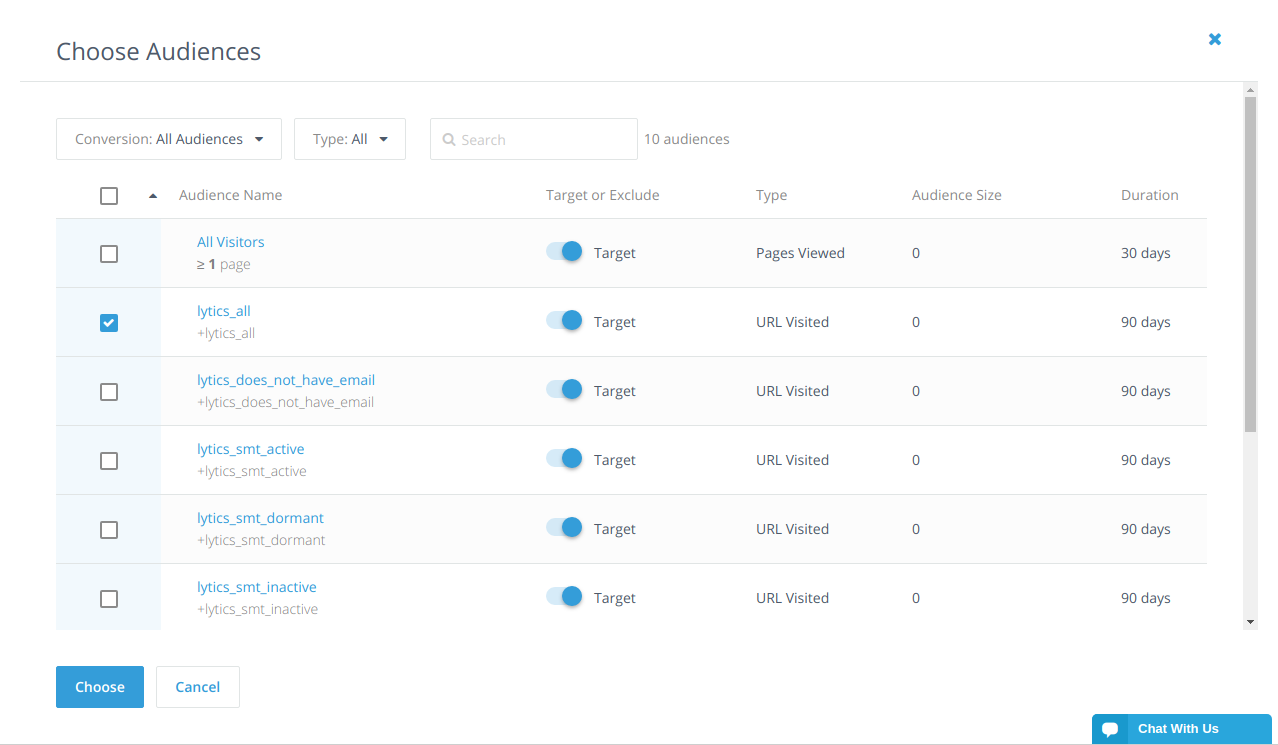
Click Audience and then Choose at the top right.
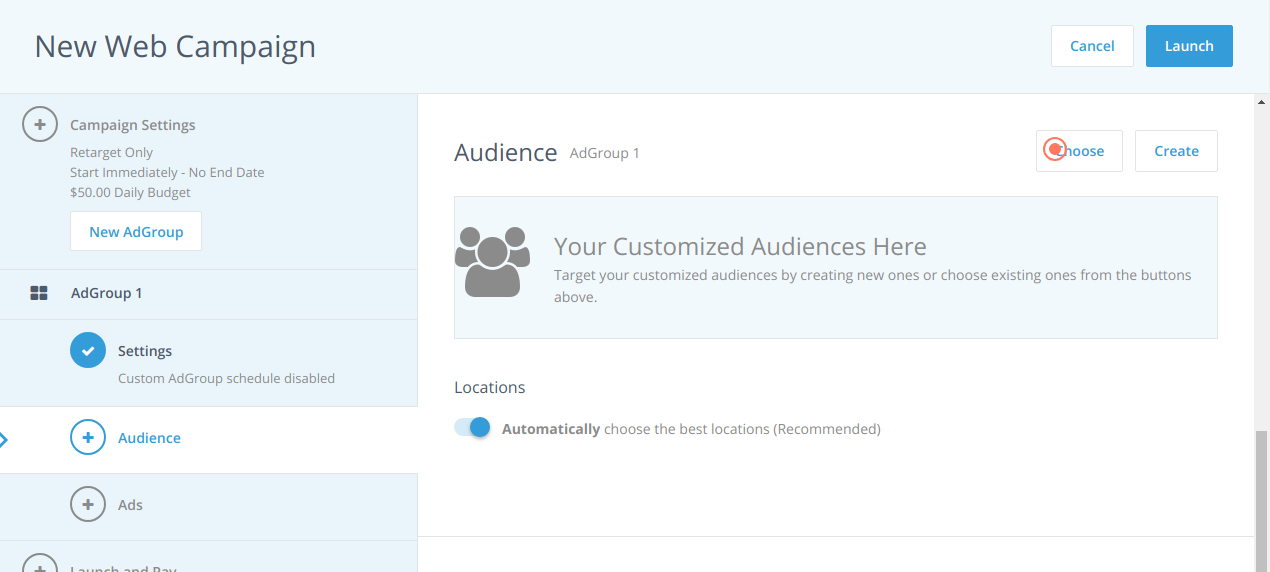
-
Select one or more audiences from the list and then click Choose.
-
Continue on with your standard ad selection or creation process.


