

Amazon Redshift
Overview
Amazon Redshift is a cloud data warehouse service provided by Amazon. With Redshift, you can query and combine structured and semi-structured data across your data warehouse, operational database, and data lake using standard SQL. Redshift lets you easily save the results of your queries back to S3. Connect Lytics to your Redshift database to leverage Lytics' data science and audience building capabilities on your data.
Authorization
If you haven't already done so, you will need to set up an Amazon Web Services (AWS) account before you begin the process described below. See the Redshift Getting Started Guide to get started with Amazon Redshift. You will also have to add Lytic's IPs to your cluster's ingress rules. Contact your Account Manager for the current list of Lytics' IP addresses.
There are two Redshift Authorization Types:
- Redshift Only for importing records from a Redshift Table
- Redshift and S3 for exporting users to a Redshift table
Redshift Only
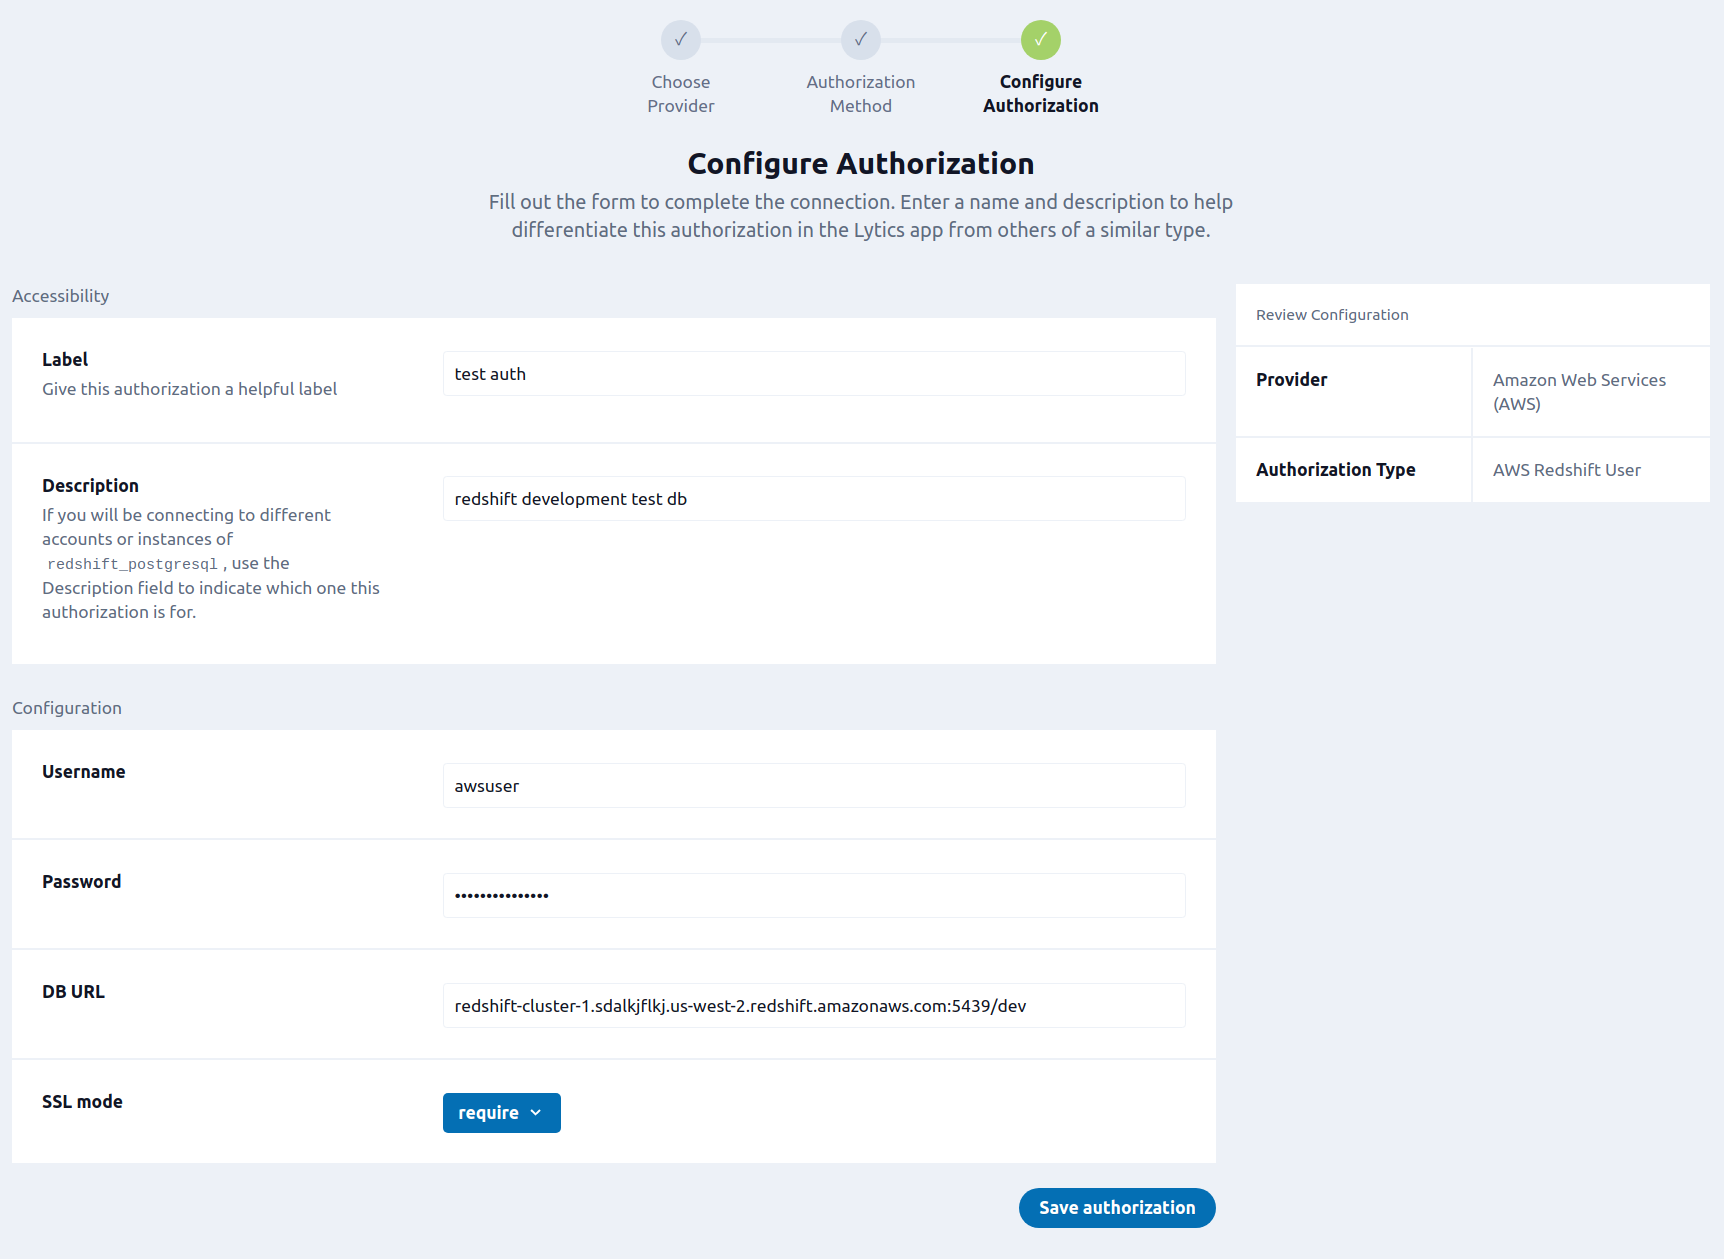
To set up AWS Redshift User you will need the following credentials: database username and password. See the Redshift Users Guide for instructions on how to create a user in Amazon Redshift. If you are new to creating authorizations in Lytics, see the Authorizations documentation for more information.
-
Select Amazon Web Services (AWS) from the list of providers.
-
Select the AWS Redshift User method for authorization.
-
Enter a Label to identify your authorization.
-
(Optional) Enter a Description for further context on your authorization.
-
In the Username text box, enter your Redshift cluster admin user name.
-
In the Password password box, enter your Redshift cluster admin password.
-
(Optional) In the DB URL text box, enter your Redshift database endpoint. Follow these instructions to obtain your DB URL; copy the Endpoint from the general information page (the area as the JDBC URL in the Amazon instructions). This will be of the form:
redshift-cluster-name.VCP-cluster.region.redshift.amazonaws.com:port/db-name. If left blank the import will need to have the DB URL set in the job configuration. -
(Optional) From the SSL mode input, select your SSL mode credential. Leave blank to disable SSL verification.
-
Click Save Authorization.

Redshift and S3
To setup the AWS S3 Keys And Redshift User you will need the following credentials:
- Redshift database username
- Redshift database password
- S3 access key ID
- S3 secret key
- Redshift database URL
See the Redshift Users Guide for instructions on how to create a user in Amazon Redshift. If you are new to creating authorizations in Lytics, see the Authorizations documentation for more information.
- In the Label text box, enter a name for the authorization.
- (optional) In the Description text box, enter a description for this authorization.
- In the S3 Access Key text box, enter your S3 Access Key credential.
- In the S3 Secret Key password box, enter your S3 Secret Key credential.
- In the Redshift Username text box, enter your Redshift Username credential.
- In the Redshift Password password box, enter your Redshift Password credential.
- In the Redshift DB URL text box, enter your Redshift DB URL credential. Follow these instructions to obtain your DB URL; copy the Endpoint from the general information page (the area as the JDBC URL in the Amazon instructions). This will be of the form:
redshift-cluster-name.VCP-cluster.region.redshift.amazonaws.com:port/db-name. - From the Redshift SSL mode input, select your Redshift SSL mode credential.
Export Audience
The Redshift Export lets you create and keep updated an AWS Redshift table based on a Lytics audience. With your audience in Redshift you can use your already existing analytics tools to gain new insight into your users.
Integration Details
- Implementation Type: Server-side Integration
- Implementation Technique: File Based Transfer Integration
- Frequency: Batch Integration
- Resulting data: User Profile Fields
Steps/Pattern:
- Scan the selected audience.
- Write a file up to 1 GB of users to S3. Repeat until all users have been written to a file.
- Copy the files into a temporary table.
- Rename the temporary table to the main table.
The Redshift Export is a two step export, it first exports users to Amazon S3, then executes a COPY operation to load those files to a table in Redshift. The table's name is based on the Lytic's audience's slug name. The files are setup to expire after 72 hours, so no manual cleanup is needed. Executing the COPY command to a temporary table allows the main table to continue to be used while data is loading; Only the brief time when the main table is removed and the temporary table is renamed will the data be unavailable. The temporary table is a full table and not an actual temporary table in Redshift.
Fields
By default, Lytics exports all user fields to Redshift. You may configure the fields to export by selecting them in the Fields to Export input.
Fields in Redshift will match their Lytics field names. The type depends on
the field type in Lytics:
| Lytics type | Redshift column type |
|---|---|
| Int | INT8 |
| Float | FLOAT |
| Date | TIMESTAMPZ |
| Bool | BOOLEAN |
| String | VARCHAR(max) |
| Other | SUPER |
Configuration
Follow these steps to set up and configure an export job for Amazon Web Services (AWS) Redshift in the Lytics platform.
-
Select Amazon Web Services (AWS) from the list of providers.
-
Select the export job type from the list.
-
Select the Authorization you would like to use or create a new one.
-
Enter a Label to identify this job you are creating in Lytics.
-
(Optional) Enter a Description for further context on your job.
-
Select the audience to export.
-
Complete the configuration steps for your job.
-
(optional) From the Region input, select aWS region that S3 resides in (us-east-2, etc.).
-
(optional) In the S3 Bucket Name text box, enter select or enter the bucket that you would like to save your files in.
-
In the Directory text box, select or enter the directory that you would like to save your files in. The directory suggestions can be slow on large S3 buckets. These files will expire after 72 hours.
-
(optional) From the Fields to Export input, select a list of user fields to export.
-
(optional) In the User Limit numeric field, enter the maximum number of users to export. Leave blank to export all users.
-
(optional) Select the Keep Updated checkbox, to select to run this export continuously.
-
(optional) From the File Export Frequency input, select how often a continuous export should update the table. Default is daily.
-
(optional) From the Time of Day input, select the time of day to start the update. This only affects daily and slower frequency exports. Exact time of the update will vary based on load and audience size.
-
(optional) From the Timezone input, select the timezone to use for the time of day.
-
Click the Start job button to start the job
Import Table
Import user data directly from your AWS Redshift database into Lytics, resulting in new user profiles or updates to fields on existing profiles.
Integration Details
- Implementation Type: Server-side Integration.
- Implementation Technique: PostgreSQL connection.
- Frequency: Batch Integration with frequency configurable from hourly to weekly.
- Resulting data: User Profiles.
This integration connects to your Redshift table through a PostgreSQL connection and then completes the following steps:
- Create a temporary table containing a snapshot of the database to query against.
- Adds a column for consistent ordering of data.
- Only rows that have a timestamp after the last import, or Since Date will be included.
- Query a batch of rows from the temporary table.
- Emits rows to the data stream.
- Repeat steps 2 and 3 until the entire temporary table is read.
Fields
Because of the nature of Redshift data, there is no default mapping defined. By default the data will be added to the redshift_table_name data stream, where table_name is the name of the Redshift table imported.
Configuration
Follow these steps to set up and configure an import Redshift table job for Amazon Web Services (AWS) in the Lytics platform. If you are new to creating jobs in Lytics, see the Data Sourcesdocumentation for more information.
- Select Amazon Web Services (AWS) from the list of providers.
- Select the Import Redshift Table job type from the list.
- Select the Authorization you would like to use or create a new one.
- Enter a Label to identify this job you are creating in Lytics.
- (Optional) Enter a Description for further context on your job.
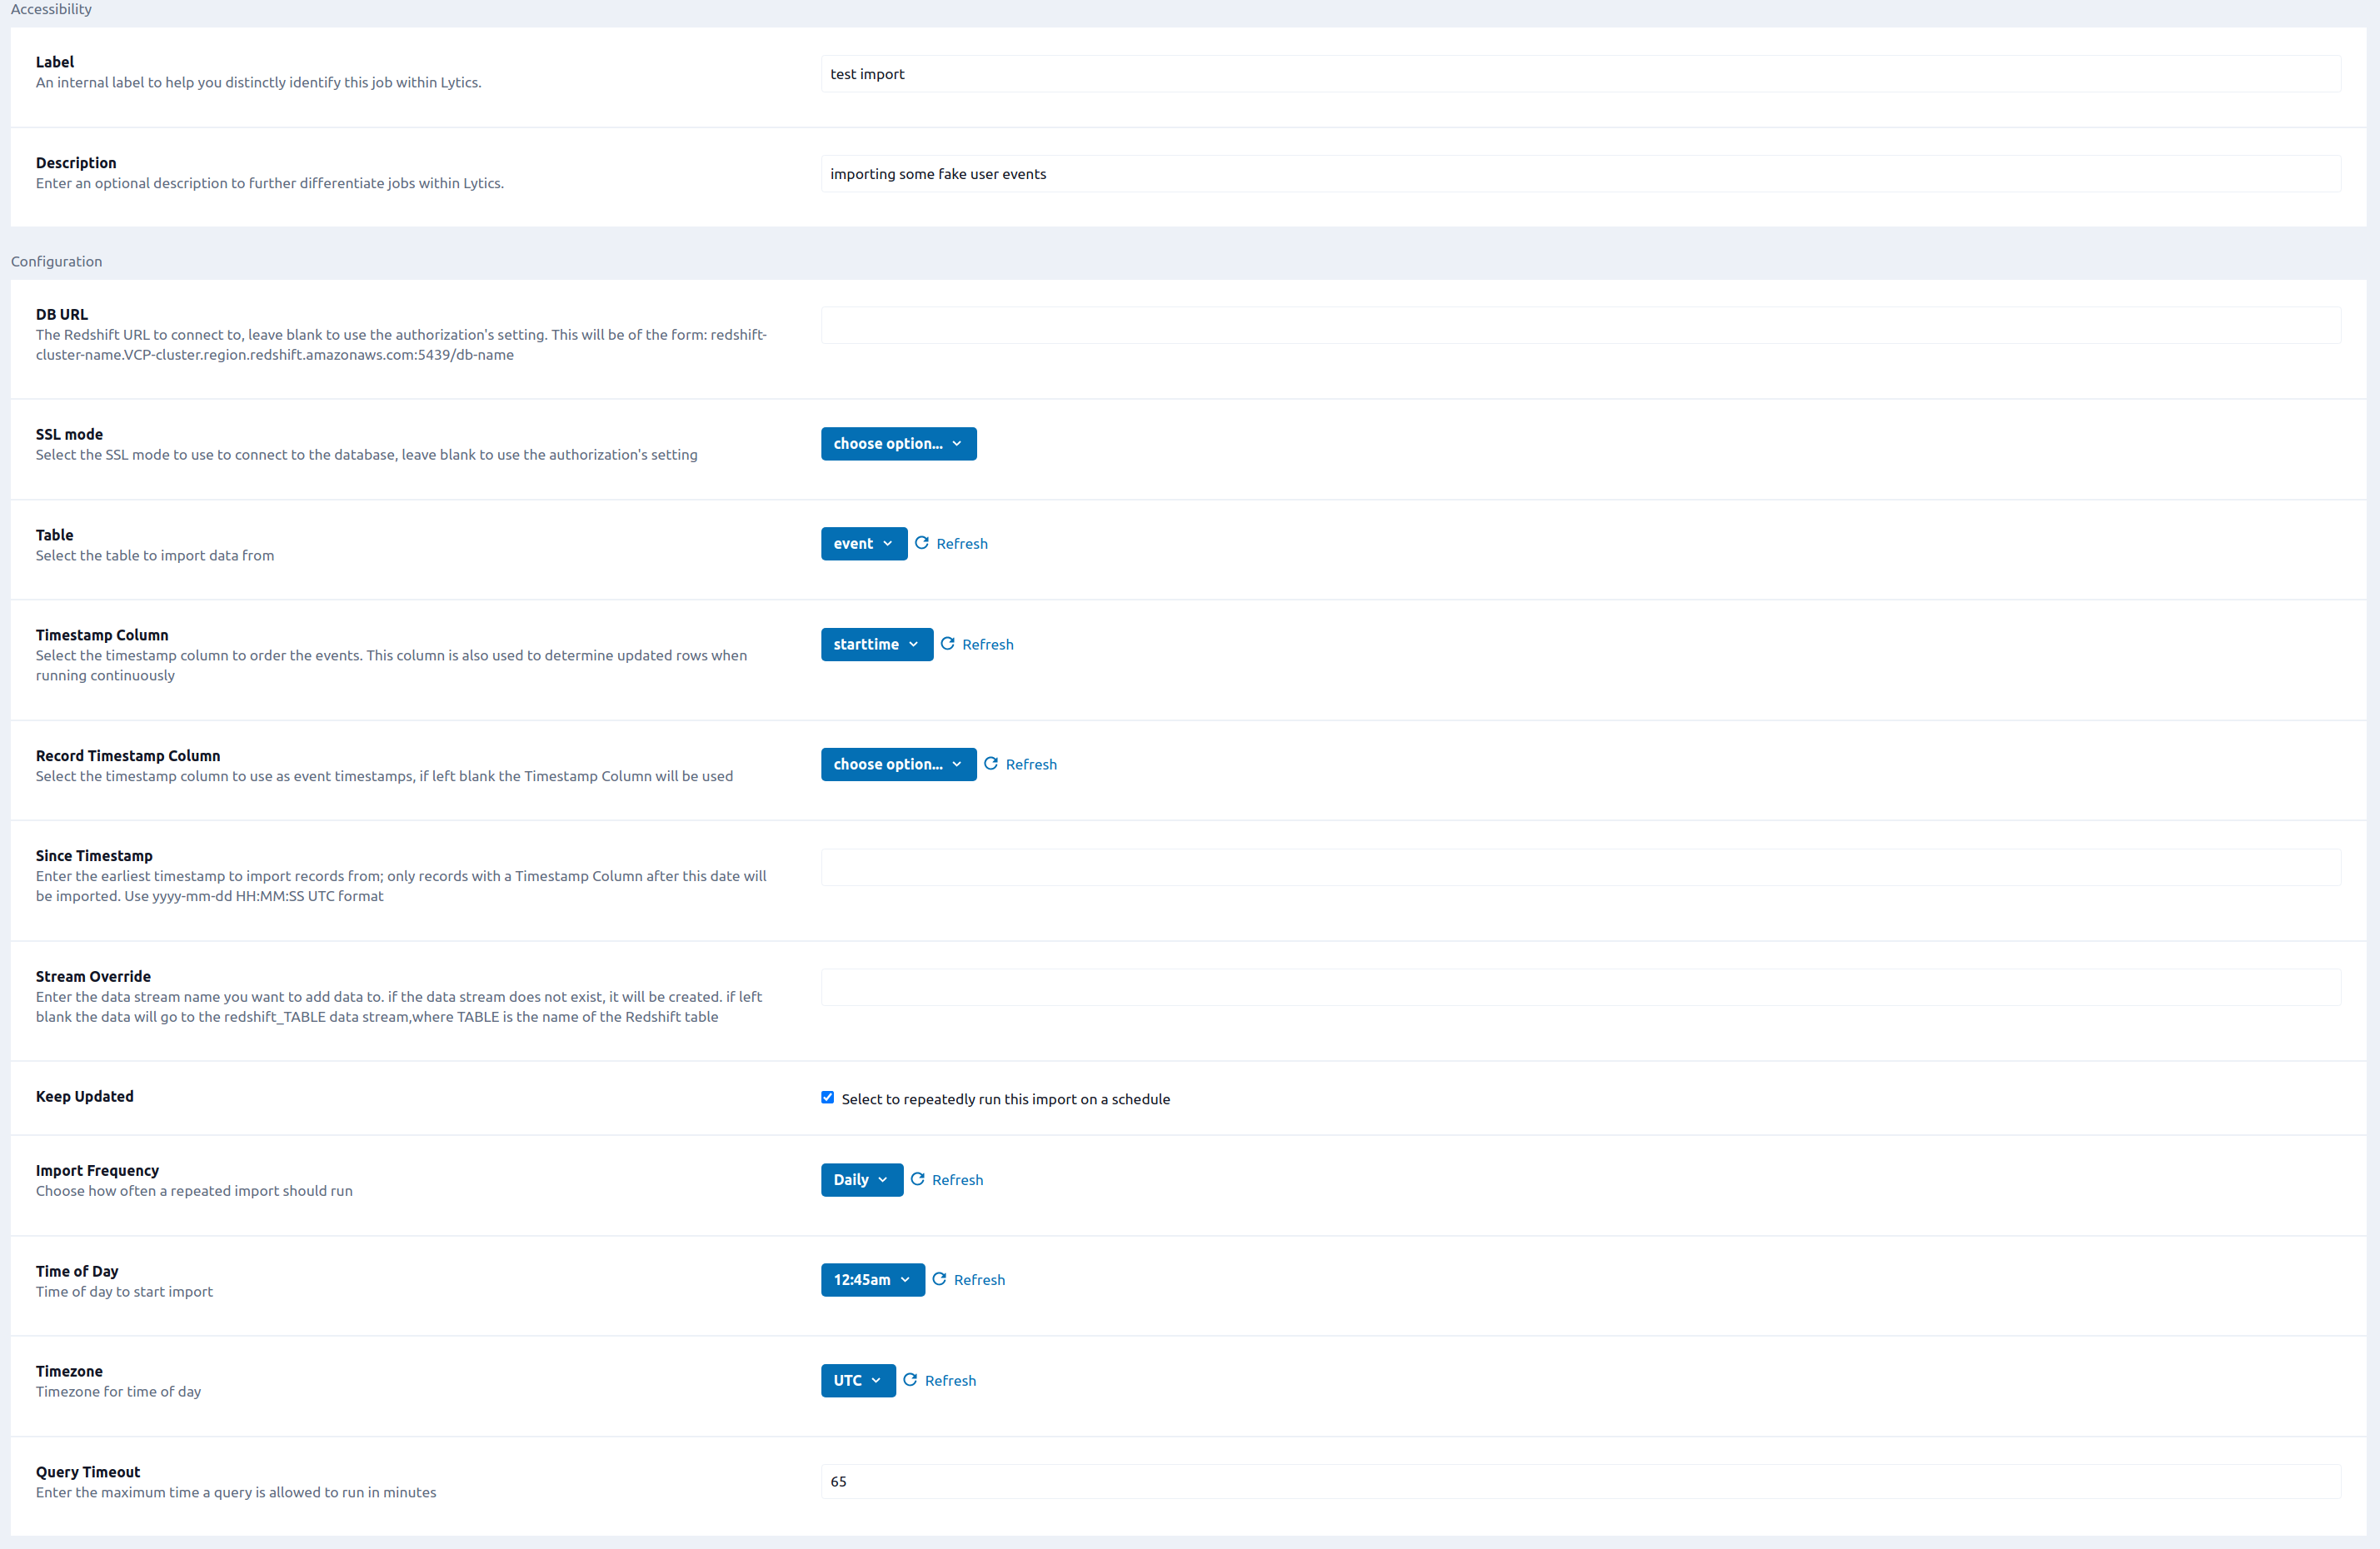
- Complete the configuration steps for your job.
- (Optional) In the DB URL text box, enter the Redshift URL to connect to. Leave blank to use the authorization's setting. Follow these instructions to obtain your DB URL; copy the Endpoint from the general information page (the area as the JDBC URL in the Amazon instructions). This will be of the form:
redshift-cluster-name.VCP-cluster.region.redshift.amazonaws.com:port/db-name - (Optional) From the SSL mode input, select the SSL mode to use to connect to the database. Leave blank to use the authorization's setting.
- From the Table input, select the Redshift table to import data from.
- From the Timestamp Column input, select the timestamp column to order the events.
- (Optional) From the Record Timestamp Column input, select the timestamp column to use as event timestamps, if left blank the Timestamp Column will be used.
- (Optional) From the Since Timestamp input, enter the earliest timestamp to import records from; only records with a Timestamp Column after this date will be imported. Use
yyyy-mm-ddHH:MM:SSUTC format. - (Optional) In the Stream Override text box, enter the data stream name you want to add data to. if the data stream does not exist, it will be created. If left blank the data will go to the
redshift_TABLEdata stream, where TABLE is the name of the Redshift table. - (Optional) Select the Keep Updated checkbox to repeatedly run this import on a schedule.
- (Optional) From the Import Frequency input, select how often a repeated import should run.
- (Optional) From the Time of Day input, select the time of day to start import. Only applies to Daily, Weekly, or Monthly import frequencies.
- (optional) From the Timezone input, select the timezone for time of day.
- (Optional) In the Query Timeout numeric field, enter the maximum time a query is allowed to run in minutes.
- Click Start Import.

Updated 16 days ago