

Creating a Flow
This guide walks you through creating a complete flow from start to finish, focusing on the creation workflow and essential concepts.
Planning Your Flow
Before building, consider these key questions:
- Who should enter this flow? (Define your audience)
- What actions should they receive? (Email, webhook, etc.)
- When should things happen? (Timing and delays)
- How should users progress? (Linear or branching paths)
Step-by-Step Flow Creation
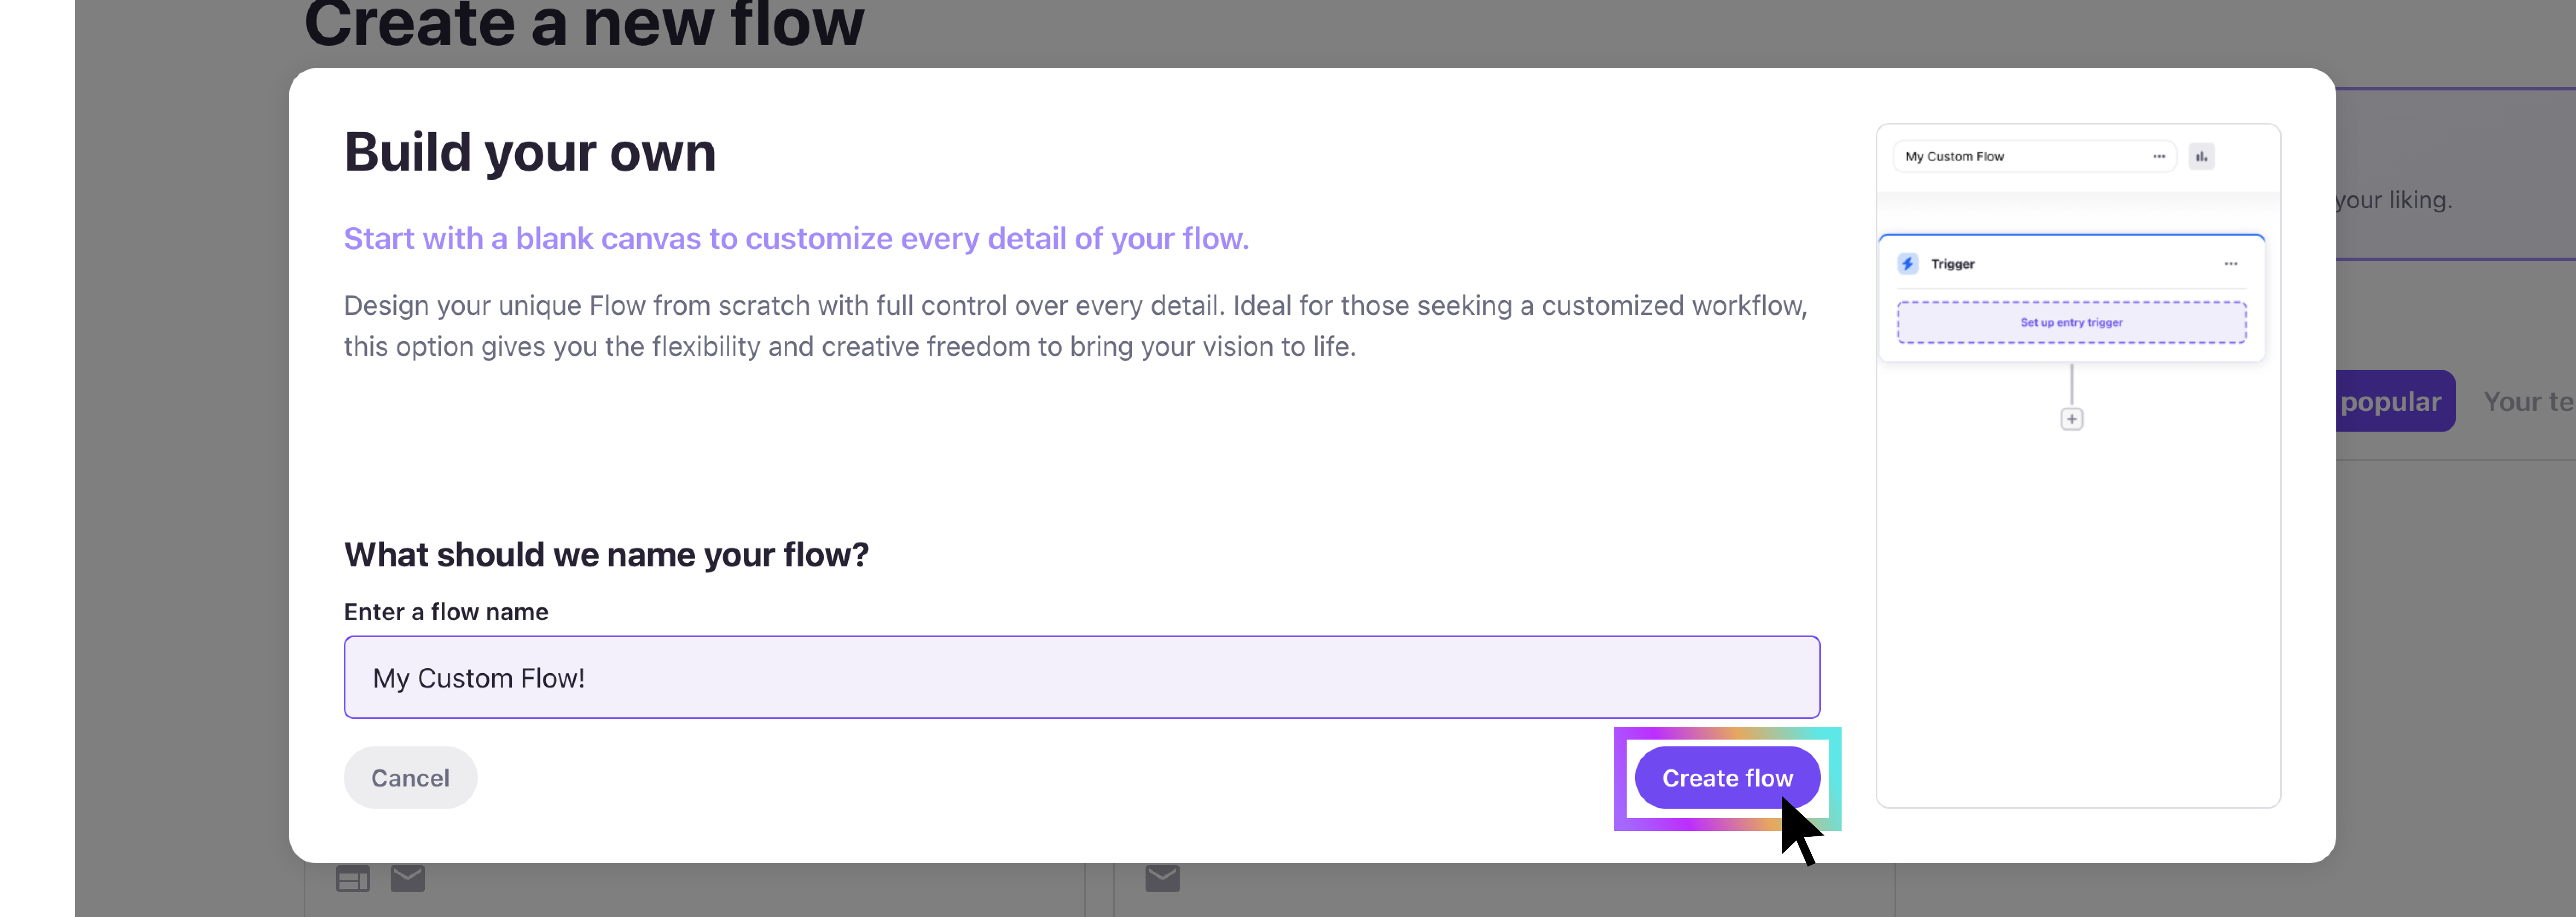
Step 1: Create a New Flow
-
From the Flows dashboard, click Create New
-
Choose either:
- Template: Start with a pre-built flow
- Build Your Own: Start with a blank canvas
-
Enter a descriptive name for your flow
-
Click Create flow
Step 2: Configure the Trigger Step
The trigger step is automatically created and defines who enters your flow.
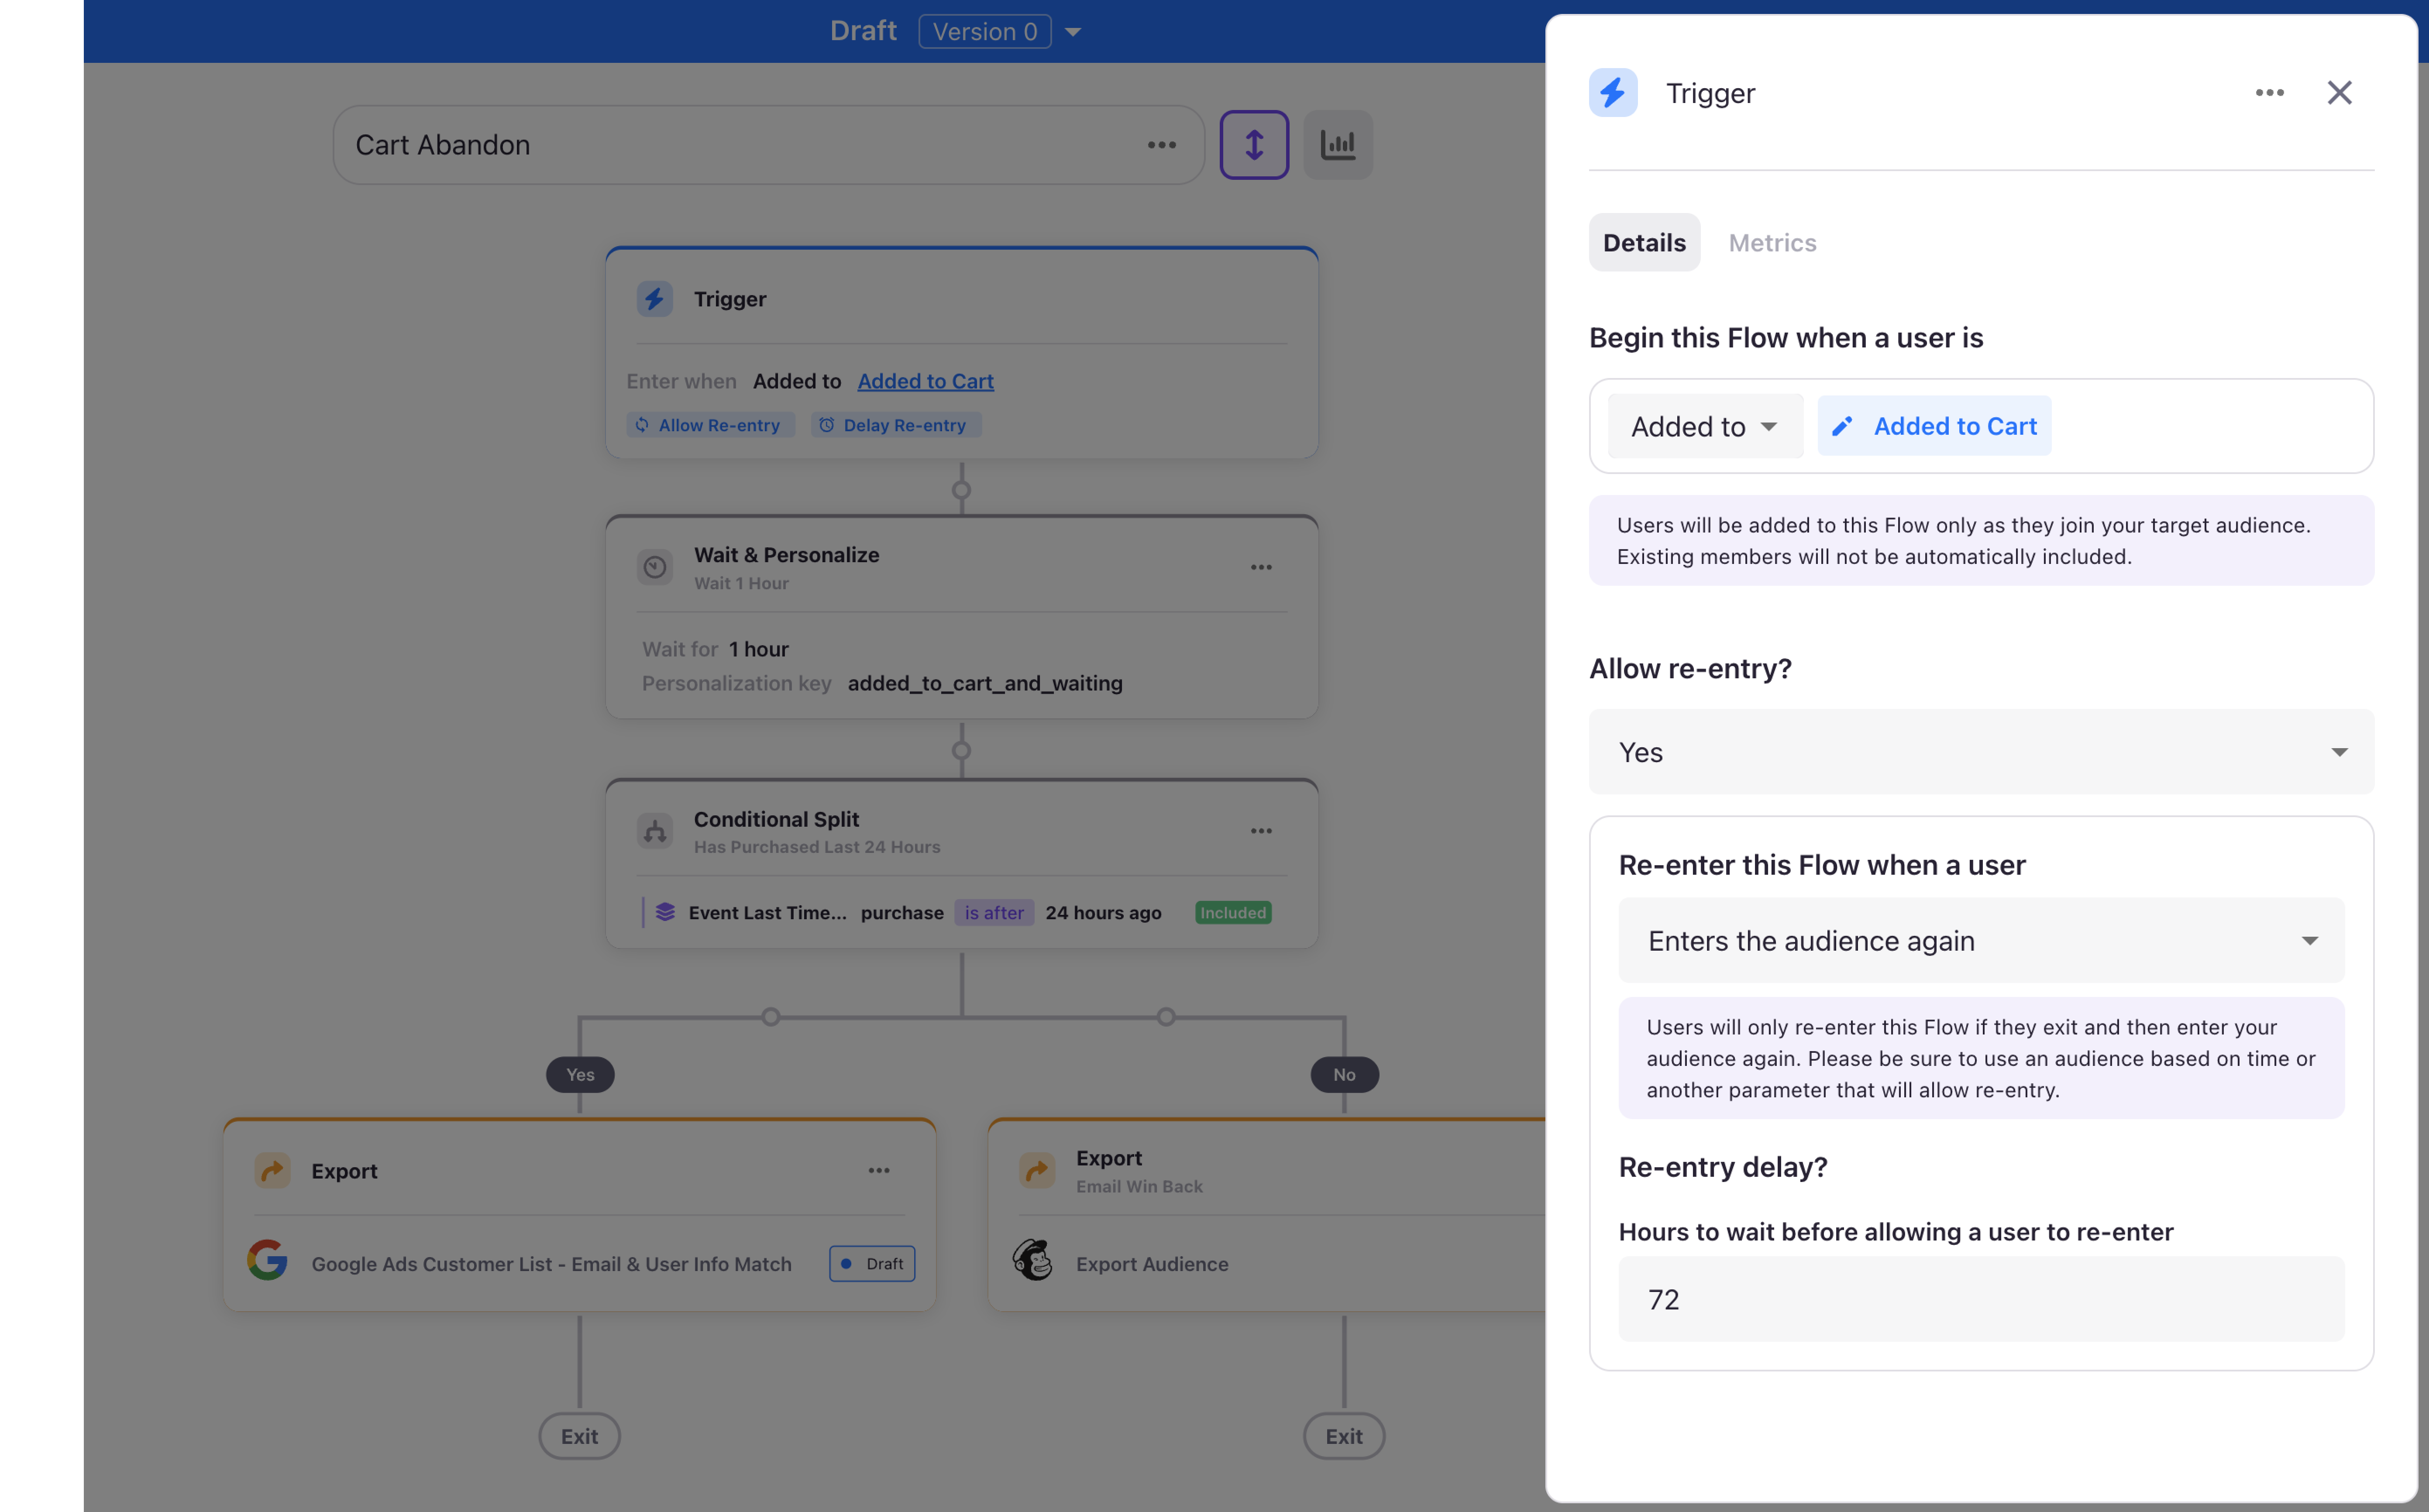
- Click on the trigger step to open the sidebar
- Select your audience: Choose from existing audiences in your account
- Set entry conditions: Choose how users enter:
- Added to: Only new additions to the audience trigger entry (recommended for most flows)
- Member of: All current members plus future additions enter
- Configure re-entry if users should be able to go through the flow multiple times
Note: For detailed trigger configuration options, see Flow Steps - Trigger Step.
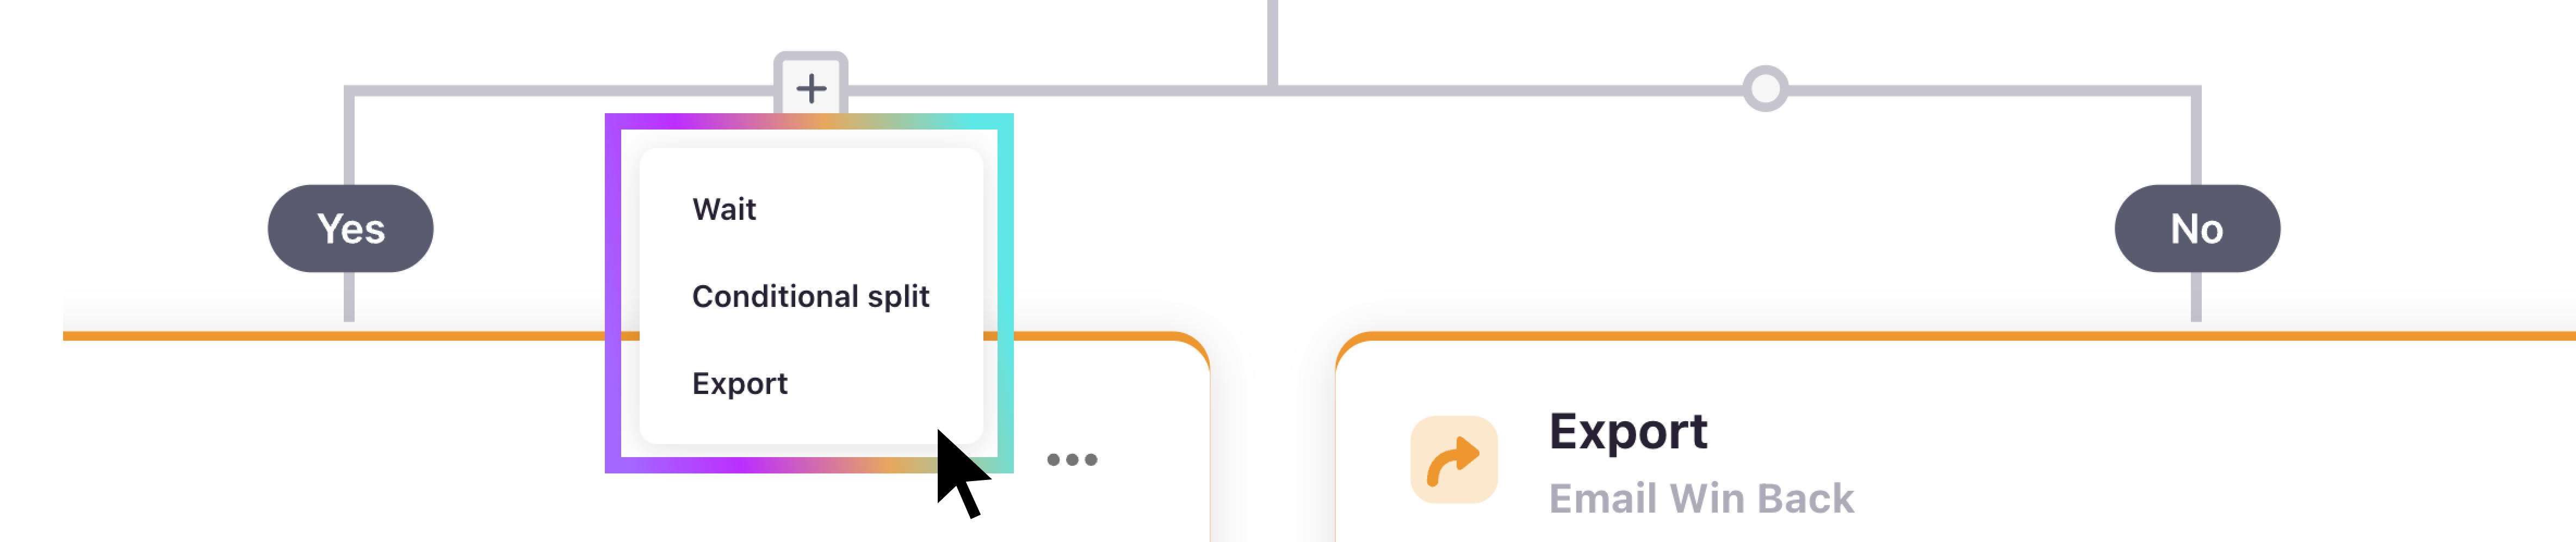
Step 3: Add Flow Steps
Add steps by clicking the + button after any existing step. Each step type serves a specific purpose:
- Wait Steps: Control timing and enable personalization
- Export Steps: Send user data to external systems
- Conditional Splits: Create branching paths based on user attributes
Note: For detailed configuration of each step type, see Flow Steps.
Step 4: Build Your Complete Flow
Example: Welcome Series Flow
Here's a complete welcome series flow structure:
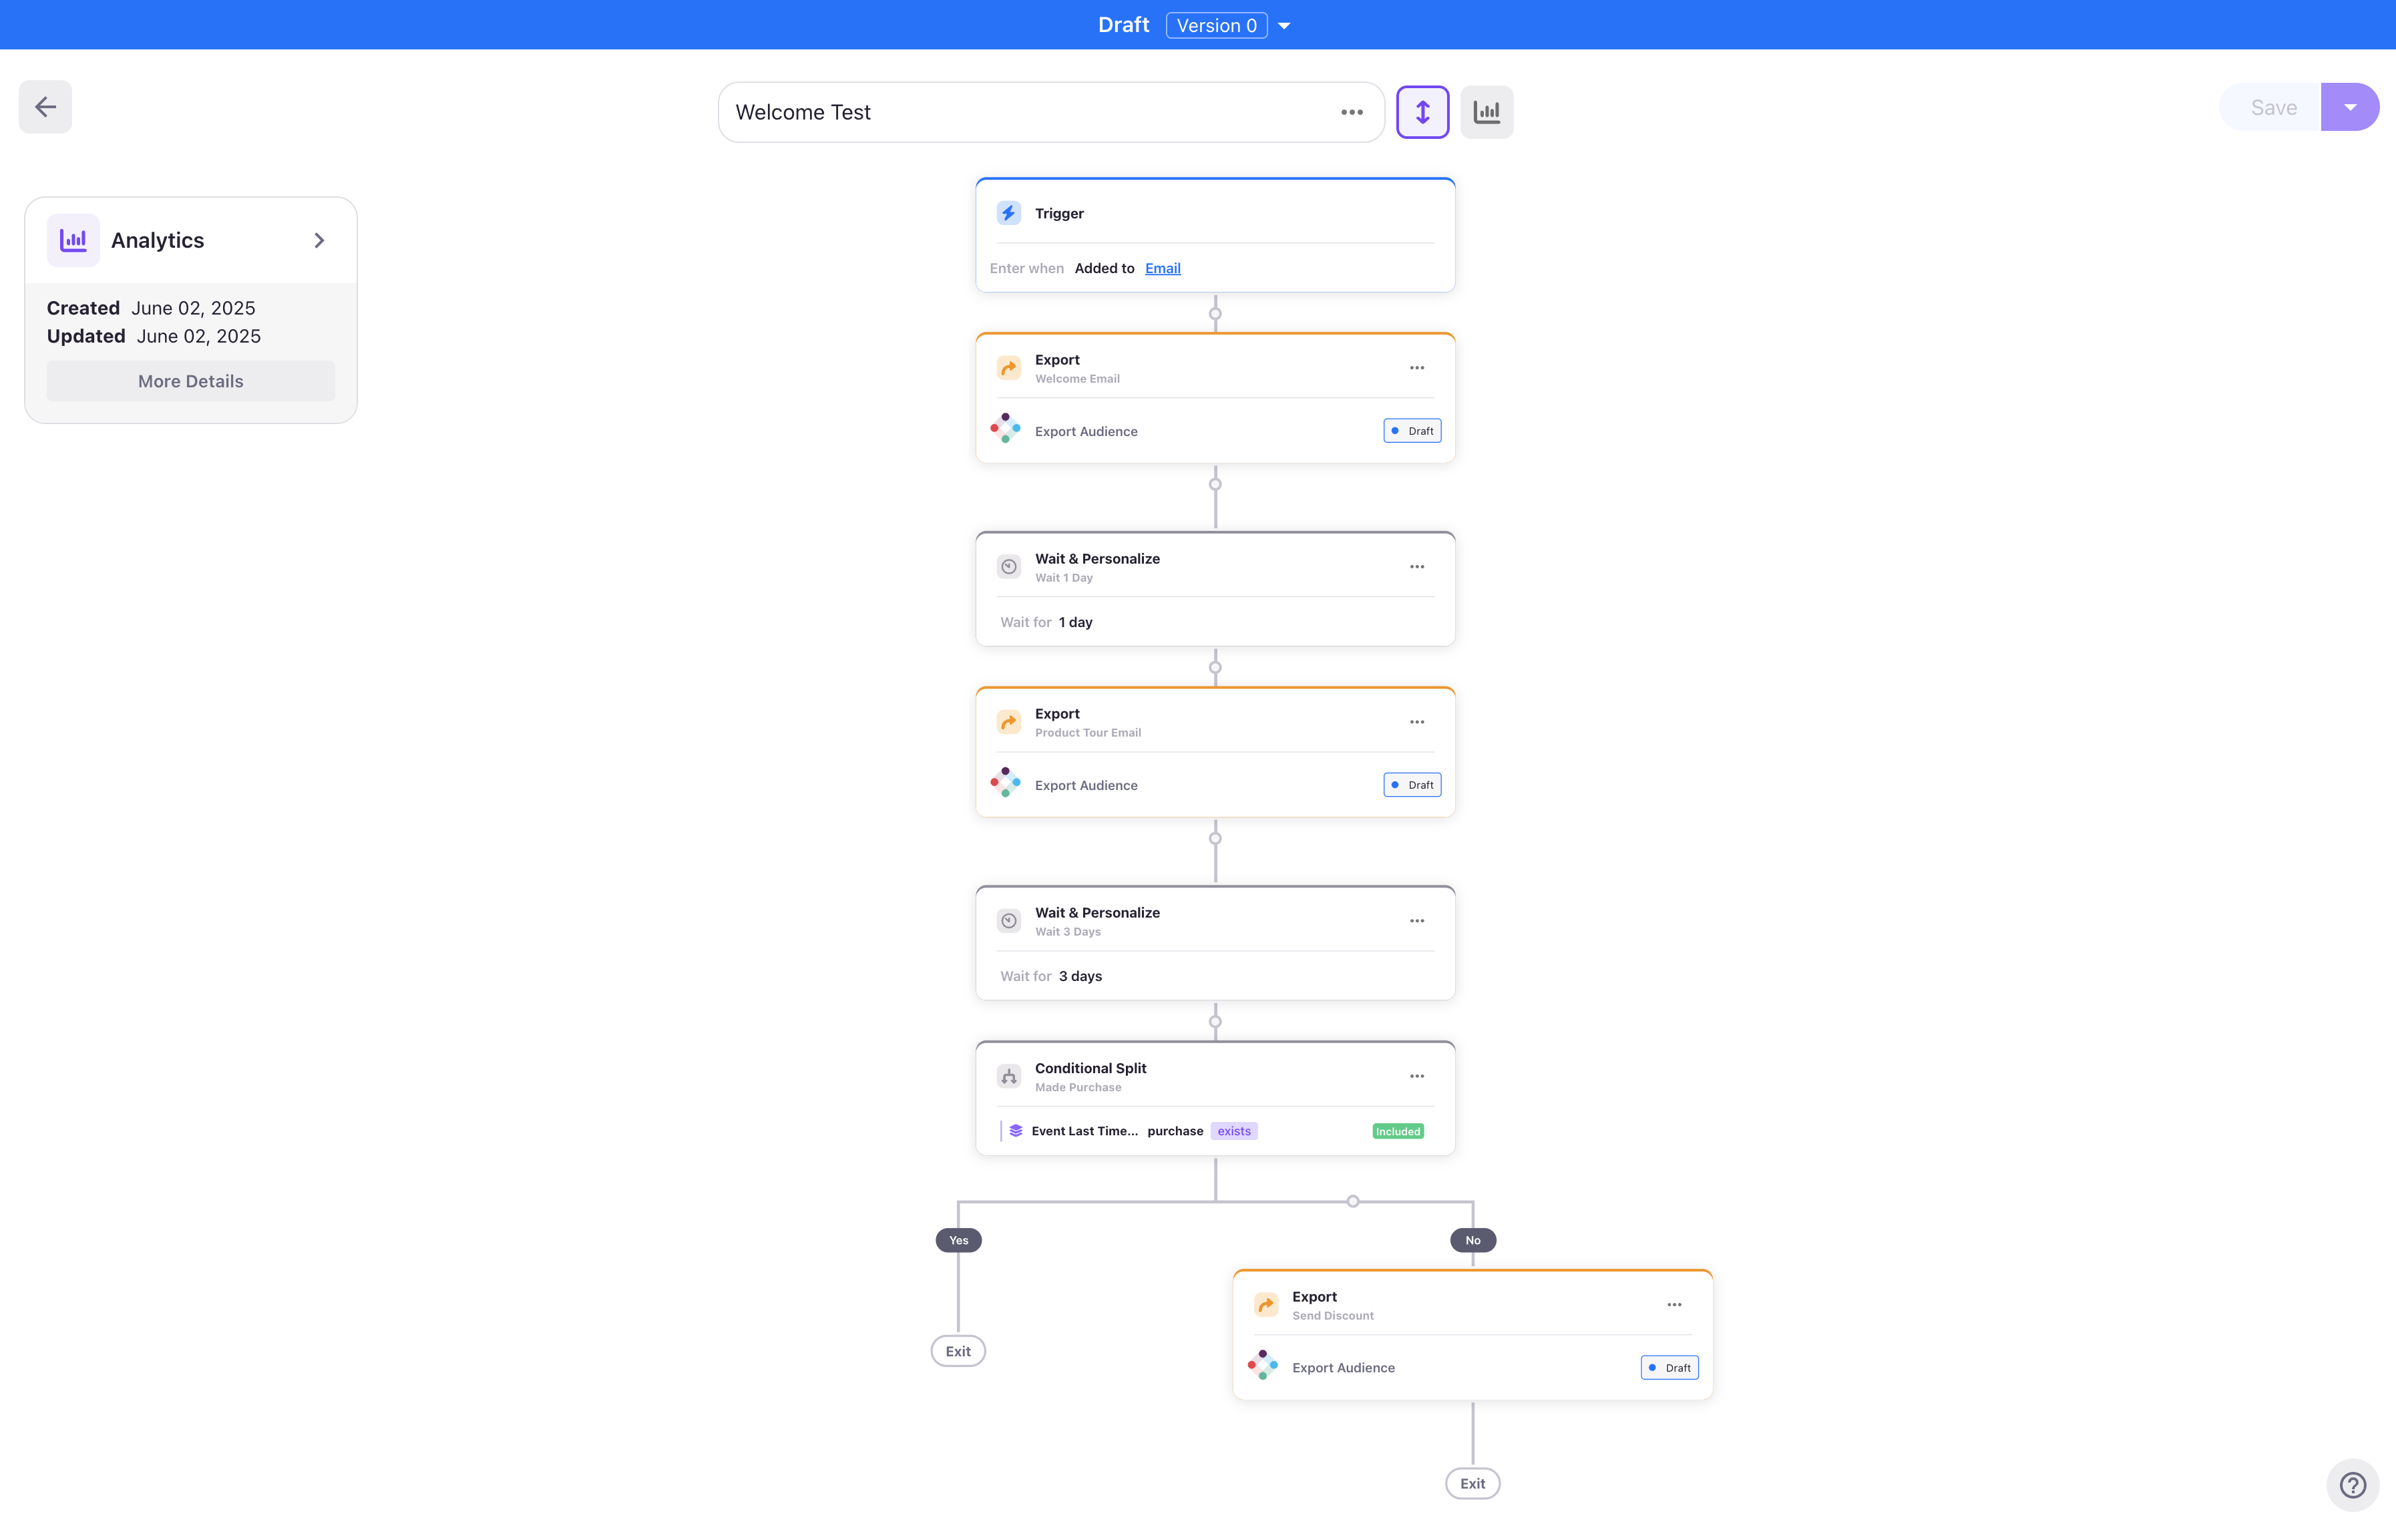
- Trigger: When added to "Has Email Address" audience
- Export: Send welcome email immediately
- Wait: 1 day delay
- Export: Send product tour email
- Wait: 3 days delay
- Conditional Split: Check if user has made a purchase
- Yes path: Exit Flow
- No path: Send discount offer email
Naming Your Steps
Give descriptive names to each step for better organization:
- "Welcome Email"
- "Product Tour Delay"
- "Purchase Check"
- "New Customer Thank You"
Names appear in the flow canvas, user profiles, and metrics reporting.
Step 5: Validate Your Flow
Before publishing, ensure your flow is properly configured:
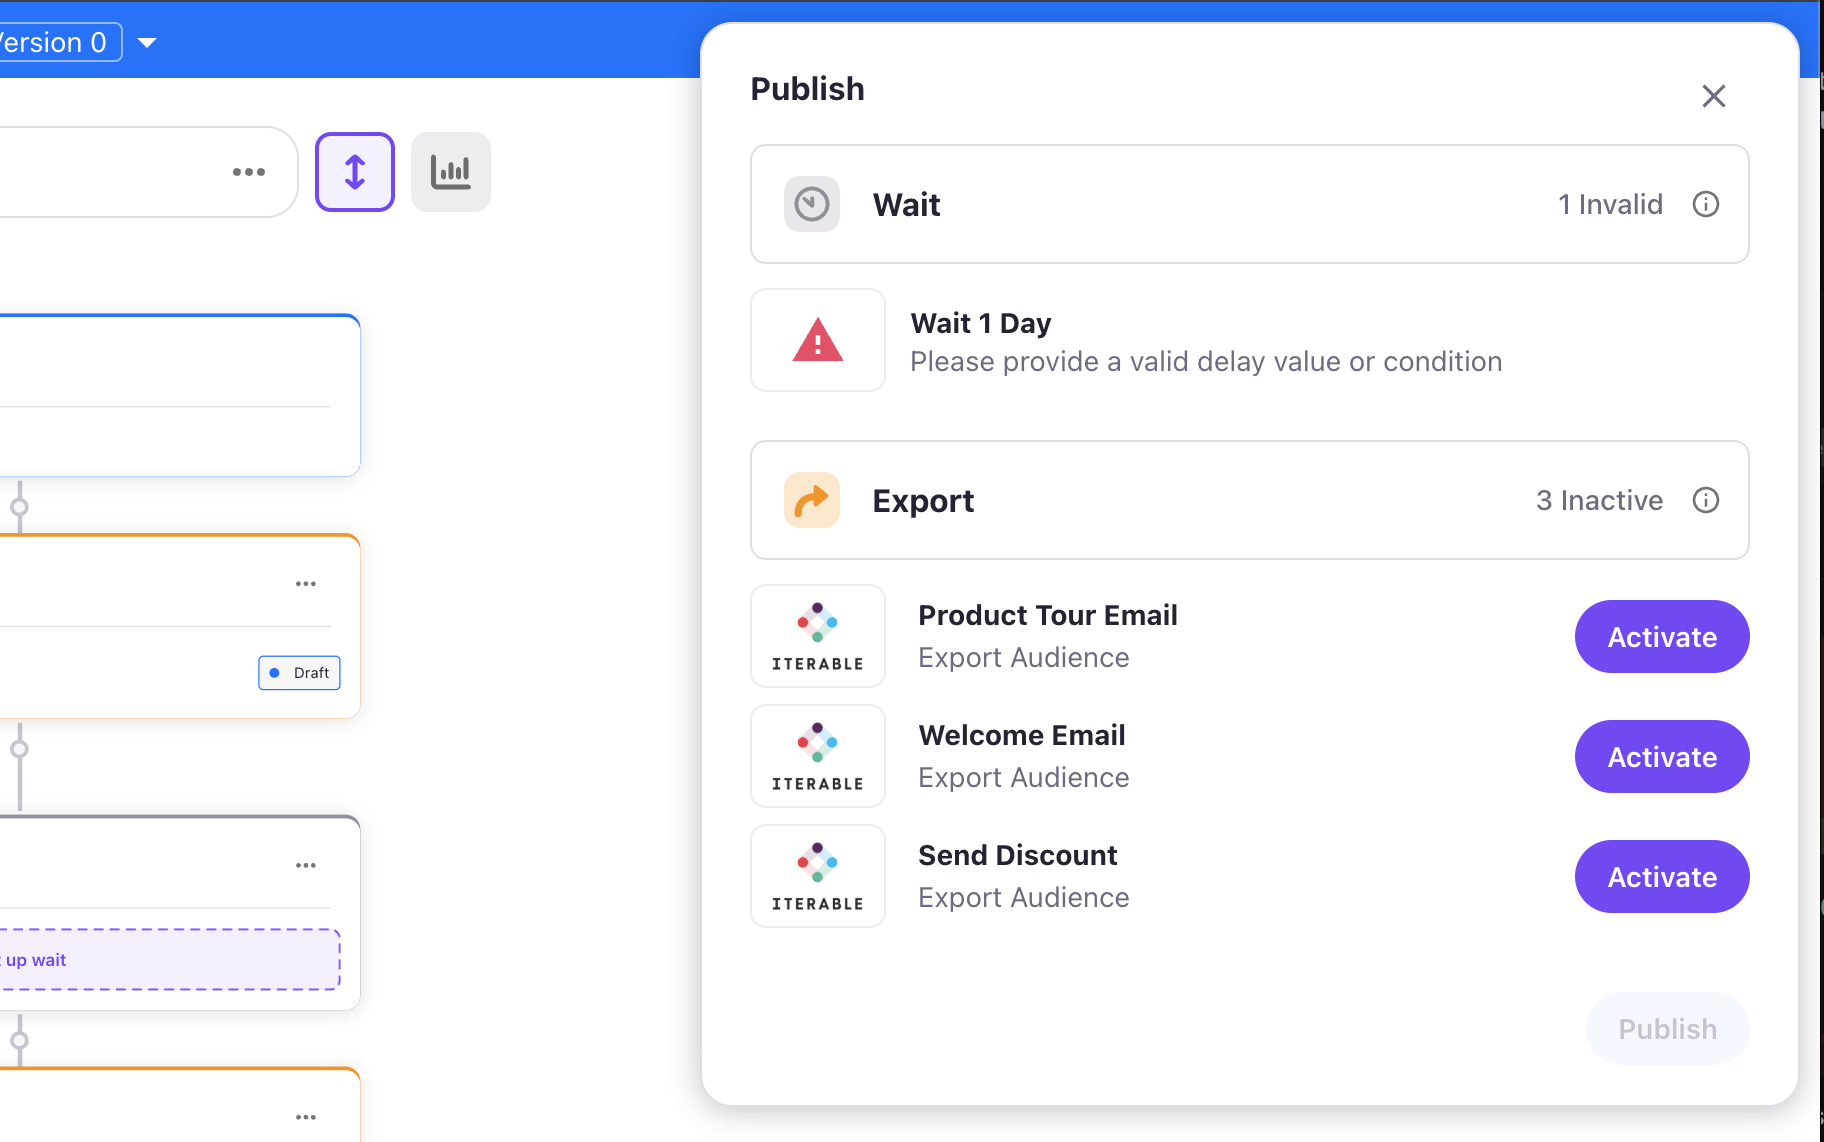
Common Validation Issues:
- Wait steps without time or condition specified
- Export steps not properly configured
- Conditional splits without rules defined
- Missing connections between steps
Validation Process:
- Click Publish in the action menu
- Review any validation errors
- Fix issues before proceeding
- Activate any draft export jobs
Advanced Configuration Tips
Using Personalization Keys
Personalization keys enable real-time website customization:
// Example: Check if user is in a specific flow step
jstag.call("entityReady", (profile) => {
  const targetKey = "welcome-series-delay";
  let isInWelcomeSeries = false;

  try {
    const activeSteps = profile?.data?.user?.flows_step_slugs || {};
    const personalizationKeys = Object.values(activeSteps).flat();
    if (personalizationKeys.includes(targetKey)) {
      isInWelcomeSeries = true;
    }
  } catch (error) {
    console.warn("Error checking for active steps:", error);
  }

  if (isInWelcomeSeries) {
    // Show welcome banner or special offer
    document.getElementById("welcome-banner").style.display = "block";
  }

  console.log(`User ${isInWelcomeSeries ? "is" : "is not"} in welcome series`);
});
Best Practices
Flow Structure:
- Keep flows focused on single objectives
- Use conditional splits sparingly
- Document complex flows with step names
Next Steps
Once your flow is created:
- Learn about Publishing and Managing Flows
- Understand Monitoring and Metrics
Updated 14 days ago