

Episerver
Overview
Episerver offers solutions to automate and personalize campaigns across channels including web, mobile, email.
Integrating Episerver with Lytics allows you to export Lytics audiences to Episerver recipient lists for use in your marketing campaigns.
Authorization
If you haven't already done so, you will need to set up an Episerver account before you begin the process described below. You will also need to create an API user that Lytics will use to import/export data. To create an Episerver API user, please contact your Episerver representative.
Then follow the steps below to authorize the integration.
If you are new to creating authorizations in Lytics, see the Authorizations documentation for more information.
- Select Episerver from the list of providers.
- Select the User API Key method for authorization.
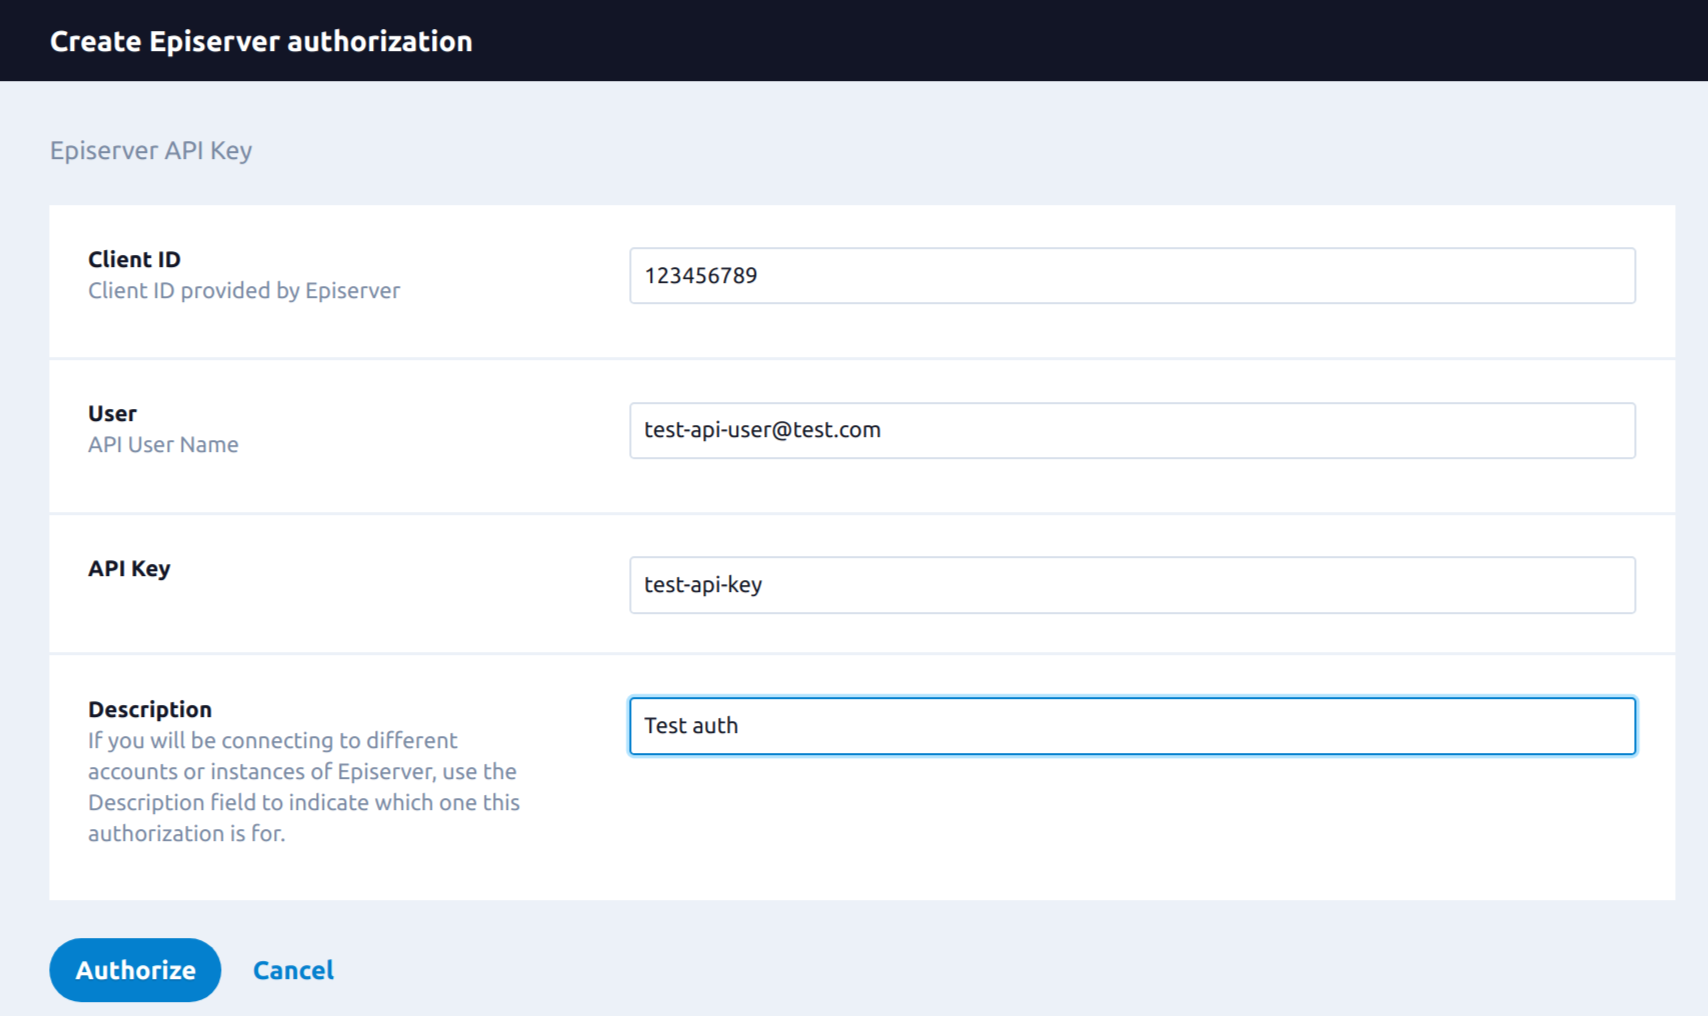
- In the Label text box, enter a name for the authorization
- (optional) In the Description text box, enter a description for this authorization
- In the Client ID textbox, enter your Episerver Client ID.
- In the User textbox, enter the API User Name that Episerver created for you.
- In the API Key textbox, enter the API Key for the User above.
- Click Save Authorization.

Import Activity
Import your Recipients' activity from Episerver into Lytics and use that data to build targeted audiences. Before you start this workflow, make sure that the user you added in the authorization step has permission to create a Webhook on the Episerver side. To provide this permission to the API user, please contact Episerver support.
Integration Details
- Implementation Type: Server-side Integration.
- Implementation Technique: REST API Integration and Webhook Integration.
- Frequency: Activity data is received in Real-time Integration.
- Resulting Data: Activity data for Episerver Recipients related to Episerver Campaigns will be collected as additional User Fields.
This integration utilizes the Episerver API to register and activate a webhook. On each run of the job, it will:
- Create the webhook in Episerver.
- Activate the webhook.
The activated webhook URL will receive the data and post it in the episerver_acitivity data stream in Lytics.
Fields
The following fields are included in the default mapping for the episerver_activity stream.
| Source Field | Conditional | Lytics User Field | Description | Type |
|---|---|---|---|---|
| clientId | ep_client_id | Episerver Client ID which has this Recipient | string | |
| email(mediaTypesToAddresses.EMAIL) | email unique id | Email Address | string | |
| map("email", epochms()) | IF tolower(type) IN ("open", "click") | last_channel_activities | Last Activity By Channel | map[string]time |
| max(epochms()) | IF eq(tolower(type), "click") | ep_lastclick_ts | Episerver Last Click Event | date |
| max(epochms()) | IF eq(tolower(type), "open") | ep_lastopen_ts | Episerver Last Open Event | date |
| max(epochms()) | last_active_ts | Last Active | date | |
| min(epochms()) | IF eq(tolower(type), "click") | ep_firstclick_ts | Episerver First Click Event | date |
| min(epochms()) | IF eq(tolower(type), "open") | ep_firstopen_ts | Episerver First Open Event | date |
| recipientId | ep_recipient_id unique id | Episerver Recipient ID | string | |
| set("email") | IF tolower(type) IN ("open", "click") | channels | All Channels Used | []string |
| set(link) | ep_links | Episerver Link URLs | []string | |
| set(mailingId) | ep_mailing_id | Episerver set of Mailings with Email Activity | []string | |
| set(userListId) | ep_recipient_list_id | Episerver Recipient List ID | []string | |
| valuect(hash(urlmain(link))) | IF eq(tolower(type), "click") | hashedurls | Hashed Urls Visited | map[string]intsum |
| valuect(type) | ep_event_type | Episerver Count per Email Event | map[string]intsum |
Configuration
Follow these steps to set up and configure an import job for Episerver in the Lytics platform. If you are new to creating jobs in Lytics, see the Data Sources documentation for more information.
- Select Episerver from the list of providers.
- Select the Import Activity job type from the list.
- Select the Authorization you would like to use or create a new one.
- Enter a Label to identify this job you are creating in Lytics.
- (Optional) Enter a Description for further context on your job.
- Complete the configuration steps for your job.
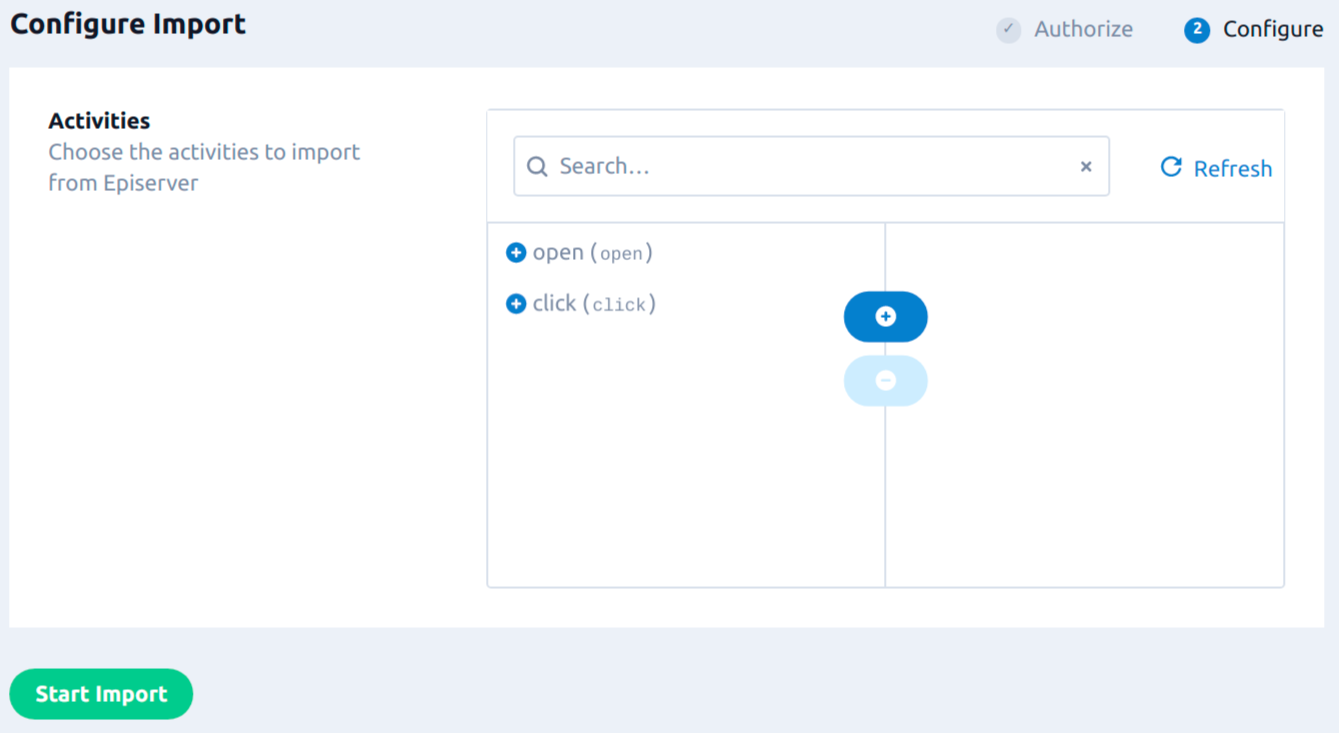
- (Optional) Select the type of Activity you would like to import from Episerver. If you do not select any, Lytics will import activity for all the event types.
- Click Start Import.

Import Recipients
Import Recipients from your Episerver Lists into Lytics to create enriched user profiles that can then be exported as audiences for refined targeting.
Integration Details
- Implementation Type: Server-side Integration.
- Implementation Technique: REST API Integration.
- Frequency: Batch Integration.
- Resulting Data: Full User Profiles for all Episerver Recipients.
This integration utilizes the Episerver API to import Recipients. Each run of the job will proceed as follows:
- Make a call to Episerver Recipients API and bring in the Recipients' data from the selected Recipient Lists.
- Post this data in the
episerver_recipientsdata stream in Lytics. - After successful completion, it will import new/updated recipients on a daily basis only if configured to do so.
Fields
The following fields are included in the default mapping for the episerver_recipients stream:
| Source Field | Lytics User Field | Description | Type |
|---|---|---|---|
| email(email) | email unique id | Email Address | string |
| id | ep_recipient_id unique id | Episerver Recipient ID | string |
| max(epochms()) | last_active_ts | Last Active | date |
| todate(created) | ep_created_date | Episerver Created Date for Recipient | date |
| todate(modified) | ep_modified_date | Episerver Modified Date for Recipient | date |
Configuration
Follow these steps to set up and configure an import job for Episerver in the Lytics platform. If you are new to creating jobs in Lytics, see the Data Sources documentation for more information.
- Select Episerver from the list of providers.
- Select the Import Recipients job type from the list.
- Select the Authorization you would like to use or create a new one.
- Enter a Label to identify this job you are creating in Lytics.
- (Optional) Enter a Description for further context on your job.
- Complete the configuration steps for your job.
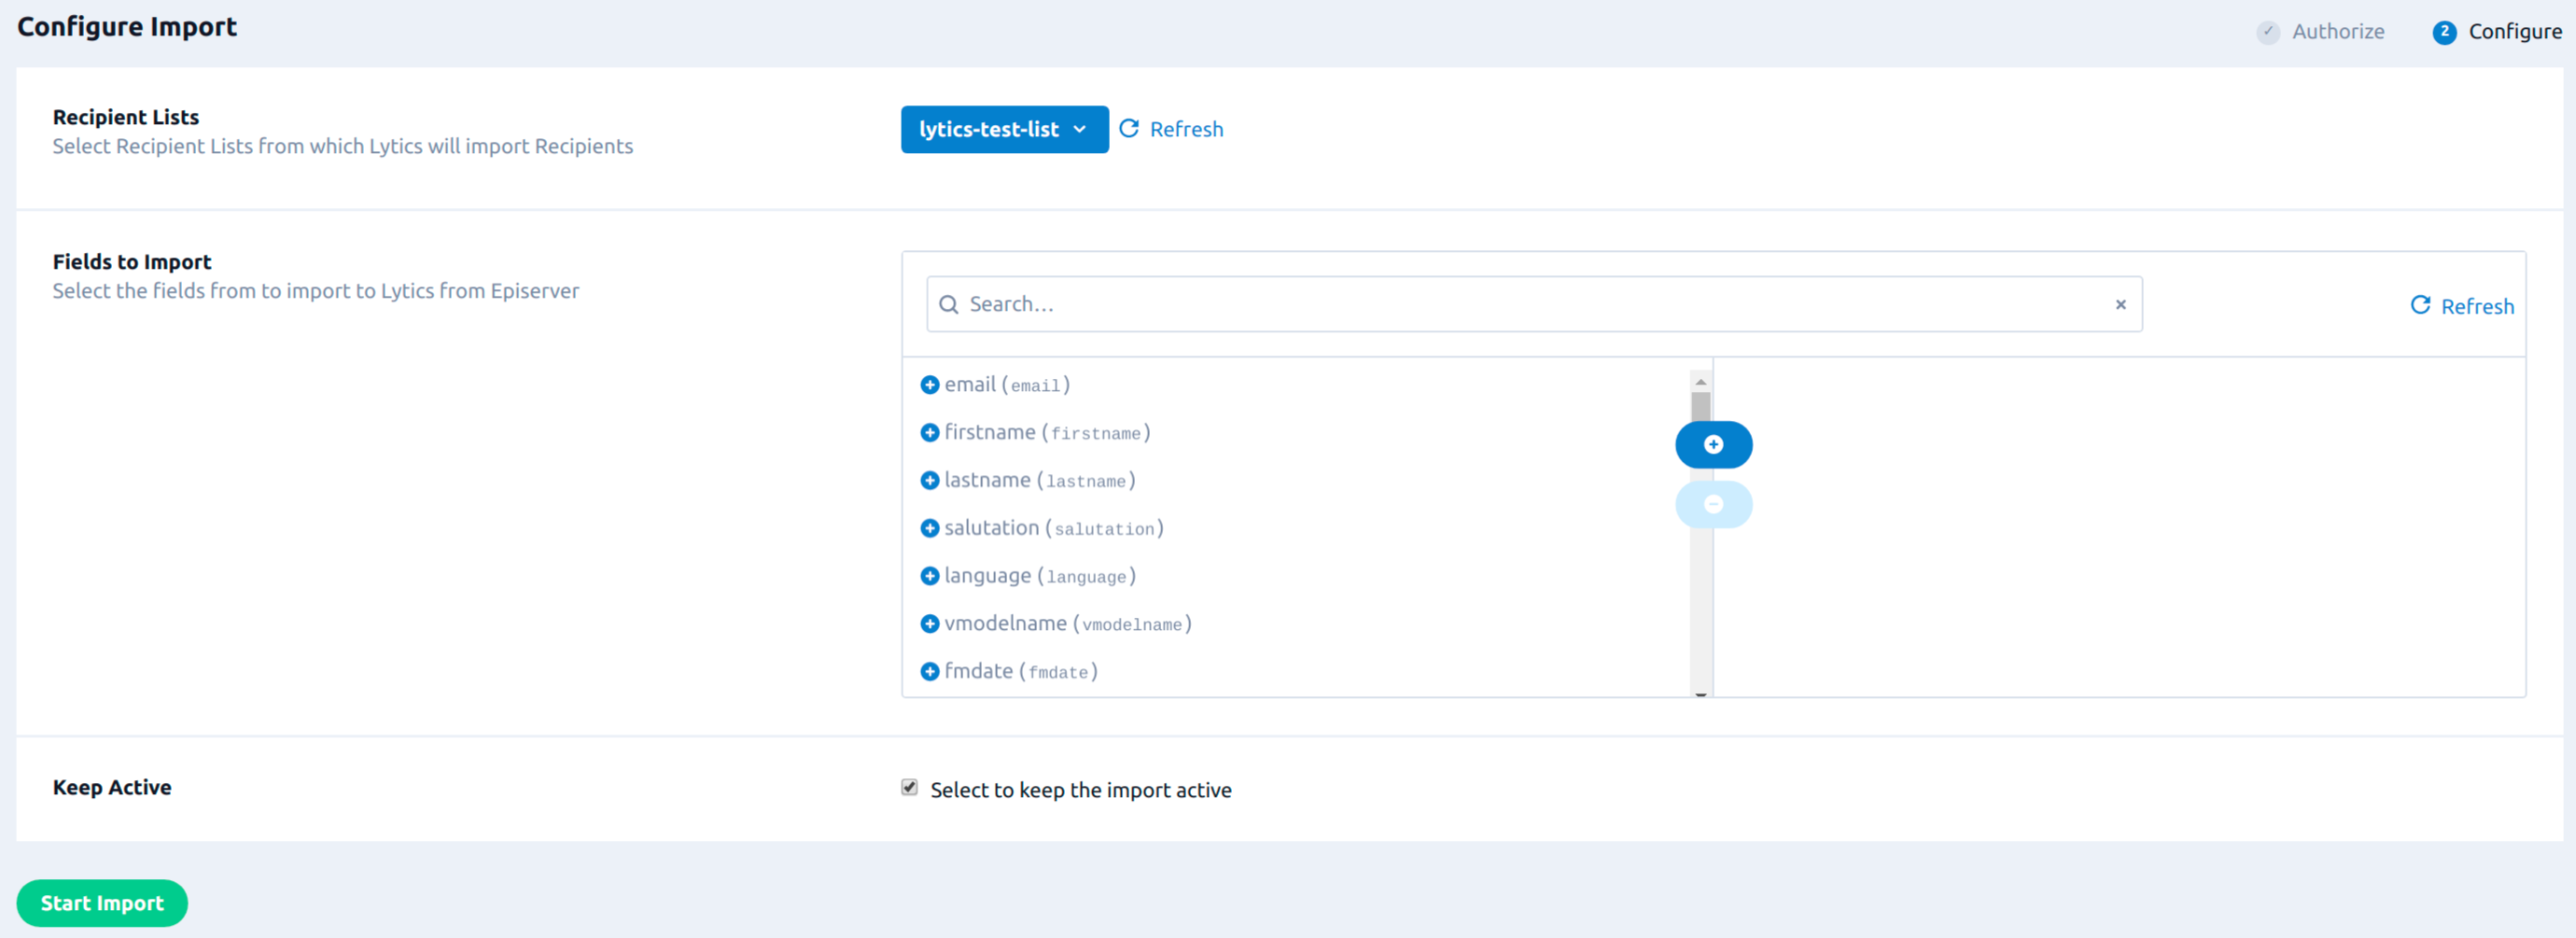
- from the Recipient Lists input, select the Episerver Recipient List(s) to import recipients from.
- (Optional) Using Attributes to Import , select the fields you want to import that are associated with the Recipients. If no fields are selected, none will be imported.
- Select the Keep Active checkbox, to bring in new/updated recipients on a daily basis. If not selected the import job will run once.
- Click Start Import.

Export Audiences
Send Lytics user profiles to your existing Episerver recipient lists. All existing members and new members of the selected audience are exported in real-time.
Integration Details
- Implementation Type: Server-side Integration.
- Implementation Technique: Audience Trigger Integration.
- Frequency: Real-time Integration, with a one-time Backfill of the audience after setup.
- Resulting Data: Lytics users that are members of the selected audience(s) are exported to Episerver as recipients and put in the selected recipient List.
This integration utilizes the Episerver REST API to send users to the selected recipient list in Episerver. Once initiated, the job will:
- Run a backfill of the selected Lytics audience(s), and create or add recipients to the Episerver recipient list.
- After a backfill, the job will receive real-time updates when a user enters or exits the audience.
- For each user entering the audience, it will create and add the user in the Recipient List. It will also populate the audience column mapped during work configuration with the concatenated value of the Lytics Audience that the user is in.
- For each user exiting in the selected audience, the job will update the Episerver Recipient List field, which is mapped with audience membership using the concatenated value of the Lytics Audience that user will be in after this event.
Fields
You can export any Lytics user fields to Episerver fields that are present in the selected recipient list. Lytics allows you to map user profile fields with the corresponding Episerver recipient list field as part of the job configuration.
Configuration
Follow these steps to set up and configure an export job for Episerver in the Lytics platform. If you are new to creating jobs in Lytics, see the Jobs Dashboard documentation for more information.
- Select Episerver from the list of providers.
- Select the Export Audiences job type from the list.
- Select the Authorization you would like to use or create a new one.
- Enter a Label to identify this job you are creating in Lytics.
- (Optional) Enter a Description for further context on your job.
- Select the audiences to export.
- Complete the configuration steps for your job.
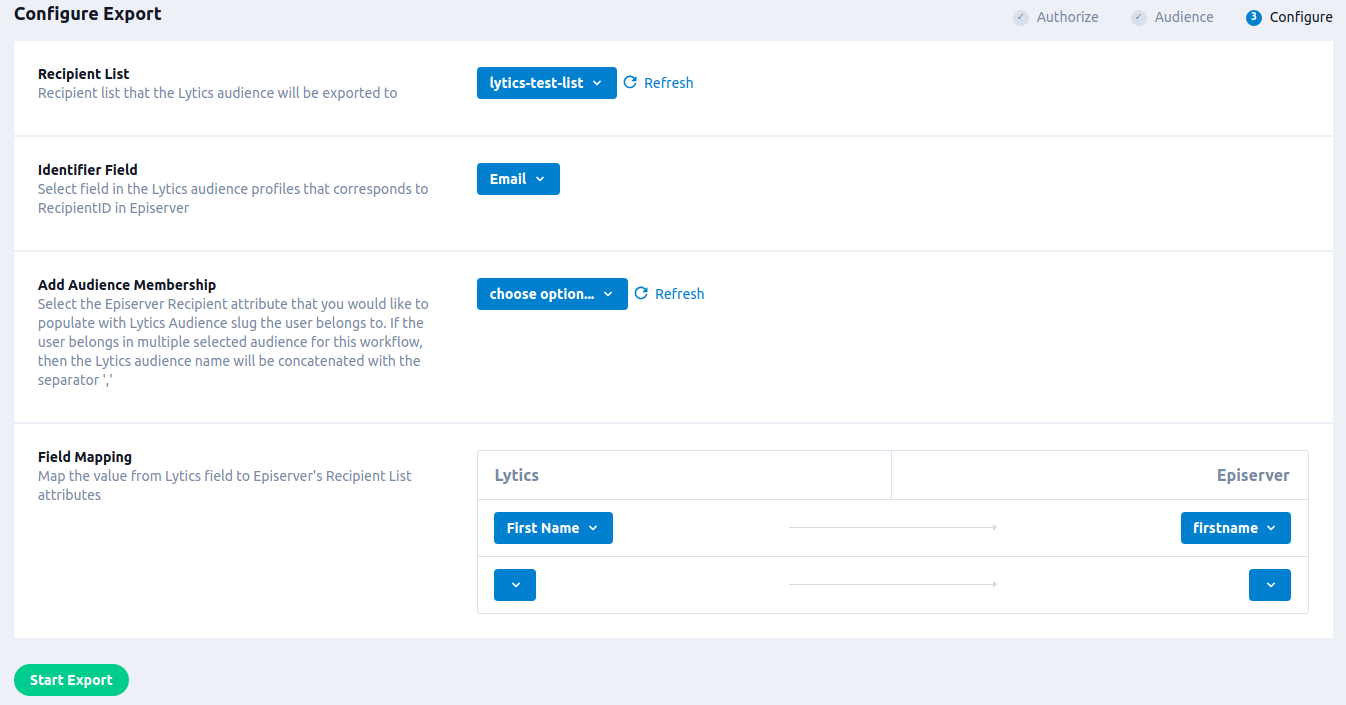
- From the Recipient List dropdown, select the Episerver recipient list you want to export your audiences to.
- From the Identifier Field dropdown, select the Lytics user field that represents the Recipient's Identifier ID in Episerver.
- (Optional) From the Add Audience Membership input, select the Episerver recipient list field where the Lytics Audience Membership will be populated.
- (Optional) Use the Fields Mapping input to map Lytics fields to the existing field of the selected Episerver Recipient list. Select Lytics data fields on the left and the Episerver recipient list fields on the right. If no fields are mapped, only the identifier field will be exported.
- Click Start Export.

Users should be available in the Episerver recipient list within a few minutes of starting the export. Larger audiences may take a few hours to be completely added to the list.
Updated 18 days ago