

Cheetah Digital
Overview
Cheetah Digital is a customer engagement platform that allows marketers to deliver personalized experiences, cross-channel messaging, and loyalty strategies.
Integrating Lytics with Cheetah Digital allows you to enrich customer profiles and export user activity data based on one or more audiences in Lytics.
Authorization
If you haven't already done so, you will need to set up a Cheetah Digital account before you begin the process described below. If you are new to creating authorizations in Lytics, see the Authorizations documentation for more information.
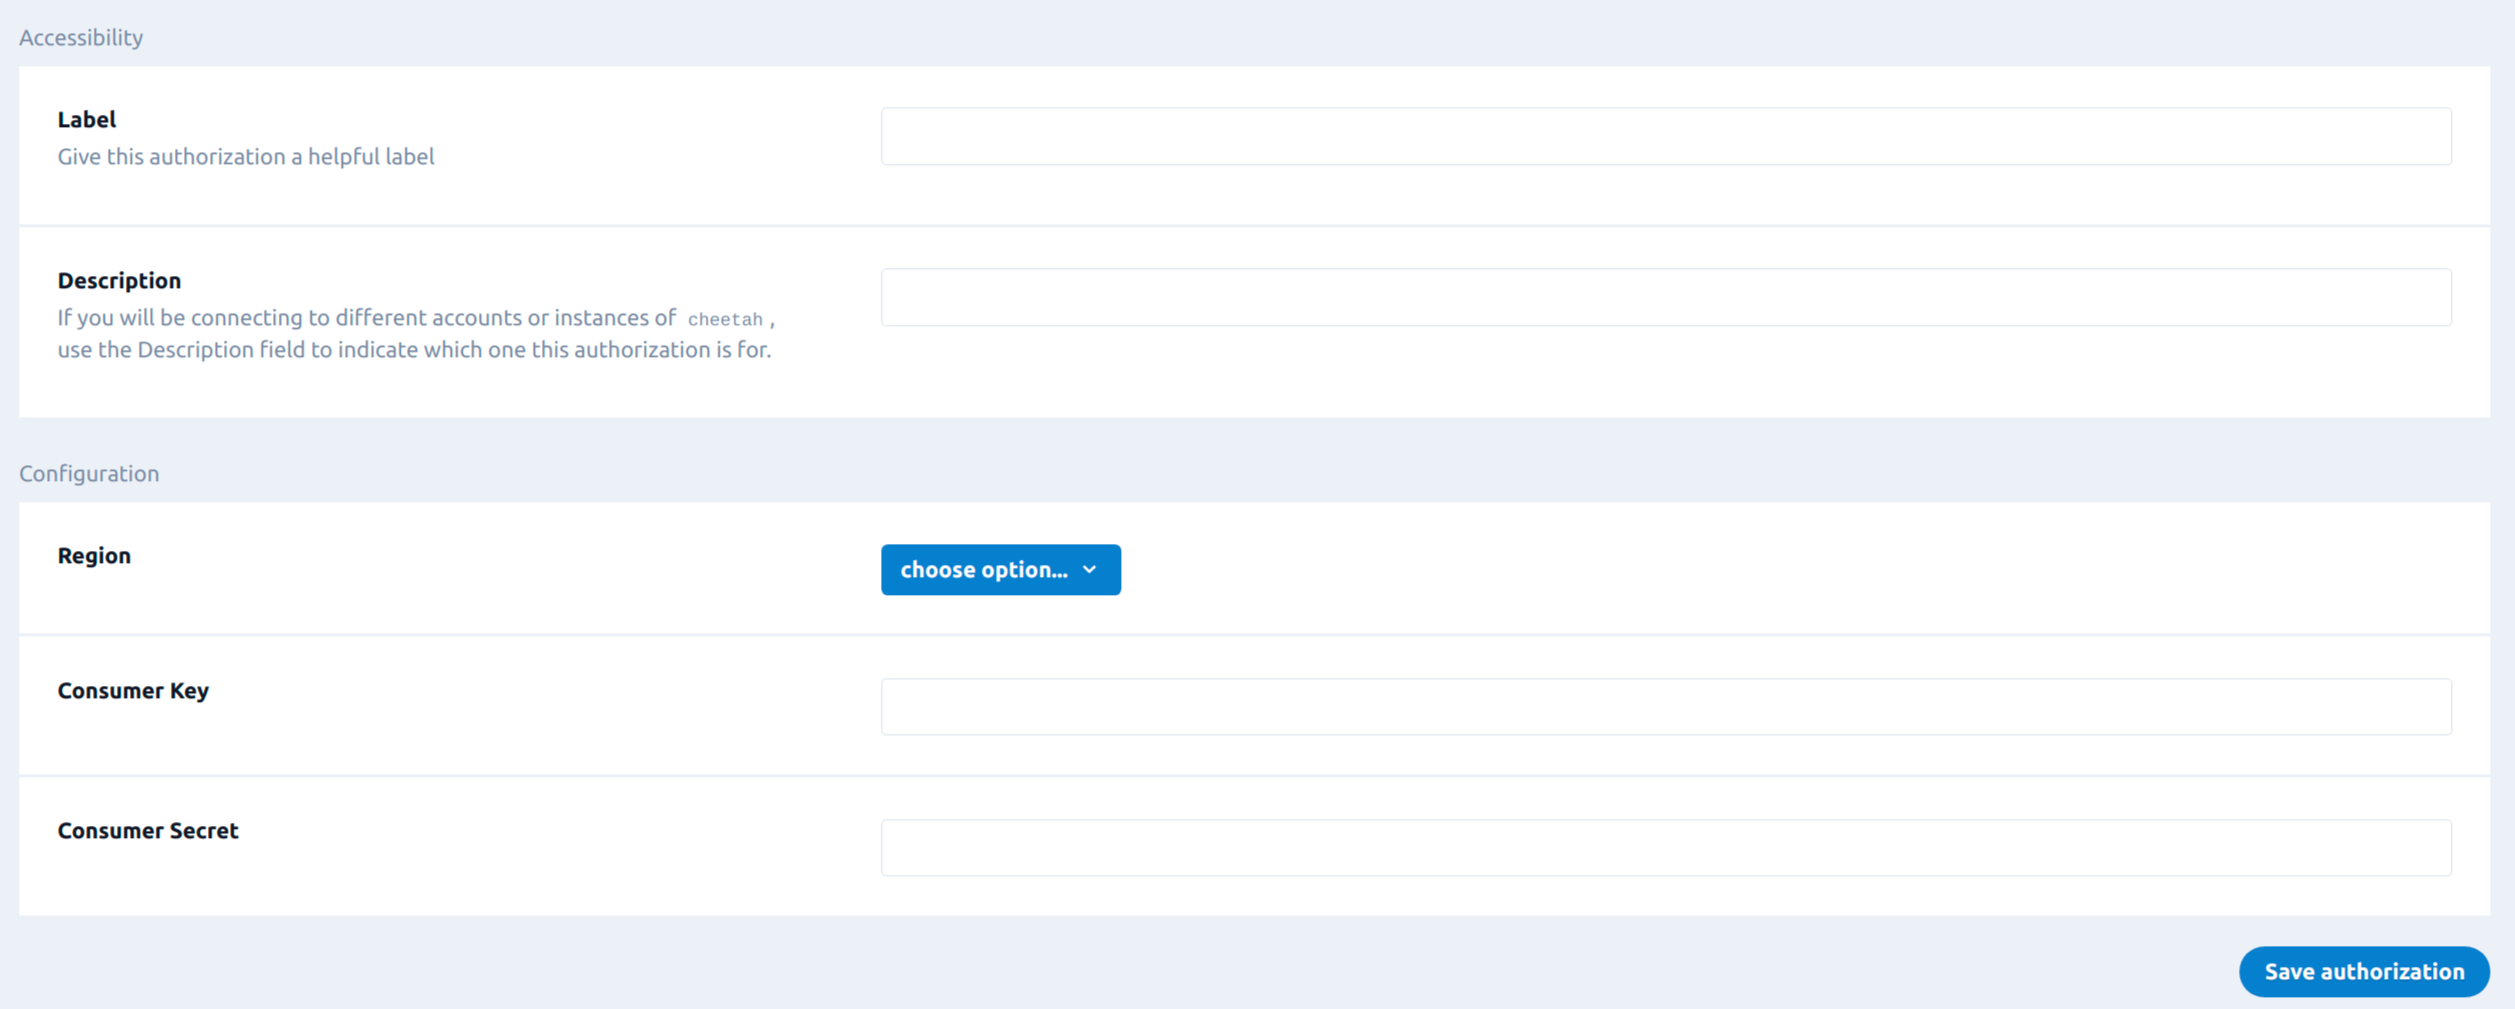
To authorize your connection to Cheetah Digital, you must provide a Cheetah Digital consumer key and consumer secret so that Lytics can communicate with Cheetah Digital's APIs to send data from your Lytics account. You will also be required to specify the region where your Cheetah Digital resources reside. For instructions on how to create a consumer key and secret, please contact Cheetah Digital support.
- Select Cheetah Digital from the list of providers.
- Select Cheetah Digital Consumer Key/Secret.
- Enter a Label to identify your authorization.
- (Optional) Enter a Description for further context on your authorization.
- Select the Region where your Cheetah Digital resources reside.
- Enter your Cheetah Digital Consumer Key.
- Enter your Cheetah Digital Consumer Secret.
- Click the Save Authorization button.

Export Audiences
Export audience changes from Lytics to improve your marketing experiences delivered through Cheetah Digital.
Integration Details
- Implementation Type: Server-side Integration.
- Implementation Technique: REST API Integration, Audience Trigger Integration.
- Frequency: Real-time Integration, with a one-time Backfill of the audience after setup.
- Resulting data: User profiles with selected user fields.
This export job sends the users' enter/exit activity to Cheetah Digital. This integration utilizes Cheetah Digital's Advanced data load API to send users' data to the configured Cheetah Digital table. Once initiated, the job will:
- Run a backfill of the selected Lytics audience(s), and insert or update the records with the data that was selected during configuration in the selected Cheetah Digital table.
- After a backfill, the job will receive real-time updates when a user enters or exits the audience.
- For each enter/exit event the job receives, it will insert/update the records in the Cheetah Digital table.
Fields
The export job can be configured to send following fields to Cheetah Digital table:
| Lytics User Field | Description | Cheetah Digital Table | Type |
|---|---|---|---|
| Any | Any Lytics Field | Primary Key Column | |
| - | Audience Slug | Audience Slug Column | string |
| - | was this an audience Enter or Exit | Subscription Column | boolean |
| - | Event Time | Timestamp column (if any) | timestamp |
Configuration
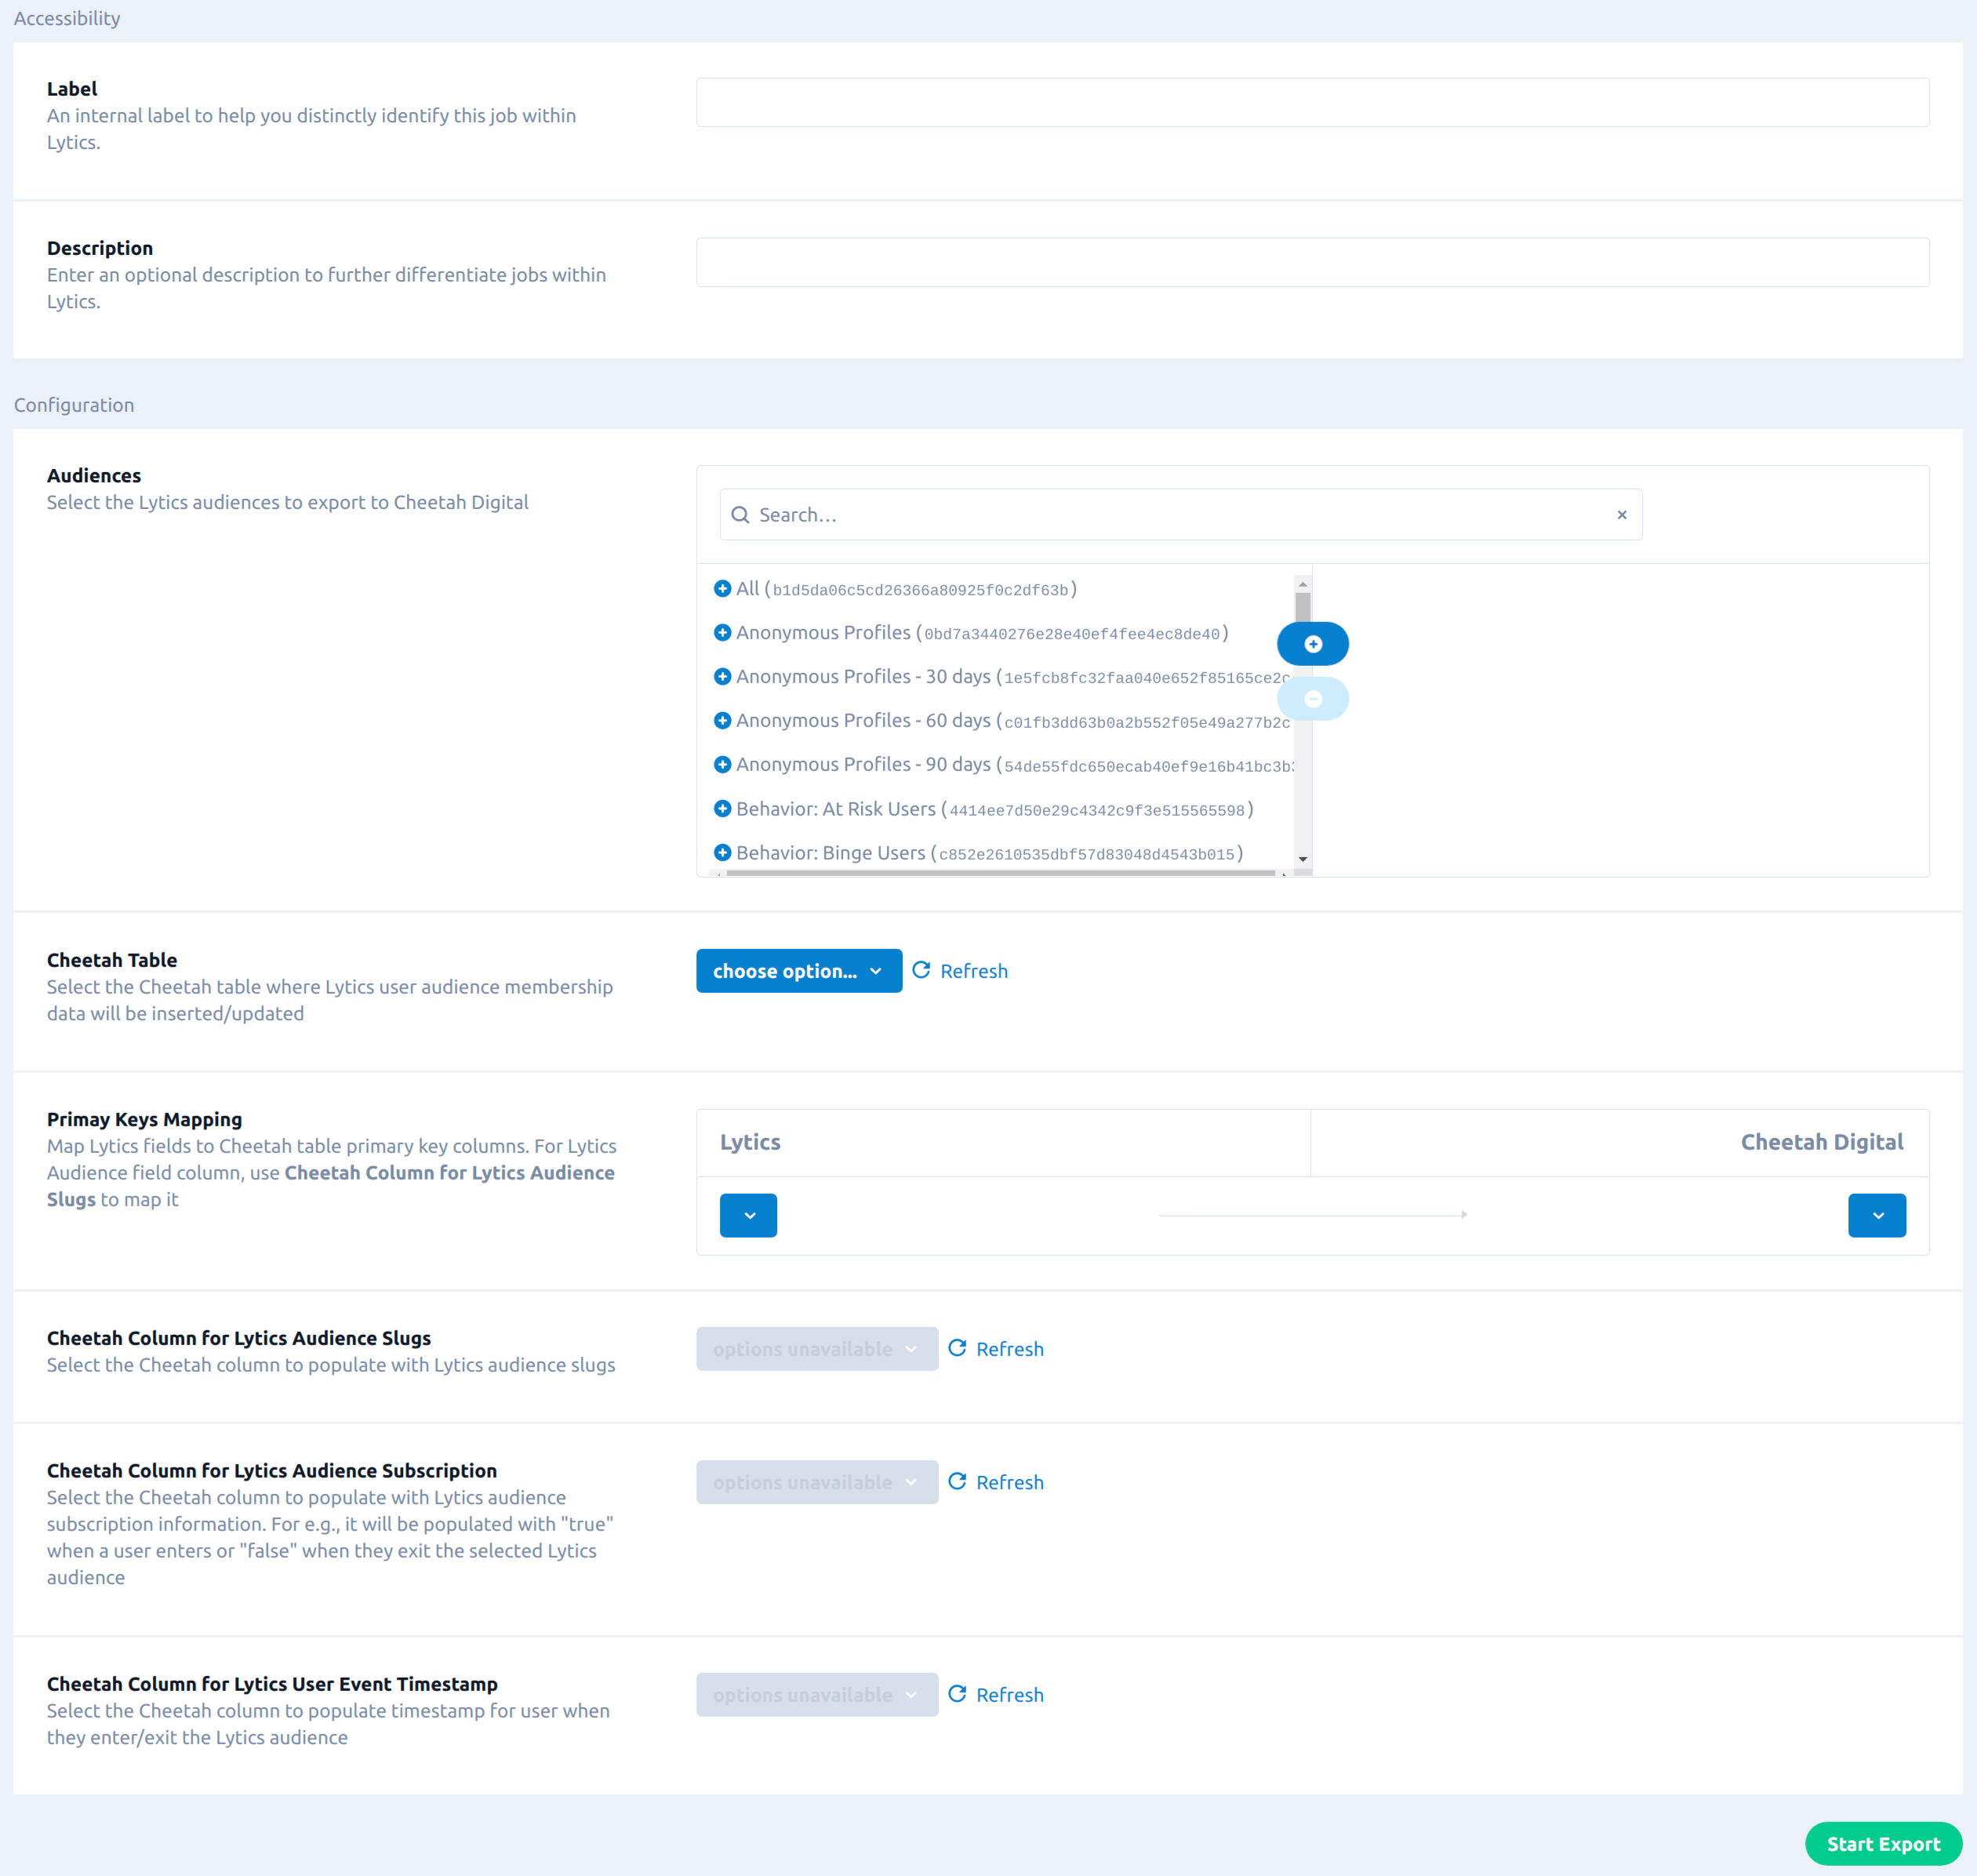
Follow these steps to set up an export job for Cheetah Digital. If you are new to creating jobs in Lytics, see the Jobs Dashboard documentation for more information.
- Select Cheetah Digital from the list of providers.
- Select the Export Audiences job type from the list.
- Select the Authorization you would like to use or create a new one.
- Enter a Label to identify this job you are creating in Lytics.
- (Optional) Enter a Description for further context on your job.
- Select the Lytics audiences to export.
- From the Cheetah Table input, select the Cheetah Digital table where Lytics user audience membership data will be inserted/updated.
- From the Primay Keys Mapping input, map Lytics fields to Cheetah table primary key columns. For Lytics Audience field column, use Cheetah Column for Lytics Audience Slugs to map it.
- From the Cheetah Column for Lytics Audience Slugs input, select the Cheetah column to populate with Lytics audience slugs.
- From the Cheetah Column for Lytics Audience Subscription input, select the Cheetah column to populate with Lytics audience subscription information. It will be populated with "true" when a user enters or "false" when they exit the selected Lytics audience.
- (Optional) From the Cheetah Column for Lytics User Event Timestamp input, select the Cheetah column to populate timestamp for user when they enter/exit the Lytics audience.
- Click the Start Export button to start the job.

Updated 15 days ago