

Yahoo Ads
Overview
Export Lytics Audiences to custom audiences in the Yahoo Ads: Native and Search Ads Network to be more precise with your ad spend by targeting the right users. By connecting Lytics to Oath Ads, you can increase your return on ad spend dramatically.
Authorization
If you haven't already done so, you will need to set up a Yahoo account before you begin the process described below.
If you are new to creating authorizations in Lytics, see the Authorizations documentation for more information.
- Select Yahoo from the list of providers.
- Select the method for authorization. Note that different methods may support different job types. Yahoo supports the following authorization methods:
- Enter a Label to identify your authorization.
- (Optional) Enter a Description for further context on your authorization.
- Complete the configuration steps needed for your authorization. These steps will vary by method.
- Click Save Authorization.
Yahoo Sign In
Yahoo Sign In is an Oauth2 based authorization for the Yahoo Gemini platform.
- Enter your Yahoo login credentials in the login popup.
- In the Label text box, enter a name for the authorization
- (optional) In the Description text box, enter a description for this authorization

DataX
For the DataX exports, you will need the following information:
- In the Label text box, enter a name for the authorization
- (optional) In the Description text box, enter a description for this authorization
- In the MDM ID text box, enter your Master Data Management (MDM) ID obtained from your Yahoo account.
- (optional) Select the GDPR checkbox, if GDPR protected users will be in the dataset. You are responsible for managing consent.
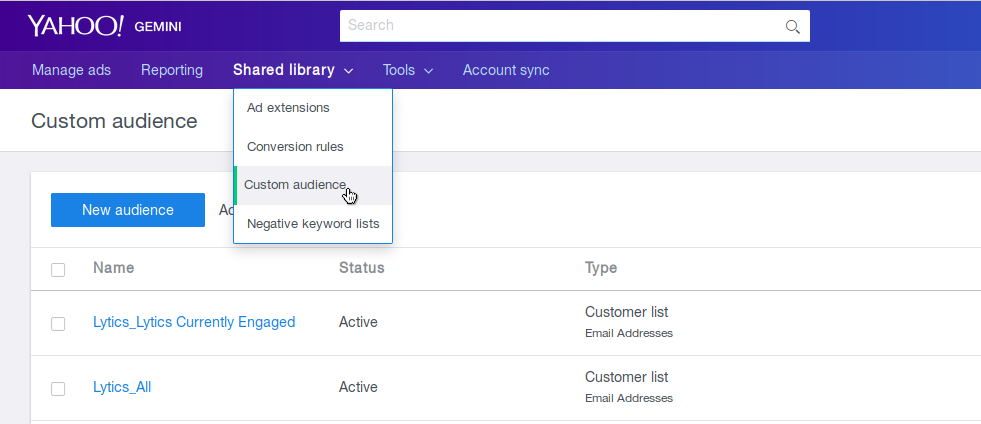
Export Audience
Starting an export will create a Custom Audience by uploading a Lytics audience into Yahoo Gemini. Lytics can match email addresses. After the initial export (details below), the sync will run continuously, adding users into the Custom Audience as users enter the Lytics audience. The Yahoo API currently doesn't support removals from custom audiences.
Integration Details
- Implementation Type: Server-side Integration
- Implementation Technique: REST API Integration
- Frequency: Real-time Integration with Backfill.
- Resulting data: Custom audience list in Yahoo Gemini
This integration uses the custom audience API in Yahoo
- A new customer list audience is created in Yahoo
- As a user enters the selected Lytics audience the user's email is sent to Yahoo
Fields
By default, Lytics exports the following fields to Yahoo Gemini Custom Audience.
The name of the audience in Yahoo will be a name defined by you or the default Lytics + audience name
| Lytics User Field | Description | Yahoo Field | Type |
|---|---|---|---|
| Email Address | string | ||
Configuration
Follow these steps to set up and configure an export of yahoo in the Lytics platform.
- In Yahoo Advertiser Account ID input, select the Yahoo Ads account where the Custom Audience will be created
- From the Audience input, choose the Lytics audience to export to Yahoo
- From the Email Field input, select the field that contains the user email. Values may be plain or already SHA256-hashed; plain emails are hashed before being sent to Yahoo
- Click on the Show Advanced Options tab to expand the advanced configuration
- In Audience Name add a name if you would like to override the default naming of the audience, "Lytics _Audience Name"
- Also optionally add a Audience Description to help identify the audience in Yahoo
- Click "Start Export" to start he export

Using Custom Audiences in campaigns
Within a few minutes the exported audience from Lytics should be visible in the Yahoo Gemini dashboard. The full synchronizing time depends on the size of the exported audience, and will usually take 24 hours to see the audience count updated to reflect the full export.
DataX Export Audience
Export users to Yahoo DataX for targeting across Yahoo's platform.
Integration Details
- Implementation Type: Server-side Integration
- Implementation Technique: REST API Integrations , Audience Trigger Integration
- Frequency: Real-time Integration
- Resulting data: User Fields, audience membership
This integration utilizes the Yahoo Data X API to manage the taxonomy and send user data to an audience in Yahoo. Once the export is started the job will:
- Verify exported fields and audience exist in existing taxonomy, updating the taxonomy if they don't
- Create a small batch of users to update
- Update users in DataX
- Repeat steps 2 and 3 every 10 minutes
Fields
The fields exported to Yahoo DataX are configurable, but will at minimum include the selected identifier and audience name.
Configuration
Follow these steps to set up and configure an export job for Yahoo in the Lytics platform. If you are new to creating jobs in Lytics, see the Destinations documentation for more information.
- Select Yahoo from the list of providers.
- Select the export job type from the list.
- Select the Authorization you would like to use or create a new one.
- Enter a Label to identify this job you are creating in Lytics.
- (Optional) Enter a Description for further context on your job.
- Select the audience to export.
- Complete the configuration steps for your job.
- From the Identifier Type input, select the type of identifier used to identify the users. Raw email fields will be hashed before being sent to DataX.
- From the Identifier Field input, select the field that contains the ID to use for identifying the user.
- (optional) From the Fields input, select the user attributes you would like to upload to DataX.
- Click the Start job button to start the job
Partner Match
Add a Partner Identifier to your users (PXID) to use across the yahoo platform.
Integration Details
- Implementation Type: Server-side Integration
- Implementation Technique: REST API Integration , Audience Trigger Integration
- Frequency: Real-time Integration
- Resulting data: User Fields
This integration utilizes the Yahoo Data X API to send user match data to Yahoo. Once the export is started the job will:
- Add users in the Lytics audience to a batch of users to send to Yahoo
- if user is missing a PXID, a new one will be generated.
- if using EMAIL as the identifier, and the identifier is not a valid SHA256 hash, the identifier will be hashed then added to the batch.
- Push the batch to DataX Partner match
- PXIDs will be sent to the Lytics
yahoo_partner_matchstream allowing the ID to be joined to the Lytics user profile. - Repeat steps 1-3 every 10 minutes.
Fields
The following fields are included in the default mapping of the yahoo_partner_match stream:
| Source Field | Lytics User Field | Description | Type |
|---|---|---|---|
email unique id | string | ||
| gpadvid | google_aid | Current Google Advertising ID | string |
| hashed_email | email_hash_sha256 | Hashed Email Address (SHA 256) | string |
| idfa | idfa | Current IDFA | string |
| ixid | yahoo_id | Yahoo Cookie ID | string |
| pxid | yh_pxid | Yahoo PXID | string |
| gpadvid | google_aids unique id | Google Advertising IDs | []string |
| idfa | idfas unique id | IDFAs | []string |
| zip4 | zip4 | ZIP + 4 | string |
Configuration
Follow these steps to set up and configure an export job for Yahoo in the Lytics platform. If you are new to creating jobs in Lytics, see the Destinations documentation for more information.
- Select Yahoo from the list of providers.
- Select the export job type from the list.
- Select the Authorization you would like to use or create a new one.
- Enter a Label to identify this job you are creating in Lytics.
- (Optional) Enter a Description for further context on your job.
- Select the audience to export.
- Complete the configuration steps for your job.
- From the Identifier Type input, select the type of identifier used to identify users.
- From the Email Field input, select the field that contains the identifier to tie to the PXID.
- (optional) In the PXID text box, select the field that contains the PXID to use for partner matching, if left empty new PXIDs will be generated.
- Click the Start Job button to start the job.