

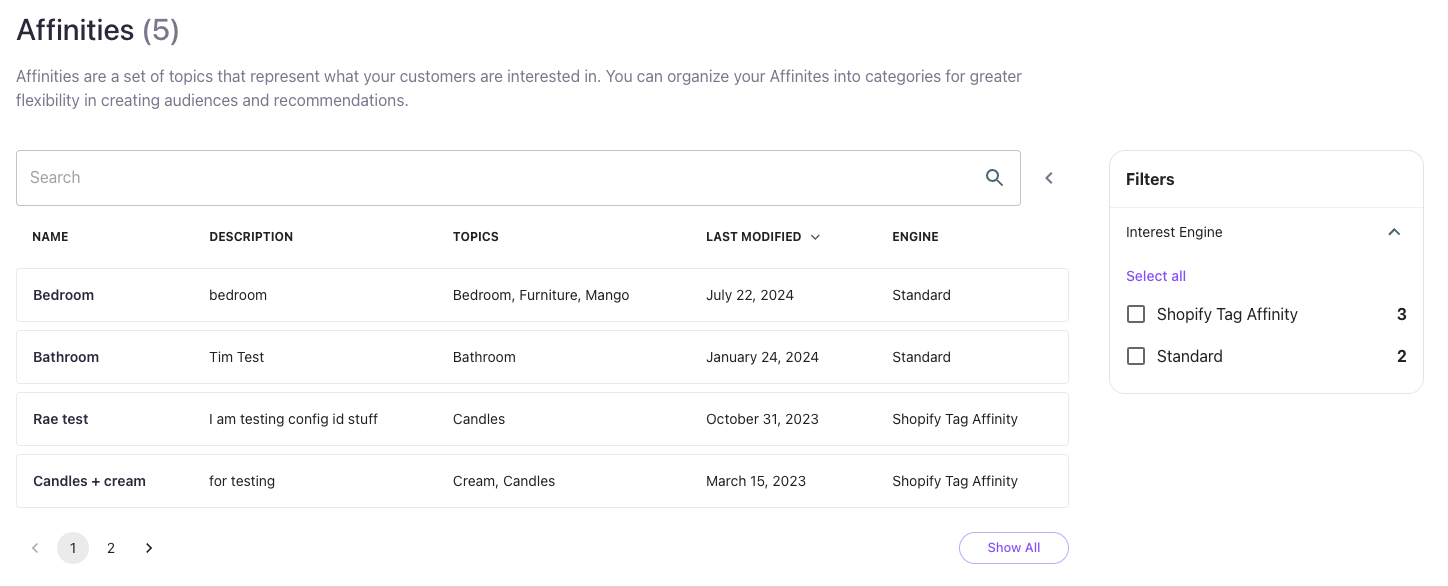
Affinities
Viewing Affinities
To view your Affinities, select Context Layers under Content in the Lytics navigation bar.
At the bottom of the page, you’ll find a table displaying the Affinities in your account. You can filter the list by Context Layer or search for a specific Affinity. This table presents the Name, Description, Topics, Last Modified Date, and Context Layer associated with each Affinity. To view the Affinities tied to a particular Context Layer, simply navigate to the Context Layer page.
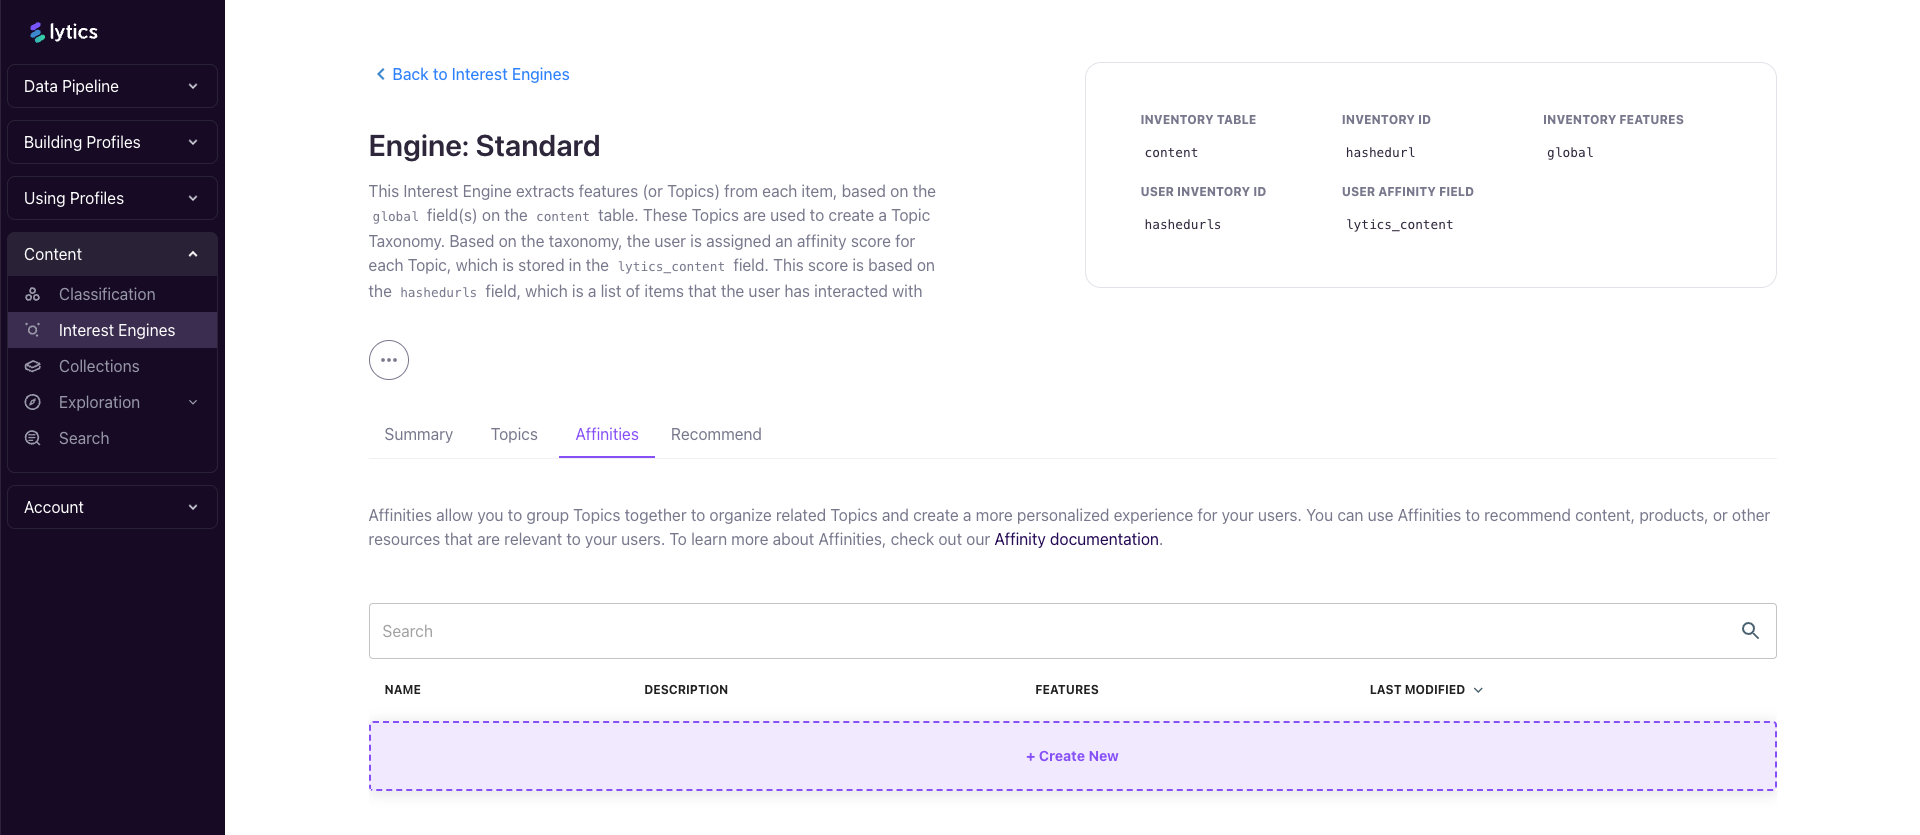
Creating Affinities
Affinities allow you to group related Topics into a targetable unit, making it easier to reach your customers based on their interest groups. This document will walk you through how to use the Affinity Builder step-by-step. Once an Affinity is created, you can use it to build Audiences and content collections.
To create an Affinity, navigate to the Context Layers page under Content, select the Standard tile, and click on + Create New.
- Add a Name for your Affinity. This will be displayed in the Affinity tab of the audience builder.
- Add a Description for more context. The name and description fields are required.
- Assign Topics to your Affinity. There are a few ways to explore and add Topics.
- Use the filter to quickly find Common Topics. Lytics surfaces the Topics that are most prevalent in your taxonomy, based on the number of documents with that Topic. The default limit for Common Topics is 500.
- Click on a row to see related Topics.
- Select the checkbox next to a Topic to add it to your Affinity.
- Use the Search to find any Topic in your account.
The search option gives you access to any Topic in your taxonomy, even if it's not included in your list of Common Topics. This means you don't need to allow or block certain Topics to make the ones you care about available in the UI.
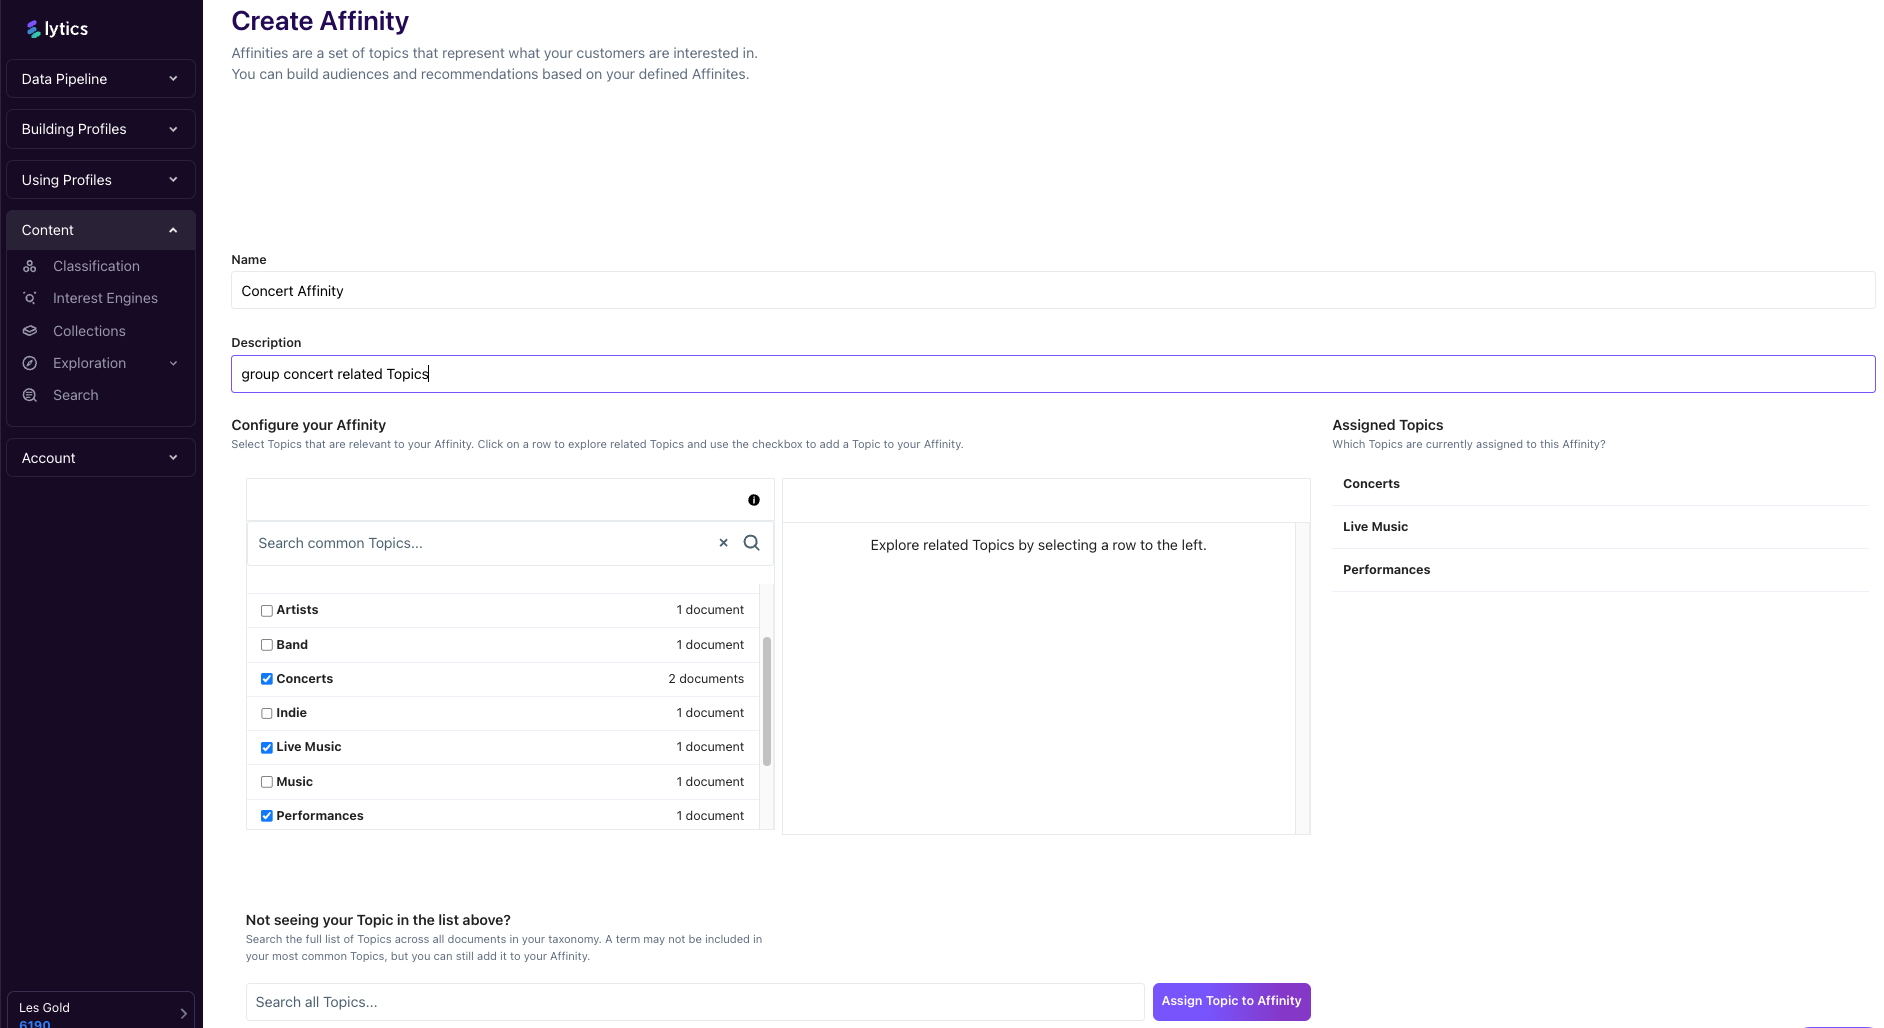
As you select Topics, they will be added to the Assigned Topics list on the right. In this example, we created an Affinity named "Concert Affinity" that included Topics such as "Concerts", "Live Music" and "Performances".
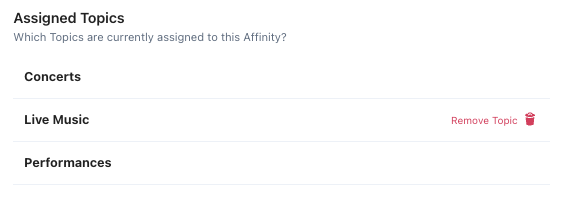
There are two ways you can remove selected Topics from your Affinity.
- Hover over the Topic in the Assigned Topics list and click Remove Topic.
- Unselect the checkbox next to the Topic within the table view.
- Once you have all your desired topics assigned, click Save to save your Affinity
Once an Affinity has been created, you can add or remove Topics at a later time, and edit the name or description.
After saving an Affinity, note that users will be evaluated for that Affinity as they engage with the topics included in the Affinity going forward. All users without new activity for those topics will be reevaluated within a few days.
Affinity Summary
Each Affinity has a summary page that provides an overview of how many users are interested in this group of Topics and how much of your brand's content or product inventory is represented. After creating an Affinity, or when clicking any row in the Affinity list, you'll be directed to this summary page.
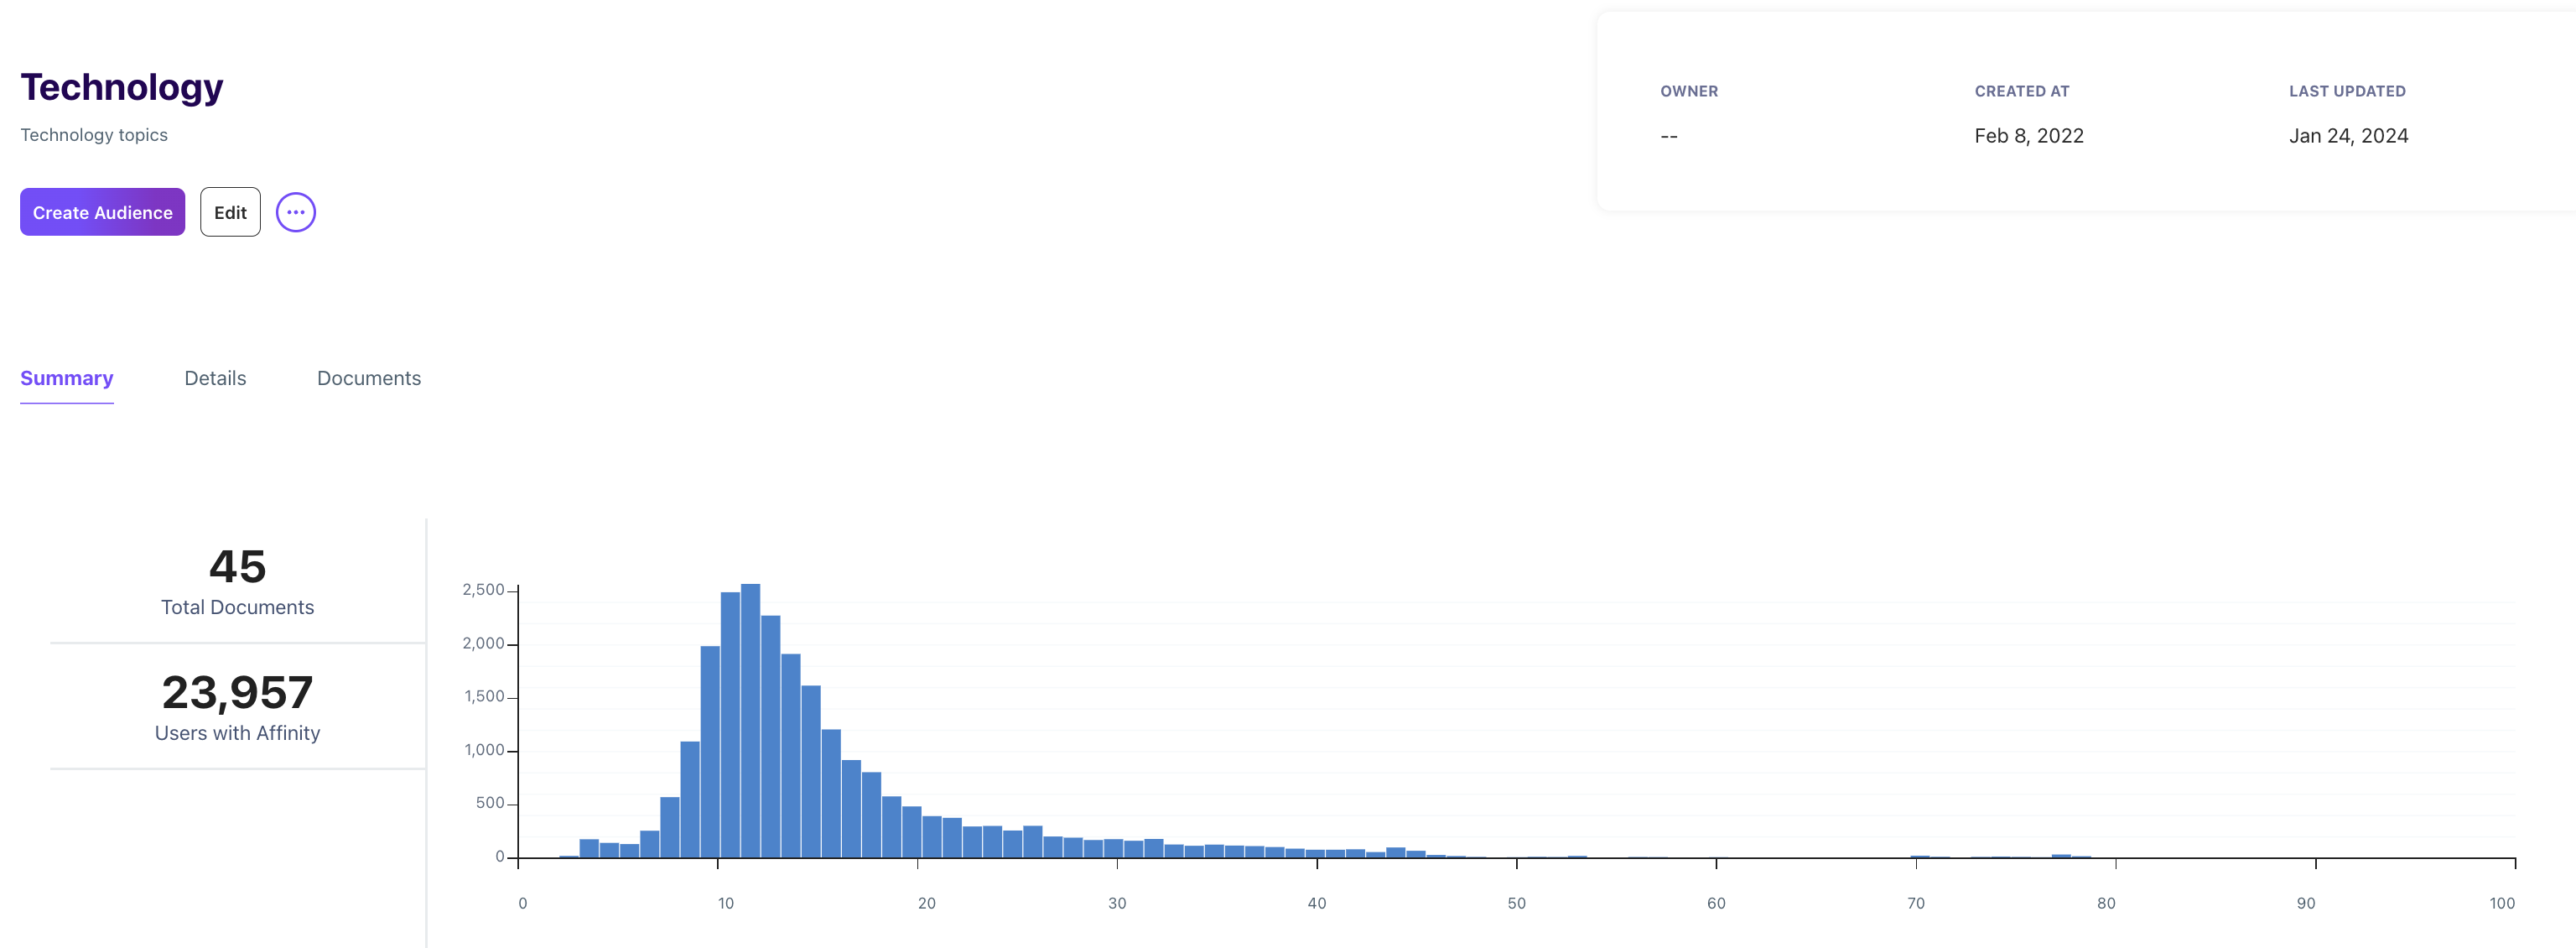
At the top of the Affinity Summary page, you’ll find the following details:
- Owner: The Lytics user who created the Affinity.
- Created: The date the Affinity was first created.
- Updated: The date the Affinity was last modified.
Chart
After creating an Affinity, it may take a few days for the chart to fully populate as Lytics evaluates users' interest in the selected Topics. To the left of the chart, you’ll find key metrics::
- Total Documents: The number of documents that include one or more Topics from this Affinity.
- Users with Affinity: The number of users who have shown interest in one or more Topics in this Affinity.
On the chart, the X axis shows affinity scores on a scale from 0-100, where 0 represents "no interest" and 100 represents the "highest interest." The Y axis displays the number of users. You can click on individual bars to see how many users fall within specific affinity ranges.
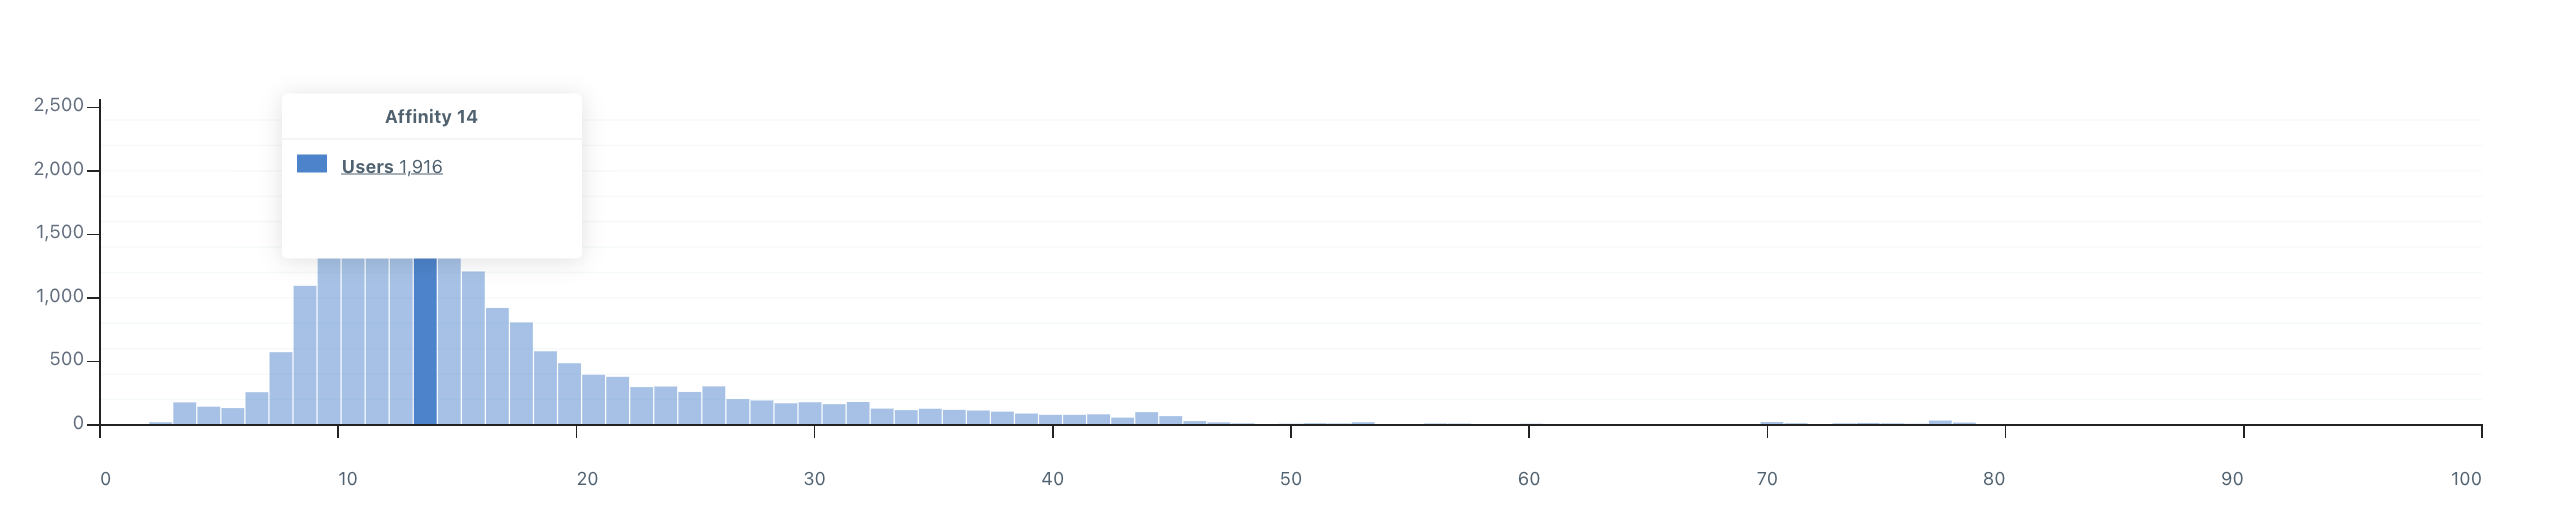
This data helps your marketing team identify which users to target based on their interest levels. For example, you can focus on users with medium-to-high affinity for certain Topics in an ad campaign, increasing the likelihood of relevance and conversions.
Details

This section outlines how your Affinity is configured.
- Topics: The set of related Topics selected for this Affinity.
- Configuration ID: The method of calculation for the Affinity.
defaultwill be listed unless you have a custom setup configured by the Lytics Data Science Team. - Slug: Automatically created based on the name of your Affinity. Lowercase letters are used with underscores between words.
Sample Documents
At the bottom of the summary page, you will see a paginated list of sample documents for this Affinity. Your content must be classified before it will appear in this list.
Updated 3 months ago