

Sailthru
Overview
Sailthru is a marketing automation software that enables you to deliver customer-centric email, web, and mobile experiences.
Connect Sailthru and Lytics to improve the personalization and precision of your email marketing. Lytics combines behavioral data from your other marketing tools so you can create audiences based on how your users interact with your brand across channels. Use these custom audiences to power your next Sailthru campaign.
Authorization
If you haven't already done so, you will need to set up a Sailthru account before you begin the process described below. The API Key and API Secret are unique to your company’s Sailthru account and can be found on the API & Postbacks Settings page in My Sailthru.
If you are new to creating authorizations in Lytics, see the Authorizations Dashboard documentation for more information.
- Select Sailthru from the list of providers.
- Select the Sailthru API Key method for authorization.
- In the Label text box, enter a name for the authorization
- (Optional) In the Description text box, enter a description for this authorization
- Enter your API Key credential.
- Enter your API Secret credential.
- Click Save Authorization.
Import Audiences
Import your Sailthru lists into Lytics to leverage this user data to build behavioral, cross-channel audiences in Lytics.
Integration Details
- Implementation Type: Server-side.
- Implementation Technique:
REST API and
File based transfer. - Frequency: Batch daily.
- Resulting data: User profiles and
User fields.
This integration utilizes the Sailthru API. Once started the job will:
- Create a Sailthru export job of the List to import.
- Wait while the Sailthru job runs. Sailthru will write the contents of the list to a CSV file. When the file is written, the job completes and returns a link for the workflow to download the contents.
- The workflow will download the file, parse it, and the user fields will be ingested into the
sailthru_usersstream. - If Keep Updated is selected in the configuration, steps 1 through 3 will repeat daily at the time specified by Time of Day.
Fields
The following fields are included in the default mapping of the sailthru_users stream:
| Source Field | Lytics User Field | Description | Type |
|---|---|---|---|
| Email Hash | hashed_email unique id | Email Hash | string |
| Profile Id | st_ids unique id | Sailthru: Distinct ID | []string |
| Geolocation City | city | City | string |
| Geolocation Country | country | Country | string |
| Last Click | email_lastclick_ts | Email: Last Time Email Clicked | date |
| Last Open | email_lastopen_ts | Email: Last Time Email Opened | date |
| Optout Time | email_lastopt_out_ts | Email: Last Time Opted-out | date |
| Last Pageview | email_lastpageview_ts | Email: Last Pageview Time | date |
| Domain | emaildomain | Email Domain | string |
| Geolocation Zip | postal_code | Postal Code | string |
| Clicks | st_click_ct | Sailthru: Click Count | int |
| Profile Created Date | st_created_ts | Sailthru: Profile Created Date | date |
| Email Status | st_email_status | Sailthru: Email Status | string |
| Engagement | st_engagement | Sailthru: Engagement | string |
| Opens | st_open_ct | Sailthru: Open Count | int |
| source_list | st_source_list | Sailthru: Source List | []string |
| Pageviews | st_view_ct | Sailthru: Viewed Count | int |
| Geolocation State | state | State | string |
Configuration
Follow these steps to set up and configure an import job for Sailthru in the Lytics platform. If you are new to creating jobs in Lytics, see the Jobs Dashboard documentation for more information.
- Select Sailthru from the list of providers.
- Select the Import Audiences job type from the list.
- Select the Authorization you would like to use or create a new one.
- Enter a Label to identify this job you are creating in Lytics.
- (Optional) Enter a Description for further context on your job.
- Complete the configuration steps for your job.
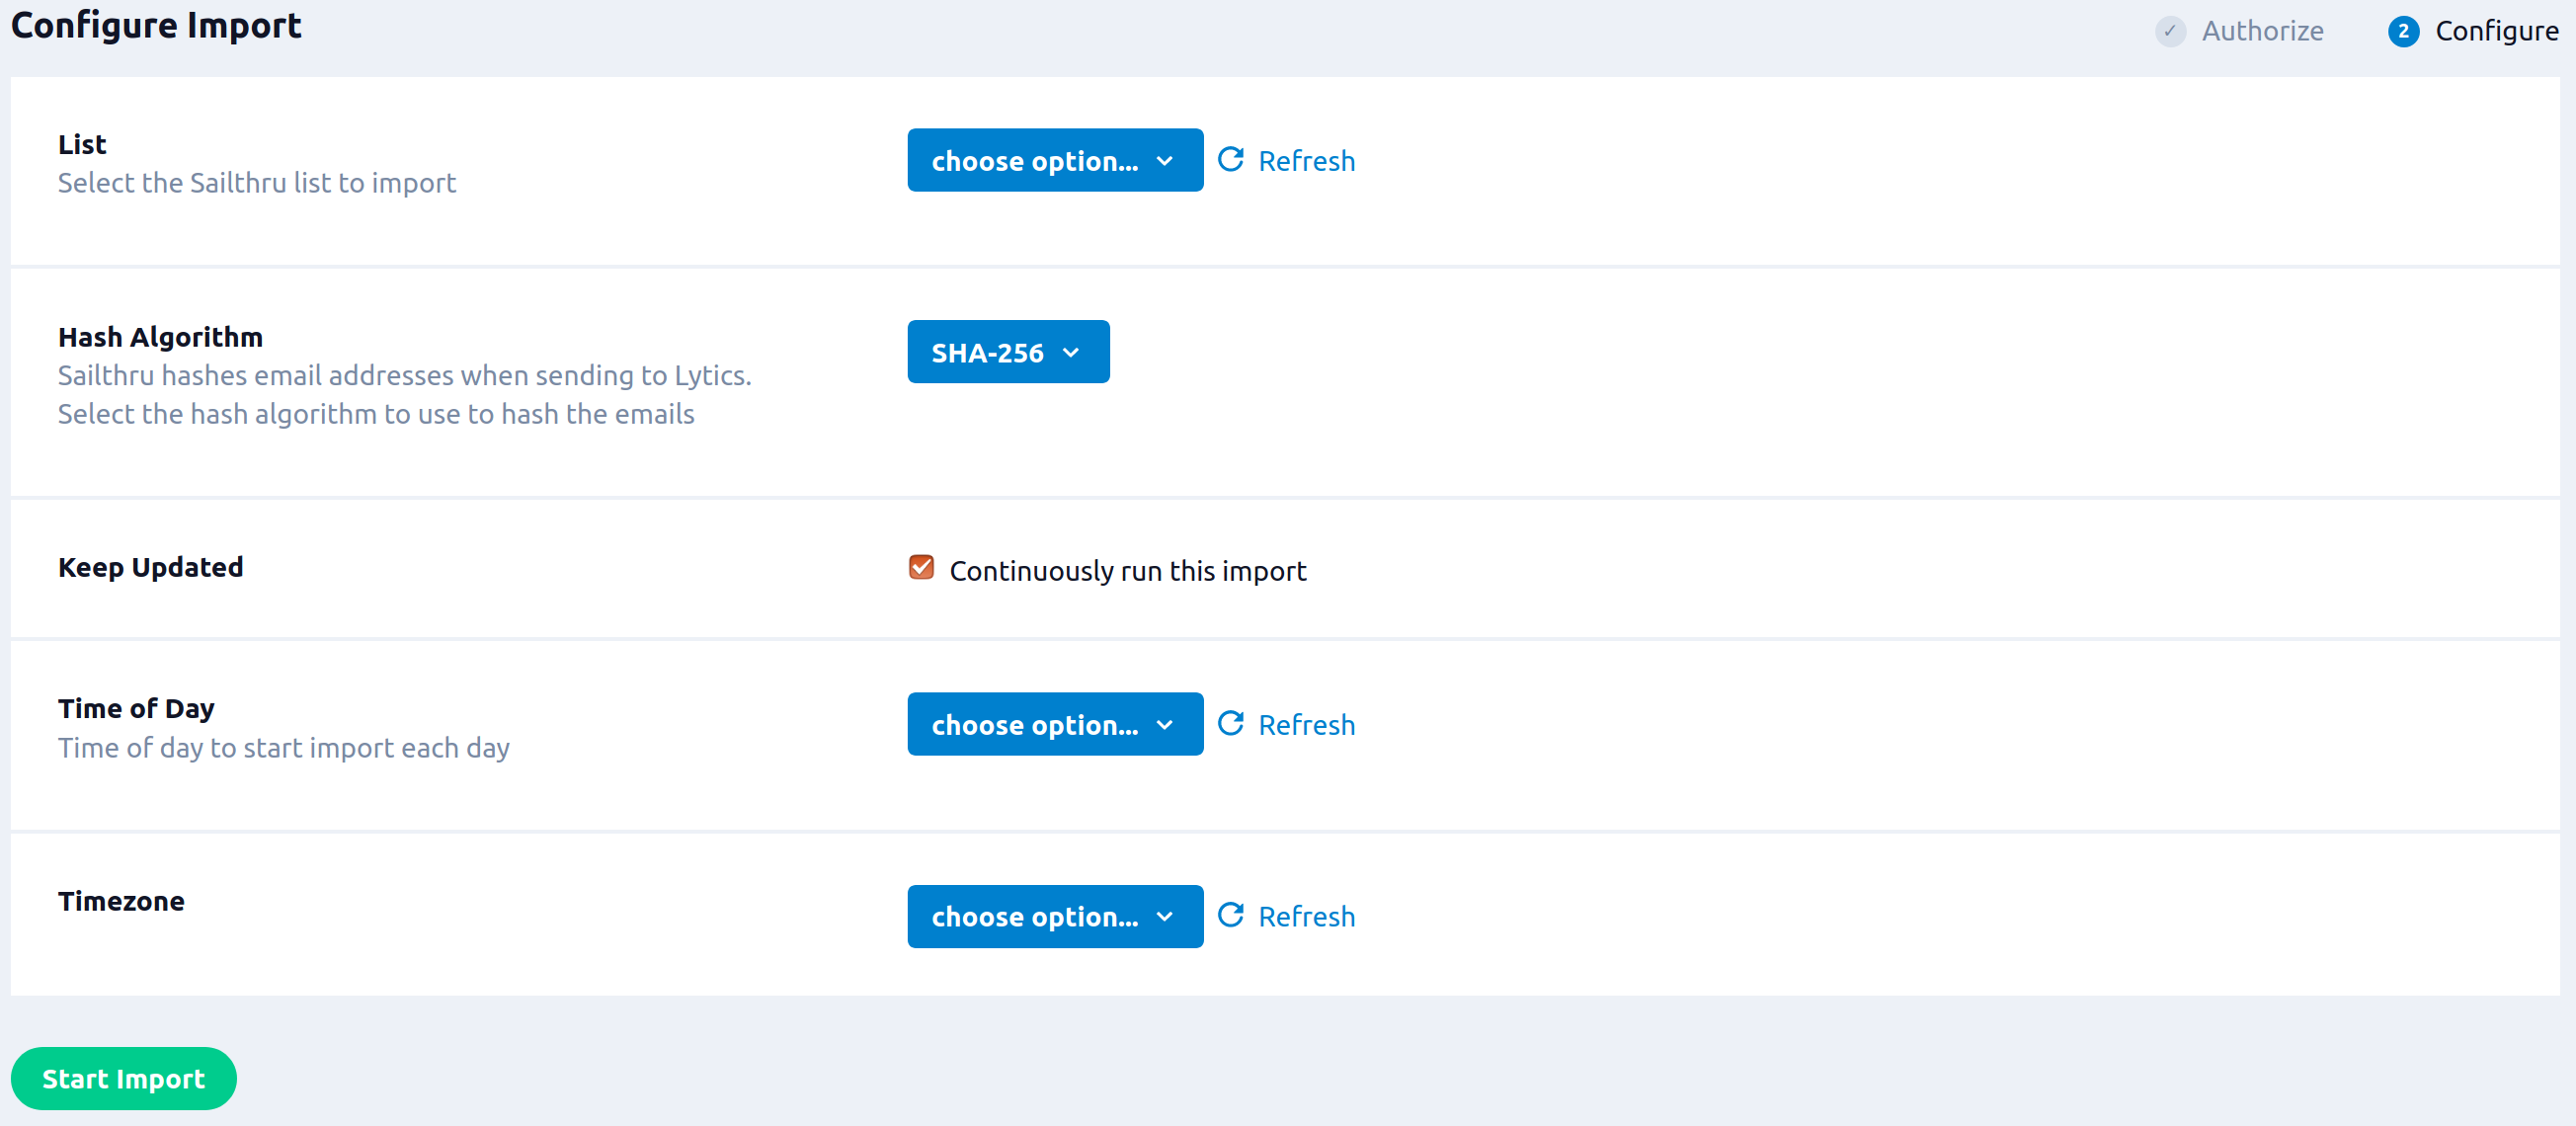
- From the List input, select the Sailthru list to import.
- (Optional) From the Hash Algorithm input, select sailthru hashes email addresses when sending to Lytics. Select the hash algorithm to use to hash the emails.
- (Optional) Select the Keep Updated checkbox to continuously run this import.
- (Optional) From the Time of Day input, select time of day to start import each day.
- (Optional) From the Timezone input, select a timezone for Time of Day.
- Click Start Import.

Export Audiences
Export Lytics audiences to enrich your Sailthru campaigns with cross-channel data, behavioral scores, content affinities, and more.
Integration Details
- Implementation Type: Server-side.
- Implementation Technique:
REST API with
audience triggers. - Frequency:
Real-time. - Resulting data:
A Sailthru list containing users currently in the Lytics audience. The name of Sailthru audience will be "Lytics " followed by the audience name that is being exported (e.g. Lytics All). Any user fields selected in the configuration will be sent and associated with the user in Sailthru.
This integration utilizes the Sailthru API to send user data. Once the export is started the job will:
- Make a scan of the current members of the Lytics audience and send them to Sailthru via the
/jobendpoint. If a corresponding audience does not yet exist in Sailthru, one will be created. - The job will listen for changes to the Lytics audience being exported. Users are sent to Sailthru in batches via the
/jobendpoint every minute, or when the batch size reaches 1000, whichever happens first. - When new users enter the audience, they will be added to the corresponding Sailthru audience.
- When users leave the audience, they will be removed from the Sailthru audience.
Fields
By default, Lytics exports the following field to Sailthru.
| Lytics User Field | Description | Sailthru Field | Type |
|---|---|---|---|
| Email Address | string |
Configuration
Follow these steps to set up and configure an export job for Sailthru in the Lytics platform. If you are new to creating jobs in Lytics, see the Jobs Dashboard documentation for more information.
- Select Sailthru from the list of providers.
- Select the Export Audiences job type from the list.
- Select the Authorization you would like to use or create a new one.
- Enter a Label to identify this job you are creating in Lytics.
- (Optional) Enter a Description for further context on your job.
- Select the audience to export.
- Complete the configuration steps for your job.
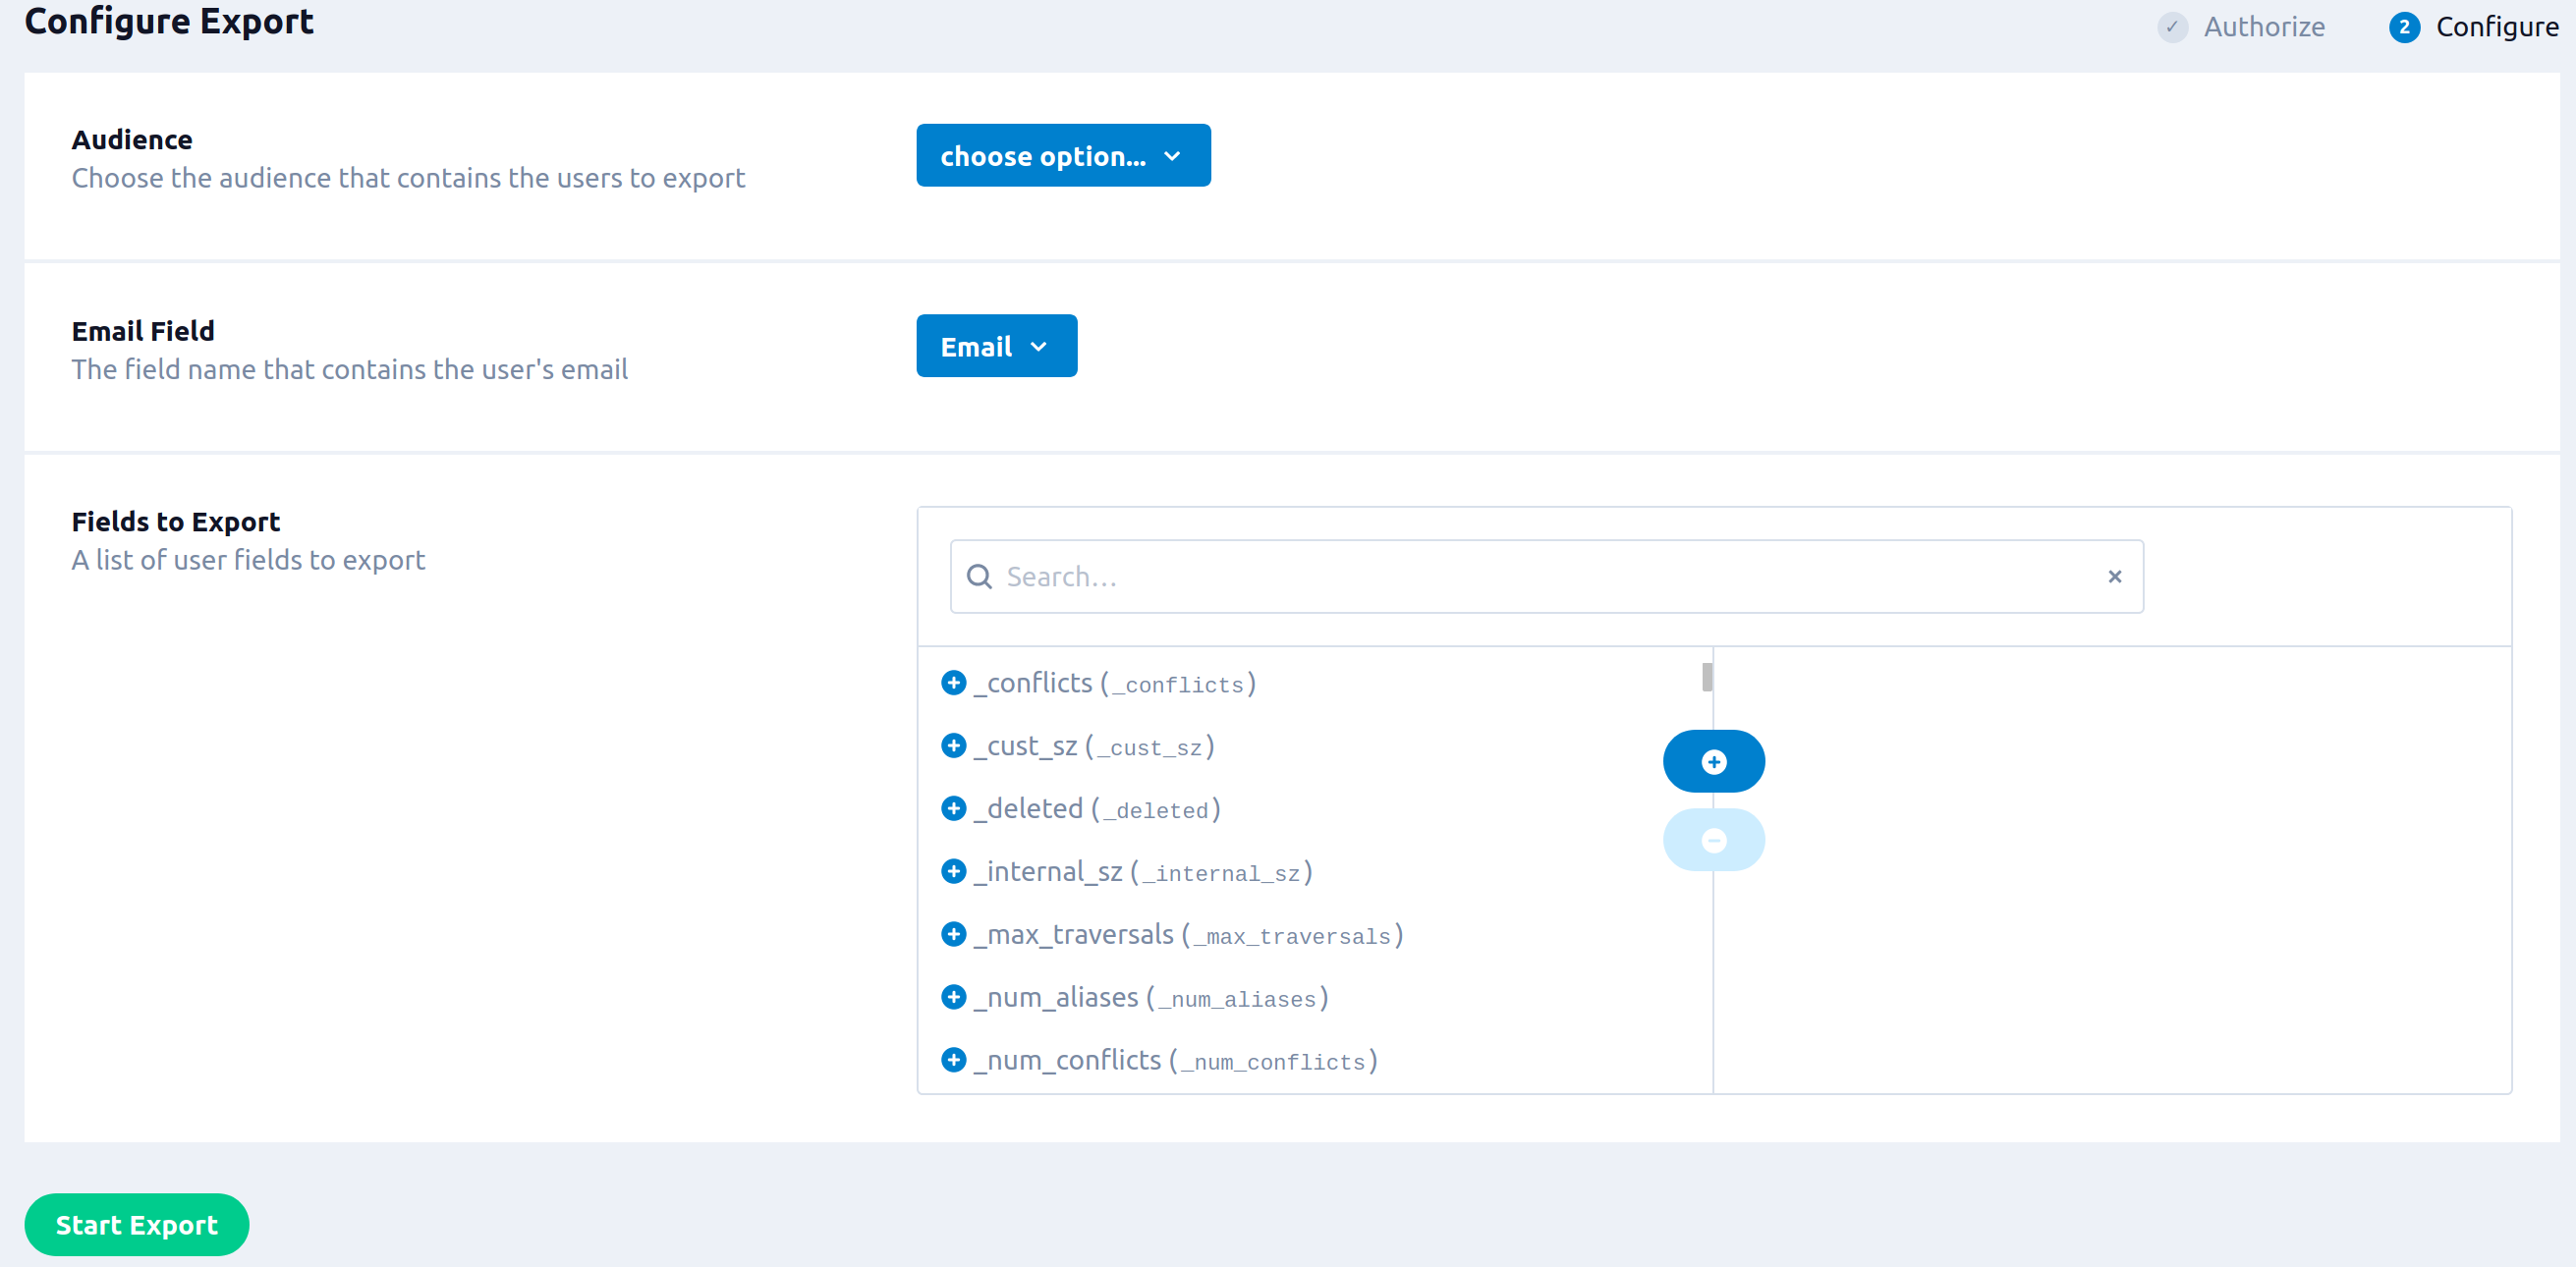
- From the Email Field input, select the field name that contains the user's email.
- (Optional) From the Fields to Export input, select a list of user fields to export.
- Click Start Export.

Export Audiences (Lifecycle Optimizer)
Sailthru Lifecycle Optimizer allows you to automate email campaigns based on user events, such as entering an audience. By exporting your Lytics audiences in real-time, you can activate automated interactions with your users immediately as changes to their profiles are processed.
Integration Details
- Implementation Type: Server-side.
- Implementation Technique:
REST API with
audience triggers
or other - Frequency:
Real-time. - Resulting data:
A Sailthru list containing users currently in the Lytics audience. The name of Sailthru audience will be "Lytics " followed by the audience name that is being exported (e.g. Lytics All). Any user fields selected in the configuration will be sent and associated with the user in Sailthru.
This integration utilizes the Sailthru API to send user data. Once the export is started the job will:
- Make a scan of the current members of the Lytics audience and send them to Sailthru via the
/userendpoint. If a corresponding audience does not yet exist in Sailthru, one will be created. - The job will listen for changes to the Lytics audience being exported. Users are sent to Sailthru one at a time via the
/userendpoint. - When new users enter the audience, they will be added to the corresponding Sailthru audience.
- When users leave the audience, they will be removed from the Sailthru audience.
Fields
By default, Lytics exports the following fields to Sailthru
| Lytics User Field | Description | Sailthru Field | Type |
|---|---|---|---|
| Email Address | string |
Set up Lifecycle Optimizer
Before configuring an export job in Lytics, you will need to set up Lifecycle Optimizer in your Sailthru account.
- Login to your Sailthru account and navigate to Communications > Lifecycle Optimizer.
- Set up a Lifecycle Optimizer flow schedule by declaring what Action should happen when a user joins a specified list (only List Joined option will work in the Entry part of the Lifecycle Optimizer flow).
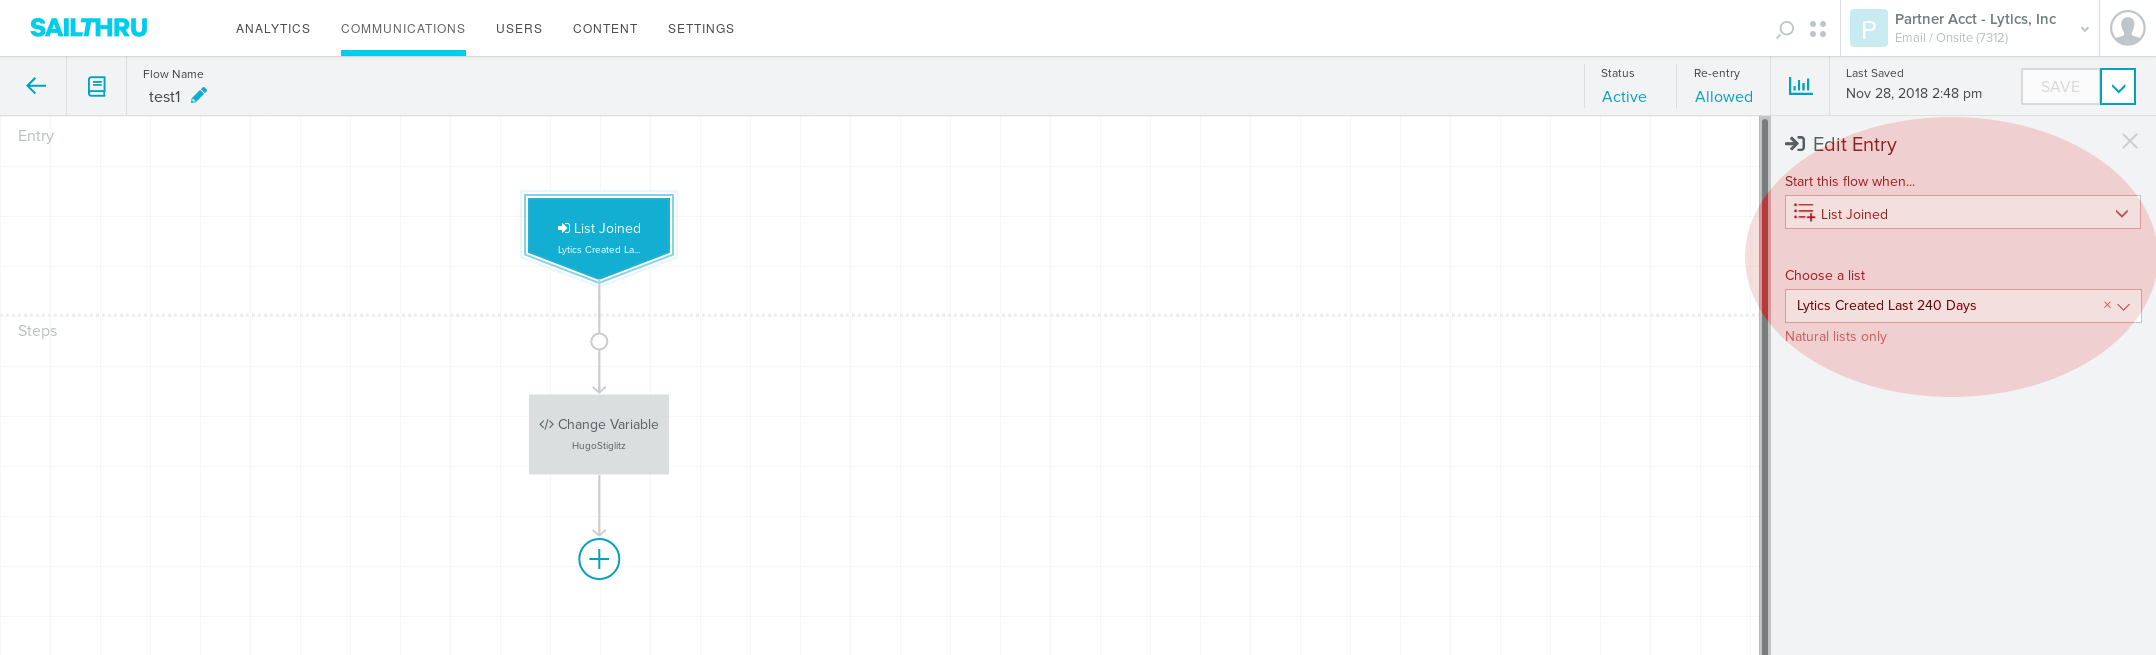
- The list should be named
Lyticsfollowed by the audience name you want to export from Lytics. Either create a new list corresponding to the audience from the Users > Lists or use an existing list.

See the Sailthru Lifecycle Optimizer documentation for more information.
Configuration
Follow these steps to set up and configure an export job for Sailthru in the Lytics platform. If you are new to creating jobs in Lytics, see the Jobs Dashboard documentation for more information.
- Select Sailthru from the list of providers.
- Select the Export Audiences (Lifecycle Optimizer) job type from the list.
- Select the Authorization you would like to use or create a new one.
- Enter a Label to identify this job you are creating in Lytics.
- (Optional) Enter a Description for further context on your job.
- Select the audience to export.
- Complete the configuration steps for your job.
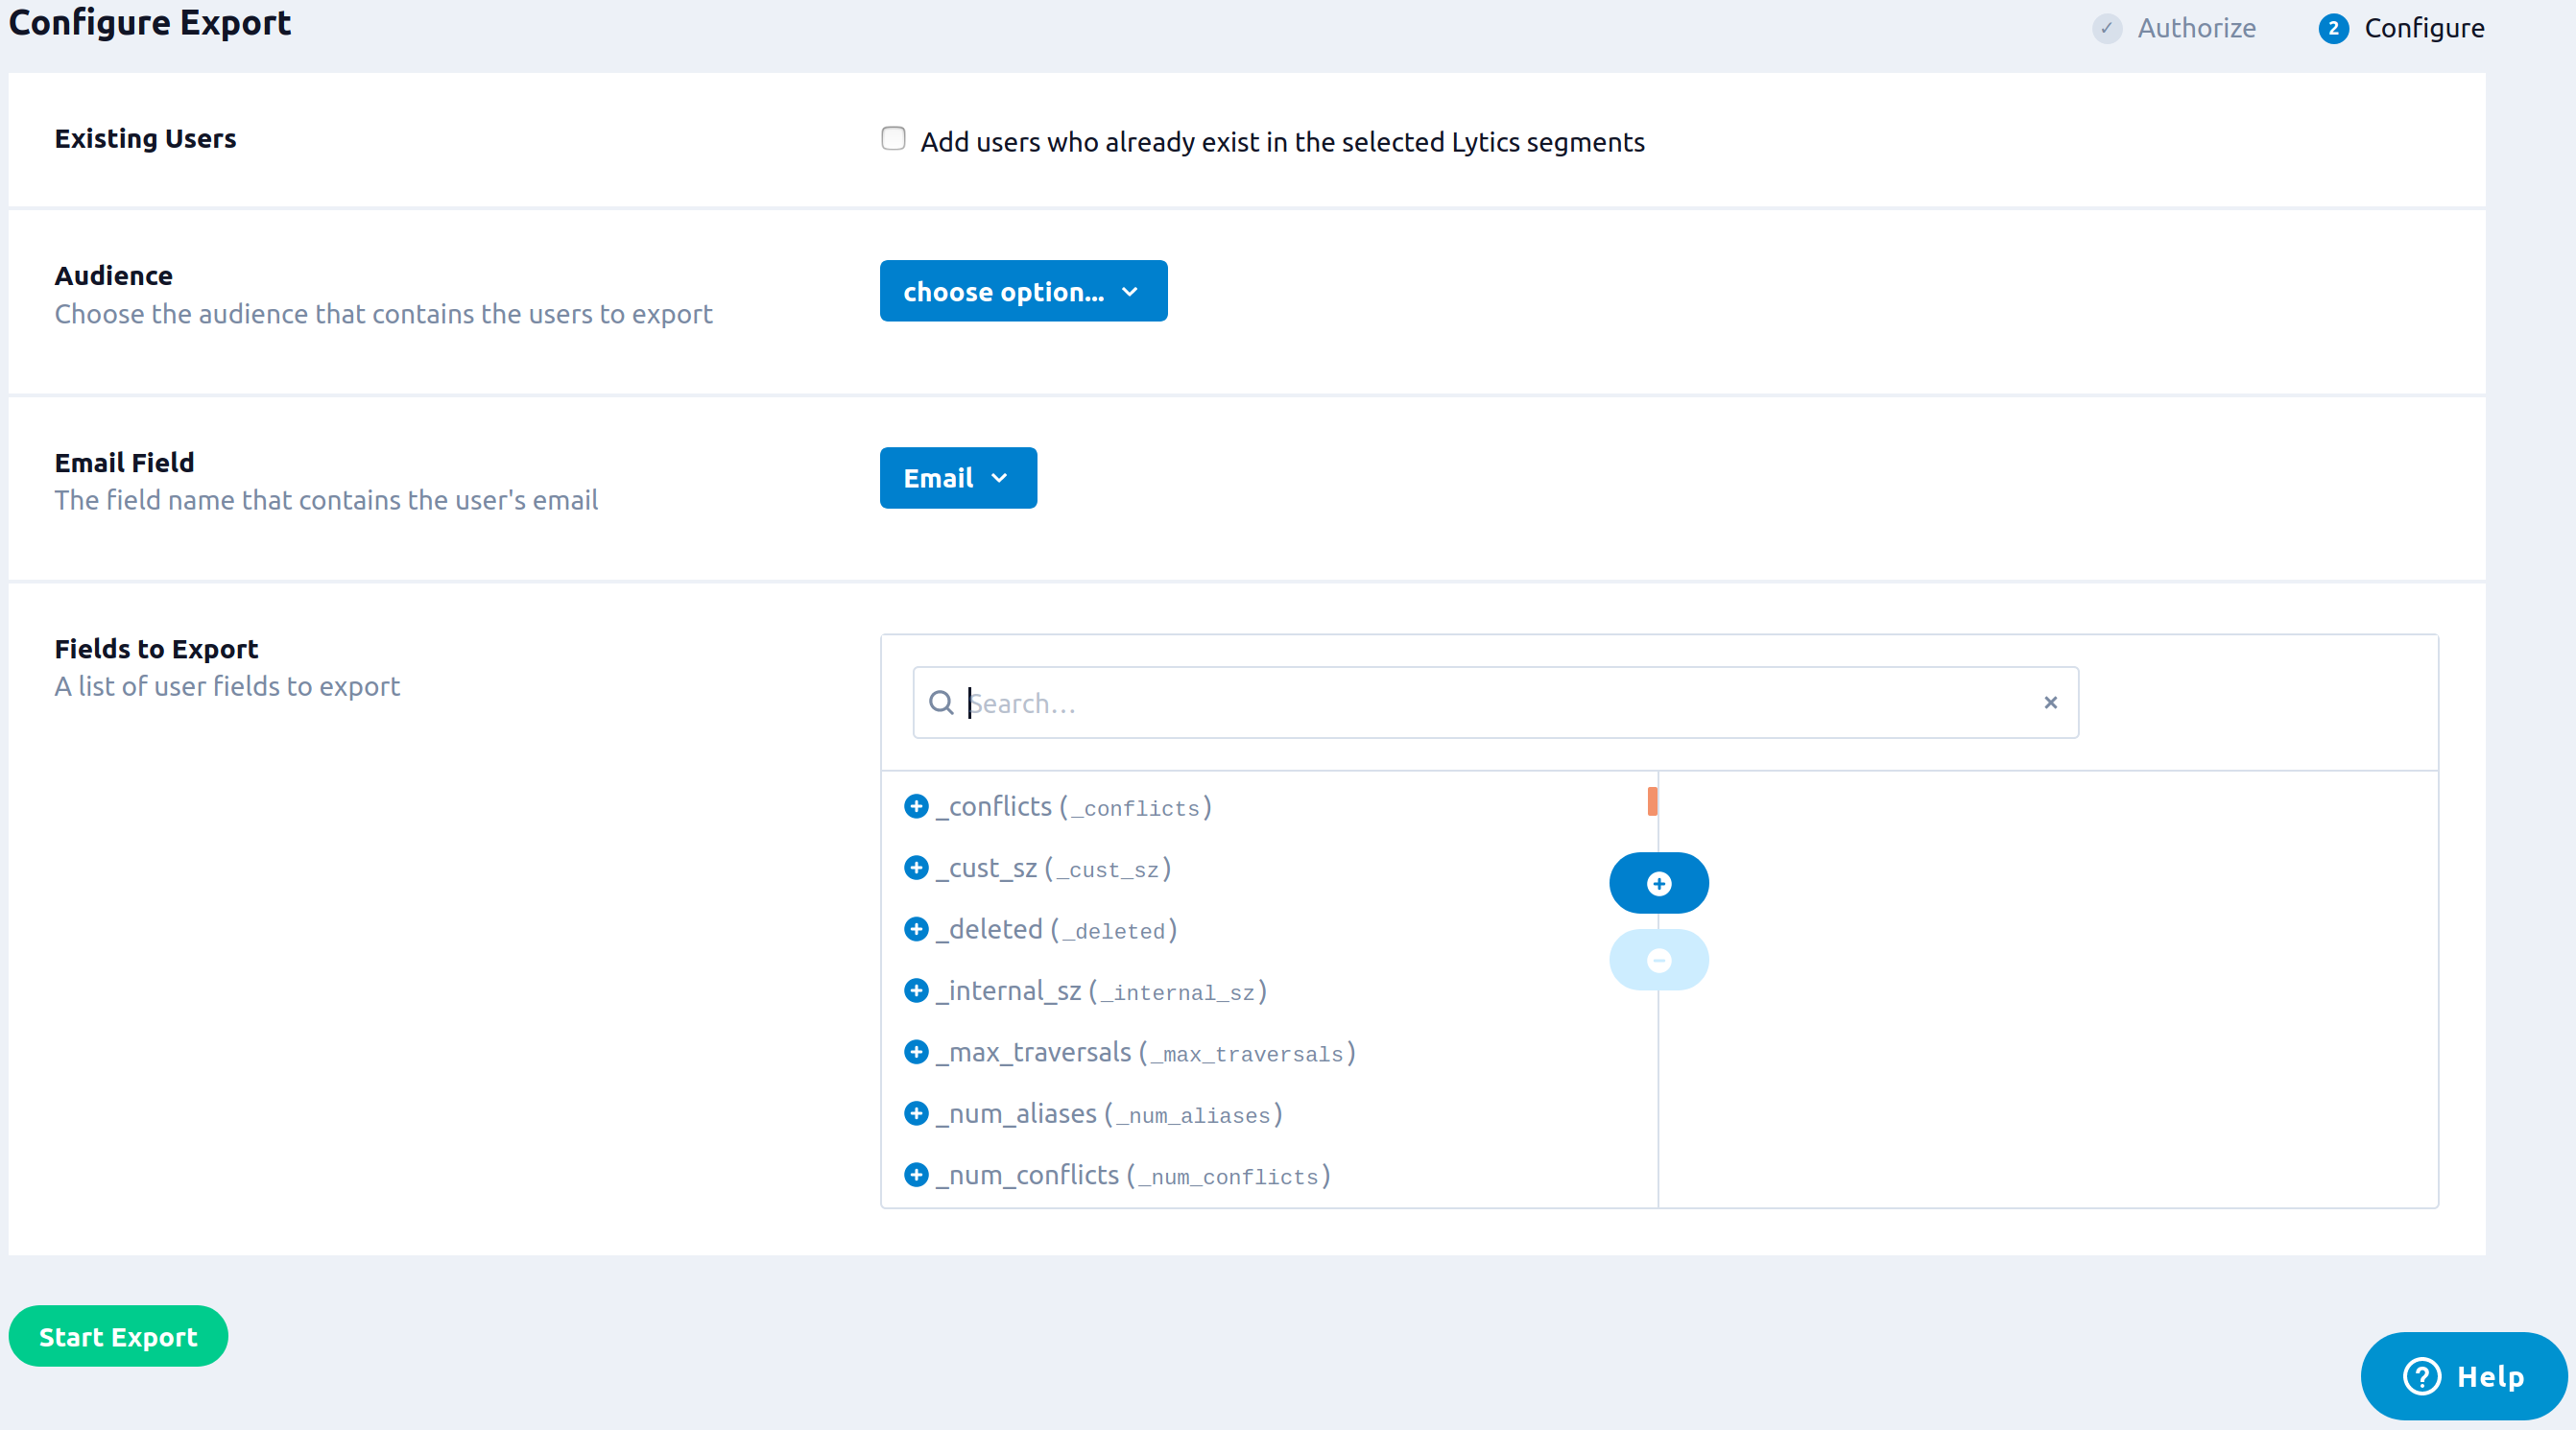
- (Optional) Select the Existing Users checkbox to add users who already exist in the selected Lytics audiences.
- From the Email Field input, select the field name that contains the user's email.
- (Ooptional) From the Fields to Export input, select a list of user fields to export.
- Click Start Export.

Including Identifiers in Links
You may want to pass a unique Sailthru identifier from links within your email to help enable cross-channel identity resolution. This will help Lytics identify users across data streams and merge their email and web activity.
The easiest way to pass a unique identifier from Sailthru click-through links into Lytics is to modify your email template to include a hashed email in each URL in the email being sent.
Requirements
The Lytics JavaScript Tag must be installed on your site, and an import will need to be active with userId set for import (default state). In addition, a line of LQL (Lytics Query Language) will need to be added to the Sailthru query in order to map the hashed email field to the user's profile. For assistance contact your Lytics representative or Lytics support.
For example:
qs(url, "email_hash") as hashed_email SHORTDESC "Hashed Email"Add encrypted email to Sailthru links
-
Ensure the Lytics Sailthru import Hash Algorithm option is set to 'SHA-256' (default).
-
Log in to Sailthru and navigate to Communications > Templates then select your email template.
-
Select the Advanced tab.
-
Copy
email_hash={sha256(email)}into the Auto-Append Link Parameters field.
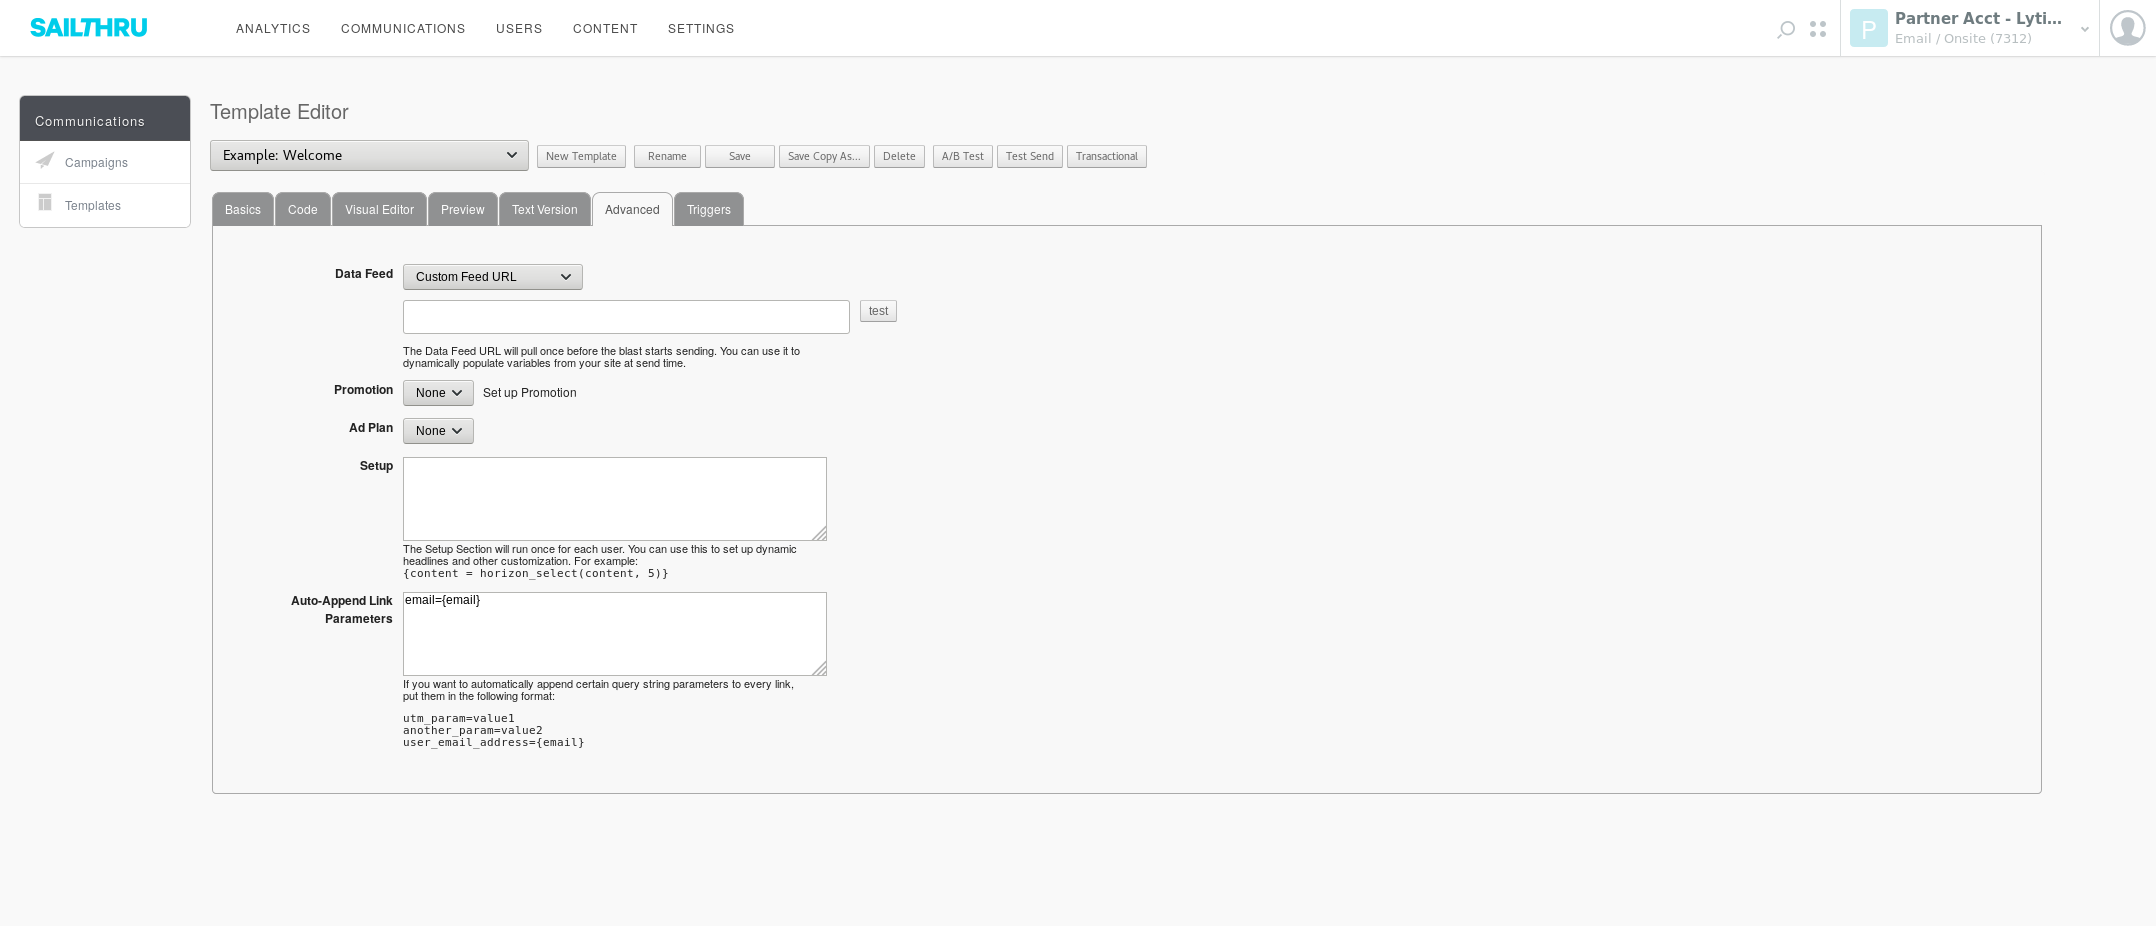

Now all email clicks will pass the encrypted SHA256 email to your website when users click the links, and Lytics will map the encrypted email to the user's profile.
www.yourcompanyURL.com/email-campaign-page?email_hash=hashed-email-here-for-each-userUpdated 9 days ago