

Configure Data & Insights
Now that you’ve accessed Data & Insights, it’s time to connect the dots between your website, Contentstack, and Personalize. This part of the setup ensures your content is properly classified, your audience data flows seamlessly, and your site is ready for real-time personalization.
It’s a quick process, and once it’s in place, Data & Insights will continuously enrich visitor profiles and power dynamic experiences across channels.
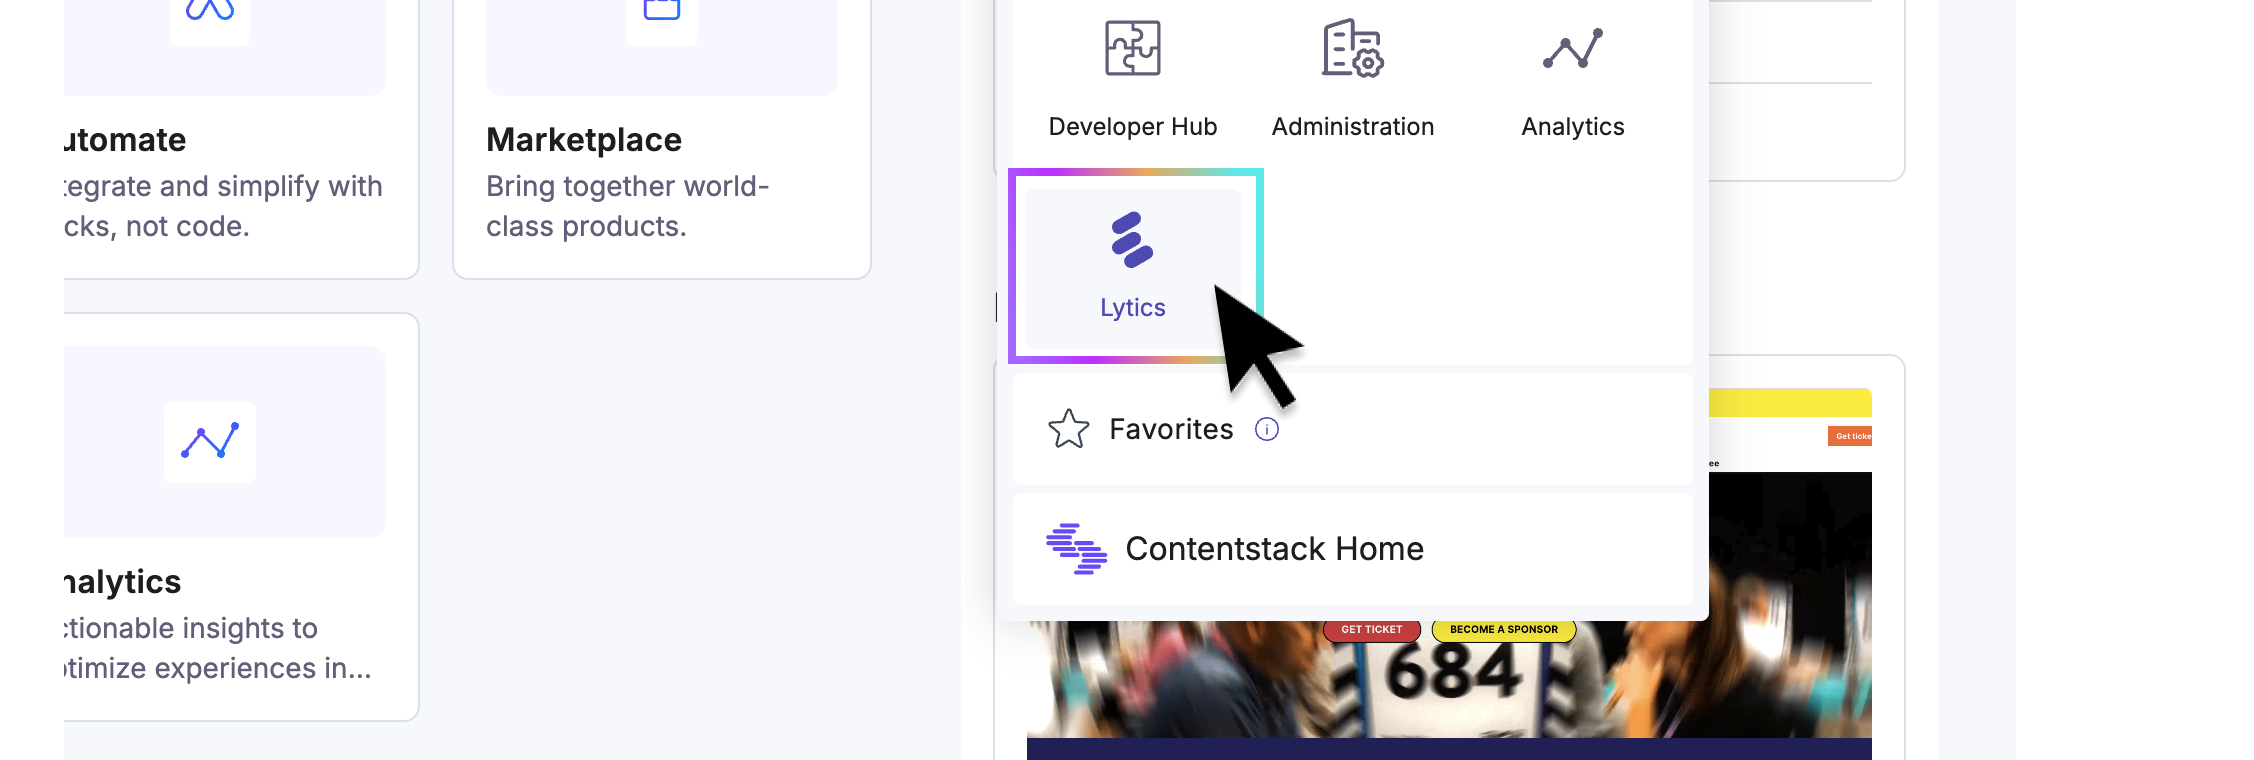
1. Access Data & Insights
To access Data & Insights, open the app switcher in the top-right corner and select Lytics.
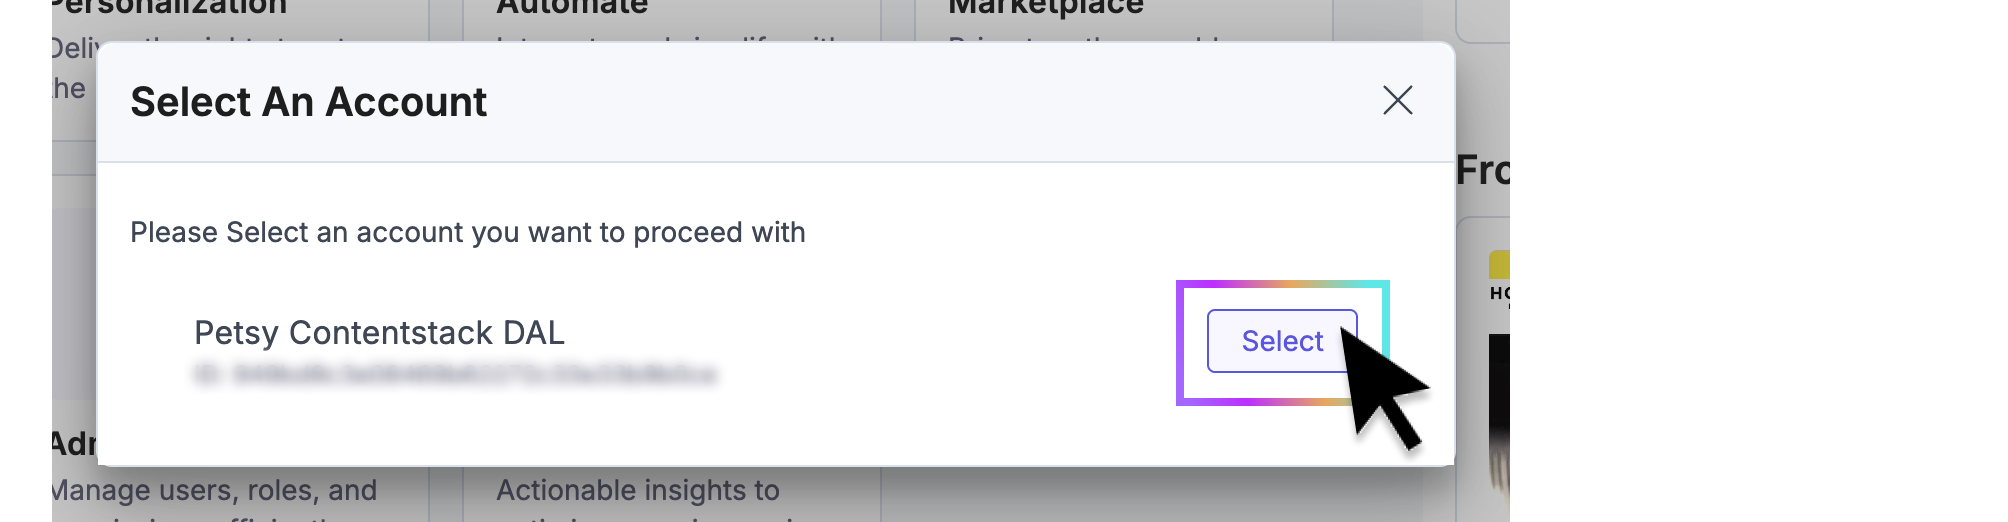
The first time you access Data & Insights, you’ll need to configure shared authorization. Start by selecting the Data & Insights account you want to access, as shown below.
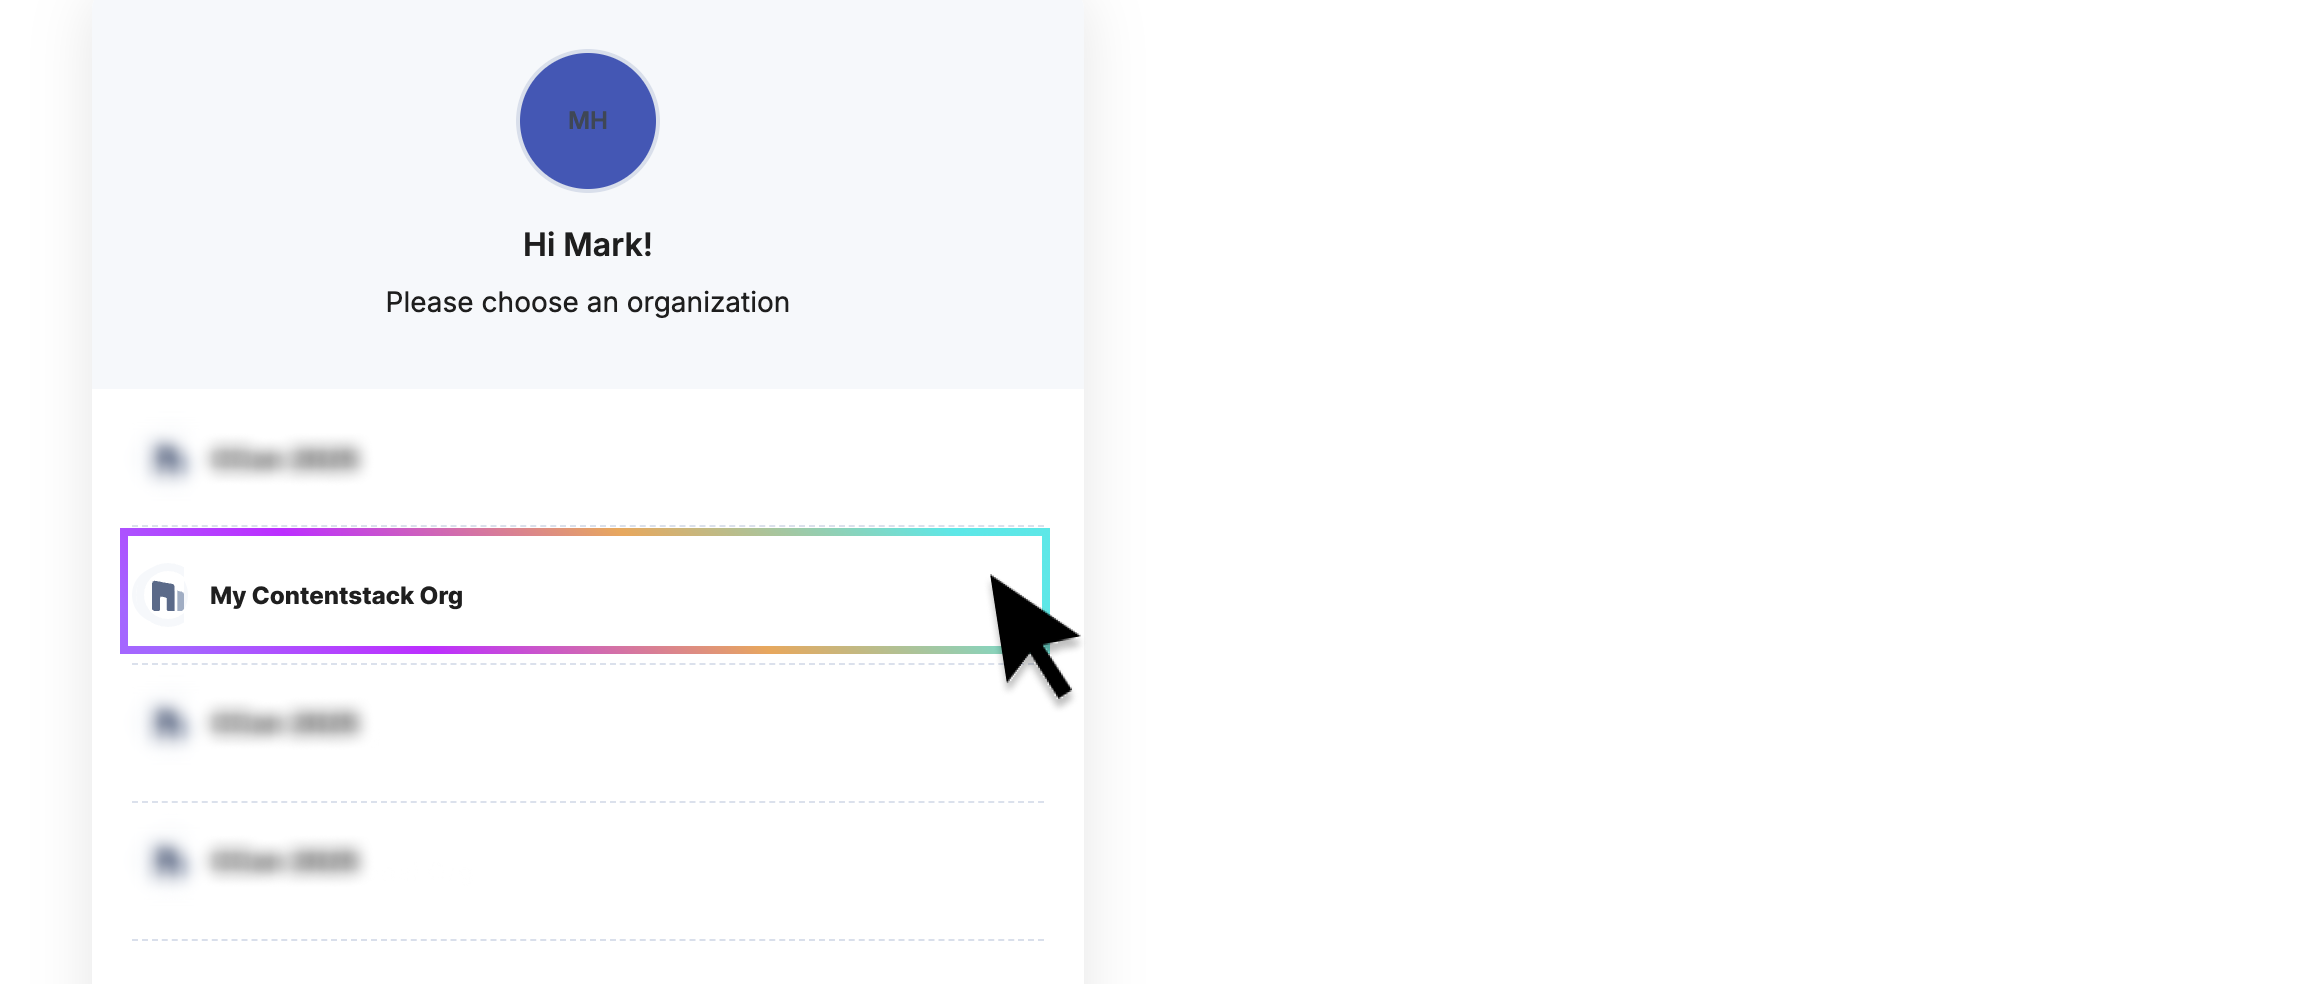
When the OAuth modal appears, confirm the organization you want to access by clicking the link shown below.
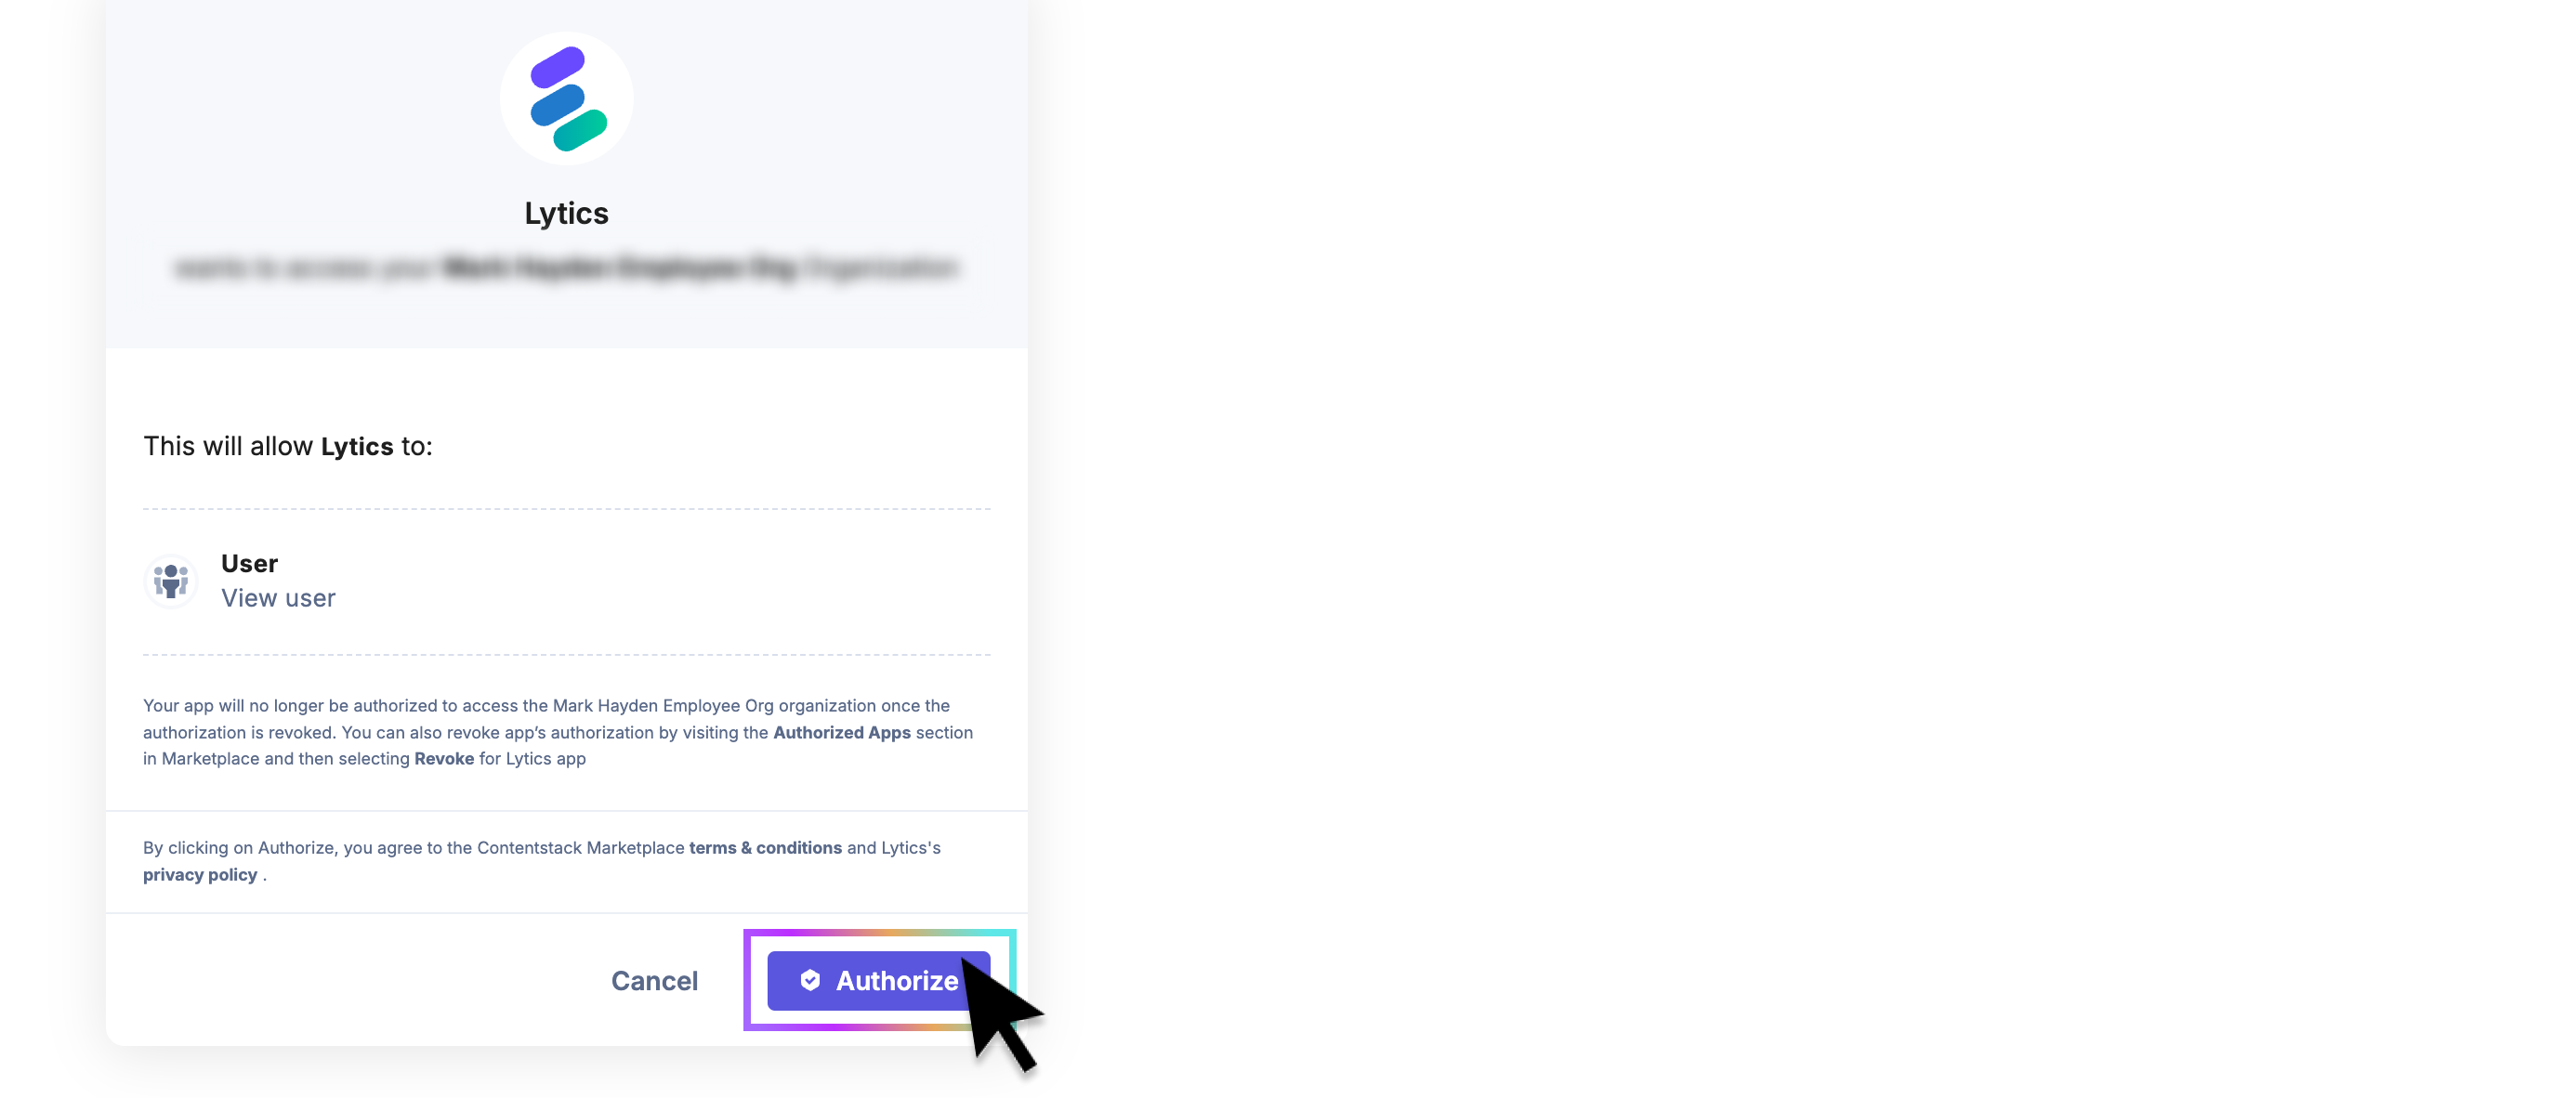
Finally, click Authorize to complete the setup. You’ll only need to do this the first time you access Data & Insights.
2. Configure content classification
After successful authorization, you’ll be redirected to your Data & Insights (Lytics) dashboard. The first time you access it, a brief onboarding will guide you through setup to ensure a personalized and efficient experience.
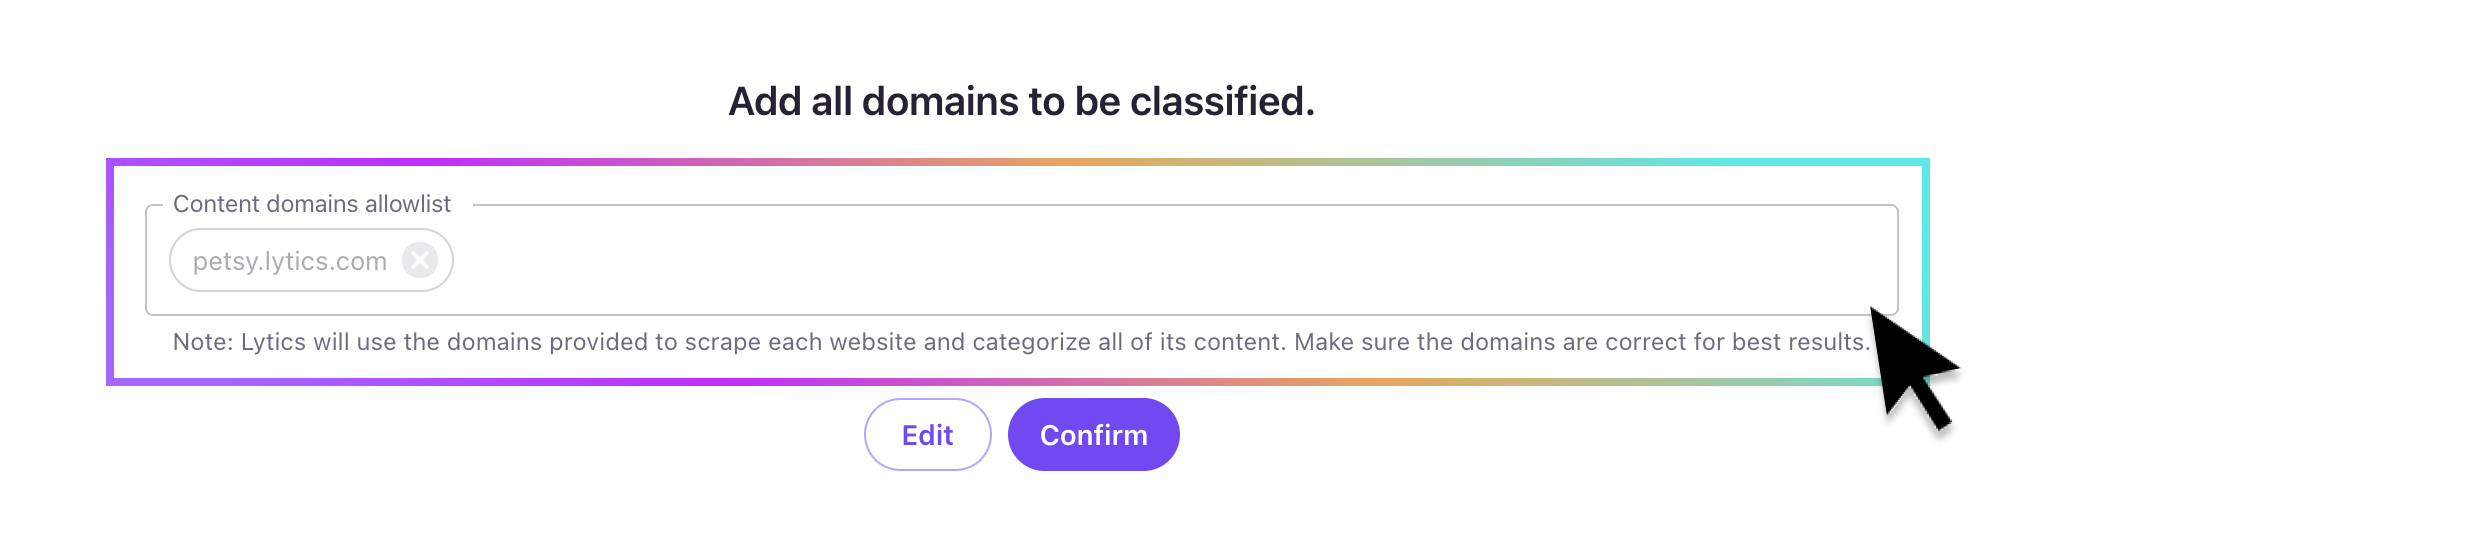
When prompted, verify the domain(s) you want classified. This step is important—it tells Data & Insights where to access your website so it can associate content interactions with your visitors.
3. Configure Data & Insights ↔ Contentstack Sync
The final setup step is to create the synchronization between your real-time data activation layer and your various Contentstack instances. This involves completing three tasks:
Step 1: Synchronize your Stack entries with Data & Insights
Step 2: Synchronize your visitors interests & audience membership with Personalize via the web
Step 1: Sync CMS Entries → Data & Insights
To get the most out of Data & Insights' content classification service, it’s important to sync all of your entries directly to Data & Insights. This is done by creating a Job—a one-time setup that continuously keeps your entries in sync as they evolve.
To configure it, go to Jobs under the Data Pipeline section in the Data & Insights sidebar, as shown below.

To locate the Contentstack job options, enter "Contentstack" in the search bar and click the branded tile.
You’ll be prompted to select the job type, authorization method, and configuration options.
For detailed guidance, refer to the following documentation:
Step 2: Sync Data & Insights Profiles → Personalize
Finally, you’ll need to install Data & Insights JavaScript Tag on your website. This enables two key operations:
-
Behavior Tracking
As visitors engage with your site, their behavior is automatically captured. This data is used to build cross-channel profiles that continuously improve over time. -
Real-Time Personalization
For each visitor, the Data & Insights tag identifies who they are and returns relevant information to the browser (and to Personalize), such as audience membership, attributes, and more — all in real-time.
This setup enables hyper-targeted content and campaign personalization.
For detailed guidance, refer to the following documentation:
- Activating real-time profile sync from Data & Insights → Personalize
- Installing the Data & Insights JavaScript Tag
- Already using Launch? Automatically install the tag via Launch.
Updated 10 months ago
What’s Next
📈 You've done it. Your DAL is all activated and configured. Ready to put it to work for your customers? In the next section we'll cover how to explore insights and deliver hyper personalized experiences in real-time (coming-soon).