
X Ads
Overview
X is a social media platform where users interact with each other using tweets and messages. X Ads platform allows advertisers to share various types of ads and reach their customers. Connect your X Ads account with Lytics to send audiences to X Ads and target them with specific ads to increase your return.
Authorization
If you haven't already done so, you will need to set up a X Account and X Ads Account before you begin the process described below. Please refer to X's authentication document for details on how Lytics accesses X's Ads API.
If you are new to creating authorizations in Lytics, see the Authorizations documentation for more information.
- Select X from the list of providers.
- Select the authorization method. Note that different methods may support different job types. X supports the following authorization methods:
- Enter a Label to identify your authorization.
- (Optional) Enter a Description for further context on your authorization.
- Complete the configuration steps needed for your authorization. These steps will vary by method.
- Click Save Authorization.
X Ads Sign-In
This authorization allows Lytics to access your X Ads account.
- Select X Sign-In Oauth authorization method.
- From the user selection window, select the X Ads account you want to connect from the list of accounts.
- Click Allow.
Export Audience
Use this export job to send Lytics user to X Ads Custom audience
Integration Details
- Implementation Type: Server-side Integration
- Implementation Technique: REST API Integration
- Frequency: Real-time Integration
- Resulting data: X Ads Custom Audience matched with users from the selected Lytics audience.
This integration utilizes X Ads API to send the Lytics audience users. Once the job is started, it will:
- Create a new X Ads Custom Audience with the name format
Lytics {audience_slug} {YYYYMMDD_hhmmss}if it does not already exist. - For every user entering the selected Lytics audience, the job adds the user's selected identifiers and adds them to the add queue. Similarly, for every user exiting the selected Lytics audience, the selected user's identifiers will be placed on remove queue.
- Both the add and remove queue are sent to X Ads using its Custom Audience Users API.
- The export job will run continuously. The add/remove queue of users are sent to X Ads every 5 minutes or when the batch reaches 1,000 users.
Fields
The export job gives you an option to select to send Email, Device ID, X Handle and X ID as part of job configuration. Please refer to X Ads documentation to learn more about each type of identifier. Identifiers already SHA-256 hashed are accepted, otherwise plain user-identifier data will be SHA-256 hashed before being exported to X Ads.
Configuration
Follow these steps to set up and configure an export job for X Ads in the Lytics platform. If you are new to creating jobs in Lytics, see the Destinations documentation for more information.
- Select X Ads from the list of providers.
- Select the Export Audience from the list.
- Select the Authorization you would like to use or create a new one.
- Enter a Label to identify this job you are creating in Lytics.
- (Optional) Enter a Description for further context on your job.
- Complete the configuration steps for your job.
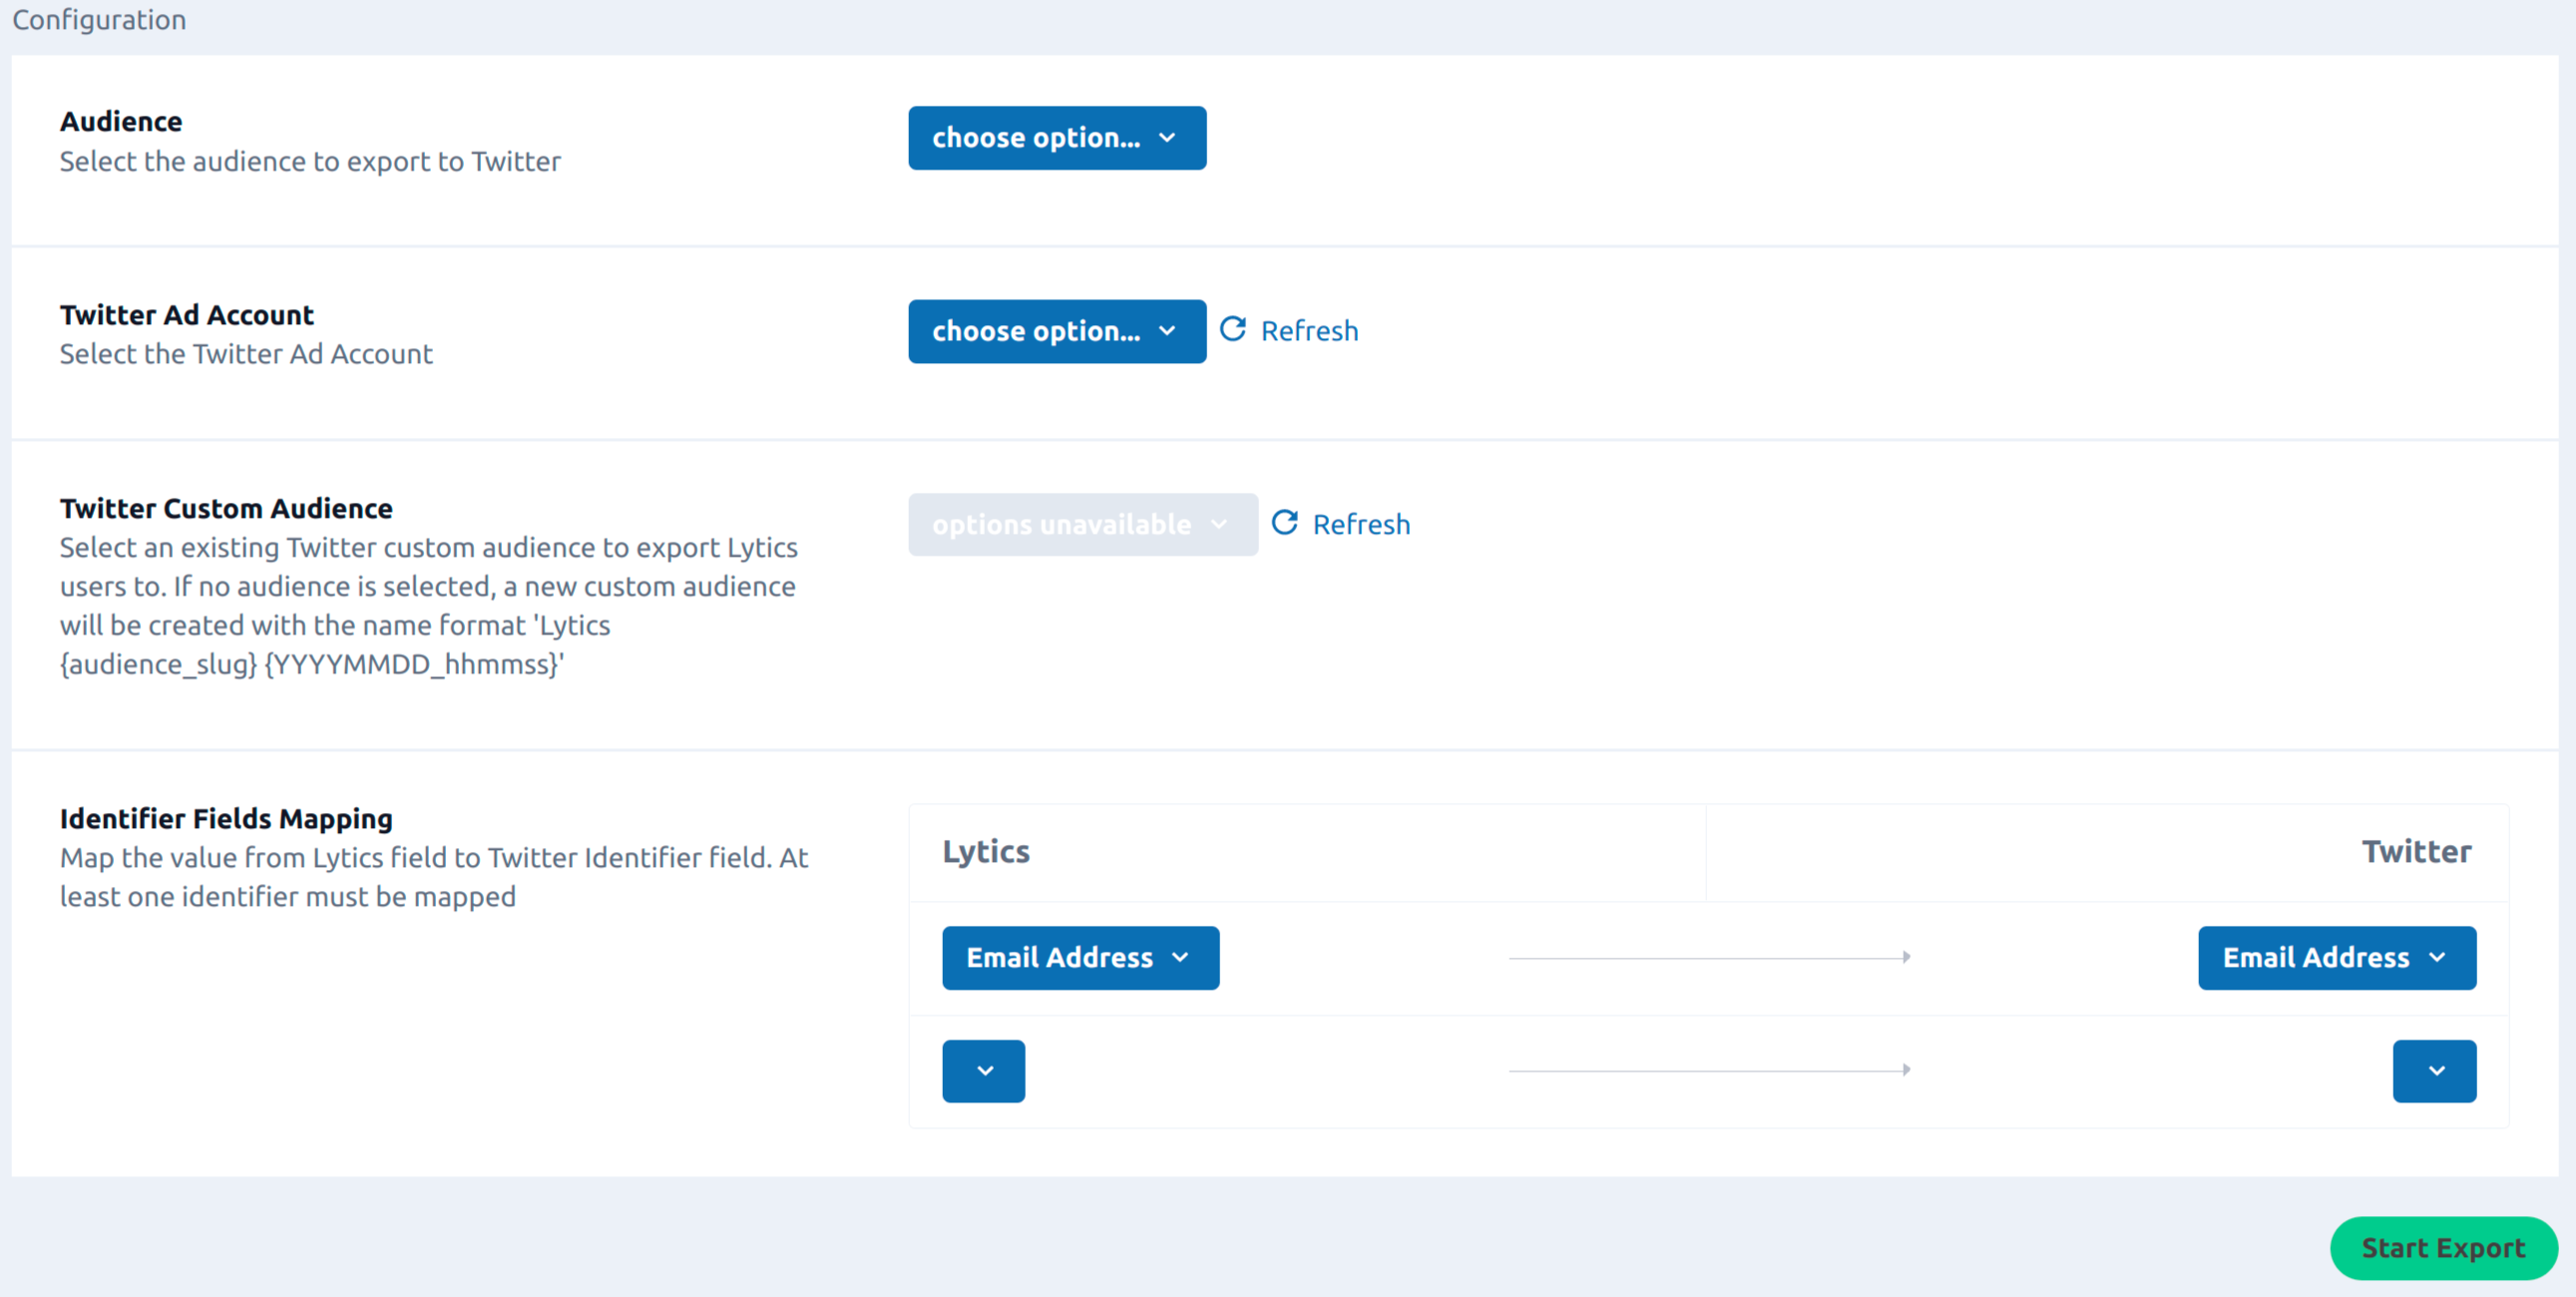
- From the X Ads Account input, select the X Ads Account.
- (Optional) From the X Ads Custom Audience input, select an existing X Ads custom audience to export Lytics users to. If no audience is selected, a new custom audience will be created with the name format
Lytics {audience_slug} {YYYYMMDD_hhmmss}. - From the Identifier Fields Mapping input, map the value from Lytics field to X Identifier field. At least one of
Email,Device ID,X HandleorX IDmust be mapped. Identifiers already SHA-256 hashed are accepted, otherwise plain user-identifiers will be SHA-256 hashed. - Click the Complete button to start the job.

Updated 6 months ago