

Schema Patches
Stage, review, and publish batches of schema changes — fields, mappings, and identity key ranks — together.
Introduction
Schema Patches are how you make schema changes in Lytics. Instead of editing one field at a time against the live schema, you stage fields, mappings, and identity key ranks into a single, named changeset — a patch — preview a complete diff against your live schema, and publish everything at once.
When a patch is applied, it creates a new published schema version. If anything goes wrong, you can revert to a previous version using the standard schema version history.
When to Use Schema Patches
Use a patch when you want to:
- Onboard a new data source — add the fields and mappings that belong together and roll them out as a single reviewed change.
- Reorganize identity resolution — adjust identity key ranks alongside related field changes.
- Coordinate with a team — give each changeset a name and description so reviewers know what it's for, and let multiple people work on separate patches at once.
- Review before anything goes live — inspect a property-level diff of every change against the live schema, so nothing reaches the live schema without an explicit apply step.
Enabling Schema Patches
Schema patches are available to every account, but the workflow has to be turned on before you can use it in the UI. Until it's enabled, schema edits made in the UI go through the legacy draft-based editor.
An administrator turns patches on from Building Profiles → Schema → Patches using the Enable Schema "Patches" button. Users without permission to edit account settings will need to contact their administrator to enable the feature.
Before enabling, note that:
- It's an account-wide switch. Once enabled, every schema change made in the UI — for all users on the account — goes through a patch. The legacy draft editor is no longer available, and direct links to the old create and edit screens redirect into the patch workflow.
- You must clear the existing draft first. If the account has unpublished schema changes, the Enable Schema "Patches" dialog blocks activation until you publish or discard them. This keeps in-progress edits from being stranded in a draft that's about to be retired.
Enabling patches changes how everyone on the account edits the schema, so plan to switch over when your team is ready to adopt the patch workflow together.
How Schema Patches Work
The schema patch lifecycle has five steps:
-
Create a patch — Start by creating a new patch with a name and description. Each patch targets a specific table (e.g.,
user). Think of the patch as an empty container for your proposed changes. -
Add changes — Add, modify, or mark for deletion any combination of fields, mappings, and identity key ranks within the patch. You can make as many changes as needed before moving forward.
-
Review the diff — Inspect the patch to see exactly what would change relative to the live schema, with property-level before/after values for every modified field and mapping, so you can verify each change before it goes live.
-
Apply the patch — When you're satisfied, apply the patch. This publishes a new schema version containing all of the patch's changes. From this point forward, incoming data is processed against the updated schema.
-
Revert if needed — If the applied changes cause issues, use schema version history to revert to a previous version.
You can update a patch as many times as needed before applying it. You can also delete a patch entirely if you decide not to proceed.
Accessing Schema Patches
From the Lytics navigation, open Building Profiles → Schema → Patches. The patches list shows every patch in the account with its target table, description, creator, and timestamps. You can filter by table and sort by any column.
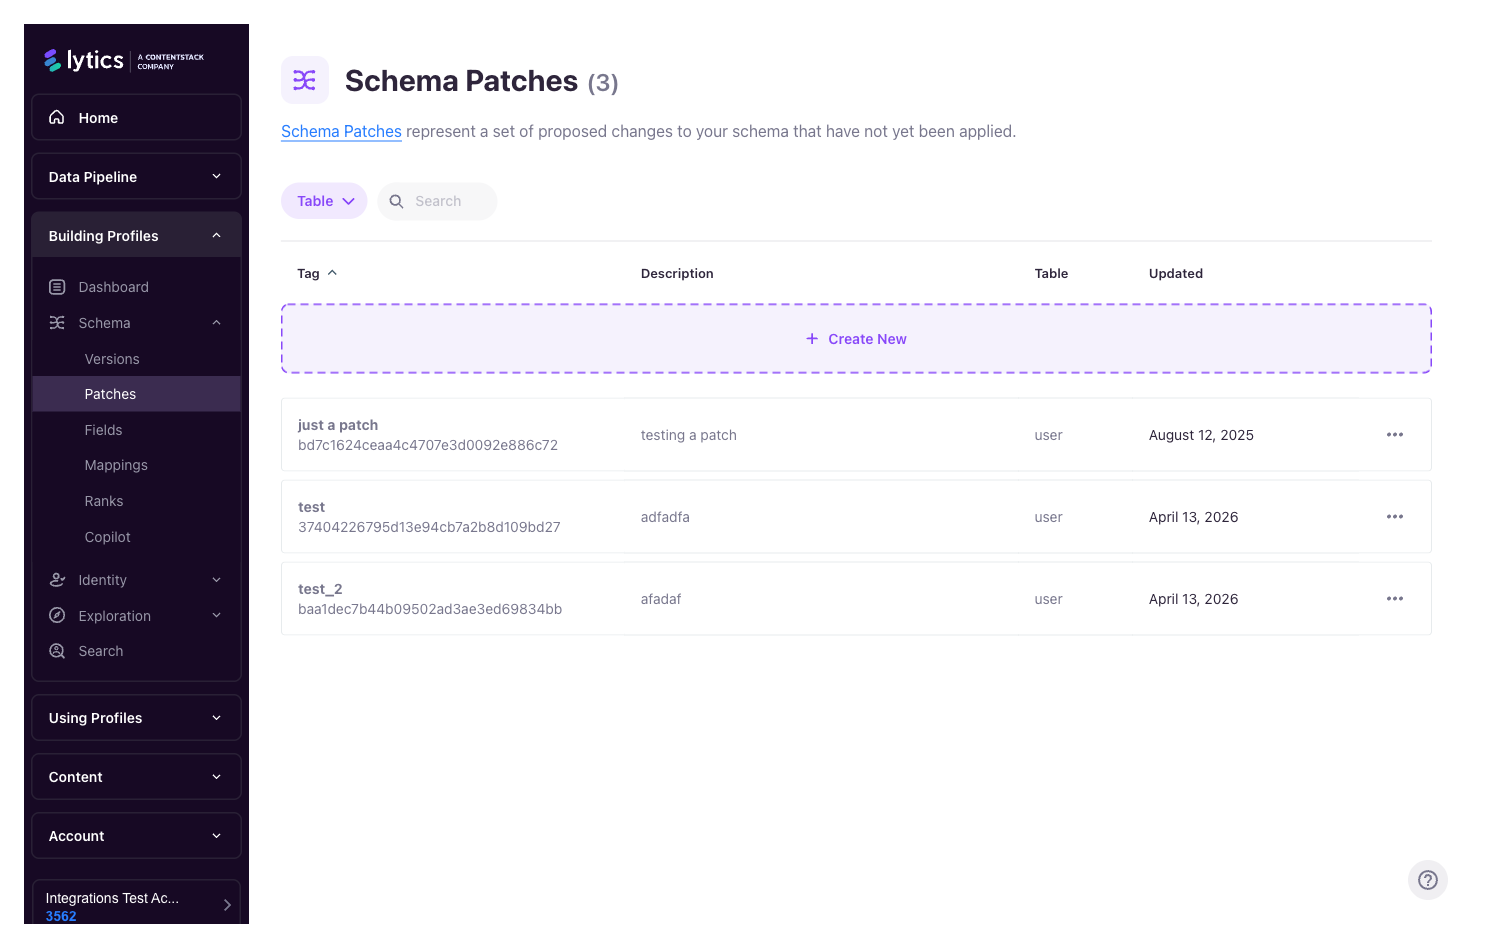
From the list you can:
- Create a new patch — name it, describe it, and choose the table it targets (e.g.,
user). - Open an existing patch — continue editing a patch someone started earlier.
- Delete a patch — discard a staged changeset you no longer need.
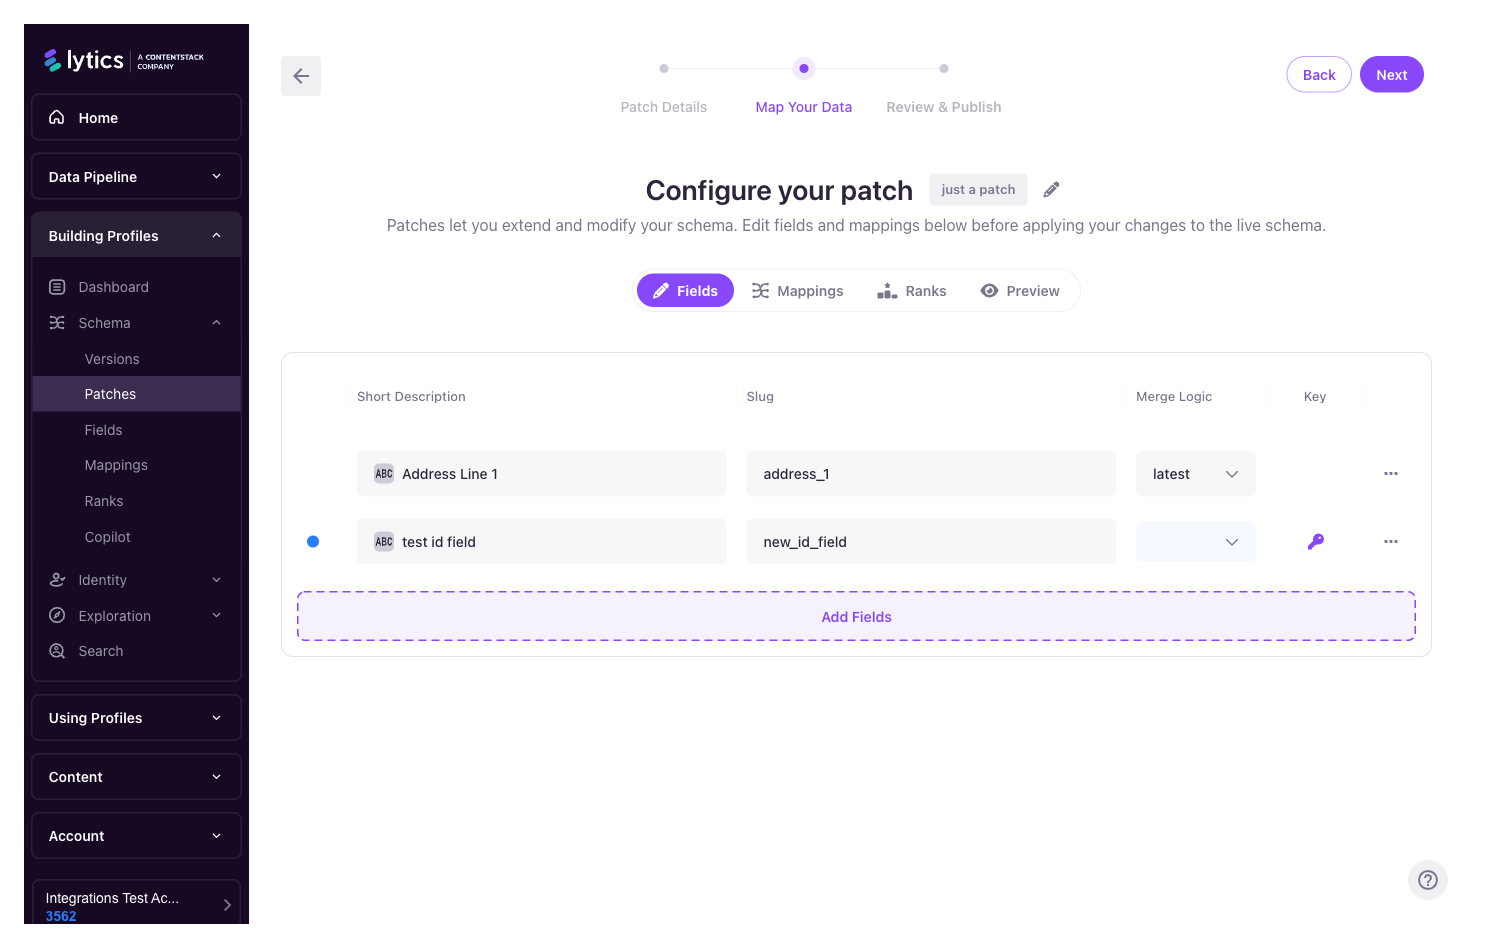
The Patch Editor
Opening a patch takes you into a three-step wizard — Patch Details → Map Your Data → Review & Publish — across the top of the page. The core work happens in the middle Map Your Data step, which is organized into tabs:
| Tab | What it's for |
|---|---|
| Fields | Add new fields, edit existing ones, or mark fields for deletion. Inline controls for data type, description, merge operator, capacity, keep days, and the other properties described in Fields & Mappings. |
| Mappings | Add or modify LQL mappings that transform incoming stream data into user fields. |
| Ranks | Reorder identity keys to change the priority used during profile resolution. See Identity Key Ranks. |
| Preview | A side-by-side diff of the patch against the live schema — every property that would change, with before/after values. |
| Advanced | A raw JSON editor for the patch, for power users. Access to this tab is permission-gated, so it only appears for users with the required role. |
Working with Fields and Mappings
Within the Fields and Mappings tabs, each item carries an edit status that describes how it relates to the live schema:
| Status | Meaning |
|---|---|
new | Added in this patch — does not exist in the live schema. |
modified | Exists in the live schema, but one or more properties have changed. |
deleted | Marked for removal — will be deleted when the patch is applied. |
unmodified | Shown for context only. No changes from the live schema. |
When adding or updating a field, the same properties apply as when managing fields directly — data type, merge operator, capacity, keep days, and so on. See Fields & Mappings for details on field and mapping properties.
Adding existing items to a patch
To modify a field or mapping that already exists, use the Add search. Results can be filtered by type, identifier, stream, and category. Editable items surface first; non-editable items (e.g., system fields) are shown but cannot be selected. Use Select All to pull a whole filtered set into the patch at once.
"Add related" shortcuts
Click a field in the patch to jump into the mapping selector, pre-filtered to mappings that use that field. Click a mapping to find the field it writes to. This makes it straightforward to build complete, self-consistent changesets.
Undoing a change
Each item in the patch can be reverted independently without discarding the rest of the patch. For example, if you've added three fields and decide one of them isn't ready, remove that one field's changes and keep the other two.
If you don't set a
managed_byvalue when adding a field or mapping to a patch, it defaults to the current user.
Identity Key Ranks in a Patch
Identity key rank lists — which control the priority ordering of identity keys used during profile resolution — can also be staged in a patch, from the Ranks tab. Bundling rank changes alongside field and mapping updates ensures everything is reviewed and applied together.
See Identity Key Ranks for more on how rank ordering affects identity resolution.
Previewing a Patch
The Preview tab is the gate between "staged" and "published." It shows:
- Every field, mapping, and rank change in the patch, grouped by type.
- Property-level before/after values for modified items.
- Status pills on each item (
Added,Modified,Deleted) so you can scan the shape of the change at a glance.
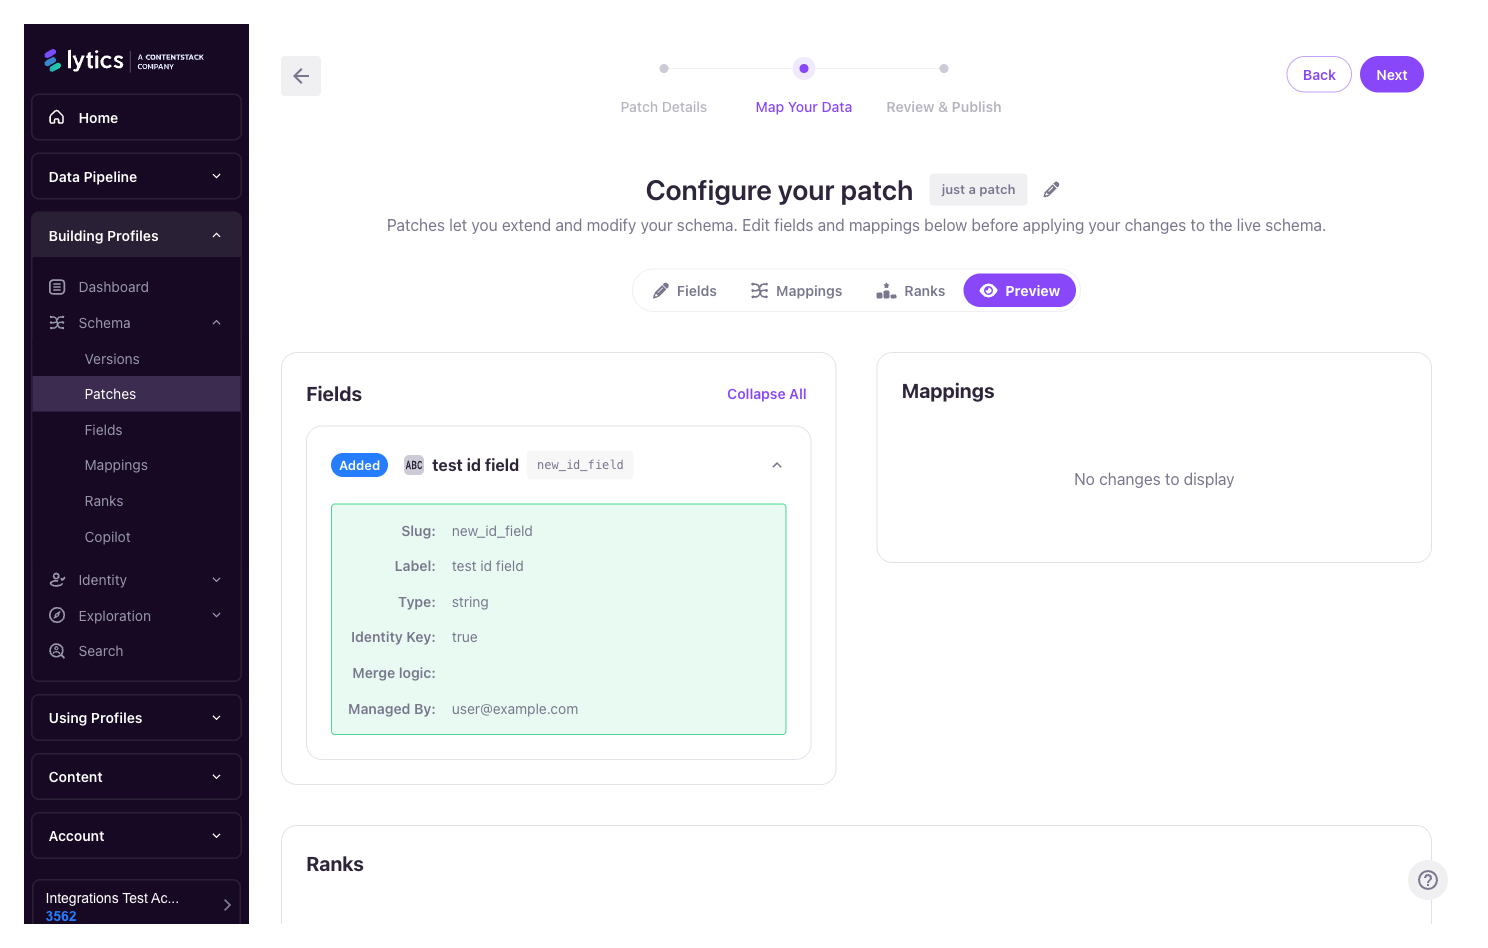
Nothing in this tab affects the live schema — it is purely a read-only review surface.
Publishing a Patch
When you're satisfied with the preview, publish the patch. This creates a new schema version containing all of the patch's changes, and incoming data is processed against the updated schema from that point forward.
If something goes wrong after publishing, revert to a previous version using the standard schema version history — no need to manually undo each change.
Patches that target the
contenttable publish immediately on apply, without a separate review step. User-table patches follow the full stage → preview → publish workflow.
Managed Workflows and Patches
For accounts with patches enabled, LQL workflows that need to modify the schema (for example, managed integrations that add new fields as they discover them in incoming data) will create a patch for you to review, rather than writing directly into the draft. You'll see these patches appear in the list with an identifying tag; open, review, and publish them as you would any manually-created patch.
Permissions
- Create / edit a patch — requires the
schema:editpermission. - Delete a patch — requires the
schema:deletepermission. - Enable patches for the account — requires permission to edit account settings.
- Advanced tab (raw JSON) — separately gated for power users.
Related
- Schema Versions — Publishing and reverting schema versions
- Fields & Mappings — Managing individual fields and mappings
- Identity Key Ranks — Identity key ranking and priority
Updated about 2 months ago